Advertisement
Quick Links
Advertisement

Related Manuals for Mini Gadgets MQ350


Summary of Contents for Mini Gadgets MQ350
- Page 2 25-Day Standby Voice Recorder 8GB USB SKU: MQ350 Updated 04/23/2018 1 Version 1.0...
- Page 3 THANK YOU FOR PURCHASING THE MQ350 Please read this manual before operating the device and keep it handy. Your purchase should include: 1 x MQ350 1 x Manual Updated 04/23/2018 2 Version 1.0...
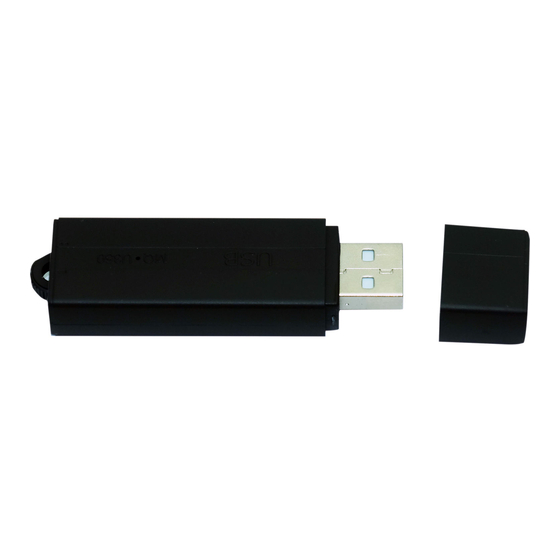
- Page 4 GET FAMILIAR WITH YOUR DEVICE Updated 04/23/2018 3 Version 1.0...
- Page 5 Updated 04/23/2018 4 Version 1.0...
-
Page 6: Operating Your Device
OPERATING YOUR DEVICE IMPORTANT NOTICE: Allow the device to charge 4-6 hours before using it. Note: If you are not located in the US, or if you intend to use this product anywhere other than the US, you will need to purchase a converter in order to use the AC wall plug in and avoid damaging the product. - Page 7 b. The charging indicator light will blink when fully charged. 3. Alternatively, you can plug the USB stick into an AC wall charger’s USB jack, then plug the wall charger into a functioning outlet. HOW TO CHECK THE REMAINING BATTERY LIFE 1.
- Page 8 a. Turn the mode circle switch to the manual recording position (see page 3 – there is a tiny indention on the outside of the device). b. The device is now recording. 2. To stop recording, turn the mode switch to the stop position (see page 3 –...
- Page 9 b. The device is now ready to record when it detects voices. 2. To stop voice activated mode, turn the mode switch into the stop position (see page 3 – middle position). a. The device has exited voice activated mode, and has saved the audio file.
- Page 10 The device is now in voice activation mode and ready to record. 2. Plug the USB stick into your PC’s USB jack. 3. When you want to stop long recording, turn the Recording Switch into the stop position (see page 3), and safely eject the device from your PC.
- Page 11 a. Go to Start > Computer > Removable Disk 3. Double-click the “Time Setup” file saved in the Removable Disk. 4. The “date_time.cfg Creator” should open. Click the “Start” button in the popup window. a. The program should draw the current date and time as displayed on your computer.
- Page 12 1. Connect your device to your PC using the USB port. Open the “date_time.cfg Creator” window inside your device. 2. In the right side of the window, select the quality of recording you want, then hit “Start”. The automatic setting is “HQ”.
- Page 13 2. In the “date_time.cfg Creator” window, select the “SVOS Level” according to your preferences. a. Selecting “-2” will cause the device to only activate when loud sounds are detected. b. Selecting “+2” will cause the device to activate when low sounds are detected.
- Page 14 1. Remove the USB port cover (see page 3) and plug the device’s USB port into the USB port on your computer. 2. Locate “Removable Disk” inside the (My) Computer folder. AutoPlay Removable Disk > Open folder to view files Updated 04/23/2018 13 Version 1.0...
- Page 15 Or… Go to Start > Computer > Removable Disk Updated 04/23/2018 14 Version 1.0...
- Page 16 3. Open the Removable Disk drive. 4. Open the [folder name] folder. 5. Double click the file you want to view. If you are having video playback issues, such as a completely black video recording or “squiggly lines”, we recommend you use VLC media player to play back the videos.
- Page 17 The video files created are just like any other file on your computer, and can be managed in the exact same manner. To save a file, you want to select the file, right click your mouse on the file name, and then choose “Copy”...
- Page 18 If you are using MAC OS X, you must empty the trashcan after you delete a file. If this is not done, the SD card will fill with hidden files, and the device will no longer record new files. Updated 04/23/2018 17 Version 1.0...
-
Page 19: Troubleshooting
TROUBLESHOOTING THE DEVICE WON’T TURN ON Charge the device for at least 4 hours before the first use. Make sure the device is securely connected to the charging source. MY COMPUTER DOESN’T RECOGNIZE THE DEVICE Unplug the device from your PC and reboot the device. - Page 20 Try using a different USB slot on your THE SOUND IS UNCLEAR The device needs charging. OTHER PROBLEMS Call our technical support at 770-694- 6921 Updated 04/23/2018 19 Version 1.0...
-
Page 21: Specifications
SPECIFICATIONS Recording Time About 288 Hours (Continuous Recording) Voice Detection 64 Kbps Audio Quality Audio Format Water Resistant Loop Recording No Updated 04/23/2018 20 Version 1.0... - Page 22 28 Hours Continuous Battery Life Recording 25 Days Standby/Voice Activated Recording Internal Storage Type of Memory Memory Capacity 288 Hours Recording Capacity 2.0 USB USB Interface VLC recommended Player Software Windows 2000 Operating Windows Me Systems Windows XP Windows Vista Windows 7 Mac OSX Updated 04/23/2018 21...
- Page 23 Linux QUALITY CONTROL CHECKLIST ☐ MQ350 ☐ Instruction Booklet Updated 04/23/2018 22 Version 1.0...
Need help?
Do you have a question about the MQ350 and is the answer not in the manual?
Questions and answers