JVC RV-NB20B Instructions Manual
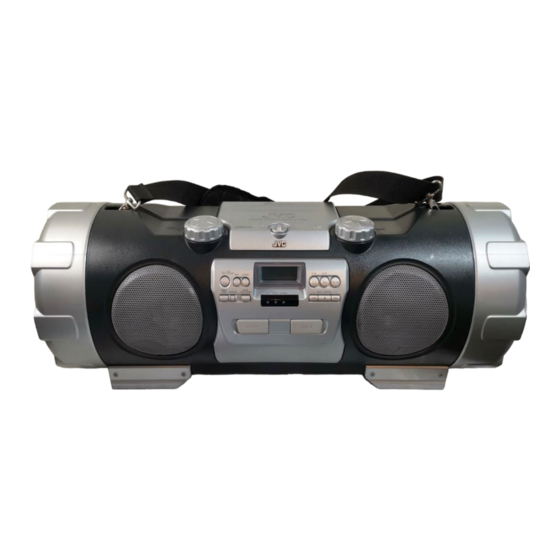
Powered woofer cd system
Hide thumbs
Also See for RV-NB20B:
- Instructions manual (68 pages) ,
- Instructions for use manual (44 pages) ,
- Instructions manual (68 pages)

Related Manuals for JVC RV-NB20B


Summary of Contents for JVC RV-NB20B
- Page 1 POWERED WOOFER CD SYSTEM CHAIN CD A WOOFER AMPLIFIE RV-NB20B/RV-NB20W INSTRUCTIONS MANUEL D’INSTRUCTIONS LVT1614-002A...
- Page 2 Caution maintenance (servicing) instructions in the literature accompanying the appliance. Changes or modifications not approved by JVC could void the user’s authority to operate the equipment. (For U.S.A.) For Canada/pour le Canada THIS DIGITAL APPARATUS DOES NOT EXCEED THE...
- Page 3 IMPORTANT FOR LASER PRODUCTS CAUTION: 1. CLASS 1 LASER PRODUCT • Do not block the ventilation openings or holes. (If the ventilation 2. CAUTION: Do not open the top cover. There are no user openings or holes are blocked by a newspaper or cloth, etc., the serviceable parts inside the unit;...
-
Page 4: Table Of Contents
General • With JVC’s COMPU PLAY you can turn on the system and start playing the iPod connected to the iPod jack with a single touch, as well as the radio and disc player. (Only when AC power is used.) •... -
Page 5: Index Of Parts And Controls
Index of parts and controls Display window How to open the cover See pages in parentheses for details. Display window o Timer indicators (16) ON/STANDBY button (7) • (timer), ON, OFF 2 Shoulder strap hooks (4) ; SLEEP indicator (15) 3 AUX button (3, 14) a CLOCK indicator (8, 15) •... -
Page 6: Getting Started
Remote control See pages in parentheses for details. 1 Number buttons (9, 11) 2 SLEEP button (15) 3 Multi control buttons (9, 11, 15, 16) • GROUP UP, GROUP DOWN • 4, 7, x 4 Source buttons (3, 9 – 14) •... - Page 7 Carrying the system Using the carrying handles Using the shoulder strap Be sure to hold both handles when you carry the system. Attach the supplied shoulder strap (adjustable in length) to each If you carry the system by only one handle, because of the length end of the system as illustrated.
- Page 8 To car’s cigarette lighter socket (DC12V) CAUTIONS: • Be sure to use the specified car adapter (JVC model CA-R120) to prevent Battery cover mishaps or damage resulting from different polarity design. • For safety, stop the car before performing operations.
- Page 9 Connecting the auxiliary equipment Connecting the iPod (See page 13.) (See page 14.) To headphones jack To dock connector Stereo mini plug cable (not supplied) iPod cable iPod stand (supplied) Auxiliary equipment (not supplied) (supplied) Disconnecting the auxiliary equipment When disconnecting the auxiliary equipment, make sure the iPod (not supplied) system is turned off.
-
Page 10: Basic Operations
Basic operations ON/STANDBY SUPER WOOFER DISPLAY VOLUME +/– VOLUME +/– SOUND SUPER WOOFER STANDBY lamp ON/STANDBY VOLUME +/– SOUND MUTING ACTIVE CLEAR ACS ON/LEVEL SOUND indicator VOLUME +/– Turning the power on and off Turning off the system Note: The lighting condition for the STANDBY lamp and for the Press ON/STANDBY again. - Page 11 Turning off the sound Selecting the sound mode temporarily Sound modes can be selected to enhance the type of music being played. Using the remote control only Press SOUND to select the sound mode. Press MUTING. Each time you press the button, the sound mode changes as “MUTING”...
-
Page 12: Listening To The Radio
Listening to the radio Number buttons FM/AM FM/AM PRESET TUNING FM MODE FM MODE You can listen to FM and AM stations. Stations can be tuned in manually, automatically, or from preset memory storage. Before listening to the radio, fully extend the FM telescopic antenna. Preset Tuning (possible only after presetting stations) Tuning in to a station Select the desired preset number using PRESET TUNING on... -
Page 13: Playing Back Discs
4. Press the number buttons to select the Presetting stations preset number you want. You can preset up to 30 FM stations and 15 AM stations. • To select 5, press 5. • To select 15, press +10 then 5. Note: Preset numbers may have been set to factory test •... - Page 14 Skip Play Using the disc player—Normal Press to select the track you Play want to play during playback. • Press x once to skip to the beginning of the next track. To play a disc • Press 4 to skip to the beginning of the track being played. Press 4 twice quickly to skip to the beginning of the previous 1.
- Page 15 Programming the playing order Random play of the tracks The tracks will play in no special order when you use this mode. Using the remote control only Using the remote control only You can program up to 50 tracks in any desired order including 1.
-
Page 16: Listening To The Ipod
You can also select a track with the same buttons while the iPod is see the iPod instruction manual. paused. • JVC is not responsible for any loss of or damage to iPod that To start playback, press iPod 6. might result from the use of this product. -
Page 17: Listening To Auxiliary Equipment
Listening to auxiliary equipment QP LINK You can listen to auxiliary equipment. First make sure that the auxiliary equipment is properly connected to the system. (See pages 5 and 6.) Note: For operation of the auxiliary equipment, refer to its instructions. How does QP Link work? Listening to auxiliary While QP Link is activated, starting playback performs the... -
Page 18: Using The Microphone/Guitar
Using the microphone/guitar 3. Connect a microphone or a guitar into the Microphone/guitar mixing MIC/GUITAR INPUT jack on the rear of the Using a microphone or a guitar (not supplied), you can mix its system. sound with a source sound. 4. - Page 19 2. Set the length of time you want the source 5. Set the OFF time (example: PM1:30). to play before shutting off. Each time you press the button, it changes the number of minutes shown on the display in this sequence: 10 = 20 = 30 = 60 = 90 = 120 = OFF = (back to the beginning) (1) Press x or 4 to select the hour, then press SET.
-
Page 20: Care And Maintenance
Care and maintenance Handle your discs carefully, and they will last a long time. Cleaning the lens Compact discs If the lens in the pickup is dirty, dropout, etc., could degrade sound. • This system can play back the following discs: Open the disc compartment door and clean the lens as shown. -
Page 21: Specifications
Symptom Possible cause Action • The track skips. • The disc is dirty or scratched. • Clean or replace the disc. • The disc does not play (“NO PLAY” or • The disc is upside down. • Put the disc in with the label side up. “NO DISC”... -
Page 22: Caractéristiques
Général • Avec COMPU PLAY de JVC vous pouvez mettre le système sous tension et démarrer la lecture du iPod connecté à la prise iPod en appuyant sur une seule touche, comme vous le feriez pour la radio ou le lecture de disque. (Seulement lorsque le courant secteur est utilisé.) -
Page 23: Liste Des Pices Et Des Commandes
Liste des pices et des commandes Fenêtre d’affichage Comment ouvrir le couvercle Pour les détails, référez-vous aux pages entre parenthèses. Fenêtre d’affichage o Indicateurs de minuterie (16) 1 Touche ON/STANDBY (7) • (minuterie), ON, OFF 2 Crochets de bandoulière (4) ;... -
Page 24: Pour Commencer
Télécommande Pour les détails, référez-vous aux pages entre parenthèses. 1 Touches numériques (9, 11) 2 Touche SLEEP (15) 3 Touches polyvalentes (9, 11, 15, 16) • GROUP UP, GROUP DOWN • 4, 7, x 4 Touches de source (3, 9 – 14) •... - Page 25 Transport du système Utilisation des poignées de transport Utilisation de la bandoulière Lorsque vous transportez le système, assurez-vous bien de le porter Fixez la bandoulière fournie (ajustable en longueur) à chaque bout par les deux poignées. du système, comme montré sur l’illustration. Si vous portez le système seulement par une poignée, à...
- Page 26 (CC12V) ATTENTION: • Assurez-vous d’utiliser l’adaptateur pour voiture spécifié (modèle CA- R120 de JVC) pour éviter tout problème de branchement ou tout Couvercle des piles dommage pouvant résulter d’un agencement différente des polarités. • Pour des raisons de sécurité, arrêtez la voiture pour effectuer les réglages.
- Page 27 Connexion des appareils auxiliaires Connexion du iPod (Voir page 13.) (Voir page 14.) À la prise du casque d’écoute À connecteur de dock Câble à mini-fiche stéréo (non fourni) Câble iPod (fourni) Appareil auxiliaire (non fourni) Support pour iPod (fourni) Déconnexion des appareils auxiliaires •...
-
Page 28: Fonctionnement De Base
Fonctionnement de base ON/STANDBY SUPER WOOFER DISPLAY VOLUME +/– VOLUME +/– SOUND SUPER WOOFER Témoin ON/STANDBY VOLUME +/– STANDBY SOUND MUTING ACTIVE CLEAR Indicateur ACS SOUND ON/LEVEL VOLUME +/– Mise hors tension du système Mise sous et hors tension Appuyez de nouveau sur la touche Remarque: L’état du témoin STANDBY et de l’affichage est STANDBY. - Page 29 Arrêt momentané du son Sélection des modes sonores Les modes de son peuvent être sélectionnés pour relever le type de Utilisation de la musique lue. télécommande uniquement Appuyer sur la touche SOUND pour Appuyez sur la touche MUTING. sélectionner le mode de son. La mention “MUTING”...
-
Page 30: Écoute De La Radio
Écoute de la radio Touches numériques FM/AM FM/AM PRESET TUNING FM MODE FM MODE Vous pouvez écouter les émetteurs en FM et AM. La syntonisation peut se faire manuellement, automatiquement ou par présélections. Avant d’écouter la radio, etendez complètement l’antenne FM télescopique. Recherche des présélections (possible uniquement après la Recherche d’un émetteur présélection des émetteurs) -
Page 31: Lecture Des Disques
4. Appuyez sur les touches numériques pour Présélection des émetteurs sélection le numéro de préréglage souhaité. Vous pouvez ainsi présélectionner jusqu’à 30 émetteurs FM et • Pour sélectionner 5, appuyez sur 5. jusqu’à 15 émetteurs AM. • Pour sélectionner 15, appuyez sur +10 puis sur 5. Remarque: Certains numéros de présélections peuvent avoir été... - Page 32 Saut de lecture Utilisation du lecteur disque— Appuyez sur pour choisir la plage Lecture normale que vous souhaitez reproduire pendant la Lecture d’un disque lecture. • Appuyez une fois sur la touche x pour localiser le début de la plage suivante. 1.
- Page 33 Programmation de l’ordre de Lecture en ordre quelconque lecture des plages (aléatoire) Lorsque ce mode est utilisé, les plages sont lues dans un ordre Utilisation de la totalement aléatoire. télécommande uniquement Utilisation de la Vous pouvez programmer jusqu’à 50 plages dans n’importe télécommande uniquement quel ordre, y compris plusieurs fois les mêmes plages.
-
Page 34: Écoute De Ipod
Pour démarrer la lecture, appuyez sur iPod 6. d’instruction de iPod. • JVC ne peut être tenu responsable pour toute perte ou dommage à Recherche de passage iPod résultant de l’utilisation de ce produit. -
Page 35: Ecoute D'appareils Auxiliaires
Ecoute d’appareils auxiliaires QP LINK La présente chaîne permet d’écouter des appareils auxiliaires. Pour ce faire, assurez-vous tout d’abord que les appareils auxiliaires sont correctement raccordés à le système. (Voir pages 5 et 6.) Remarque: Pour plus de détails sur le fonctionnement des appareils auxiliaires, se reporter à leurs propres manuels d’utilisation. Comment fonctionne la fonction QP Link? Ecoute d’appareils auxiliaires Pendant que la fonction QP Link est en service, démarrer la lecture... -
Page 36: Utilisation D'un Microphone Ou D'une Guitaretar
Utilisation d’un microphone ou d’une guitaretar 3. Connectez un microphone ou une guitare à Mixage du microphone ou de la prise MIC/GUITAR INPUT à l’arrière du la guitare système. En utilisant un microphone ou une guitare (non fourni), vous 4. Démarrez une source: disque, tuner, iPod pouvez mixer leur son avec une source sonore. - Page 37 2. Déterminez la durée d’écoute avant 5. Réglez l’heure de mise hors tension (OFF) l’extinction du système. (exemple: PM1:30). Chaque fois que vous appuyez sur la touche, la minuterie d’arrêt change le nombre de minutes affiché dans l’ordre suivant: 10 = 20 = 30 = 60 = 90 = 120 = OFF = (retour au début) Après avoir réglé...
-
Page 38: Entretien - Divers
Entretien - Divers Prenez soin de vos disques afin d’assurer leur bon et long fonctionnement. Nettoyage de la lentille Si la lentille du lecteur de disque est sale, tombe, etc., cela risque Disques compacts de diminuer la qualité du son. •... -
Page 39: Caractéristiques
Symptôme Cause possible Action • Le son du plage saute. • Le disque est sale ou rayé. • Nettoyez ou remplacez le disque. • Le disque n’est pas reproduit (“NO • Le disque est placé à l’envers. • Posez le disque avec les inscriptions vers PLAY”... - Page 40 EN, FR © 2006 Victor Company of Japan, Limited 0806KMMMDWJEIN...