
Related Manuals for ATOMSTACK Befon A5 Pro Plus


Summary of Contents for ATOMSTACK Befon A5 Pro Plus
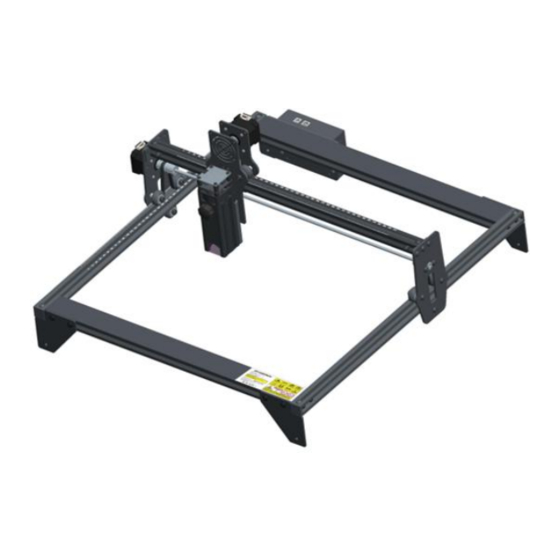
- Page 1 Shenzhen AtomStack Technologies Co., Ltd. support@atomstack3d.com Befon A5 Pro+ Laser engraving machine manual(English) note: (The picture is for reference only, the actual product shall prevail) Version: V1.0...
-
Page 2: Table Of Contents
Shenzhen AtomStack Technologies Co., Ltd. support@atomstack3d.com Directory Befon A5 PRO+......................1 0. Security Statement....................3 0. 1 Laser safety..........................3 0.2 Fire safety..........................3 0.3 Material safety......................... 4 0.4 Use Safety..........................4 0.5 Power safety........................4 1. Disclaimer and warning..................... 2. Befon A5 PRO+ Engraver Introduction..............6 3. -
Page 3: Befon A5 Pro
Shenzhen AtomStack Technologies Co., Ltd. support@atomstack3d.com 0. Security Statement Before Using the laser engraving, please read this safety guide carefully, it mentions situations that require special attention and includes warnings of unsafe practices that can cause damage to your property or even endanger your personal safety. -
Page 4: Material Safety
Shenzhen AtomStack Technologies Co., Ltd. support@atomstack3d.com 0.3 Material safety Do not engrave materials with unknown properties. Materials Recommended: Wood, bamboo, leather, plastic, fabric, paper, opaque acrylic, glass. Materials not recommended: Metal, precious stones, transparent materials, reflective materials etc. 0.4 Use Safety... -
Page 5: Disclaimer And Warning
"user manual" and the latest instructions and warnings. S henzhen Befon Technologies Co., Ltd. (Atomstack) reserves the right to u pdate this Disclaimer and Safe Operation Guidelines. Please be sure to read this document carefully before using the produc t to understand your legal rights, responsibilities and safety instructions;... -
Page 6: Befon A5 Pro+ Engraver Introduction
Shenzhen AtomStack Technologies Co., Ltd. support@atomstack3d.com 2. Befon A5 PRO+ Engraver Introduction The Befon A5 PRO+ laser engraving can be used for engraving, and cutting. The Befon A5 PRO+ laser engraver uses a fixed-focus laser, traditional lasers are zoom lasers and require to look directly at the laser spot to find a proper size. -
Page 7: Software Installation And Use
Shenzhen AtomStack Technologies Co., Ltd. support@atomstack3d.com 3. Software installation and use Befon currently supports two of the most popular versions of LaserGrbl-4.0.5 and Lightburn.v0.9.20 (customers can download the official version).LaserGRBL is an open source, easy to use and powerful software, but unfortunately LaserGRBL only supports Windows (Win XP / Win 7 / Win 8 / XP / Win 10). -
Page 8: Installing Laergrbl
Shenzhen AtomStack Technologies Co., Ltd. support@atomstack3d.com 2. installing LaerGRBL Double-click the software installation package to start the software installation, and keep clicking Next until the installation is complete. 3 .1 LaserGRBL software installation Picture 3. Adding custom buttons: The software supports users to add custom buttons, you can add custom buttons in the software according to your usage. - Page 9 Shenzhen AtomStack Technologies Co., Ltd. support@atomstack3d.com Next, we will load the custom buttons into the LaserGRBL software. In the LaserGRBL software, right-click on the blank space next to the bottom button (as shown in Picture 3.3) -> Import custom button, then select the custom button zip file downloaded before to import, keep pressing Yes (Y) until no window pops up.
-
Page 10: Connect Laser Engraving Machine
Shenzhen AtomStack Technologies Co., Ltd. support@atomstack3d.com The installed software is shown as the following figure. 3 .5 Software button Picture 4. connect laser engraving machine A. Connect the engraver to a computer with LaserGBRL software installed. B. Plug in the power supply of the engraving machine. - Page 11 Shenzhen AtomStack Technologies Co., Ltd. support@atomstack3d.com Picture 3.6 Check the port number E. First, install CH340 Driver. In the LaserGRBL software, click "Tools">"install CH340 Driver" to install the driver, and restart the computer after installation to connect. F. Click on the lightning connection logo in the software. When the...
- Page 12 Shenzhen AtomStack Technologies Co., Ltd. support@atomstack3d.com 3 .7 Connecting laser engraver Picture G. The computer and engraving machine chain machine failure, need to update the drive, the method is as follows In LaserGRBL, click "Tools" > in turn.Linstall CH340 Driver "Update and install the Driver, restart the computer after the update, and then connect, as shown in the picture below.
-
Page 13: Setting Engraving Parameters
Shenzhen AtomStack Technologies Co., Ltd. support@atomstack3d.com 5. Setting Engraving Parameters A. Select the engraving file. Open LaserGRBL software, click "File"> "Open File", then select the graphics you want to engrave, LaserGRBL supports NC, BMP, JPG, PNG, DXF and other formats. - Page 14 Shenzhen AtomStack Technologies Co., Ltd. support@atomstack3d.com engraving machine, Befon A5 PRO+ engraver uses rectangular spot for 0.23*0.23mm, the core energy area of the spot size is about 0.08*0.15mm, Therefore, it is recommended to use an engraving quality of 8, The response to laser illumination varies from different materials, so the exact value depends on the specific engraving material.
- Page 15 Shenzhen AtomStack Technologies Co., Ltd. support@atomstack3d.com b. In the selection of the laser mode, there are two commands for laser, M3 and M4, it is recommended to use the M4 command for 1bit litter engraving, and M3 command for other cases. If your laser only has M3...
-
Page 16: Laser Focus Adjustment
Shenzhen AtomStack Technologies Co., Ltd. support@atomstack3d.com aser focus adjustment 6. L The effect of engraving or cutting depends largely on whether the laser is focused, most of the existing laser engraving machines on the market use a zoom laser, need to rotate the focus nut while staring at the laser dot with your eyes to observe whether the laser is focused. - Page 17 Shenzhen AtomStack Technologies Co., Ltd. support@atomstack3d.com A. Loosen the fixing screws on the sliding rails on both sides of the laser to allow the laser to slide freely until it comes into contact with the fixed focus plate (once in contact, the laser can be lifted up slightly to remove the fixed-focus film at the end).
-
Page 18: Positioning
Shenzhen AtomStack Technologies Co., Ltd. support@atomstack3d.com D. Take out the fixed focus piece and finish focusing. Picture 3.14 Take out the fixed focus piece 7. Positioning A. The engraver does not know what position to carve, so there is one important task before you start carving, that is positioning. - Page 19 Shenzhen AtomStack Technologies Co., Ltd. support@atomstack3d.com C. Click "light laser" button, the laser will emit a weak light, the laser emits irradiation point is the center of the engraving pattern, based on this, adjust the position of the engraved object! Picture 3.16 light laser...
- Page 20 Shenzhen AtomStack Technologies Co., Ltd. support@atomstack3d.com Picture 3.17 Profile Scan...
-
Page 21: Start, Termination Carving Or Cutting
Shenzhen AtomStack Technologies Co., Ltd. support@atomstack3d.com 8. Start, Termination carving or cutting Start After finishing all the above operations, click the green button as shown in the figure to start engraving. There is a number that can be edited next to the start button. It is the number of times of engraving or cutting, LaserGRBL allows multiple consecutive engraving or cutting of uniform shapes, this function is especially useful for cutting. - Page 22 Shenzhen AtomStack Technologies Co., Ltd. support@atomstack3d.com 3 .20 LightBurn Picture Software package Double-click on the installation package to install and click "Next" in the pop-up window. (note: LightBurn is a paid software, for better experience we recommend you to buy the original one, here we will demonstrate the installation of the trial version) 3 .21 Select the installation path...
- Page 23 Shenzhen AtomStack Technologies Co., Ltd. support@atomstack3d.com 3 .22 Choose a free trial Picture Click Find My Laser 3 .23 Click”Find my laser” Picture Click Add Device 3 .24 Click GRBL(410*400mm),Click add Device Picture...
- Page 24 Shenzhen AtomStack Technologies Co., Ltd. support@atomstack3d.com To set the origin, we usually set the origin in the front left. set the origin in the Front left. 3 .25 Picture If the computer fails to connect to the machine, we can select the port of the laser engraver like the following picture.
-
Page 25: Techniques For Using Machines
Shenzhen AtomStack Technologies Co., Ltd. support@atomstack3d.com 4. Techniques for using machines A. the closer the laser is to the table, the less stable the structure will be, try to elevate the laser as far away from the table as possible when using the laser. -
Page 26: Common Materials And Recommended Engraving And Cutting Parameters26
Shenzhen AtomStack Technologies Co., Ltd. support@atomstack3d.com d. Click on the following two buttons in sequence to move the laser so that the laser point moves to the center of the engraving. Once the positioning is complete, you can start engraving. - Page 27 Shenzhen AtomStack Technologies Co., Ltd. support@atomstack3d.com...
- Page 28 Shenzhen AtomStack Technologies Co., Ltd. support@atomstack3d.com...
- Page 29 Shenzhen AtomStack Technologies Co., Ltd. support@atomstack3d.com...
- Page 30 Shenzhen AtomStack Technologies Co., Ltd. support@atomstack3d.com Table 5.2 Lightburn software common material engraving and cutting parameter table recommendation...
-
Page 31: Common Problems Possible Causes Treatment
Shenzhen AtomStack Technologies Co., Ltd. support@atomstack3d.com 6. Common Problems Possible Causes Treatment Common Possible cause Solution problem... - Page 32 Shenzhen AtomStack Technologies Co., Ltd. support@atomstack3d.com Common Possible cause Solution problem Log on website http://atomstack3d.com/a5 Lasergrbl/Lightburn download updates driver missing corresponding Lasergrbl drive and lightburn drive. Multiple LaserGRBL Close LaserGRBL software The engraving software open repeatedly that is open repeatedly...
- Page 33 Shenzhen AtomStack Technologies Co., Ltd. support@atomstack3d.com Customer Service: For Laser Engraver technical support and service, please email: support@atomstack3d.com Manufacturer: Shenzhen AtomStack Technologies Co., Ltd. Address: AB301,New Chabridge Industrial Park,No.3,Baolong 6th Rd.,Longgang Dist,Shenzhen,Guangdong,CHINA 518116...
Need help?
Do you have a question about the Befon A5 Pro Plus and is the answer not in the manual?
Questions and answers