Table of Contents
Advertisement
Available languages
Available languages
Advertisement
Chapters
Table of Contents

Related Manuals for ROTOR INspider ALDHU24


Summary of Contents for ROTOR INspider ALDHU24
- Page 1 MANUAL DE USUARIO USER MANUAL...
- Page 2 SENSOR ID Register your ROTOR power meter www.rotorbike.com/registration...
- Page 3 La información de este documento está sujeta a cambios sin previo aviso. ROTOR se reserva el derecho a cambiar o ROT117 mejorar sus productos y a realizar modificaciones en su contenido sin la obligación de comunicar a ninguna persona u organización tales modificaciones o mejoras.
-
Page 4: Table Of Contents
1.Descripción del producto ................... 5 2.Instalación de la araña ......................6 3.Vinculación ............................ 11 4.Calibración / Puesta a cero ..................13 5.Comenzando con su ROTOR INspider............... 15 6.Pila ................................16 7.Entrenando con su ROTOR INspider............. 17 8.Mantenimiento ......................... 22 9.Preguntas frecuentes ....................23 10.Política de Seguridad.................... -
Page 5: Descripción Del Producto
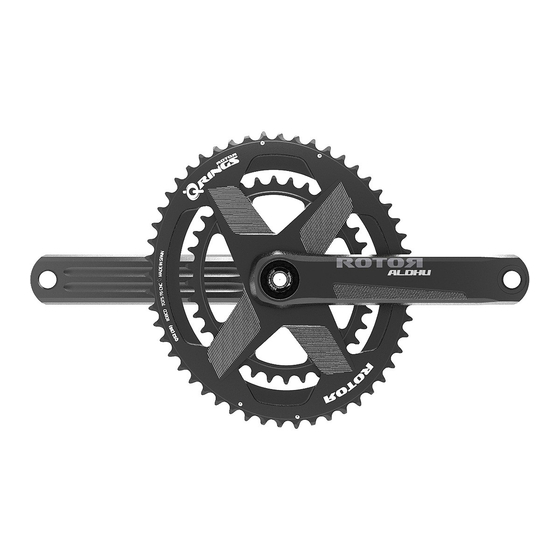
1. DESCRIPCIÓN DEL PRODUCTO 1.1. ARAÑA CON POTENCIÓMETRO INTEGRADO INspider La araña INspider contiene el medidor de potencia y lleva grabado el número de serie de sensor Bluetooth® Smart / ANT+ ATENCIÓN: NO DESMONTAR LAS TAPAS DE SU ARAÑA INspider HERRAMIENTAS NECESARIAS: el montaje de su araña INspider requiere el uso de las siguientes herramientas: - Llave allen de 5 mm para el montaje de los platos. -
Page 6: Instalación De La Araña
La araña potenciómetro INspider tiene un BCD de 110 mm y cuatro brazos, siendo compatible con platos 1x y 2x de carretera y con platos específicos 1x de ROTOR para montaña. El potenciómetro INspider es compatible con platos ovalados y con platos redondos. - Page 7 Las imágenes a continuación muestran tres tipos de montaje de la araña potenciómetro INspider con platos 1x y 2x de carretera y con platos específicos 1x de ROTOR para montaña. Tome estos montajes como referencia cuando instale su conjunto INspider + bielas + platos.
- Page 8 EXPLOSIONADO CARRETERA MONOPLATO EXPLOSIONADO CARRETERA DOBLE PLATO ¡ATENCIÓN! Puede que ciertos modelos de cuadros con cajas de pedalier sobredimensionadas interfieran con las superficies interiores de la araña; compruebe que no se produce ninguna interferencia entre los distintos componentes de la transmisión y el cuadro para asegurar la compatibilidad. Instalación de la araña...
- Page 9 2.3. VERIFICACIÓN DE ESPACIADORES 2.3.1. VERIFICACIÓN DE ESPACIADORES DE MONTAÑA Para un correcto uso de sus bielas ROTOR es necesario seleccionar los espaciadores apropiados para su cuadro. NOTA: si se usa un pedalier / rodamiento diferente, puede que el espaciado varíe.
- Page 10 2.3.2. VERIFICACIÓN DE ESPACIADORES DE CARRETERA Para un correcto uso de sus bielas ROTOR es necesario seleccionar los espaciadores apropiados para su cuadro. NOTA:si se usa un pedalier / rodamiento diferente, puede que el espaciado varíe. Seleccione su cuadro de carretera y espaciadores de la tabla siguiente:...
-
Page 11: Vinculación
La vinculación puede hacerse en automático o de forma manual (recomendable cuando esté en presencia de otros potenciómetros ANT+™). Antes de vincular en automático el ROTOR INspider con un monitor, asegúrese de que está al menos 10 metros alejado de cualquier otro sensor de potencia ANT+™. Esto prevendrá la vinculación por error con cualquier otro sensor de potencia. - Page 12 (pues volvería a dormirse), introduzca manualmente el “Sensor ID” del ROTOR INspider en el dispositivo ANT+™. El “Sensor ID” se encuentra grabado en la parte interior de la araña potenciómetro. Este número de serie aparece también en la primera página de este manual.
-
Page 13: Calibración / Puesta A Cero
O C A y O C P , y una correcta representación de la gráfica T O R Q U E 3 6 0 . No es necesario calibrar su ROTOR INspider cada vez que use la bicicleta, pero sí cuando se instala en la bicicleta y tras el cambio de plato. - Page 14 4.1.PROCESO DE CALIBRACIÓN Para calibrar su ROTOR INspider: 4.1.1. Active el potenciómetro pedaleando unos metros (para más información vaya al apartado 3.1. del manual de usuario) y complete el siguiente proceso de calibración en un tiempo inferior a dos minutos.
-
Page 15: Comenzando Con Su Rotor Inspider
5. COMENZANDO CON SU ROTOR INspider El dispositivo ROTOR INspider se enciende por primera vez al aplicar sobre él una fuerza de 2,5 kg, lo cual se consigue fácilmente pedaleando unos metros. Una vez pasado un período de 2 minutos de inactividad, el potenciómetro entra en estado de hibernación. Para volver a activarlo, basta con aplicar sobre él de nuevo una fuerza de 2,5 kg. -
Page 16: Pila
4 Ensayos realizados en condiciones de laboratorio. El consumo en modo rápido de funcionamiento (activable sólo cuando se conecta con el U s e r S o f t w a r e al ordenador o con la aplicación ROTOR Power) es mayor, reduciéndose las horas de autonomía. -
Page 17: Entrenando Con Su Rotor Inspider
ROTOR INspider para maximizar su rendimiento. MEDICIONES DEL ROTOR INspider El ROTOR INspider comienza a medir de forma automática al pedalear. Los siguientes datos son enviados por señal de radio a su ciclocomputador: POTENCIA: potencia del último ciclo completo de pedaleo. La potencia mostrada en su ciclocomputador es la potencia combinada de las dos piernas. - Page 18 (área encerrada por la curva de par, o por la de fuerzas) representado en el gráfico TORQUE 360. El OCA está íntimamente ligado a los platos ROTOR QRINGS®,puesto que su OCA (Optimum Chainring Angle) sugiere en qué posición instalar sus platos QRINGS®,posición marcada por los puntos de OCP (Optimum Chainring Position) del plato.
- Page 19 Pedalada anterior FUERZA APLICADA(N) Pedalada actual (Optimum Chainring Angle) Entrenando con su ROTOR INspider...
- Page 20 La aplicación ROTOR Power puede descargarse gratuitamente de las tiendas “App Store” y “Google Play”, permitiendo acceso a las métricas más sofisticadas de los potenciómetros de ROTOR no sólo en el entrenamiento en rodillo sino también en la calle, en condiciones reales de pedaleo.
- Page 21 En el modo “Entrenamiento”, además de las métricas habituales de potencia, cadencia, distancia o velocidad, la aplicación ROTOR Power muestra valores de OCA y OCP (ver pág. 18 ) recomendado. El resumen de estos datos al final de cada sesión está en “Historial”.
-
Page 22: Mantenimiento
Revise, por favor, estos daños después de cada salida. Controle también periódicamente el apriete correcto de la tornillería, pero no sobreapriete los tornillos. ¡ATENCIÓN! Nunca use equipos de limpieza de alta presión o productos químicos para lavar el ROTOR INspider. “Resistencia al agua: IPX7”. -
Page 23: Preguntas Frecuentes
¿Diferencias entre los modelos de potenciómetro ¿Qué voy a encontrar en la caja de mi ROTOR: INpower®, 2INpower® e INspider? nuevo potenciómetro INspider? ROTOR INpower® mide en el eje de las bielas, con lo Al adquirir un potenciómetro INspider, en la caja que mide únicamente la potencia generada por la encontrará, además de la araña potenciómetro, un... - Page 24 Si se activa el modo rápido (únicamente disponible En ningún caso se debe intentar desmontar las en el U s e r S o f t w a r e o en la aplicación ROTOR Power) tapas de plástico que protegen la electrónica en el consumo aumenta puesto que, para representar el el interior de la araña.
- Page 25 ¿Qué pasa si hay algún error durante la actualización de firmware? Si ocurre algún problema durante la actualización de firmware, debe volver a intentar la actualización hasta que ésta termine de manera satisfactoria. Si se inicia el proceso de actualización de firmware y el programa detecta algún problema, el proceso se reinicializará...
- Page 26 ROTOR con el programa UserSoftware que puede descargar de manera No es necesario calibrar tras cargar la batería. gratuita en la web de ROTOR, o con la aplicación para Es recomendable una segunda calibración tras las móviles ROTOR Power.
- Page 27 OCP (Optimum Chainring Position) del el U s e r S o f t w a r e o la aplicación de ROTOR: plato. TORQUE 360 y OCA (Optimum Chainring Angle).
- Page 28 Lea el manual de usuario para un de Sigma incluyen una compatibilidad especial correcto emparejamiento del potenciómetro con su con los potenciómetros ROTOR, siendo capaces dispositivo ANT+ de mostrar en tiempo real los valores de OCA y OCP y grabarlos para analizarlos en su software.
- Page 29 Por favor, contacte con su tienda o distribuidor local. http://www.garmin.com/en-US ROTOR provee de dos años de garantía en todos sus productos de acuerdo a la normativa europea. ¿Qué soporte voy a tener si necesito asistencia con mi ROTOR INspider? Encontrará...
-
Page 30: Política De Seguridad
No llevar a cabo un mantenimiento adecuado reduce drásticamente la vida útil del producto así como su rendimiento. Si tiene cualquier duda, comuníquelo en su punto de venta ROTOR más cercano o contacte con un mecánico profesional. CONDICIONES DE GARANTÍA ROTOR Los productos ROTOR y todos sus componentes están garantizados durante dos años contra cualquier fallo... -
Page 31: Declaración Normativa
Conectar el equipo a una toma de corriente o circuito diferente al del receptor. Consultar al distribuidor o a un técnico especialista de radio o TV. ROTOR no autoriza cambios o modificaciones realizados por el usuario en el dispositivo. Cualquier cambio o modificación podría invalidar el derecho del usuario a utilizar el equipo. - Page 33 ROTOR. INSIDE ROTOR grants permission to download a single copy of this manual onto a hard drive or other electronic storage medium to be viewed and to print one copy of this manual...
- Page 34 1. Product description ................... 35 2. Spider and cranksinstallation................36 3. Pairing ......................41 4. Calibration / Zeroing ..................43 5. First steps with your ROTOR INspider ..............45 6. Battery ......................46 7. ROTOR INspider training use................43 8. Maintenance ....................52 9.
-
Page 35: Product Description
1. PRODUCT DESCRIPTION 1.1. Spider with integrated power meter: INspider The spider contains the power meter unit and specific Bluetooth® Smart / ANT+ sensor ID number. Non-drive-side crank assembly includes bolt and DTT insert. ATTENTION: DO NOT REMOVE THE COVERS FROM YOUR SPIDER. TOOLS NEEDED: the assembly of your spider requires the use of the following tools: - 5 mm Allen key for chainrings assembly. -
Page 36: Spider And Cranksinstallation
INspider power meter has 4 arms and 110 mm BCD. It is compatible with 1x and 2x road chainrings and with ROTOR specific 1x MTB chainrings. INspider power meter is oval ring and round ring compatible. 2. SPIDER AND CRANKS INSTALLATION 2.1. - Page 37 The following images show the exploded view for three different assemblies that can be done with the INspider power meter: road assemblies with 1x and 2x chainrings; MTB assembly with 1x ROTOR specific chainrings. Please use them as reference when installing your power meter. MTB ASSEMBLY...
- Page 38 1X ROAD ASSEMBLY 2X ROAD ASSEMBLY ¡ATENCIÓN! It is possible that some oversized frames interfere with the inner surfaces ofthe spider; check that there are no interferences between the different transmission components and the frame to ensure compatibility. Spiderand cranks installation...
- Page 39 2.3.1. SPACERVERIFICATION FOR MTB CRANKS To correctly use your ROTOR crankset, it is necessary to select the appropriate spacers for your frame. NOTE: if different bearings are used, spacing may differ. Select your MTB frame and spacers from the table below:...
- Page 40 2.3.2. SPACER VERIFICATION FOR ROAD CRANKS To correctly use your ROTOR crankset, it is necessary to select the appropriate spacers for your frame. NOTE: if different bearings are used, spacing may differ. Select your road frame and spacers from the table below:...
-
Page 41: Pairing
Pairing can be done both automatically or using the manual mode (recommended when other ANT+™ power meters are close). Before pairing ROTOR INspider with a monitor, make sure you are at least 10 meters (30 feet) away from any other ANT+™ power sensor. This will prevent accidental pairing with another power sensor. - Page 42 You can connect your Inspider power meter to the ROTOR Power app via Bluetooth® Smart too. The ROTOR Power app is iOS and Android compatible and can be downloaded for free in your smartphone. Please check section 7.1 of this manual for more information about the app.
-
Page 43: Calibration / Zeroing
TORQUE360 and OCA representation. There’s no need to calibrate/zero your ROTOR INspider every time you use your bike, but it is convenient to zero it once a week approximately. It should always be done when installing the system on the bike for the first time, or when assembling or swapping chainrings. - Page 44 4.1. CALIBRATION PROCESS 4.1.1.Activate your power meter by pedalling a few meters (see section 3.1. of the user manual) and complete the following calibration process in less than two minutes. 4.1.2.With the bike upright and level with the ground, place the left crank in the 6 o’clock position as shown in the picture.
-
Page 45: First Steps With Your Rotor Inspider
5. FIRST STEPS WITH YOUR ROTOR INspider ROTOR INspider becomes active when applying a 2.5 kg force to it. This can be easily achieved by riding a few meters. After two minutes of inactivity it enters hibernation mode. To active it again, just apply the 2.5 kg force once again. -
Page 46: Battery
A special tool is required in case battery replacement is needed. For that purpose, contact your ROTOR dis tributor and they will assist you. *Tests performed in laboratory conditions. Fast mode consumption (only available when connected to the User Software or the ROTOR Power app) is greater, reducing the hours of autonomous use. - Page 47 After pairing your ROTOR power meter, follow the configuration options for your cyclecomputer to select the metrics you would like to display on your device. Consult your personal trainer in order to evaluate which of the measured values provided by ROTOR INspider are optimal to maximize your performance.
- Page 48 93º, you should start using Q RINGS® in OCP #3. Visit w w w . r o t o r b i k e . c o m for more information and to download the ROTOR U s e r S o f t w a r e , its documentation and to learn more about OCA.
- Page 49 Previous pedal rotation APPLIED FORCE(N) Current pedal rotation (Optimum Chainring Angle) ROTOR INspider training use...
- Page 50 Bluetooth® Smart. This is an essential characteristic that allows compatibility with the ROTOR Power application. The ROTOR Power application can be downloaded for free from the “App Store” and “Google Play” stores. This app gives access to the most sofisticated metrics of ROTOR power meters not only indoors but outdoors, when real pedalling conditions take place.
- Page 51 You must follow the path: phone icon - apps - ROTOR Power folder - files. You can also directly upload your rides to Strava® or TrainingPeaks® from the History section.
-
Page 52: Maintenance
Inspect your ROTOR product for damage including cracks, dents and serious scratches before each ride and after every fall or crash. Do not use your ROTOR product until it has been thoroughly inspected, repaired or replaced. Cyclists should inspect their bicycle and parts on a regular basis or consult with a professional bicycle mechanic to determine the need for service and to detect damage that may have occurred from normal use. -
Page 53: Frequently Asked Questions
(e.g. long climbs with ROTOR INspider measures in the spider instead of higher temperatures at the bottom and lower in the axle or crank, on sequently measuring temperatures at the top). - Page 54 What happens if there is an error while updating the firmware? ROTOR INspider uses a Lithium (Li-ion) battery. It has 3.7V nominal tension and 290 mAh capacity. It can If any error occurs during the updating process, you need to try the update again until it successfully finishes.
- Page 55 If I have doubts that I’ve correctly calibrated my power meter. Read the user manual carefully and calibrate the How often do I need to calibrate my ROTOR Inspider? cranks as explained. To ensure accurate measurement, it is necessary If you have doubts about correct calibration, to correctly calibrate (zero-offset) the power meter.
- Page 56 U s e r S o f t w a r e or the ROTOR shown in the T O R Q U E 3 6 0 graph.
- Page 57 OCA value? TORQUE 360, OCA and OCP can only be visualized through the U s e r S o f t w a r e or the ROTOR Power app at the moment. Connection to the U s e r S o f t w a r e can be done both via ANT+ or Bluetooth®...
- Page 58 Please contact your ROTOR delaer or local distributor. Check to see if the battery is charged enough. For ROTOR provides two years of warranty for all its that purpose, apply some force on one of the pedals products in compliance with European law.
- Page 59 What does it mean to train with power? Visit trainingpeaks.com for a better understanding of how training with power works. ROTOR recommends subscribing to TrainingPeaks to obtain the maximum benefit of the data provided by your power meter. What software can I use to analyze my data? http://home.trainingpeaks.com...
-
Page 60: Safety Warning
Failure to perform necessary and essential maintenance could drastically reduce the service life of your ROTOR product and reduce its performance. If you have any questions, please contact a professional bike mechanic or your nearest ROTOR dealer for additional information. -
Page 61: Regulator Statements
Connect the equipment into an outlet on a circuit different from that to which the receiver is connected. Consult the dealer or an experienced radio/TV technician for help. ROTOR has not approved any changes or modifications to this device by the user. Any changes or modifications could void the user’s authority to operate the equipment. -
Page 62: Cee Regulation
CEE REGULATION This product is compliant with Directive 93/42/EEC. Hereby, ROTOR declares that the radio equipment type INpower is in compliance with Directive 2014/53/EU. The full text of the EU declaration of conformity is available at the following internet address: http://rotorbike.com/... - Page 64 w w w . r o t o r b i k e . c o m rotor_bike rotorbikecomponents rotorbike...
Need help?
Do you have a question about the INspider ALDHU24 and is the answer not in the manual?
Questions and answers