Table of Contents
Advertisement
Advertisement
Table of Contents

Related Manuals for Panasonic NA-S106X1


Summary of Contents for Panasonic NA-S106X1
- Page 1 AWW9901C2Z00 S0318-0(V) Printed in Vietnam 03-2018...
-
Page 2: Table Of Contents
Contents SAFETY PRECAUTIONS Safety Precautions ... 4 Before Using Checking Your Washing Machine....8 Before Washing . - Page 3 Consumption ....46 Specifications ....47 Images in these instructions are of the NA-S106X1, unless otherwise indicated.
-
Page 4: Safety Precautions
Safety Precautions Read and follow these safety precautions. WARNING May cause serious injury or death. For the safety of you and your family This appliance is not intended for use by persons (including children) with reduced physical, sensory or mental capabilities, or lack of experience and knowledge, unless they have been given supervision or instruction concerning use of the appliance by a person responsible for their safety. - Page 5 WARNING Such materials may be destroyed and thereby damage the appliance. Never stop the appliance before the end of the drying cycle unless all items are quickly removed and spread out so that the heat is dissipated. Ground the appliance Be sure to have your dealer perform grounding work.
- Page 6 Safety Precautions (continued) CAUTION May cause injury or property damage. Correct use This appliance is only suitable for textiles labelled washing machine washable. Do not connect to a hot water supply. Do not obstruct the openings of the bottom face with carpet, etc. To prevent water leaks New hose-sets supplied with the appliance are to be used and old hose-sets should not be reused.
- Page 7 CAUTION To prevent damage to the appliance and laundry This may cause excessive vibration of the appliance. Do not wash clothes that are stained with a lot of vegetable oil, cosmetic oil, etc. The oil can get hot and deform the door seal, leading to water leakage.
-
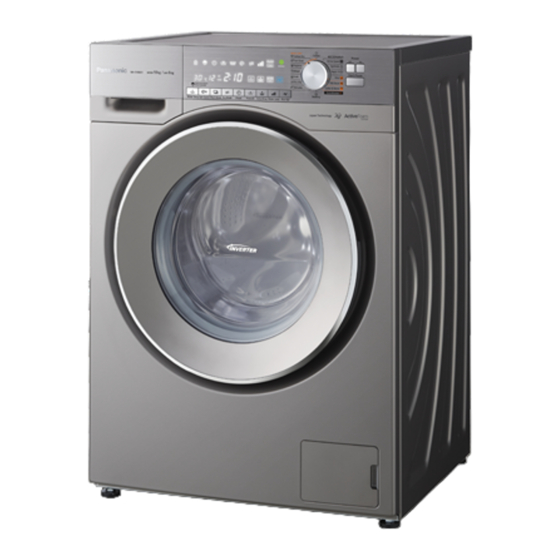
Page 8: Checking Your Washing Machine
Checking Your Washing Machine Detergent drawer (P. 12) Control panel (P. 10) Drum (Washing/spin-drying Door tub) Door seal Hinge (P. 30) (Rear of appliance) Water inlet (P. 43) Drain hose (P. 42, 43) Anchor bolts (P. 41) Power cord and plug* Adjustable feet * The plug shape (P. -
Page 9: Before Washing
Stained items Apply stain remover to any stains. “StainMaster+” programmes (P. 17) are recommended for removing stains. (Only for NA-S106X1) Sorting Brush off hair, animal fur, sand etc. Wash separately clothes that before washing are not colour fast. (denim, dark Heavy dirt or deep stains: Wash coloured items, etc.) -
Page 10: Control Panel
Control Panel Controls For NA-S106X1 (For NA-S106G1) 1. Power button [On], [Off] 5. Display ( P. 11) 2. Start/Pause button [Start/Pause] NOTE To start or pause the operation. To turn the power off and back on, 3. Programme selection dial press “Power”... - Page 11 Display This illustration shows all indications for explanation purposes. 1. Lock 8. Spin speed : The door is locked 9. Remaining time : The door and buttons are This indicator shows the all locked (Child Lock) approximate time until the 2.
-
Page 12: Detergent
Detergent Add detergent, etc. before pressing “Start/Pause”. Read instructions on the packet of detergent or other agent, for correct quantity depending on the amount of laundry, degree of soiling, and water hardness. Detergent, water softener, bleach, stain remover When using a tub cleaning detergent, also put it in this compartment. - Page 13 Detergent Water softening agent Use a low foam detergent. If you live in a hard water area (1.3 mmol/L hardness or more), we To prevent powdered detergent recommend using a water softening from remaining in detergent drawer: agent. This reduces the detergent Dry inside the detergent drawer required, and prevents limescale, with a cloth.
-
Page 14: Washing & Drying
Washing & Drying Basic Method Changing settings, using optional functions To open the door during NOTE operation Do not get laundry caught in the (The door is locked during door. operation) It can cause damage to the door seal. Press “Pause”. (The lock is released with a click) During spinning process, it may... - Page 15 Prewash ( P. 24) (P. 16, 17) Extra Rinse ( P. 25) Required time display (recalculated) Blue Ag+ ( P. 21, 25) (Only for NA-S106X1) (e.g.) NOTE The range of settings you (The buzzer sounds and the door can change and the optional lock is released.)
-
Page 16: Programme List
Programme List WASH&DRY Max load (kg) Time* Wash & Programme Description Wash Wash For daily items of cotton, 0:57 - 2:40 - linen and cotton blends, e.g. Cotton 10.0 T-shirt, underwear, towel, and 1:17 5:15 tablecloth. Takes longer but consumes 1:00 - 2:35 - Cotton... - Page 17 WASH Programme Description Max load (kg) Time* For items with mixed fabric, for example, cotton, linen and 10.0 1:18 - 2:23 page 21) Active Washes faster than the Cotton 0:49 programme with small load. Speed Synthetic* 0:53 Washes gently hand washable and machine washable wool Wool* 0:40...
-
Page 18: Details Of Programmes
Details of Programmes Available Settings Auto setting models Water Water Spin Water Temp S106X1 S106G1 Temp level* speed (°C)* Programme (°C)* (r/min) Cold, 30, 40, 50, Cotton Cold, 30, 40, 50, Cotton Eco 1200 Tub Clean Unchangeable Hygiene 60, 90 Cold, 30, 40, 50, Shirts –... - Page 19 H, M 500, 700 – – Unchangeable Unchangeable – – – 500, 700, 900, 1000, Unchangeable – 1200 500, 700, 900, 1000, Unchangeable – 1200 500, 700, 900, 1000, Unchangeable – 1200 *3 “Blue Ag+” is for models NA-S106X1 only.
-
Page 20: Washing Tips
Washing Tips “Wool” and “Delicates” “Bedding” programme programmes Washable items When washing Items with (Wash) or (Handwash) on label. inside the drum. Blankets, 100 % synthetic and For wool items, use a mild liquid 100 % cotton detergent. Sheets Bedspreads To rinse fully, use the “Extra Rinse”... - Page 21 Ask a service person for sensing may not work properly. replacement. “Blue Ag+” (Max. 3 kg) “Active Foam” (Only for NA-S106X1) The “Active Foam” works with the This feature sterilises your laundry, which works during rinse using silver on page 19.
-
Page 22: Changing Programme Settings
Changing Programme Settings Changing the temperature Water Temp Preparing You can change the washing temperature according to the type of Sort the laundry and put it into the laundry or the degree of soiling. drum. ( P. 9) Add the detergent. ( P. 12) Press. -
Page 23: Changing The Spin Speed [ Spin Speed]
Changing the spin speed Setting the programme end time Preset Spin Speed Change the spin speed to dry laundry You can set how may hours later the more thoroughly or reduce wrinkles in washing will end. laundry. Press. Press. The spin speed indication The time indication displayed displayed changes with each changes with each press. -
Page 24: Washing With Optional Functions
Washing with Optional Functions You can use combinations of optional Select and run processes functions with each programme. Wash Mode Preparing You can select and run a combination of wash, rinse and spin processes. Sort the laundry and put it into the drum. -
Page 25: Rinse Thoroughly [ Extra Rinse]
Rinse thoroughly Sterilise the laundry Blue Ag + (Max. 3 kg) Extra Rinse If you are concerned that some Sterilises your laundry using silver detergent may remain in your laundry, ions and ultraviolet (UV) light. ( P. 21) you can add an extra rinse process. Press. -
Page 26: Dry Mode Dry Mode
Washing with Optional Functions (continued) Dry Mode Dry Mode You can choose different dry modes depending on your clothing. Press. lights (activated) or goes out with each press. Dry Mode Description Auto For clothes that are not easy to be wrinkled, such as towels, underwear, etc. -
Page 27: Changing Appliance Settings
Turn on the power. This also locks the control buttons. Turn on the power. Press for at least 5 seconds. For NA-S106X1 The buzzer setting is cancelled after a beep. Press for at least 5 seconds. To activate lights up.) -
Page 28: Maintenance
Maintenance If the water supply hose is frozen 1 Wrap warm towels around the joints of the water supply hose. properly. Joints Water 1 Turn off the tap. supply hose 2 Turn on the power and start the “Cotton” programme without any laundry or detergent inside the 2 Put 2 to 3 litres of hot water (about drum. -
Page 29: Drum
Door seal Power plug Detergent drawer Detergent Wash the detergent drawer with water. drawer A build-up of detergent can develop mould. 1 Pull out the detergent drawer. Drum Window 2 Pull laterally by both thumbs with Drum proper force as shown by the small Once a month, run the “Tub Clean”... -
Page 30: Drain Filter
Maintenance (continued) 4 No water being left, turn the drain a month. A build-up of lint can hamper drainage. pull it out. 1 Switch off and unplug the appliance. front, and place a container to receive discharged water. Hose stopper Pump hose 3 Pull out the pump hose, remove the hose stopper to drain water into the... -
Page 31: For Better Results
For Better Results Symptoms Use correct amount of detergent. (Using too small amount of detergent may cause once- removed stains to stick to the clothes again, resulting in darkening of clothes and odour.) Use correct amount of softener. (If excessive softener is put in, the softener residue on clothes may cause darkening of clothes.) When using in combination with liquid... - Page 32 For Better Results (continued) Symptoms Put delicates such as lingerie in laundry nets before washing. Damaged clothes and they may be damaged due to rubbing. Shorten the spin time. Depending on the material, weaving method, thickness and type, some clothes are not suited for washing or drying.
- Page 33 Symptoms Do you choose a dry mode in line with requirements for your clothing? After drying, have the items been always placed in the drum? - After drying, the clothes should be removed from the drum immediately. When the hand If you increase the washing time and the feeling changes due rinse times, the clothes are more likely to be...
-
Page 34: Troubleshooting
Troubleshooting Problem Cause and Measures - Settings cannot be changed while an operation is in progress. Only the spin speed and “Extra Rinse” Buttons do not settings can be changed when the wash process is work paused. - The Child Lock ( ) may be activated. - Page 35 Problem Cause and Measures Remaining “Dry” time does - The displayed time is a guideline. (different from the not decrease actual time) or suddenly decrease The door and the - The door may be stained with water drops during drum are stained drying.
- Page 36 Troubleshooting (continued) Problem Cause and Measures - The amount of softener used may have been above the Fabric softener “MAX” line in the detergent drawer. (P. 12) - The detergent drawer may have been closed too strongly and spilt some of the softener. There is powdered - Powdered detergent may have been put directly into detergent left on...
-
Page 37: Error Display
Error Display What to do Turn off the power, remove all clothes from the drum and turn on the machine again. Select the “Tub Clean” programme and press the “Extra Rinse” button for 5 seconds to clean the lint. Unable to dry *... - Page 38 Error Display (continued) The cooling water cannot be drained during drying. What to do Unable to drain (Refer to contents of during drying - Spin and dry after troubleshooting. Are there too many bubbles in the drum? Is there too much detergent ? What to do - Turn off and re-start.
-
Page 39: Choosing The Right Location
Make sure to ask a service person for installation. Do not install by yourself. If the installation, test run and inspection of the washing machine are not carried out following this installation method, Panasonic will not be liable for any accident or damage caused. -
Page 40: Moving And Installing
Moving and Installing 2 Hang the rear claws of the bottom Carrying the appliance plate to the base. Don’t do it by yourself alone. 3 Snap the front claws into the base until they click. 4 Snap the left and right claws into Tilt the appliance backwards, then the base securely until they click. - Page 41 When moving the appliance again, Removing the anchor bolts the anchor bolts must be attached to the appliance. Attach the anchor The anchor bolts keep the interior of bolts in the reverse order they were the appliance in place, and protect it removed.
-
Page 42: Connecting The Hoses
Connecting the Hoses Connect the hoses properly to prevent water leaks. Maximum connection distance of hoses and power cord Right side connections 110 cm Water supply hose 40 cm Sink Rise of drain hose (max. 100 cm) Drain hose 125 cm Drain hole Left side connections 125 cm... - Page 43 Water supply hose Drain hose Draining to a sink or wash basin Water pressure: 0.03-1 MPa CAUTION If the water pressure exceeds this Secure the drain hose with an elbow so that it does not come off by water more pressure during drainage.
-
Page 44: Checking After Installation
Checking after Installation Appliance parts checklist Power plug Anchor bolts Have you removed all 4 anchor Is the appliance plugged into an AC 220-240 V household (P. 41) socket? Power plug Anchor bolts (4) Water supply hose Drain hose Adjustable feet (4) Adjustable feet Water supply hose... - Page 45 Test run Turn on the tap. Water leaks Close the door without any Check the appliance and hose laundry in the drum. joints for leaks. (P. 42) Switch on the appliance. Abnormal noise Select the “Rapid 15” programme. Make sure the appliance is level. (P.
-
Page 46: Power And Water Consumption
Power and Water Consumption Power Water Programme Temperature Water level Load Time* consumption* consumption* Cotton Cold High 10 kg 0.15 kWh 95 L 1:02 40 °C High 10 kg 1.0 kWh 95 L 1:17 60 °C High 10 kg 1.5 kWh 95 L 1:32 Cotton Eco... -
Page 47: Specifications
Model No. NA-S106X1 NA-S106G1 Rated voltage 220 - 240 V Rated frequency 50 Hz Maximum energy 1700 - 1990 W rated power input For washing 1610 W Heating energy rated power input For drying 1530 W (230 V) Maximum spin speed... - Page 48 © Panasonic Appliances (Vietnam) Co., Ltd. 2018...