Table of Contents
Advertisement
Quick Links
English
Operating Instructions
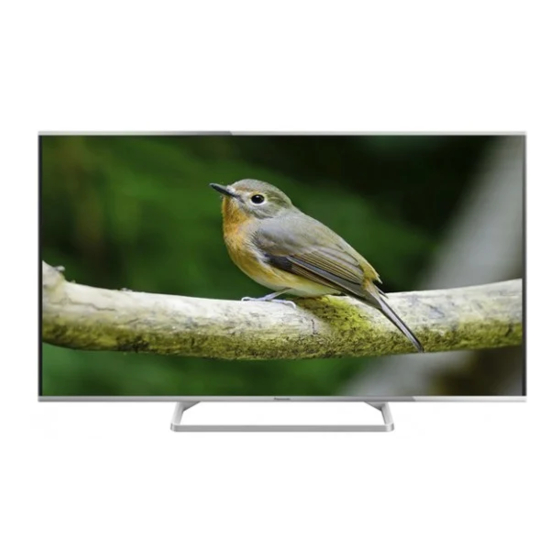
LCD Television
Thank you for purchasing this Panasonic product.
Please read these instructions carefully before operating this product and
retain them for future reference.
The images shown in this manual are for illustrative purposes only.
M0314-0
For more detailed instructions, refer to [eHELP]
(Built-in Operating Instructions).
●
How to use [eHELP]
Model No.
TX-40AS640B
TX-48AS640B
TX-55AS640B
(p. 17)
TQB0E2398U
English
Advertisement
Table of Contents

Related Manuals for Panasonic VIERA TX-40AS640B


Summary of Contents for Panasonic VIERA TX-40AS640B
- Page 1 (Built-in Operating Instructions). ● How to use [eHELP] (p. 17) Thank you for purchasing this Panasonic product. Please read these instructions carefully before operating this product and retain them for future reference. TQB0E2398U The images shown in this manual are for illustrative purposes only.
-
Page 2: Table Of Contents
Contents Be Sure to Read Important Notice··················································· 3 Safety Precautions ··············································· 3 Quick Start Guide Accessories ························································ 7 Connections ························································ 8 Identifying Controls ··············································12 First time Auto Setup ············································15 Using your VIERA Operations ·························································16 ● For the information of the trademarks, refer to How to Use eHELP ··············································17 [eHELP] (Support >... -
Page 3: Important Notice
THE MOULDED MAINS PLUG http://panasonic.net/viera/support FOR YOUR SAFETY, PLEASE READ THE FOLLOWING TEXT CAREFULLY. Panasonic does not guarantee operation and This TV is supplied with a moulded 3-pin mains plug performance of peripheral devices made by other for your safety and convenience. - Page 4 ● Do not use an unapproved pedestal / mounting ● Install or remove the TV by the specified procedure. equipment. Be sure to ask your local Panasonic dealer to perform the setup or installation of approved wall-hanging brackets. ● Do not apply strong force or impact to the display panel.
- Page 5 On / Off switch, then turn it on again. ● ■ Additional information for the wireless LAN and Battery for the Remote Control / access point may be on the following website. 3D Eyewear / Touch Pad Controller http://panasonic.net/viera/support Caution ■ Bluetooth wireless technology ® ●...
- Page 6 If you suffer from any eyesight problems (short / far- Declaration of Conformity (DoC) sighted, astigmatism, eyesight differences in left and “Hereby, Panasonic Corporation declares that this TV is right), ensure that you correct your vision before using in compliance with the essential requirements and other the 3D Eyewear.
-
Page 7: Accessories
Accessories Assembling / Removing the pedestal Assembly screw (4) Remote Control M5 × 15 (p. 12) ● N2QAYB000829 Assembly screw (4) M4 × 12 Bracket (2) Touch Pad Controller (p. 13) ● N2QBYA000004 Base Pedestal (p. 7) ■ Mains lead Assembling the pedestal (p. -
Page 8: Connections
Connections ● External equipment and cables shown are not supplied with this TV. ● Please ensure that the unit is disconnected from the mains socket before attaching or disconnecting any cables. ● Check the terminal type and cable plugs are correct when connecting. - Page 9 8 Terrestrial terminal (p. 9) AV devices 9 DIGITAL AUDIO ■ DVD Recorder / VCR 10 HDMI1 - 2 (p. 9, 10, 11) Basic connections ■ Mains lead AC 220-240 V 50 / 60 Hz Mains lead (supplied) Insert the mains plug firmly into place. ●...
- Page 10 Network Other connections ■ DVD Player To use internet service, you need a broadband network environment. (COMPONENT equipment) ● If you do not have any broadband network services, please consult your retailer for assistance. ● Prepare the internet environment for wired connection or wireless connection.
- Page 11 ■ Amplifier (to listen with speakers) ● For more information, refer to [eHELP] (Functions > Common Interface), read the manual of the CI ● Use HDMI2 for connecting an amplifier. This module, or check with the content provider. connection is applicable when using an amplifier that has ARC (Audio Return Channel) function.
-
Page 12: Identifying Controls
Identifying Controls 8 [Option Menu] ● Easy optional setting for viewing, sound, etc. 9 Coloured buttons (red-green-yellow-blue) ● Remote Control Used for the selection, navigation and operation of various functions. 10 Volume Up / Down 11 Numeric buttons ● Changes channel and teletext pages. ●... - Page 13 10 Voice Control button Touch Pad Controller ● Press to use Voice Control function. Touch Pad Controller is designed for the convenient 11 Return operations, especially, on Home Screen or internet ● Returns to [Home Screen]. contents. You can operate the TV intuitively with this 12 APPS controller.
- Page 14 ■ Installing / Removing batteries Indicator / Control panel ● When pressing 4, 5, 6 buttons, the control panel guide appears on the right side of the screen for Slide open 3 seconds to highlight the pressed button. Close Rear side of the TV 1 Remote control signal receive ●...
-
Page 15: First Time Auto Setup
First time Auto Setup Select the type of [Home Screen] The demonstration to explain how to use [my Home Screen] is displayed. Confirm the demonstration by Automatically sets up the TV and searches for available following the on-screen instructions, and then select the TV channels when the TV is turned on for the first time. -
Page 16: Operations
Operations ● You can also select the mode pressing the TV button repeatedly. ● If [TV Selection] is not displayed, press the TV button to switch the mode. Turn power on Select a channel (TV) down (Remote Control) ● Mains power On / Off switch should be on. (p. 14) ●... -
Page 17: How To Use Ehelp
If this is not the first time to view [eHELP] from when the TV is turned on, the confirmation screen Use the supplied 3D Eyewear or Panasonic 3D Eyewear is displayed to select whether [First Page] or [Last that supports Bluetooth wireless technology. - Page 18 ● Please consult the suppliers of contents or programmes for availability of this service. ■ 3D photos and 3D videos taken by 3D-compatible Panasonic products ● Available in Media Player and Network services. ■ 2D images converted to 3D ●...
-
Page 19: Faqs
● Point the remote control directly at the TV’s remote Panasonic dealer or visit freeview.co.uk/retune control signal receiver (within about 7 m and a Re-tuning only takes a few minutes, just follow the 30 degree angle of the signal receiver). -
Page 20: Maintenance
Maintenance Specifications ■ First, remove the mains plug from the socket outlet. Model No. : TX-40AS640B Display panel, Cabinet, Pedestal 40-inch model : TX-48AS640B 48-inch model Regular care: : TX-55AS640B 55-inch model Gently wipe the surface of the display panel, cabinet, Dimensions (W ×... - Page 21 WPA-PSK (TKIP/AES) Receiving systems / Band name WEP (64 bit/128 bit) Check the latest information on the available services at the following website. Bluetooth wireless technology* http://panasonic.net/viera/support Standard Compliance Bluetooth 3.0 DVB-T / T2 Frequency Range Digital terrestrial services 2.402 GHz - 2.480 GHz...
- Page 22 This equipment complies with the EMC standards listed below. EN55013, EN61000-3-2, EN61000-3-3, EN55020, EN55022, EN55024 ■ When using the wall-hanging bracket Please contact your local Panasonic dealer to purchase the recommended wall-hanging bracket. ● Holes for wall-hanging bracket installation Rear of the TV 40-inch model...
- Page 24 • Or go on line through our Internet Accessory ordering application at www.pas-europe.com. • Most major credit and debit cards accepted. • All enquiries transactions and distribution facilities are provided directly by Panasonic UK. • It couldn’t be simpler! • Also available through our Internet is direct shopping for a wide range of finished products. Take a browse on our website for further details.