Table of Contents
Advertisement
Quick Links
Advertisement
Table of Contents

Related Manuals for Specim FX10 Series


Summary of Contents for Specim FX10 Series
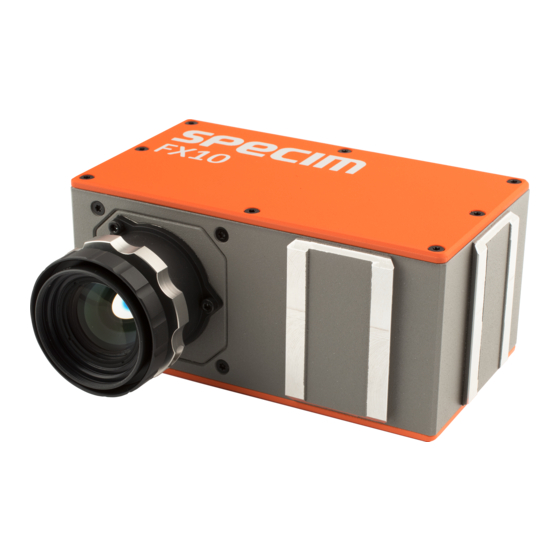
- Page 1 Specim FX10 - User Manual 2.2...
-
Page 2: Table Of Contents
| Contents | 2 Contents Specim FX10......................4 Legal Information..............................4 Description......................... 5 Hyperspectral Imaging............................5 Illumination Overview............................5 Camera Overview..............................7 External Interfaces..............................9 Power Connector............................9 Camera Link Camera External Interfaces....................10 GigE Camera External Interfaces......................10 Frame Grabbers..............................11 Compatible Frame Grabbers........................11 Frame Grabber Relevant Configuration.................... - Page 3 | Contents | 3 Triggering and Strobe through Power Connector....................39 External Trigger Configuration.......................... 41 Maintenance Guide....................42 Important Maintenance Information........................42 Cleaning the Fore Optics............................42 Troubleshooting....................... 43 Troubleshooting FX............................43 Technical Information.................... 44 Default Settings and Calibrations........................44 Optical Characteristics............................45 Performance Characteristics..........................46 Mechanical Specifications..........................
-
Page 4: Specim Fx10
Imaging Oy Ltd reserves the right to make changes to this information without notice. Reproduction of this manual in whole or in part, by any means, is prohibited without prior permission having been obtained from Specim, Spectral Imaging Oy Ltd. -
Page 5: Description
Pushbroom imaging technique SPECIM FX cameras use pushbroom line scanning technique, which means that the target is scanned one spatial line at a time and full spectral data from that line is aqcuired simultaneously. - Page 6 If the illumination does not have signal in some of the wavelengths, the measured data on those wavelengths is not valid. The recommended options for Specim FX are halogen-based and sunlight illumination solutions. Figure 1: Halogen Spectrum...
-
Page 7: Camera Overview
For more information, see Status Line section of this manual and ASCII for FX -series document. Serial number Camera version 1xxxxxx FX10 2xxxxxx FX17 3xxxxxx FX10e 4xxxxxx FX17e 5xxxxxx FX10b 6xxxxxx FX10be 7xxxxxx FX10c All rights reserved - Specim, Spectral Imaging Oy Ltd. - Page 8 A customer with several cameras can replace one camera with another and still have the same spectral calibration and smile/keystone without additional calibration. All rights reserved - Specim, Spectral Imaging Oy Ltd.
-
Page 9: External Interfaces
General purpose input 0 (5 V) ISO_TRIGGER Default Trigger in (5-15 V) RESERVED Reserved, do not connect RESERVED Reserved, do not connect RESERVED Reserved, do not connect RESERVED Reserved, do not connect All rights reserved - Specim, Spectral Imaging Oy Ltd. -
Page 10: Camera Link Camera External Interfaces
Note: The LED light may appear dim. Status LED Status Not lit Power off Stable green Power on GigE LED 1 Status Not lit No data connection Blinking green Data connection active All rights reserved - Specim, Spectral Imaging Oy Ltd. -
Page 11: Frame Grabbers
Tap 0 Tap 1 Tap 0 Tap 1 Tap 0 Tap 2 8 Bit 8 Bit 10 Bit 10 Bit 12 Bit 12 Bit 0 (LSB) 7 (MSB of 8 Bit) All rights reserved - Specim, Spectral Imaging Oy Ltd. - Page 12 | Description | 12 Tap 0 Tap 1 Tap 0 Tap 1 Tap 0 Tap 2 9 (MSB of 10 Bit) 11 (MSB of 12 Bit) All rights reserved - Specim, Spectral Imaging Oy Ltd.
-
Page 13: Installation Guide
This chapter describes the mounting kit installation option. Figure 6: Mounting Kit dimensions Note: Make sure to leave adequate space behind the camera for cabling. Note: Pay attention to the slit orientation when mounting the camera. All rights reserved - Specim, Spectral Imaging Oy Ltd. - Page 14 2. Slide the camera holder part to the mounting kit bottom plate. Figure 8: Mounting Kit parts 3. Slide the camera dovetails to the camera holder. Figure 9: Dovetail joints for the Mounting Kit All rights reserved - Specim, Spectral Imaging Oy Ltd.
-
Page 15: Cabling The Camera Link Camera
Figure 11: Back panel connectors Note: Leave at least 150 mm space behind the camera for cabling. Note: Make sure that the Camera Link cable is connected before powering up the camera. Connect the cables: All rights reserved - Specim, Spectral Imaging Oy Ltd. -
Page 16: Cabling The Gige Camera
Note: Leave at least 60 mm space behind the camera for cabling. Note: Make sure that the GigE data cable is connected before powering up the camera. Connect the cables: 1. Connect the interface connector (GigE) to the camera. All rights reserved - Specim, Spectral Imaging Oy Ltd. -
Page 17: Setting The Jumbo Frame Value
PC. 1. Open Windows start menu and search for network status. Figure 15: Network status in Windows start menu 2. Open the network status window and click Change adapter options. All rights reserved - Specim, Spectral Imaging Oy Ltd. - Page 18 | Installation Guide | 18 3. In the Network Connections window, click the right mouse button on the network adapter used by the camera. Select Properties. 4. Click Configure. All rights reserved - Specim, Spectral Imaging Oy Ltd.
- Page 19 | Installation Guide | 19 5. Open the Advanced tab and select Property: Jumbo frame. 6. Set the property to the maximum value (typically 9KB MTU). All rights reserved - Specim, Spectral Imaging Oy Ltd.
-
Page 20: Software Options
SpecSensor SDK sends commands to cameras and gets the frames from the cameras, however it does not have a GUI or record data to the disk. For instructions on how to use your Specim SDK, refer to the SpecSensor SDK User Manual. ASCII Commands... -
Page 21: Functionality
Frames per second equal to the inverse of the readout time. Simultaneous readout mode (exposure time is greater than readout time) The frame rate is given by the exposure time. Frames per second equal to the inverse of the exposure time. All rights reserved - Specim, Spectral Imaging Oy Ltd. - Page 22 When the acquisition of an image needs to be synchronised to an external event, an external trigger can be used. In this mode, the camera is idle until it gets a signal to capture an image. All rights reserved - Specim, Spectral Imaging Oy Ltd.
-
Page 23: Readout Timing
FRAME_VALID (FVAL) and LINE_VALID (LVAL) mask valid image information. The signal SHUTTER indicates the active integration phase of the sensor and is shown for clarity only. Figure 22: Timing diagram of sequential readout mode All rights reserved - Specim, Spectral Imaging Oy Ltd. - Page 24 Figure 24: Timing diagram simultaneous readout mode (readout time is less than exposure time) Table 4: Explanation of control and data signals used in the timing diagram Frame time Frame time is the inverse of the frame rate. All rights reserved - Specim, Spectral Imaging Oy Ltd.
-
Page 25: Reduction Of Image Size
Figure 25: FX camera image size (ROI) on sensor When you want to define a region of interest, it is done using the Multiple Regions of Interest (MROI) feature. See Multiple Regions of Interest for more information. All rights reserved - Specim, Spectral Imaging Oy Ltd. -
Page 26: Multiple Regions Of Interest
MROI rows. There needs to be three rows in FX10/FX10e and four rows in FX17/FX17e. These extra rows must then be discarded in data processing as their data may be invalid. All rights reserved - Specim, Spectral Imaging Oy Ltd. -
Page 27: Trigger And Strobe
A missed trigger counter counts these events. This counter can be read out by the user. All rights reserved - Specim, Spectral Imaging Oy Ltd. - Page 28 In camera-controlled exposure time the exposure time is defined by the camera. For an active high trigger signal, the camera starts the exposure with a positive trigger edge and stops it when the preprogrammed exposure time has elapsed. The exposure time is defined by the software. All rights reserved - Specim, Spectral Imaging Oy Ltd.
- Page 29 Additionally the optional external strobe output is controlled by the rising edge of the trigger pulse. The timing diagram below shows the detailed timing for the external trigger mode with pulse width controlled exposure time. All rights reserved - Specim, Spectral Imaging Oy Ltd.
- Page 30 The time between two acquisitions and the number of acquisitions can be configured by a user defined value via the camera software. The burst trigger feature works only in the mode "Camera controlled Exposure Time". All rights reserved - Specim, Spectral Imaging Oy Ltd.
- Page 31 The strobe output is an opto-isolated output located on the power supply connector that can be used to trigger a strobe. The strobe output can be used both in free-running and in trigger mode. There is a programmable delay available to adjust the strobe pulse to your application. All rights reserved - Specim, Spectral Imaging Oy Ltd.
-
Page 32: Image Correction
Correction values are relative addresses where the camera output data is interpolated for each pixel. The correction is performed separately in a spectral and a spatial direction. All rights reserved - Specim, Spectral Imaging Oy Ltd. - Page 33 2. Subtract the black reference image from the average value. 3. Mark pixels that have a grey level higher than 1008 DN (@ 12 bit) as hot pixels. 4. Store the result in the camera as the offset correction matrix. All rights reserved - Specim, Spectral Imaging Oy Ltd.
-
Page 34: Digital Gain And Offset
32 bit. The assignment of the parameters to the fields is listed in the table below. Table 6: Parameter field Start pixel index Parameter width [bit] Parameter Description Preamble: 0x66BB00FF All rights reserved - Specim, Spectral Imaging Oy Ltd. - Page 35 12 digits fractional value. Line Input Level Electronics Type Code Electronics Serial Number Spectral camera serial number Custom value 1: value of register StatusLineCustomValue1 that can be set by the user All rights reserved - Specim, Spectral Imaging Oy Ltd.
-
Page 36: Test Images
The LFSR test pattern was chosen because it leads to a very high data toggling rate, which stresses the interface electronic and the cable connection. All rights reserved - Specim, Spectral Imaging Oy Ltd. - Page 37 If the data transmission is error free, the histogram of the received LFSR test pattern will be flat. On the other hand, a non-flat histogram indicates problems, that may be caused either by the cable, by the connectors or by the frame grabber. All rights reserved - Specim, Spectral Imaging Oy Ltd.
- Page 38 In robots applications, the stress that is applied to the Camera Link cable is especially high due to the fast movement of the robot arm. For such applications, special drag chain capable cables are available. Contact Specim for more information.
-
Page 39: Configuration Options
TN_58 - Trigger and Strobe with FX10 and FX17. Notice: Camera's regular power cable does not support external triggering. Use the power cable version designed for external trigger use. All rights reserved - Specim, Spectral Imaging Oy Ltd. - Page 40 This resistor should be located directly at the signal receiver. Acceptable minimum Strobe Output pulse width is 0.2 us. Maximum pulse width is half of frame period. For example, with 100 fps the half would be 5 ms. All rights reserved - Specim, Spectral Imaging Oy Ltd.
-
Page 41: External Trigger Configuration
External Trigger Configuration External triggering can be configured through power connector. These instructions are for trigger configuration in Lumo Recorder or Lumo Scanner. If you are using Specim SDK or ASCII, refer to the relevant documentation. 1. Configure the external trigger source and connect the cables. -
Page 42: Maintenance Guide
3. Clean fingerprints or smudges from the lens with cotton swabs moistened in isopropanol. Start from the middle and work your way towards the edges in circular motion. Caution: Remove fingerprints immediately to avoid damage to the lens. All rights reserved - Specim, Spectral Imaging Oy Ltd. -
Page 43: Troubleshooting
Add cooling if the temperature rises repeatedly. Data is not stored to PC. Save folder is not set. Define the save folder in LUMO. All rights reserved - Specim, Spectral Imaging Oy Ltd. -
Page 44: Technical Information
There are two calibration pack versions included in the delivery: one with "FX" in the file name is to be used with AIE image corrections, and the other without it. Note: We recommend to always use the FX calibration pack. All rights reserved - Specim, Spectral Imaging Oy Ltd. -
Page 45: Optical Characteristics
Table 9: Optical Characteristics Optical Characteristics FX10/FX10e FX10c 400-1000 nm 400-780 nm Spectral range F number 38 degrees 38 degrees Minimum focusing distance 150 mm 150 mm Figure 35: FX10 Spectral Response Graph All rights reserved - Specim, Spectral Imaging Oy Ltd. -
Page 46: Performance Characteristics
Frame rate (fps), full range (224 bands) max. 327 FPS Frame rate (fps), MROI examples 20 bands = 2800 FPS 5 bands = 6500 FPS Integration time Adjustable, within frame time Sensor cooling Passive All rights reserved - Specim, Spectral Imaging Oy Ltd. -
Page 47: Mechanical Specifications
For more information on maximum frame rates, refer to Technical Note: Maximum frame rates in FX10/FX10e and FX17/FX17e. Mechanical Specifications This section describes the mechanical specifications of the camera. Table 12: Mechanical Specification Characteristics Value Housing Painted aluminium case All rights reserved - Specim, Spectral Imaging Oy Ltd. - Page 48 | Technical Information | 48 Characteristics Value Size (L x W x H) 150 x 85 x 71 mm Weight 1.3 kg 56,5 ±0,2 All rights reserved - Specim, Spectral Imaging Oy Ltd.
-
Page 49: Electrical Specifications
15Hz - 105.94Hz: 0.01 g²/Hz • 105.94Hz - 150Hz: +6 dB/Oct. • 150Hz - 500Hz: 0.02 g²/Hz • 500Hz - 2000Hz: -6 dB/Oct Shock The camera has been tested for and tolerates shock: All rights reserved - Specim, Spectral Imaging Oy Ltd. - Page 50 The temperature test has been performed in temperature cycle, run for 2 weeks. The test cycle was as follows: • Ramp to 5°C (30 min) • Steady 5°C for 240 min • Ramp to 40°C (30 min) • Steady 40°C for 240 min • Ramp to 22°C (30 min) All rights reserved - Specim, Spectral Imaging Oy Ltd.
-
Page 51: Change History
Added possibility to change the readout mode • Updated the GigE LED information • Added the results of vibration, shock and operation temperature tests 20 December 2018 Corrected grabber information 18 July 2018 First version All rights reserved - Specim, Spectral Imaging Oy Ltd.
Need help?
Do you have a question about the FX10 Series and is the answer not in the manual?
Questions and answers