Table of Contents
Advertisement
Quick Links
Advertisement
Table of Contents

Related Manuals for Siemens Gigaset SX761 dsl


Summary of Contents for Siemens Gigaset SX761 dsl
- Page 1 First steps Gigaset SX761 dsl Gigaset...
-
Page 3: Table Of Contents
Positioning ............15 Connecting and activating the Gigaset SX761 dsl ......16 Ports on the rear panel . - Page 4 Contents Configuring Advanced Settings ....37 Internet ............38 Internet selection .
- Page 5 Contents Status information ......89 Overview ............89 Security .
-
Page 6: The Gigaset Sx761 Dsl
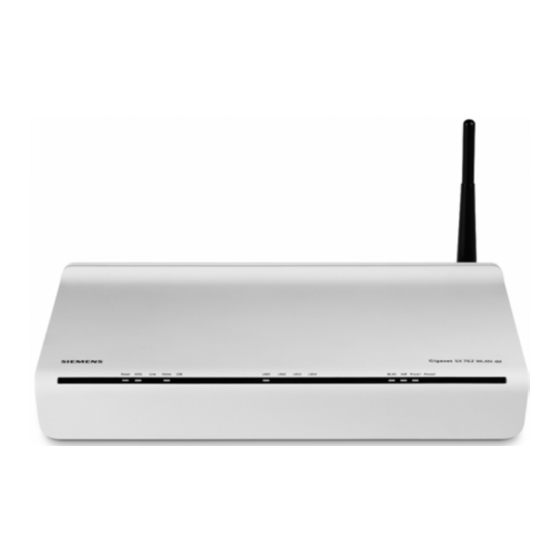
– depending on the hardware type of your device – with the registration (Scan) but- ton on the back panelThe Gigaset SX761 dsl has an extensive range of functions but remains simple to use. It can be configured and operational within a few minutes. -
Page 7: Local Area Networks With Gigaset Products
The Gigaset SX761 dsl Local area networks with Gigaset products You can use the Gigaset SX761 dsl to set up a local area network, for example a home network. All PCs in this network can communicate with each other and have access to the Internet. -
Page 8: Internet Telephony And Connecting Analogue Phones
We advise having the configuration of such a network carried out by a specialist. Internet telephony and connecting analogue phones The Gigaset SX761 dsl allows a Internet telephony (VoIP) over DSL for two analogue tel- ephones and four other wired VoIP telephones or SIP clients. - Page 9 You can configure these ports using the Gigaset SX761 dsl. The PABX of the Gigaset SX761 dsl allows you to connect PCs with SIP clients (software for Internet telephony) as extensions. You can use all functions of your PABX for Internet telephony also.
-
Page 10: Button Features And Applications
The Gigaset SX761 dsl button Features and applications The Gigaset SX761 dsl's wide range of features makes it ideal for a large number of applications. Depending on your device, some of the features may differ from the description in this instruction manual. - Page 11 The Gigaset SX761 dsl Offering your own services on the Internet – If you want to offer your own services on the Internet, you can set up the Gigaset SX761 dsl as a virtual server without permitting further access to the local area network.
-
Page 12: First Steps
For Internet telephony you also require – the access data for your VoIP service provider and – a phone for connecting to the Gigaset SX761 dsl or a PC with a SIP client or a VoIP telephone. Note: For the sake of clarity, the devices are depicted in lighter shades. -
Page 13: Overview Of The Installation Steps
PC first so that it can establish a connection to the Gigaset SX761 dsl. You can then use this PC to configure the device. To find out how to do this, refer to the section entitled "Configuring the local area network" on the CD-ROM. - Page 14 First steps The LEDs (from left to right) have the following functions: State Status On (green) The Gigaset SX761 dsl is connected to the mains. Power The Gigaset SX761 dsl is disconnected from the mains. A DSL connection is established. Flashing The DSL line is being synchronised.
-
Page 15: Positioning
First steps Positioning The Gigaset SX761 dsl can be set up in any suitable location in the home or office. You do not need any special wiring. However, you should comply with the following guide- lines: Operate the Gigaset SX761 dsl only indoors within a temperature range of 0 to +40 °C. -
Page 16: Connecting And Activating The Gigaset Sx761 Dsl
First steps Connecting and activating the Gigaset SX761 dsl Ports on the rear panel The rear panel of the Gigaset SX761 dsl contains the follwing ports: Element Description Socket for the mains adapter supplied Warning: Using the wrong power supply unit may damage the Gigaset SX761 dsl. - Page 17 First steps Reset button The underside of the Gigaset SX761 dsl houses the reset button. Reset button Label Reboot function: Press and hold the right end of the button for more than 1 second but less than 5 seconds to reboot the device. This does not affect the configuration settings.
-
Page 18: Connecting To The Splitter Data Port
First steps Connecting to the splitter data port You can operate the Gigaset SX761 dsl in two different operating modes in order to set up an Internet connection: – with an integrated ADSL modem – with an external modem, such as a VDSL or cable modem Using the integrated ADSL modem ì... - Page 19 First steps Using an external modem ì Connect the LAN4/WAN port on the Gigaset SX761 dsl with an external modem. To do this, use any network cable (e.g. the Ethernet cable supplied). ì Then connect this modem to the relevant communications port (e.g. splitter).
-
Page 20: Connecting To The Phone
First steps Connecting to the phone ì Connect the Gigaset SX761 dsl with the analogue phone as follows: – Insert the plug of the telephone into the Phone 1 or Phone 2 port on the Gigaset SX761 dsl. Note: You cannot make calls in the event of a power failure. Emergency numbers are also... -
Page 21: Connecting Wired To The Pc
You can connect wired PCs to your Gigaset SX761 dsl to create a local area network (LAN). First connect just one PC to the Gigaset SX761 dsl. You can then carry out the general configuration. (If you wish to connect more PCs, please turn to page 22.) ì... -
Page 22: Checking The Operating State
First steps Checking the operating state Your Gigaset SX761 dsl is now ready for use. The LED displays on the front panel of the Gigaset SX761 dsl provide information about the operating state (see page 13). When the device is ready for use, the LEDs light up as follows: The Power LED on the front lights up. -
Page 23: The User Interface
The user interface The user interface You have connected a PC to the Gigaset SX761 dsl and possibly made the settings in the local area network. You can now configure the Gigaset SX761 dsl using this PC from the user interface of the Gigaset SX761 dsl. As Internet browser we recommend Microsoft Internet Explorer V 6.0 or higher, or Mozilla Firefox V 1.0 or higher. -
Page 24: The Start Screen
Internet connection (page 26). The start screen shows the status and also the button Connect or Disconnect. Open the Status menu to obtain status information about the Gigaset SX761 dsl (page 89). -
Page 25: Selecting A Language
37. You can view information about the configuration and status Status of the Gigaset SX761 dsl in the Status menu. This is described from page 89. You also have the opportunity to specify the language for the Language user interface (page 25). -
Page 26: Connecting To The Internet Manually
To establish or end an Internet connection manually: ì Open the start screen of the Gigaset SX761 dsl as described on page 23. If you have already started the user interface, click the Home tab at the top left of the window. -
Page 27: Basic Setup Wizard
Basic Setup Wizard Basic Setup Wizard The Basic Setup Wizard wizard guides you step by step through the general configura- tion of the Gigaset SX761 dsl. This includes settings for your region and your Internet access. Connection to the Internet is established via the Gigaset SX761 dsl for all PCs connected to it. -
Page 28: Regional Options
Basic Setup Wizard Regional Options You can select your present location for the regional settings on this screen. ì Select the country in which you are currently located from the list. You can set the time so that it automatically switches to summer time and/or another time zone of your choice. -
Page 29: Configuring Internet Connections
Basic Setup Wizard Configuring Internet connections You will find the access data you require for configuring the Internet connection in the documentation you received from your Internet service provider (ISP). You can perform the initial configuration of your Internet connection on this screen. If you want to change the data later on, you can do this in the Advanced Settings (page 38) menu. - Page 30 Basic Setup Wizard Note: Connection to the Internet is only possible if you have entered all the data for your Internet service provider correctly. ì Your Internet service provider may disconnect and reconnect your Internet connec- tion daily. In this case enable 24h reconnection and choose the period of time in which the reconnection should be performed from the Reconnection time option menu.
- Page 31 Basic Setup Wizard PPPoE pass-through This option is only available if you have chosen another Protocol than PPPoE. PPPoE pass-through allows you to use an additional Internet connection (through another service provider) on one PC. Further information about this can be found on page 43. ì...
-
Page 32: Telephony
Basic Setup Wizard Telephony You will find the access data you require for configuring Internet telephony (VoIP) in the documentation you received from your service provider. ì Select the option On for VoIP account if you wish to use Internet telephony (default setting). -
Page 33: Summary
If you want to confirm the settings, click Finish to close the Basic Setup Wizard. The Gigaset SX761 dsl is now configured and ready to connect to the Internet. The Security Setup Wizard then opens automatically. We strongly recommend using the Security Setup Wizard to protect your Gigaset SX761 dsl against attacks. -
Page 34: Security Setup Wizard
With the Security Setup Wizard you can change the password for configuring the Gigaset SX761 dsl (page 35). The user interface of the Gigaset SX761 dsl guides you step by step through the security configuration. Once you have completed a screen, click Next >. If you want to make any changes or check your entries again, click <... -
Page 35: Assigning A Password
Note: If you ever forget your password you will have to return the Gigaset SX761 dsl to its factory settings (page 83). Please bear in mind that this will restore all settings to the factory configuration. The password will again be admin. -
Page 36: Saving Settings
On the next screen you end the wizard and save the settings. You will be informed of any security risks that still exist. ì Click Finish to end the wizard. The settings will now be activated on the Gigaset SX761 dsl. -
Page 37: Configuring Advanced Settings
Set up routing for your Internet connection services (page 57). You can change the Private IP address of the Gigaset SX761 dsl Local Network here and make settings on the DHCP server (page 58). You can make the settings for Internet telephony (VoIP) here Telephony and configure your extensions (page 61). -
Page 38: Internet
Configuring Advanced Settings Internet If you have configured the Gigaset SX761 dsl using the two wizards, you have also con- figured the connection (Internet access). You can check or change these settings in the Internet menu. This menu also offers you a wide range of possibilities for setting up security settings and limiting access to the Internet as well as for providing your own services on the Internet. -
Page 39: Internet Selection
Configuring Advanced Settings Internet selection You can activate or deactivate the Internet connection for the Gigaset SX761 dsl on this screen. You can choose the connection type and set up and edit a number of connection services. ì In the Advanced Settings menu, select: Internet ì... - Page 40 Configuring Advanced Settings ì For an ADSL connection, make the following settings: – Enter the values for VPI / VCI for each connection service that you have received from your Internet service provider. – Enter a description to identify the respective connection service. –...
-
Page 41: Internet Connection
Configuring Advanced Settings Internet Connection You can set up or change the configuration of your Internet connection on this screen. All the settings you make here must coincide with the features your Internet service pro- vider makes available to you. False information can lead to problems with your Internet connection. - Page 42 Configuring Advanced Settings ì Enter the data you have been given by your service provider: Protocol, User name, Password. Only if you have selected PPPoE as the protocol and if you want to set up a number of connection services with this protocol: ì...
- Page 43 Configuring Advanced Settings ì You can show additional settings, depending on the selected service provider, by means of the Show Additional Settings button. You can also change the settings, if required. These settings are pre-set with appropriate default values. This button is not available for the Other selection since all available settings are displayed in this case.
-
Page 44: Dns Server
Configuring Advanced Settings ì Click OK to apply the settings. DNS server DNS is a decentralised service that assigns PC names or Internet addresses (Domain names) and IP addresses to one another. A DNS server has to administer this information for each server or each LAN with an Internet connection. -
Page 45: Mac Address
If you already had Internet access through the same Internet service provider before connecting the Gigaset SX761 dsl, it is possible that the MAC address of one of your PCs was used for registration when the connection was being set up. In this case, you must... -
Page 46: Firewall
Protect the network against hacker attacks (for information see below), Block access by individual PCs to selected services (page 48). The firewall functions for the Gigaset SX761 dsl are activated and configured in the fac- tory. If you want to deactivate the firewall, carry out the following steps: ì... -
Page 47: Attack Detection
Configuring Advanced Settings Attack Detection If the firewall functions of the Gigaset SX761 dsl are activated, the device monitors and limits access to incoming data traffic via the DSL connection with a function called "Stateful Packet Inspection" (SPI). This allows the Gigaset SX761 dsl to detect and pre- vent certain types of attack from the Internet, such as Denial-of-Service (DoS). -
Page 48: Setting Up Access Control To The Internet
Configuring Advanced Settings Setting up access control to the Internet The Access Control function allows you to block access to various services for one or more PCs. You can permit or block access to services at certain times. ì In the Advanced Settings menu, select: Internet – Firewall – Access Control ì... - Page 49 Configuring Advanced Settings ì Select the Access rule type from the list: – Apply to all clients: The rule applies to all PCs in the network. – Specify IP address or Specify MAC address: The rule applies to a PC you have selected via the IP address or MAC address.
-
Page 50: Setting Up The Nat Function
Port triggering is a special variant of port forwarding. Unlike port forwarding, the Gigaset SX761 dsl forwards the data from the port block to the PC which has previously sent data to the Internet via a certain port (trigger port). This means that approval for the data transfer is not tied to one specific PC in the network, rather to the port numbers of the required Internet service. - Page 51 IP addresses of PCs in the local network are converted to the router's public IP address when accessing the Internet. You can use the NAT settings to configure the Gigaset SX761 dsl to carry out the follow- ing tasks:...
-
Page 52: Port Triggering
Configuring Advanced Settings Port Triggering If you configure port triggering for a certain application, you must identify a trigger port and the protocol (TCP or UDP) this port uses. You can then assign the public ports that must be opened for the application and this trigger port. You can select known Internet services for this purpose or assign ports or blocks of ports manually. -
Page 53: Port Forwarding
Apply the settings by clicking OK. Port Forwarding If you configure Port Forwarding, the Gigaset SX761 dsl outwardly assumes the role of the server. It receives requests from remote users under its public IP address and auto- matically redirects them to local PCs. The private IP addresses of the servers on the local network remain protected. -
Page 54: Opening The Firewall For A Selected Pc (Exposed Host)
Configuring Advanced Settings You can use – a single port number, – several port numbers separated by commas, – port blocks consisting of two port numbers separated by a dash, or – any combination of these (for example 80,90-140,180). ì In the Local port field, enter the internal port number to which service requests are to be forwarded. -
Page 55: Dynamic Dns
This task is performed by the dynamic DNS service (DynDNS). You can use the DynDNS service to assign the Gigaset SX761 dsl an individual fixed domain name on the Internet even if it does not have a static IP address. - Page 56 Configuring Advanced Settings One possible service is DynDNS.org (http://www.DynDNS.org). If you have activated the device's DynDNS function, it will monitor its public IP address. When this changes, the device will open a connection to DynDNS.org and update its IP address there. Note: You must have an account with the service you have chosen (e.g.
-
Page 57: Routing
Configuring Advanced Settings Routing Your Internet service provider can permit you to set up a number of connection services. The entire data traffic between your local network and the Internet uses the first con- nection service (route) by default. After setting up various connection services (page 39), you can change this default route and set up additional routes by assigning data traffic to other connection services. -
Page 58: Lan Configuration
Gigaset SX761 dsl is 255.255.255.0. ì If you want to assign a different IP address to the Gigaset SX761 dsl, enter your cho- sen IP address in the boxes next to IP address. - Page 59 (including routers). Notes: New settings can only be made after the Gigaset SX761 dsl has been rebooted. If nec- essary, reconfigure the IP address on your PC (including one that is statically assigned) so that it matches the new configuration.
-
Page 60: Assigning Static Ip Addresses To Individual Pcs
Configuring Advanced Settings Entering the DNS server DNS is a decentralised service that assigns PC names or Internet addresses (Domain names) and IP addresses to one another. A DNS server must administer this information for each server or for each LAN with an Internet connection. Your Internet service provider will usually provide you with a DNS server that makes this... -
Page 61: Setting Up Internet Telephony (Voip)
Configuring Advanced Settings Setting up Internet telephony (VoIP) The Gigaset SX761 dsl allows you to make telephone calls via the Internet using an ana- logue telephone. For Internet telephony (VoIP), you require access authorisation from your service provider and the relevant access data. To make calls, you have to enter this data along with other configuration settings under Advanced Settings in the Telephony - VoIP menu. -
Page 62: Voip Settings
Configuring Advanced Settings VoIP settings You will receive the access and configuration data for Internet telephony from your serv- ice provider. ì In the Advanced Settings menu, select: Telephony – VoIP ì Select On if you wish to use Internet telephony (default setting). ì... - Page 63 Configuring Advanced Settings data traffic at the same time over the DSL line, the voice quality may not be opti- mum. To ensure optimum voice quality, you can use this option to define the bandwidth, which is to be used as a maximum for your VoIP connection. The upstream bandwidth is set automatically by default.
-
Page 64: Setting Up Or Modifying A Voip Account
Configuring Advanced Settings Setting up or modifying a VoIP account ì To set up a new account, select On. ì In the Service provider menu, select the Other option or otherwise select one of the preconfigured providers. ì Enter the data you have received from your service provider: If you choose a preconfigured service provider, the only options are generally User name and Password. -
Page 65: Extensions
Gigaset SX761 dsl, is somewhat different to that for the SIP extensions. The latter must be VoIP telephones, which are connected to the Gigaset SX761 dsl, or PCs with a SIP cli- ent, which are connected to the Gigaset SX761 dsl. - Page 66 Configuring Advanced Settings Phone connectors The two telephone ports Phone 1 and Phone 2 of the Gigaset SX761 dsl have the inter- nal phone number *1 or *2. ì Click Edit to adapt the settings for an entry (page 67).
- Page 67 Click Delete to delete an entry. Configuring extensions The Extension shows either the selected port of the Gigaset SX761 dsl (Phone 1 or Phone 2) or the SIP client. The Extension number for the extension is preset and is dis- played as a call number.
- Page 68 Configuring Advanced Settings ì You can configure Divert calls with the following options for the Phone 1 and Phone 2 ports: – Divert always: Each call for the extension is forwarded to the extension selected in the Divert calls to field. –...
-
Page 69: Dialing Plans
Configuring Advanced Settings Dialing Plans On this screen you can: Enter your area code, Define for Internet telephony whether the area code should be automatically dialled, Specify which phone numbers or prefixes are to be dialled via which VoIP account. ì... -
Page 70: Quick Dial
Configuring Advanced Settings Quick dial Quick dial numbers or names enable you to dial frequently used phone numbers quickly and easily. The quick dial number is a two-digit number (01 to 20). A vanity number is a combina- tion of letters you can enter instead of a phone number. You can specify a quick dial number and/or a vanity number for a phone number. -
Page 71: Call Guide
Call guide Call guide Your Gigaset SX761 dsl allows you to make calls via the Internet (VoIP). A description of how to configure your Gigaset SX761 dsl for using the telephone functions is provided under "Telephony" on page 32 and "Setting up Internet telephony (VoIP)" on page 61. -
Page 72: Advanced Options
The functions described in this section, which are available to you when making calls via your Gigaset SX761 dsl, apply both for external calls and for internal calls. The functions described below are dependent on the connected terminal in the case of VoIP exten- sions. -
Page 73: Conference Call Between Three Participants
Call guide Key combination Effect Description Press R2 to accept an incoming call during a call. The connection to the first call is put on hold. Accept call waiting/ If you terminate the first call before- toggle between two hand, your phone rings and you can calls take the second call as usual. -
Page 74: Call Answering And Forwarding
Call guide Call answering and forwarding Key combination Effect Description Dial *21*, the desired internal phone number to which all calls are to be forwarded that are received on this extension, and then press the # key. Forward to internal *21*[number]# phone number Example: You want to set up call for-... -
Page 75: Call Waiting And Call Reject If Busy
Call guide Call waiting and call reject if busy Use the key combination *43# to *43# Allow call waiting allow call waiting when the line is busy. Dial #43# to disable call waiting if #43# Delete call waiting busy again. Use the key combination *26# to specify that all calls are to be rejected. -
Page 76: Administration
Administration Administration The Gigaset SX761 dsl user interface includes several helpful functions for administra- tion. Enables regional settings (page 77) Regional Options Changes the system password (page 78) System Password Configures system management (page 79) System Management Backs up and, if necessary, restores configuration data Save &... -
Page 77: Regional Options
Administration Regional Options For operating your Gigaset SX761 dsl, you can select the location, time zone and format for entering the time and date, and you can also configure a time server for the Internet time (system time). ì In the Advanced Settings menu, select: Administration – Regional Options ì... -
Page 78: Internet Time
Click OK to apply the settings. System Password You can assign a System Password to the Gigaset SX761 dsl user interface and specify the period after which a session is to be automatically ended if no further entry is made. -
Page 79: System Management
Avoid proper names and all too obvious words. Use a combination of letters, digits and special characters. Note If you forget your System Password, you have to reset the Gigaset SX761 dsl . This returns all your settings to the factory configuration. This means the system password is changed back to admin. - Page 80 Remote Management enables a PC that is not in your local network to be used to con- figure the Gigaset SX761 dsl via a standard Web browser. You can activate Remote Man- agement for one particular or for any PC.
- Page 81 Internet always has the same IP address. For access to the configuration environment via Remote Management, you must enter the address of the Gigaset SX761 dsl to be managed in the browser using the following format: http://X.X.X.X:8080 (x.x.x.x represents the IP address of the Gigaset SX761 dsl).
-
Page 82: Backing Up And Restoring A Configuration
Administration Backing up and restoring a configuration When the Gigaset SX761 dsl has been configured, it is recommended that you back up the settings. This means you can restore the settings at any time if they are accidentally deleted or overwritten. -
Page 83: Restoring The Saved Data
A window will appear prompting you to confirm the procedure. Note: If the Gigaset SX761 dsl is not operating properly, you can reboot it. It should then be ready for use again . Please remember that when the device is fully reset, all the configuration settings are returned to the factory settings. -
Page 84: Updating Firmware
If Gigaset Communications GmbH or your Internet service provider releases a new ver- sion of the firmware, you can update the firmware of the Gigaset SX761 dsl. You can perform the update manually or you can configure an automatic periodical check for firmware update. - Page 85 Click OK. The firmware will now be updated. Warning: Do not turn off the Gigaset SX761 dsl during the updating procedure and do not inter- rupt the power supply. Turning off the device can make it unusable. The update can take several minutes.
-
Page 86: Local Firmware Update
Click Start firmware update. The firmware will now be updated. Warning: Do not turn off the Gigaset SX761 dsl during the updating procedure and do not inter- rupt the power supply. Turning off the device can make it unusable. The update can take several minutes. -
Page 87: System Log
Administration System Log The System Log is displayed in the Status – Device menu. It contains important infor- mation about how the device functions and possible problems. This information can also be automatically transferred to a system log server. ì In the Advanced Settings menu, select: Administration –... - Page 88 Administration – Server port Enter the port of the system log server that is to be used to transfer the system log. ì Click OK to save and apply the changes.
-
Page 89: Status Information
Information about configuration and the status of the Gigaset SX761 dsl is displayed in the Status menu of the Gigaset SX761 dsl. On the first screen you will find an overview of the status of the Internet connection, the local and wireless network, the telephony, the USB interface and the device. -
Page 90: Security
Status information Device System time The system time of the device. Firmware version The firmware version currently installed on the device. ì Click Refresh to refresh this screen and update the displayed data. Security You will find information about possible security risks for the device and the network on the Security screen in the Status menu. -
Page 91: Internet
Status information Internet You will find information about the status of the Internet connection of the device on the Internet screen in the Status menu. In the Status menu, select Internet: Connection service You can select the Connection service, for which the following information is to be displayed. -
Page 92: Local Network
Status information The maximum possible data transfer rate of your DSL port for incoming and out- going data traffic. – Noise margin The maximum signal-to-noise ratio of your DSL port for incoming and outgoing data traffic. – Line attenuation The line attenuation of your DSL port for incoming and outgoing data traffic. –... -
Page 93: Telephony
Status information Telephony You will find information about the VoIP accounts and phone call statistics on the Telephony screen in the Status menu. In the Status menu select Telephony: VoIP accounts Shows the number of VoIP accounts and the connection status. All SIP clients currently set up as extensions in your local network are displayed. -
Page 94: Appendix
If the mains adapter is not working properly, contact our customer serv- ice unit (see Quick Start Guide). ì If your Gigaset SX761 dsl has an On button at the rear: Check whether the device is plugged in. ì ADSL LED flashes Wait until the integrated DSL modem has com- pleted its synchronisation. - Page 95 The connection may have been terminated manu- ally with the Connect on demand option selected. – Restore the connection again manually using the Connect button or – Restart the Gigaset SX761 dsl. In both cases, the Connect on demand setting will be active again. ì...
- Page 96 PCs in the LAN. This means that the masked part of the IP address on each PC and on the Gigaset SX761 dsl has to be identical. Check whether Ethernet is specified as the Internet connection type if the PC is connected to the LAN4/ WAN port (page 39).
- Page 97 Appendix Symptom Possible cause and solutions ì You cannot conduct VoIP tel- The phone or the Gigaset SX761 dsl is not con- ephone calls. nected properly to the DSL port. Check the cabling and the ports. ì The access data for your VoIP phones is not entered correctly.
-
Page 98: Deactivating Http Proxy And Configuring A Pop-Up Blocker
Appendix Deactivating HTTP proxy and configuring a pop-up blocker Before you can start the configuration program of the Gigaset SX761 dsl, you might need to adjust the settings described below for your Web browser. Deactivating the HTTP proxy Make sure that the HTTP proxy in your web browser is deactivated. -
Page 99: Specifications
Appendix ì Click on the Content icon. ì Deactivate the Block Popup window option. ì Click OK to finish. Please note: Should you use a different pop-up blocker, you must configure this accordingly. Specifications Interfaces 1 DSL RJ11, RJ-45 4 LAN RJ45, 10Base-T/100Base-TX, Auto-sensing 2 FXS RJ11, for connecting analogue terminals (phone, fax,... -
Page 100: Authorisation
Appendix Authorisation Cet appareil est destinée pour une utilisation domestique en France. Concerning the Annex A / B operation, more information are available on the label of the device. Not all of the functions described in these instructions are available in all countries. Country-specific requirements have been taken into consideration. - Page 101 Appendix Kleinteileversand Bocholt E-Mail: kleinteileversand.com@gigaset.com Fax: +49 (0)2871 / 91 30 29 Warranty regarding further use of the Open Source Software Gigaset Communications GmbH provides no warranty for the Open Source Software programs contained in this product, if such programs are used in any manner other than the program execution intended by Gigaset Communications GmbH.
-
Page 102: Glossary
The Gigaset SX761 dsl includes a DHCP server and uses it to assign automatic IP addresses to PCs in the local network. You can specify that the IP addresses for certain... - Page 103 Glossary DHCP server DHCP Demilitarised Zone DMZ describes a part of a network that is outside the Firewall. A DMZ is set up, as it were, between a network you want to protect (e.g. a LAN) and a non-secure network (e.g.
- Page 104 Glossary Dynamic IP address A dynamic IP address is assigned to a network component automatically by DHCP. This means that the IP address of a network component can change with every login or at certain intervals. See also: Static IP address DynDNS Dynamic DNS The assignment of...
- Page 105 Glossary Global IP address Public IP address Half duplex Operating mode for data transmission. Only one side can send and/or receive data at the same time. See also: Full duplex HTTP proxy An HTTP proxy is a Server that network components use for their Internet traffic.
- Page 106 (a site). As a rule the users and operators are identical. A local network can be connected to other local networks or to a wide-area network (WAN) such as the Internet. With the Gigaset SX761 dsl you can set up a wired local Ethernet network.
- Page 107 Internet. Because of this security function, NAT is frequently used as part of the Firewall of a network. If you want to make services on a PC in the local network available on the Internet despite NAT, you can configure the Gigaset SX761 dsl as a Vir- tual server.
- Page 108 Internet. It is assigned by the Internet service provider. Devices that cre- ate a link from a LAN to the Internet, such as the Gigaset SX761 dsl, have a public and Private IP address. Private Branch Exchange PBX is the English acronym for a public branch exchange, which allows connection and configuration of extensions and telephone functions.
- Page 109 Glossary Protocol A protocol describes the agreements for communicating in a network. It contains rules for opening, administering and closing a connection, as well as in relation to data for- mats, time frames and possibly troubleshooting. Communication between two applica- tions requires different protocols at various levels, for example the TCP/IP protocols for...
- Page 110 If the subnet mask is in a network that is administered by the Gigaset SX761 dsl, for example 255.255.255.0, that means the first three parts of the IP address form the net- work number and only the final part can be used for assigning host numbers.
- Page 111 Glossary Transmission Control Protocol The TCP Protocol is part of the TCP/IP protocol family. TCP handles data transport between communication partners (applications). TCP is a session-based transfer proto- col, i.e. it sets up, monitors and terminates a connection for transferring data. See also: TCP/IP Protocol...
- Page 112 Internet that runs not on itself, but on another network component. The Gigaset SX761 dsl can be configured as a virtual server. It will then direct incoming calls for a service via Port forwarding directly to the appropriate Port of the network component in question.
-
Page 113: Index
Index Index Numerics ..resetting to factory setting ..... restoring ..10/100 Mbps switch port . - Page 114 Index ... . . transmission speed ....Exposed host ..... . . Idle time .
- Page 115 Index ..........Password .
- Page 116 Index ..Remote management System password ........assigning Reset button .
- Page 117 Index ......... . . Help VoIP account .
- Page 118 Issued by Gigaset Communications GmbH Schlavenhorst 66, D-46395 Bocholt Gigaset Communications GmbH is a trademark licensee of Siemens AG © Gigaset Communications GmbH 2008 All rights reserved. Subject to availability. Rights of modifications reserved. www.gigaset.com A31008-M707-R111-2x-7619...