Table of Contents
Advertisement
Manufacturer
Panasonic Corporation
Panasonic Appliances Microwave Oven (Shanghai) Co., Ltd
Address
888, 898 Longdong Road. Pudong, Shanghai, 201203, China.
Importer
Panasonic Marketing Middle East & Africa FZE
Address
P.O. Box 17985, Jebel Ali Free Zone (South), Dubai,
United Arab Emirates
Panasonic Corporation
Web Site: http://www.panasonic.com
Before operating this oven, please read these instructions completely and keep for future reference.
F0003CA10ST
PA0618-0
Operating Instructions
إرشادات التشغيل
Microwave Oven
فرن مايكروويف
Household Use Only
استعمال منزلي فقط
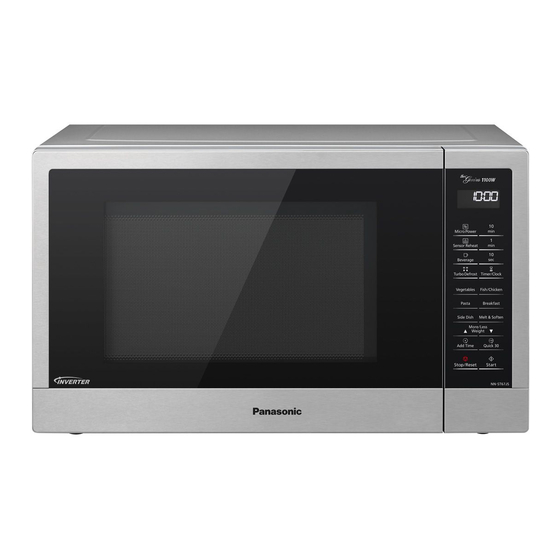
Model No. NN-ST67J S
NN-ST65JB
.قبل تشغيل هذا الفرن، يرجى قراءة هذه التعليمات بالكامل واالحتفاظ بها كمرجع في المستقبل
Advertisement
Table of Contents

Subscribe to Our Youtube Channel
Related Manuals for Panasonic NN-ST67JS


Summary of Contents for Panasonic NN-ST67JS
- Page 1 Microwave Oven فرن مايكروويف Household Use Only استعمال منزلي فقط Manufacturer Panasonic Corporation Panasonic Appliances Microwave Oven (Shanghai) Co., Ltd Address 888, 898 Longdong Road. Pudong, Shanghai, 201203, China. Importer Panasonic Marketing Middle East & Africa FZE Address P.O. Box 17985, Jebel Ali Free Zone (South), Dubai, United Arab Emirates Model No.
-
Page 2: Table Of Contents
Auto Cook Setting — To Use Melt & Soften ..................18 Timer Setting (Kitchen Timer/Standing Time/Delay Start) ..............19 3-Stage Setting ............................20 Before Requesting Service ........................21 Care of your Microwave Oven ......................22 Technical Specifications ........................22 © Panasonic Appliances Microwave Oven (Shanghai) Co., Ltd. 2018 - Eng-1 -... -
Page 3: Quick Guide
Quick Guide After plugging in, “ ” will appears in the display window, then you can start to operate. Feature How to Operate To Set Clock page 10) Set Time of day. Press once. Press twice. To Set: To Cancel: To Set / Cancel Child Safety Lock page 10) - Page 4 Quick Guide (continued) Feature How to Operate To Cook using Auto Cook Pads page 16) Press to select the Set the weight. Press. desired menu number. To Use as a Kitchen Timer page 19) Press. Set the kitchen time. Press. To Set Set the desired Standing Time...
-
Page 5: Important Safety Instructions
Important Safety Instructions READ CAREFULLY AND KEEP FOR FUTURE REFERENCE Precautions to be taken when Earthing Instructions using Microwave Ovens for This microwave oven must be earthed. In the event of an electrical short circuit, earthing reduces the risk Heating Foodstuffs of electric shock by providing an escape wire for the electric current. -
Page 6: Installation And General Instructions
Important Safety Instructions (continued) WARNING (a) The door seals and door seal areas should be cleaned with a damp cloth. The appliance should be inspected for damage to the door seals and door seal areas and if these areas are damaged the appliance should not be operated until it has been repaired by a service technician trained by the manufacturer. - Page 7 Installation and General Instructions (continued) Placement of Oven 6. DO NOT USE A CONVENTIONAL MEAT THERMOMETER IN THE MICROWAVE OVEN. This oven is intended for Counter-top use only. It is To check the degree of cooking of roasts and not intended for built-in use or use inside a cupboard. poultry use a MICROWAVE THERMOMETER.
-
Page 8: Feature Diagram
Feature Diagram Roller Ring q Oven Window Door Safety Lock System a. Roller Ring should be cleaned regularly to avoid Door Release Pad excessive noise. -
Page 9: Control Panel
At the end of any complete program, the oven will beep 5 times. * NN-ST67JS and NN-ST65JB – The design of your control panel may vary from the panel displayed, but the words on the pads will be the same. -
Page 10: Cookware And Utensil Chart
Cookware and Utensil Chart Microwave Aluminium foil for shielding Ceramic Plate Browning Dish Brown paper bags Dinnerware oven/microwave safe non-oven/microwave safe Disposable yes* paperboard containers Glassware oven glassware & ceramic non-heat resistant Metal cookware Metal twist-ties Oven cooking bag Paper towels and napkins Plastic defrosting rack Plastic dishes microwave safe... -
Page 11: Clock Setting
Clock Setting You can use the oven without setting the clock. 1. Press twice. 2. Set the time by pressing the 3. Press once. Time pads. Colon will blink in the Colon stops blinking; display window. Time appears in the display time of day is entered window;... -
Page 12: Micro Power Setting
Micro Power Setting 1. Press to select 2. Set cooking time. 3. Press Start. micro power level. Select cooking time by pressing the Time pads. The time in the (see chart below) (1000 W: up to 30 minutes display window will Other Powers: up to 99 minutes and count down. -
Page 13: Turbo Defrost Setting
Turbo Defrost Setting This feature allows you to defrost meat, poultry and seafood automatically by setting the weight. The serving/weight is 0.1 kg to 3 kg. Food Maximum Weight Minced meat, Chicken Pieces, Chops 3 kg Beef roast, lamb, whole chickens 3 kg Whole fish, scallops, prawns, fish fillets 1 kg... -
Page 14: To Cook Using The Quick 30 Function
To Cook Using the Quick 30 Function This function allows you to quickly set cooking time in 30 second increments. 1. Press Quick 30 to set the desired 2. Press Start. cooking time (up to 5 minutes). The cooking will start and the time Each press is 30 seconds. -
Page 15: Sensor Reheat/Cook Menus
Sensor Reheat/Cook Menus 1. Select desired menu Pads (Optional*): 3. Press Start. After the heat and number. Preferences for food doneness vary with each Press to select the humidity is detected individual. After having using Sensor Cook a few desired pad until the times, you may decide you would prefer your by the SENSOR the food cooked to a different doneness. - Page 16 Sensor Reheat/Cook Menus Sensor Reheat 6. Fish All foods must be pre-cooked. Casseroles, plated Suitable for cooking whole fish and fish fillets. Select dinners, soups, stews, pasta dishes (except lasagne), fish suitable for microwave cooking and place in a canned foods. Foods should be reheated from single layer in a shallow dish, with skin-side down.
- Page 17 Sensor Reheat/Cook Menus (continued) 10. Rice Stir to dissolve sugar. Spices can be added if desired. Cook covered with a lid or plastic wrap and place It is suitable for cooking short and long grain rice including container at the center of the glass tray. Select the spceialty rices.
-
Page 18: Auto Cook Setting - To Use Beverage
Auto Cook Setting — To Use Beverage This feature allows you to reheat coffee/milk without setting micro power and time. 1. Put the beverage into the oven 2. Press Beverage Pad 3. Select the Weight of 4. Press Start. beverage by pressing the Press once to reheat Cooking time Pads... -
Page 19: Auto Cook Setting - To Use Melt & Soften
Auto Cook Setting — To Use Melt & Soften 1. Select desired menu number. 2. Select the Weight of food 3. Press Start. by pressing pads. The cooking time (see chart below) appears in the display window and begins to count down. -
Page 20: Timer Setting (Kitchen Timer/Standing Time/Delay Start)
Timer Setting (Kitchen Timer/Standing Time/Delay Start) To Use as a Kitchen Timer Press once. Select desired time by pressing Press Start. the Time pads. Time will count down (up to 99 minutes and 50 seconds) without oven operating. To Set Standing Time Press once. -
Page 21: 3-Stage Setting
3-Stage Setting Example: Continually set [600 W] 3 minutes, [440 W] 2 minutes and [300 W] 2 minutes. 1. Press 3 times. 2. Set as 3 minutes 3. Press 4 times. 4. Set as 2 minutes (See page 11 for by pressing the by pressing the directions.) -
Page 22: Before Requesting Service
Before Requesting Service ALL THESE THINGS ARE NORMAL: The oven causes interference with Some radio, TV, Wi-Fi, cordless telephone, baby monitor, blue tooth my TV. or other wireless equipment interference might occur when you cook with the microwave oven. This interference is similar to the interference caused by small appliances such as mixers, vacuums, hair dryers, etc. -
Page 23: Care Of Your Microwave Oven
Care of your Microwave Oven 1. Turn the oven off and remove the power plug 6. It is occasionally necessary to remove the glass from the wall socket before cleaning, if possible. tray for cleaning. Wash the tray in warm sudsy 2.
Need help?
Do you have a question about the NN-ST67JS and is the answer not in the manual?
Questions and answers