Table of Contents
Advertisement
Quick Links
Advertisement
Table of Contents

Related Manuals for Huawei Ascend


Summary of Contents for Huawei Ascend
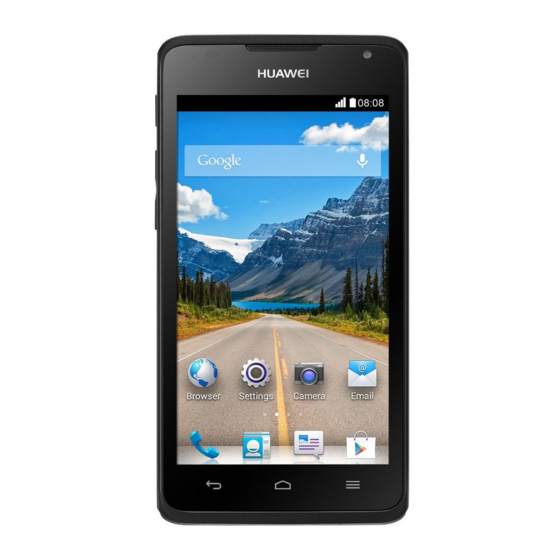
- Page 1 Y520 User Guide...
-
Page 2: Table Of Contents
Contents Read Before Proceeding ................1 Safety Precautions ......................1 Personal Information and Data Security ................. 2 Legal Notice........................3 Getting Started .................... 6 Key Functions at Your Fingertips ..................6 Important Information About the Battery ..............6 Power Saving Tips ......................7 Power On or Off Your Mobile Phone ................ - Page 3 Copying a Text Message to ToDo or Calendar ............. 22 Customizing Message Settings ..................22 Email ......................23 Adding an Email Account .................... 23 Adding Other Email Accounts ..................23 Viewing an Email Message ..................23 Saving an Email Attachment ..................24 Creating and Sending an Email Message ..............
- Page 4 Using Other Applications ................45 Calendar ........................45 File Manager ........................ 46 Clock ........................... 47 Calculator ........................47 ToDo ..........................47 Managing Your Mobile Phone ..............49 Setting the Date and Time ................... 49 Setting the Display ....................... 49 Setting Ringers ......................50 Setting Phone Services ....................
-
Page 5: Read Before Proceeding
Read Before Proceeding Safety Precautions Please read the safety precautions carefully to ensure the correct use of your mobile phone. Do not crash, throw, or puncture your mobile phone. Avoid the falling, squeezing, and bending of your mobile phone. Do not use your mobile phone in a moist environment, such as the bathroom. Prevent your mobile phone from being soaked or washed in liquid. -
Page 6: Personal Information And Data Security
Be sure to obtain third-party applications from a legitimate source. Downloaded third-party applications should be scanned for viruses. Install security software or patches released by Huawei or third-party application providers. Some applications require and transmit location information. As a result, a third-party may ... -
Page 7: Legal Notice
Huawei does not own the intellectual property of the third-party software and applications that are delivered with this product. Therefore, Huawei will not provide any warranty of any kind for third party software and applications. Neither will Huawei provide support to customers who use third-party software and applications, nor be responsible or liable for the functions or performance of third-party software and applications. - Page 8 Huawei shall not be responsible for the legality, quality, or any other aspects of any software installed on this product, or for any uploaded or downloaded third-party works in any form, including but not limited to texts, images, videos, or software etc.
- Page 9 Privacy Policy To better understand how we protect your personal information, please see the privacy policy at http://consumer.huawei.com/privacy-policy.
-
Page 10: Getting Started
Getting Started All the pictures in this guide are for your reference only. Your phone’s actual display features may be different to those described here, depending on its software version. Key Functions at Your Fingertips Press and hold to power on your mobile phone. ... -
Page 11: Power Saving Tips
When the battery power is low, the phone will alert you and display a message. When the battery power is almost exhausted, your phone will power off automatically. Power Saving Tips The longevity of battery power depends on the network to which you connect, and how you use your mobile phone. -
Page 12: Using The Touchscreen
Make some initial decisions about how you want to use your mobile phone. Powering Off Your Mobile Phone Press and hold (Power key) to open the phone options menu. Touch Power off. If Quick boot is enabled, the phone will enter the deep sleep mode. If Quick boot is disabled, touch OK to shut down the phone. -
Page 13: Locking And Unlocking The Screen
On the home screen, touch > > Display, select the Auto-rotate screen check box to disable this function. Locking and Unlocking the Screen Locking the Screen When your phone is on, press (Power key) to lock the screen. When the screen is ... -
Page 14: Home Screen
Home Screen Touch and hold a shortcut until the item expands in size, you can then drag it to your desired location or move it to the Remove. You can also drag an icon from another area of the screen to the shortcut position. Notification and Status Icons Signal strength No signal... - Page 15 Uploading Downloading Phone storage space is getting Sign-in or synchronization problem Wi-Fi network available Connected to a Wi-Fi network Portable Wi-Fi hotspot on Connected to a PC Notification Panel Your mobile phone will notify you when you receive a new message or there is an upcoming event.
- Page 16 Viewing Other Parts of the Home Screen Flick your finger left or right across the home screen. Customizing the Home Screen Adding a New Home Screen Item Touch and hold an item until mobile phone vibrates. Select the desired position and release it. Moving a Home Screen Item Touch and hold an item on the home screen until the item expands in size.
-
Page 17: Application Screen
You can also touch to turn the corresponding services on or off. Changing the Wallpaper On the home screen, touch > WALLPAPERS. Touch the following menu items to select a picture and set it as the wallpaper: Gallery Live Wallpapers ... -
Page 18: Calling
Calling To make a phone call, you can dial a number using the keypad or touch a number saved in your contact list, on a webpage, or in other places. When you are in a call, you can answer other incoming calls or redirect them to your voicemail. You can also set up conference calls with several participants. -
Page 19: Answering Or Rejecting A Call
Touch to the side of the log entry to dial. Answering or Rejecting a Call Answering or Rejecting an Incoming Call When you receive a phone call, the incoming call screen opens. If you have previously saved the caller’s number in Contact, the caller's name and number are displayed. If the caller’s number is not saved in Contact, the caller’s number is displayed. -
Page 20: Other Operations During A Call
Other Operations During a Call Making a Conference Call If you receive a new call while you are already in a call, you can add the second call to the call you are in. This feature is known as conference calling. You can also set up a conference call with multiple callers. -
Page 21: Using Airplane Mode
Touch CREATE NEW CONTACT Using Airplane Mode Some locations may require you to turn off your phone’s wireless connections. Rather than powering off your phone, you can place it in Airplane mode. Press and hold (Power key). Touch Airplane mode. -
Page 22: Contact
Contact The People application enables you to save and manage information such as phone numbers and addresses of your contacts. After you save contact information on your mobile phone, you have easy access to the contact with whom you want to communicate. Opening the Contact Application On the home screen, touch >... -
Page 23: Searching For A Contact
Searching for a Contact In the contact list, touch Enter the name of the contact you wish to search for. As you type, contacts with matching names appear below the search box. Editing a Contact You can make changes to the information you have stored for a contact at any time. In the contact list, touch the contact whose details you want to edit, and then touch >... -
Page 24: Sending Contacts
Editing a Group You can always make changes to the information you have saved for a group. In the groups list, touch the group whose details you want to edit, and then touch > Edit. Make the desired changes to the group information, and then touch DONE. Sending Contacts In the contacts list, touch >... -
Page 25: Messaging
Messaging The Messaging application allows you to exchange text messages (SMS) and multimedia messages (MMS) with anyone using an SMS-or-MMS-capable phone. Creating and Sending a Text Message On the home screen, touch Touch Enter a phone number or a contact's name in the Type name or number field, or touch to select a contact. -
Page 26: Opening And Viewing A Multimedia Message
On the message editing screen, touch > Slideshow. Select a slide to start editing it. Touch Done to finish composing your message and return to the multimedia message screen. Touch Edit to add more slides. When the message is ready to be sent, touch Send. Opening and Viewing a Multimedia Message In the message list, touch the message thread you wish to view. -
Page 27: Email
Email Your mobile phone also puts email at your fingertips. With your phone’s Email application, you can use your email account with Yahoo!, AOL, or other popular email services on your phone. Adding an Email Account When using the Email application for the first time, you must configure an email account. The Email setup wizard helps you to configure your account. -
Page 28: Saving An Email Attachment
Saving an Email Attachment Select the email account you want to use. Touch the email message you want to view. Touch attachment(s). Touch > Save for saving the attachment. Creating and Sending an Email Message Select the email account you want to use. Touch >... -
Page 29: Customizing Email Account Settings
Customizing Email Account Settings You can change a number of account settings, including how often you check for emails, how you are notified of a new mail, and details about the servers the account uses to send and receive mails. Your account’s incoming and outgoing settings depend on the kind of email service you are using. -
Page 30: Getting Connected
Getting Connected Mobile Networks Your mobile phone will be automatically configured to use your network operator’s 2G/3G service (if available) when you turn on the phone for the first time. Note that the SIM card must be inserted. Checking the Network Connection On the home screen, touch >... -
Page 31: Sharing Your Phone's Data Connection
Connecting to a Wireless Network On the home screen, touch > WIRELESS & NETWORKS, touch the Wi-Fi switch to turn on Wi-Fi. Under Under WIRELESS & NETWORKS, touch Wi-Fi. You phone then scans for available Wi-Fi networks and displays them. Touch a Wi-Fi network to connect to it. -
Page 32: Bluetooth
Sharing Your Phone’s Data Connection as a Portable Wi-Fi Hotspot On the home screen, touch > Touch More… > Tethering & portable hotspot. Touch the Wi-Fi hotspot switch to share your data connection. When Wi-Fi hotspot is on, you can touch Wi-Fi hotspot > Set up Wi-Fi hotspot to change its network SSID or secure it. - Page 33 Sending Files via Bluetooth With Bluetooth, you can share pictures, videos, or music files with your family and friends. To send files via Bluetooth: Touch and hold the file to be sent in your mobile phone or microSD card. The active options menu is displayed.
-
Page 34: Browser
Browser Your mobile phone comes with an Internet browser pre-installed. Opening the Browser On the home screen, touch When known or open Wi-Fi networks and mobile data networks are available at the same time, your phone will preferably select a Wi-Fi network for Internet access. Touch to open the browser options menu: Refresh: touch to refresh the current webpage. -
Page 35: Setting A Home Page
Setting a Home Page On the home screen, touch In a browser window, touch > Settings. Touch General > Set homepage. From the displayed option menu, choose the web page you want to set as the home page. Managing Bookmarks You can store as many bookmarks as you want on your mobile phone. -
Page 36: Entertainment
Entertainment In addition to being a communication device and personal assistant, your mobile phone also provides you with a multitude of entertainment possibilities. You can take photos, create videos and audio clips, and download and listen to music. Taking Photos and Recording Videos The camera is a combination of camera and camcorder that you can use to shoot and share pictures and videos. -
Page 37: Using The Gallery
Frame your photo within the photo capture screen. Touch to take your photo. Photos taken are displayed for a moment. You can take another photo or review your photos. Viewing Your Photos After taking a photo, a thumbnail of the photo you have just taken is shown in the lower right corner of the capture screen. -
Page 38: Enjoying Music
Opening the Gallery On the home screen, touch The Gallery application categorizes your pictures and videos by storage location and displays these files in folders. Touch a folder to view the pictures or videos inside. Viewing a Picture In Gallery, touch the folder that contains the pictures you want to view. Touch the picture to view it in full-screen mode. - Page 39 Playing Music From the music library, select a way to view your music. Touch the music file you want to play. While playing music, touch to return to the home screen, the music will continue to play in the background and you can use other applications. Open the notifications panel and touch the playing music to return to the music playing screen.
-
Page 40: Listening To The Fm Radio
Touch and hold the playlist you want to play. Touch Play to play the playlist. Listening to the FM Radio The FM radio lets you listen to FM radio programs on your mobile phone. Since the FM radio uses the provided wired stereo headset as its antenna, before opening the application, connect the headset to your phone’s the audio jack. -
Page 41: Google Services
Google Services Availability of Google applications, services, and features may vary according to your country or carrier. Please follow local laws and regulations to use them. When you turn on your mobile phone for the first time, touch a Google services such as Google, Gmail, or Play Store, and you will be prompted to sign in to your Google account. - Page 42 Switching Between Accounts In the mail list, touch Inbox on the top of the screen. Touch the account that contains the email you want to read. Creating and Sending an Email In the mail list, touch Enter the message recipient’s email address in the To field. If you are sending the email to several recipients, separate the email addresses with commas.
-
Page 43: Maps
Maps Maps lets you find your current location, view real-time traffic conditions (depending on availability in your locale), and get detailed directions to various destinations. You can view satellite images, traffic maps, or other kinds of maps of your current or other locations. Enabling the Location Service Before you open Maps to find your location or search for places of interest, you must enable the location service. -
Page 44: Play Store
Opening YouTube On the home screen, touch > Searching for a Video On the YouTube screen, touch Enter a search keyword, and then touch icon on the keypad. You will see a number of search results displayed below the notification bar. Scroll through the results and touch a video to watch it. - Page 45 To check the progress of a download, open the notification panel. Most applications are installed within seconds. After the application has been downloaded and installed on your mobile phone, the content download icon appears in the notification bar. If you want to install a non-Market application, touch >...
-
Page 46: Synchronizing Information
Synchronizing Information Some applications on your mobile phone give you access to the same personal information that you can add, view, and edit on your computer. If you add, change, or delete your information in any of these applications on the web, the updated information also appears on your mobile phone. -
Page 47: Customizing Your Account Synchronization
Adding an Exchange Account On the home screen, touch > > Add account. Touch Corporate. Follow the instructions and enter the required information about the exchange account you want to add. For details, contact the server administrator. Touch Next to display the Incoming settings screen. Configure the settings. Touch Next to display the account settings. - Page 48 Configuring General Synchronization Settings On the home screen, touch > On the ACCOUNTS, select the added account type such as Corporate, IMAP, POP3 or Google. On the account screen, touch the account and do the following: Select or clear the check box to control whether applications and services can transmit ...
-
Page 49: Using Other Applications
Using Other Applications Calendar Calendar is your personal assistant that helps you manage, arrange, and keep track of all important events. Opening Calendar On the home screen, touch > Creating a New Event In any calendar view, touch , and then touch New event to open the event details screen. -
Page 50: File Manager
Default reminder time: touch to select the default time before an event for event reminders to occur. File Manager File Manager is like having a pocket-sized personal assistant (PA), letting you organize, edit, and delete files and folders. Opening File Manager On the home screen, touch >... -
Page 51: Clock
Touch to return to the file manager screen. Viewing Your Memory Status On the home screen, touch > > Storage. The memory management screen will be displayed. This screen allows you to view the memory status and available memory on your mobile phone and microSD card. - Page 52 On the home screen, touch > Touch to create a note. Enter the information and touch DONE to save the note.
-
Page 53: Managing Your Mobile Phone
Managing Your Mobile Phone To configure your mobile phone, touch > Setting the Date and Time When your mobile phone is using the date and time settings provided automatically by the network, you cannot manually set the date, time, and time zone. On the Settings screen, touch Date &... -
Page 54: Setting Ringers
Setting Ringers Adjusting the Volume You can adjust the volume while on the home screen or on most of the application screens (such as the screen displayed during a call or when playing music or videos). Press the Volume keys to adjust volume to the level you desire. You can also adjust the volume from the settings screen. -
Page 55: Setting Phone Services
Setting Phone Services Customizing Call Settings Mobile phone service providers offer different services such as call forwarding, call waiting, fixed dialing numbers, and voicemail. You can customize many of these services if they are part of your calling plan. On the home screen, touch , then touch >... - Page 56 Under SIM CARD LOCK, touch Set up SIM card lock. Select the Lock SIM card check box. Use the keyboard to enter the PIN, and then touch OK. To change the PIN at any time, touch Change SIM PIN. You can dial emergency numbers any time from your mobile phone. Protecting Your Mobile Phone with a Screen Lock To keep your data more secure, lock the screen and/or require a screen unlock pattern every time your mobile phone is turned on or wakes up from sleep mode.
-
Page 57: Managing Applications
Touch this button to enter the Google account interface. After you have entered your Google account password, you will be able to reset the unlock pattern. If you are still experiencing any issues, please contact Huawei support staff. Managing Applications Viewing an Installed Application On the Settings screen, touch Apps. -
Page 58: Resetting Your Mobile Phone
Uninstall any downloaded programs that you no longer use. Resetting Your Mobile Phone Backing Up My Data You can use your Google account to back up your mobile phone’s settings to Google servers. If you replace your mobile phone, the settings you have backed up will be transferred to the new mobile phone the first time you sign in to your Google account. - Page 59 Make sure that your microSD card has sufficient space to store the new software version. Perform the online update following the onscreen instructions.
- Page 60 All pictures and illustrations in this guide, including but not limited to the phone color, size, and display content, are for reference only. The actual product may vary. Nothing in this guide constitutes a warranty of any kind, express or implied. Model: HUAWEI Y520-U03 HUAWEI Y520-U12 6011594_01...