Table of Contents
Advertisement
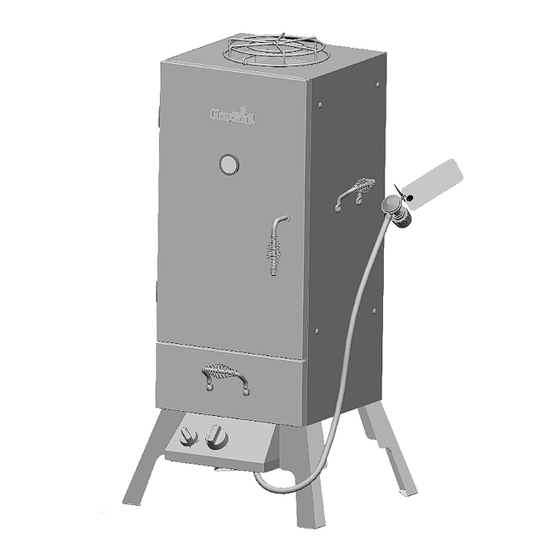
Product Manual
Model 10201597-50
IMPORTANT: Fill out the product record information below.
Model Number
Serial Number
See rating label on grill for serial number.
Date Purchased
CAUTION
Read and follow all safety statements, assembly
instructions, and use and care directions before
attempting to assemble and cook.
INSTALLER/ASSEMBLER:
Leave this manual with consumer.
CONSUMER:
Keep this manual for future reference.
If you have questions or need assistance during assembly, please call
To insure your satisfaction and for follow-up service, register your smoker online at
FOR OUTDOOR USE ONLY
www.grillregistration.com
Estimated time to complete assembly: 1 hour
WARNING
Failure to follow all manufacturer's instructions could
result in serious personal injury and/or property
damage.
CAUTION
Some parts may contain sharp edges – especially as
noted in the manual! Wear protective gloves if
necessary.
CAUTION
THIS UNIT IS HEAVY!
DO NOT assemble without a helper.
1-800-241-7548
.
42804691 • 04-01-10
Advertisement
Table of Contents
Troubleshooting

Related Manuals for Char-Broil CB600X 10201597-50


Summary of Contents for Char-Broil CB600X 10201597-50
-
Page 1: Product Record Information
CONSUMER: Keep this manual for future reference. If you have questions or need assistance during assembly, please call To insure your satisfaction and for follow-up service, register your smoker online at Estimated time to complete assembly: 1 hour WARNING Failure to follow all manufacturer’s instructions could result in serious personal injury and/or property damage. -
Page 2: For Your Safety
Installation Safety Precautions • Use your CB600x™, as purchased, only with LP (propane) gas and the regulator/valve assembly supplied. • Your CB600x™ installation must conform with local codes, or in their absence of local codes, with either the National Fuel Gas Code, ANSI Z223.1/ NFPA 54, Natural Gas and Propane Installation Code, CSA B149.1, and Propane Storage and Handling, CSA B149.2, Canadian Electrical Code, CSA C22.1... -
Page 3: Table Of Contents
Limited Warranty........20 The following are trademarks registered by W.C. Bradley Co. in the U.S. Patent and Trademark Office: Caldera®; Charcoal2Go®; Char-Broil®; American Gourmet®;... -
Page 4: Use And Care
USE AND CARE DANGER • NEVER store a spare LP cylinder under or near the appliance or in an enclosed area. • Never fill a cylinder beyond 80% full. • An over filled or improperly stored cylinder is a hazard due to possible gas release from the safety relief valve. - Page 5 LP Cylinder Exchange •Many retailers that sell grills offer you the option of replacing your empty LP cylinder through an exchange service. Use only those reputable exchange companies that inspect, precision fill, test and certify their cylinders. Exchange your cylinder only for an OPD safety feature-equipped cylinder as described in the "LP Cylinder"...
- Page 6 Hold coupling nut and regulator as shown for proper connection to LP cylinder valve. 6. Turn the coupling nut clockwise and tighten to a full stop. The regulator will seal on the back-check feature in the LP cylinder valve, resulting in some resistance. An additional one-half to three-quarters turn is required to complete the connection.
-
Page 7: Troubleshooting
• When appliance is not in use, turn off control knob and LP cylinder valve. • Smoker Chamber door should be open while attempting to light the burner. • The grease tray must be inserted into appliance and emptied after each use. -
Page 8: Match-Lighting
Ignitor Lighting • Do not lean over appliance while lighting. 1. Turn ON LP gas cylinder. 2. Open the Smoke Chamber door. 3. Press and turn the control knob to HIGH. 4. Turn ROTARY IGNITOR knob rapidly. 5. Pull out the Firebox Drawer to verify that the burner is lit. 6. -
Page 9: Spider Alert
1. Turn gas off at control knob and LP cylinder and disengage regulator from cylinder. 2. Remove the smoker drawer and water pan, shown A. 3. Remove the Electrode Wire from the Rotary Ignitor, shown B. -
Page 10: Food Safety
• Watch water level. Always keep water in water pan (unless you wish to brown your food), Food can burn quickly if water completely evaporates. When using smoker, be very careful when adding water to the hot smoker. #2 Phillips or Standard Flat blade Screwdriver (Not Provided) 10 •... - Page 11 Performance of the smoker is dependent on ambient temperature and wind conditions. With temperature below 60°F and winds of 5 MPH or more, the smoker can lose a significant amount of heat and it may not be possible to raise internal temperature of meat high enough to cook it in a reasonable time.
-
Page 12: Parts List/ Parts Diagram
#1/4-20×3/4" Combo truss head screw #1/4-20×1/2" Hex head bolt #1/4-20×1/2" Combo truss head screw Description IGNITOR, ROTARY KIT KNOB, IGNITOR TEMPERATURE GAUGE CHAR-BROIL LOGO PLATE WIRE RACK, SMOKER CHAMBER WIRE, ELECTRODE HARDWARE PACK ASSEMBLY INSTRUCTIONS, ENGLISH ASSEMBLY INSTRUCTIONS, SPANISH Description... -
Page 13: Assembly
ASSEMBLY • Carefully remove the door from the unit by swinging it opening and lifting it up and away from the smoker chamber. Lay the door aside. • Place the Smoker Chamber on it’s back with the door opening facing up. CAUTION: This unit is heavy! - Page 14 • Place Control Panel Assembly onto Smoker Chamber by placing tabs under the front edge of the Smoker Chamber. The Control valve must engage the burner venturi tube as shown A. • From the inside of the Smoker Chamber, Install 2 #10-24x3/8” screws through the smoker chamber and through the Control panel Tabs as shown.
- Page 15 • Install legs by placing 2 - 1/4-20x1/2” Hex Head Bolt through the smoker body and through each leg as shown. Thread the • Install legs by placing 2 - 1/4-20x1/2” Hex Head Bolt through the smoker body and through each leg as shown. Thread the bolts into the 1/4-20 nut welded to the underside of each leg.
- Page 16 • Insert 1/4-20x1/2” Hex Head Bolt and flat washer through the top smoker body, in the center of the damper holes as shown.(A) • Insert the damper as shown. (B) • Place the 1/4” flat washer onto bolt and thread the 1/4-20 nut on to the bolt. Tighten the nut sufficiently to allow the damper to move. (B) •...
- Page 17 • Slip the edge of the Top Grate under the Damper Handle (A), Then carefully align the grate so that the wire ends fit into the holes in the Smoker Body top.(B) • Carefully place the door back onto the Smoker Body hinges. Top Grate Cooking Grates (3) •...
-
Page 18: Troubleshooting
EMERGENCIES: If a gas leak cannot be stopped, or a fire occurs due to gas leakage, call the fire department. Emergencies Possible Cause Gas leaking from • Damaged hose. cracked/cut/burned hose. Gas leaking from LP • Mechanical failure due to rusting or cylinder. - Page 19 Troubleshooting (continued) Problem Possible Cause Burner will not light • Rotary knob rotates without clicking. using ignitor. • Sparking between ignitor and electrode. • See “GAS ISSUES:” on previous page. Burner will not match • Match will not reach. light. •...
-
Page 20: Limited Warranty
LIMITED WARRANTY This warranty only applies to units purchased from an authorized retailer. Manufacturer warrants to the original consumer-purchaser only that this product shall be free from defects in workmanship and materials after correct assembly and under normal and reasonable home use for the periods indicated below beginning on the date of purchase*. - Page 21 LIMITED WARRANTY This warranty only applies to units purchased from an authorized retailer. Manufacturer warrants to the original consumer-purchaser only that this product shall be free from defects in workmanship and materials after correct assembly and under normal and reasonable home use for the periods indicated below beginning on the date of purchase*.
- Page 22 NOTES 22 • 10201597-50...
- Page 23 Warranty Registration Department P.O. Box 1240 Columbus, GA 31902-1240 REGTEMP REV02...
Need help?
Do you have a question about the CB600X 10201597-50 and is the answer not in the manual?
Questions and answers