Table of Contents
Advertisement
Advertisement
Table of Contents

Related Manuals for PRO SIGNAL PSG04173


Summary of Contents for PRO SIGNAL PSG04173
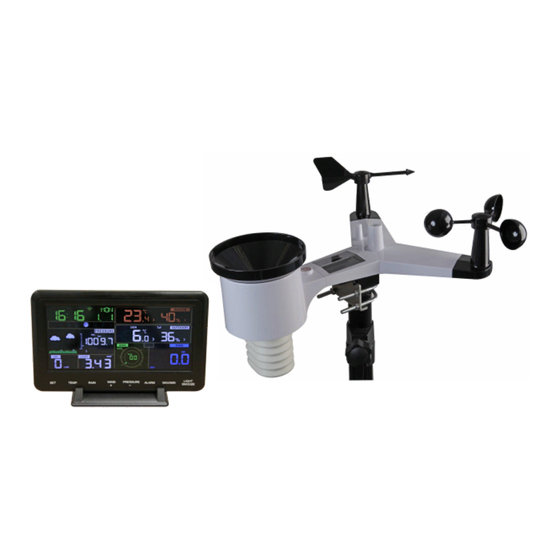
- Page 1 Professional Weather Station Model: PSG04173...
-
Page 2: Warnings And Cautions
1. Introduction Thank you for your purchase of the Solar Powered Wireless WiFi Weather Station. The following user guide provides step by step instructions for installation, operation and troubleshooting. 2. Warnings and Cautions Warning: Any metal object may attract a lightning strike, including your weather station mounting pole. -
Page 3: Pre-Installation Checkout And Site Survey
4. Pre-Installation Checkout and Site Survey 4.1 Pre Installation Checkout Before installing your weather station in the permanent location, we recommend operating the weather station for one week in a temporary location with easy access. This will allow you to check out all of the functions, insure proper operation, and familiarize you with the weather station and calibration procedures. -
Page 4: Setting Started
5. Setting Started 5.1 Contents Item Display Console Y shape outdoor sensor (Thermo-hygrometer / Rain Gauge / Wind Speed Sensor /Transmitter) Wind Vane 5V DC Adapter U-bolt with mounting clamps User manual Zip bag for 1pc 10mm single-head wrench 5.2 Sensor Set Up 1. - Page 5 5.2.1 Install U-bolts and mounting pole Installation of the U-bolts, which are in turn used to mount the sensor package on a pole, requires installation of an included metal plate to receive the U-bolt ends. The metal plate, visible in Figure 1, has four holes through which the ends of the two U-Bolts will fit.
- Page 6 5.2.2 Install wind vane Push the wind vane onto the shaft on the top of the sensor, until it stop moving further, as shown in figure 3. Tighten the set screw, with a Philips screw driver(size PH0), until the wind van cannot be removed from the axle, as shown in figure 4. Make sure the wind vane spin freely.
- Page 7 5.2.4 Install Rain Gauge Keep the Indication mark in straight line. As show below photo. 5.2.5 Install Batteries Insert 2XAA batteries in the battery compartment. The LED indicator on the back of the transmitter will turn on for four seconds and normally flash once every 16 seconds (the sensor transmission update period).
- Page 8 5.2.6 Mount assembled outdoor sensor package 5.2.6.1 Before you mount Before proceeding with the outdoor mounting detailed in this section, you may want to skip to setup instructions in section 6.2 and onwards first, while you keep the assembled outdoor sensor package nearby (although preferably not closer than 5 ft.
- Page 9 To achieve proper alignment, it is helpful to use a compass (many cell phones have a compass application). Once rotated in the correct orientation, lightly tighten the bolts a little more (use a wrench) to prevent further rotation. Note: Use the bubble level next to the rain sensor to make sure sensor array is completely level.
-
Page 10: Best Practices For Wireless Communication
5.3 Best Practices for Wireless Communication Note: To insure proper communication, mount the remote sensor(s) upright on a vertical surface, such as a wall. Do not lay the sensor flat. Wireless communication is susceptible to interference, distance, walls and metal barriers. We recommend the following best practices for trouble free wireless communication. -
Page 11: Display Console
5.4 Display console 1. Insert the 5V AC adaptor into the back of the display console Note: Place the outdoor sensor array about 5 to 10 feet from the display console and wait several minutes for the remote sensors to synchronize with the display console. - Page 12 Figure 13 Note: Your display console should have readings in all sections. Wind and Rain will show 0’s (connected) until wind or rain occur or are simulated. Note: If you only use battery to power up display console, you must press LIGHT/SNOOZE key to light up the LCD before press any other key.
- Page 13 5.4.1 Vertical Desk Stand The console is best viewed above from a 20 to 30 degree angle. In addition to the fold out desk stand on the back of the display, console, the console also includes a vertical desk stand to improve the viewing able on a desk, as shown in Figure 14.
-
Page 14: Display Console Operation
6. Display Console Operation 6.1 Screen Display 1.Time 10. Rain fall 2. Moon phase 11. Outdoor temperature 3. Barometric Pressure 12. Outdoor humidity 4. Weather forecast 13. RF icon 5. UV index 14. Indoor humidity 6. Light 15. Indoor temperature 7. -
Page 15: Initial Display Console Set Up
6.2 Initial Display Console Set Up Connect the power adapter to power up the display console. The unit will show software version number 2 seconds after power reset. The unit will turn on all segments of the LCD for 3 seconds after power reset, the unit will start to register the outdoor channel for 3 minutes. -
Page 16: Key Function
6.3 Key function The console has eight keys for easy operation Description Press this key to view MAC address. Hold this key to enter setting mode TEMP. Press this key to view wind Chill, Heat Index, Dew Point Temperature RAIN Press this key to view Rain Rate, event, Rain Day, Rain Week, Rain Month, and Rain total Press the RAIN key 2s to reset current display rain... -
Page 17: Setting Mode
6.4 Setting mode Pressing the SET key for 2 seconds to enter setting model,the basic settings can now be performed in the following order: 6.4.1 BEEP: - Press the SET key for 2 seconds to select the beep section, ON/OFF section digits will start flashing, press the WIND/+ or PRESSURE/- key to select ON or OFF. - Page 18 Note: Press the WIND/+ or PRESSURE/-key to set the value. Note: If user to change minute value, second will auto clear to 0. Note: WIFI firmware version 1.4.4 and above support Global Time synchronization. Time zone, DST and date will automatic updated from internet when base station is connected to WIFI internet.
- Page 19 3) Viewing Pressure History Press the [PRESSURE -] button to view the 12 hour, 24 hour, 48 hour and 72 hour pressure average. 4) Relative Pressure Calibration Discussion To compare pressure conditions from one location to another, meteorologists correct pressure to sea-level conditions. Because the air pressure decreases as you rise in altitude, the sea-level corrected pressure (the pressure your location would be at if located at sea-level) is generally higher than your measured pressure.
- Page 20 6.4.5 Light - Press the SET key 12th time to select light unit (lux, fc, w/m2;default: w/m2). 6.4.6 Temperature - Press the SET key 13 time to select in/outdoor temperature unit, degree C digits will start flashing, press the WIND/+ or PRESSURE/- key to select unit (C or F;...
-
Page 21: Alarm Mode
- In normal mode,press and release the RAIN key to view rain of rate, event, day, week, month and total. - Press the RAIN key for 2 seconds to reset current display rain. Note: Re s e t we e k ra in, will a uto re s e t da y ra in Re s e t m onth ra in, will a uto re s e t we e k a nd da y ra in. - Page 22 Note: - Press RAIN key to select display rate or day rain alarm data. - Press WIND/+key to select display wind or gust alarm data. - Press ALARM key third time or press LIGHT /SNOOZE key back to normal mode 6.5.2 Alarm mode setting: Press and hold for 2 seconds ALARM key enter alarm setting mode:...
-
Page 23: Max/Min Mode
6.6 Max/min mode 6.6.1 Press and release MAX/MIN key to display MAX data - Press TEMP. key to view wind chill, heat index and dew point max. - Press RAIN key to view rain rate, rain day, rain week and rain month max. - Press WIND/+ to view wind and gust max. -
Page 24: Other Features
- Press the WIND/+and PRESSURE/- key to adjust values. - Press the SET key to confirm & move to the next item. - Press the ALARM key to reset any adjusted value. - Press the LIGHT /SNOOZE key at any time to exit. Calibration Order: Indoor temperature offset calibrated (range +/-5˚C, default: 0 degrees) Indoor humidity offset calibrated (range +/-10%) - Page 25 6.8.3 Backlight Operation With AC adaptor. The backlight can only be continuously on when the AC adapter is permanently on. When the AC adapter is disconnected, the backlight can be temporarily turned on. Press the LIGHT SNOOZE key to adjust the brightness between High, Low and Off.
- Page 26 6.8.6 Weather forecast There are six color forecast icons use changing atmospheric pressure to predict weather conditions for the next 6-hours. Please allow at least one month for the weather station to learn the barometric pressure over time. Sunny Partly sunny Cloudy Rainy Snowy...
- Page 27 Storm Snowy (Blink for 30 minutes at most) Note: Snowy icon will appear in place of rainy icon when the outdoor temperature is below 0˚C (32 F). Weather Forecasting Description and Limitations In general, if the rate of change of pressure increases, the weather is generally improving (sunny to partly cloudy).
- Page 28 6.8.8 MAC address display When the external power adaptor is connected and plugged in-then press and release the SET button to view MAC address. For example the MAC is 12:34:56:AB:CD:EF: With your obtained MAC address, register your device on the Ecowitt service or customized website.
-
Page 29: Specification
7. Specification: Outdoor data Transmission distance in open field : 100m (300 feet) Frequency : 868MHz Temperature range : -40˚C--60˚C (-40˚F to +140˚F) Accuracy : + / - 1 °C Resolution : 0.1˚C Measuring range rel. humidity : 10%~99% Accuracy : +/- 5% Rain volume display : 0 –... - Page 30 Accuracy : +/-3hpa Resolution : 0.1hPa (0.01inHg) Alarm duration : 120 sec Measuring interval indoor data : 60s Power consumption • Base station : 5V DC adaptor (included), Power Consumption : 0.5 Watts (1.25 Watts during WiFi configuration mode) • Base station : 3 x AAA batteries (not included) Remote sensor...
-
Page 31: Live Internet Publishing
8. Live Internet Publishing Your console is capable of sending your sensor data to select internet-based weather services. The supported services are shown in the table below: Hosting Website Description Service Ecowitt https://www.ecowitt.net Ecowitt is a new weather Weather server that can host a bunch of sensors that other services don’t support. -
Page 32: Connecting The Weather Station Console To Wifi
8.1 Connecting the Weather Station Console to WiFi To send weather data to these services you must connect your console to the internet via Wi-Fi. The console can only operate using Wi-Fi when the external power adapter is connected and plugged in! Note: If you are testing the setup with the outdoor sensor package nearby and indoor, you may want to consider connecting to Wi-Fi, but not yet configuring any of the weather services. -
Page 33: Configure Device
Configure Device Start searching the device. Select the device you Operate as per the If the device is in your have from the device information, tick the WLAN list., it will jump to list, then press Next box to confirm the 4) screen shot. - Page 34 Press Scan and select you Start to connect your phone SSID from the list, then to the weather station enter your WiFi password “EasyWeather-WIFI” to your and press Next. router. Configure successfully If you own a dual band it will jump to “Upload Setting” router (2.4 GHz and 5.0 screen automatically.
- Page 35 a. Upload your weather data to ecowitt Website It’s recommended to use the Ecowitt Weather server to monitor and record your sensors data. Supports uploading all the sensors data to Ecowitt Weather server. For other weather services, Only server- supported data will be uploaded. On the ecowitt.net uploading Press the upper left menu Finish the registration...
- Page 36 Note: When select device address on map, please wait till the map display before selecting your address. Note: Please put in the correct time zone to get the correct time. Because the time will be updated to internet time automatically while WIFI connection.
- Page 37 b. Upload your weather data to Wunderground.com Complete and submit the On the Wunderground.com Register at form. uploading page, input Station Wunderground.com ID & Station Key, press Save. Enter your valid e-mail If you can’t find your Your station ID will be added address and password weather station model on the WU StationID.
- Page 38 Once register successfully, you’ll receive a new Station ID and password / key and an e-mail about the information of Station ID and Station password / key Back to the Wunderground.com uploading page, input Station ID & Station Key, press Save.
- Page 39 c. Upload your weather data to Weathercloud.net Upload your weather data to Register at You will then be prompted Weathercloud.net Weathercloud.net to add a device/ Select “Create device” and enter Visit weathercloud.net Input Weathercloud ID & your station’s information: and enter a Username, Weathercloud Key, press Email and Password to Save..
- Page 40 d. Upload your weather data to WeatherObservationWebsite (WOW) The actual form is longer, Register at Upload your weather WeatherObservatio but all questions should be data to WOW nWebsite self-explanatory. Input Weathercloud ID & Complete and submit the Choose create a new Weathercloud Key, press form.
- Page 41 Follow instructions on the screen and login to the site Once you are logged in you will need to create a new WOW site. “Sites” are the means by which WOW organizes weather data you contribute. Basically, WOW builds a personal web site for your weather station. Associated with the web site is two items you will need to allow uploading of data: Site ID: This is an arbitrary number that is used to distinguish your site...
- Page 42 You will also need to establish a unique 6 digits PIN code that you should keep secret. It is the “Authentication Key.” Setup this number by clicking on “Edit Site”) and filling out the with a 6-digit number of your choice: You will need both “Site ID”...
- Page 43 e. Upload your weather data to Customized Websit If you want to upload data to your customized website, select Enable button (display blue) and select the protocol type. The website should has the same protocol with Wunderground or Ecowitt. Input all the information needed. Press Save. 8.1.2.2 iOs user: Activate the application you have downloaded on your mobile device.
- Page 44 Configure Device Note:If you own a dual band router (2.4 GHz and 5.0 GHz),make sure you connect to the 2.4 GHz band, otherwise it will fail to connect the weather station to WiFi.
- Page 45 Tap on the settings icon and Operate as per the Select the device you select “Configure a New information, tick the box have from the device list, Device”. to confirm “completed then press Next operation”, press Next. select your WiFi network Press Sycn and select your you want and return to WiFi network from the WLAN...
- Page 46 Connection success, it Select device WiFi. The Press button “Select device named “ will jump to “Upload WiFi” to go to Wi-Fi EasyWeather-WIFxxxxI”” Setting” screen Setting and return to WS View App automatically. It may have chance to happen that it cannot return back the same WiFi network which you selected on step 4) The window “Please connect your...
- Page 47 Upload your weather data to Ecowitt Website On the ecowitt.net uploading Finish the registration on page, enable the ON the Ecowitt page Press the upper left menu button(displayed blue) and set button and select Devices. the uploading interval time. If you have account and Press Add Device and input Press Save on the page.
- Page 48 Upload your weather data to Wunderground.com Upload your weather data to Complete and submit Register at Wunderground.com the form. Wunderground.com Enter your valid e-mail If you can’t find your Input Station ID & Station address and password weather station model Key, press Save.
- Page 49 Once register successfully, you’ll receive a new Station ID and password / key and an e-mail about the information of Station ID and Station password / key. Back to the Wunderground.com uploading page, input Station ID & Station Key, press Save. Your station ID will be added on the WU StationID.
- Page 50 Upload your weather data to WeatherObservationWebsite (WOW) Input Weathercloud ID & Weathercloud Key, press Save.Then press Finish. Jump to the Device List home screen If you don’t have WOW ID and Key, press “ Register at WeatherObservationWebsite” to open your web browser to activating the Register with WOW option.
-
Page 51: Mobile Application - Device List
8.2 Mobile application – Device list You are able to see your console through the “Device List” menu option: Tapping on your console’s entry in the device list will bring you to the page where you can change WU registration information. If you want to stop your console upload data to Wunderground, delete your Station ID and select “Save”. - Page 52 8.3 Mobile application – Check WU weather data and graph In the mobile application tap Menu choose WU Dashboard and you will be presented with a page listing current conditions for that station. If you have added multiple WU IDs, tap on the WU Station ID to switch to view data from other IDs.
- Page 53 8.4 Mobile application – Remove or Add WU ID If you have previously registered your console for use with wunderground.com and wish to remove this device data display from App, use the “Manage WU Station” menu option after tapping on the settings icon, select “Delete”...
-
Page 54: Mobile Application - Set Units
Mobile application –Remove or Add WU ID (iOS) 8.5 Mobile application – Set Units You may want to change the units in which sensor values are reported. To do so, click on the “Configure Units” menu after tapping on the settings icon. - Page 55 Mobile application – Change units (Android) Mobile application – Change units (iOs)
-
Page 56: Registering Weatherunderground.com Through The Pc Or Mac
9. Registering WeatherUnderground.com through the PC or Mac If you have not already done setup for wunderground.com during the Wi-Fi setup, you can do so later. Perform the following steps: 1. Visit Wunderground.com and click Join as the right top arrow indicates and select the Sign up for free option. - Page 57 Clicks verify location and fill out the form. After submitting the form, you will see the following:...
- Page 58 Note: Your station ID will have the form: KSSCCCC###, where K is for USA station (I for international), SS is your state, CCCC is your city and ### is the station number in that city. In the example above, KAZPHOEN424 is in the USA (K), State of Arizona (AZ), City of Phoenix (PHOEN) and #424.
- Page 59 • WunderStation: iPad application for viewing your station’s data and graphs https://itunes.apple.com/us/app/wunderstation-weather-from-your-neig hborhood/id906099986 WU Storm: iPad and iPhone application for viewing radar images, • animated wind, cloud coverage and detailed forecast, and PWS station data https://itunes.apple.com/us/app/wu-storm/id955957721...
- Page 60 • Weather Underground: Forecast: iOS and Android application for forecasts https://itunes.apple.com/us/app/weather-underground-forecast/id48615 4808 https://play.google.com/store/apps/details?id=com.wunderground.andr oid.weather&hl=en...
- Page 61 • PWS Weather Station Monitor: View weather conditions in your neighborhood, or even right in your own backyard. Connects to wunderground.com https://itunes.apple.com/us/app/pws-weather-station-monitor/id7137059...
-
Page 62: Maintenance
10. Maintenance 1. Clean the rain gauge once every 3 months. Rotate the funnel counter-clockwise and lift to expose the rain gauge mechanism, and clean with a damp cloth. Remove any dirt, debris and insects. If bug infestation is an issue, spray the array lightly with insecticide. Clean the solar radiation sensor and solar panel every 3 months with damp cloth. -
Page 63: Troubleshooting Guide
11. Troubleshooting Guide Problem Solution Outdoor sensor The sensor array may have initiated properly and array does not the data is registered by the console as invalid, and communicate to the console must be reset. Press the reset button the display as described in Section 5.2. - Page 64 Problem Solution high in the day buildings, pavement, walls or air conditioning units. time. Use the calibration feature to offset installation issues related to radiant heat sources. Reference Section 6.7. Relative pressure You may be viewing the absolute pressure, not the does not agree relative pressure.
- Page 65 Problem Solution 5. Check your router firewall settings. The console sends data via Port 80. No WiFi 1. Check for WiFi symbol on the display. If connection wireless connectivity is successful the WiFi icon will be displayed in the time field. 2.
Need help?
Do you have a question about the PSG04173 and is the answer not in the manual?
Questions and answers