
Related Manuals for Gigaset C570HX


Summary of Contents for Gigaset C570HX
- Page 1 C570 Detailed information on the telephone system: User guide of your Gigaset telephone www.gigaset.com/manuals Documentation relating to your base/router User guide online on your smartphone or tablet: Download the Gigaset Help app...
- Page 3 You can use your handset with several different DECT bases. On a Gigaset base Connect your HX handset to a Gigaset base and use the many features with the quality you would expect from Gigaset. If your Gigaset base is IP-compatible, you can also make broadband calls using your HX handset with the highest voice quality (HDSP).
-
Page 4: Overview
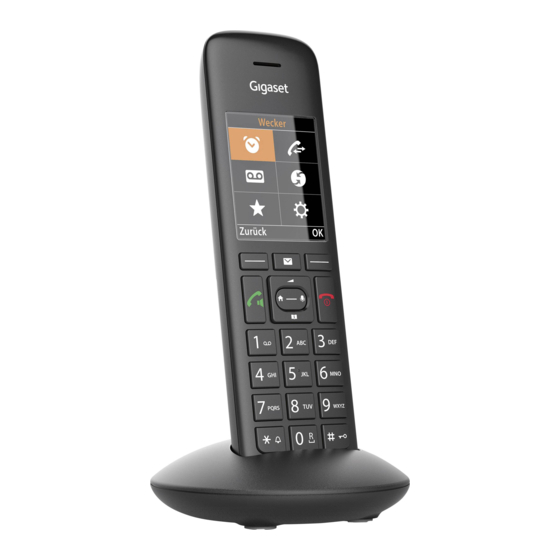
Overview Overview 4 End call key, On/off key End call; cancel function; Go back one menu level Press briefly Return to idle status Press and hold Switch the handset on and off Press and (in idle status) hold 5 Hash key / Lock key Lock/unlock the keypad Press and (in idle status) -
Page 5: Table Of Contents
Not all functions described in the user guide are available in all countries or from all network providers. Additional information Regarding the telephone system, if the handset is connected to a Gigaset base: User guide for your Gigaset telephone Regarding the telephone system, if the handset is connected to another base/router:... - Page 6 Illustration in the user guide Illustration in the user guide Warnings, which, if not heeded, can result in injury to persons or damage to devices. Important information regarding function and appropriate handling or functions that could generate costs. Prerequisite for being able to carry out the following action. Additional helpful information.
-
Page 7: Safety Precautions
If you use a medical device (e.g. a pacemaker), please contact the device manufacturer. They will be able to advise you regarding the susceptibility of the device to external sources of high fre- quency energy (for the specifications of your Gigaset product see "Specifications"). -
Page 8: Getting Started
Getting started Getting started Contents of the package • One handset • One battery cover • Two batteries • One charging cradle including power adapter • One user guide The charging cradle is designed for use in enclosed, dry rooms within a temperature range of +5 °C to +45 °C. - Page 9 Getting started Setting up the handset for use The display is protected by a plastic film. Please remove the protective film! Inserting the batteries Only use rechargeable batteries, as this could otherwise result in significant health risks and personal injury. For example, the outer casing of the batteries could be destroyed or the batteries could explode.
- Page 10 OK . . . an available base is sought . . . if required: enter system PIN (default setting on Gigaset bases: 0000) Once registration is complete, the handset returns to idle status. The internal number of the handset appears in the display, e. g. INT 1. If not, repeat the procedure.
- Page 11 Getting started Setting the date and time Set the date/time so that the correct date and time can be assigned to incoming calls, and to enable the alarm to be used. Date and time are set using the base. The date and time can also be set on an IP-compatible base via a time server on the network.
-
Page 12: Using The Telephone
"press the centre of the control key". In idle status Open the directory Press briefly Open the list of available online directories (Gigaset GO-Box 100) Press and hold or central directory of the base (e.g. CAT-iq base) Open the main menu... - Page 13 Getting to know your telephone During a conversation Open the directory Open the list of available online directories (Gigaset GO-Box 100) Press and hold or central directory of the base (e.g. CAT-iq base) Mute the microphone Initiate an internal consultation call...
- Page 14 Getting to know your telephone Main menu In idle status: Press the centre of the control key . . . use Example the control key to select a submenu Settings The main menu functions are shown in the display as icons. The icon for the selected function is highlighted in colour and the name of the associated function appears in the display header.
- Page 15 Getting to know your telephone Entering text Input position ¤ to select an entry field. A field is activated when the Example cursor is blinking inside it. ¤ New Entry to move the position of the cursor. First Name: Correcting incorrect entries Peter| •...
-
Page 16: Making Calls
Dialling from a public/central directory Depending on the base to which the handset is connected to, you can dial from a public directory, the Gigaset.net directory (e.g. Gigaset GO-Box 100) or a central directory on a CAT-iq base. ¤... - Page 17 Making calls Managing entries in the redial list ¤ Briefly press the Talk key . . . the redial list opens . . . use to select an entry Options . . . possible options: Copy an entry to the directory: Copy to Directory Copy the number to the display: ¤...
- Page 18 When the microphone is switched off, callers will no longer hear you. Switch the microphone on/off during a call: Press Local answer machine (only on Gigaset bases with local answer machine) Switching the answer machine on/off: ¤ . . . use...
-
Page 19: Local Handset Directory
Local handset directory The local directory is unique to the handset. However, it is possible to send entries to other handsets. Information about online directories (e.g. on a Gigaset GO-Box 100) or central directories on CAT-iq bases user guide of the base. - Page 20 Local handset directory Searching for/selecting a directory entry ¤ . . . use to browse searched names ¤ . . . use to enter initial letters (max. 8 letters) . . . the display jumps to the first name starting with these initial letters .
- Page 21 Local handset directory Add number to an existing entry: ¤ . . . use to select an entry . . . use to select number type OK . . . the number is entered or a prompt to overwrite an existing number is displayed .
-
Page 22: Message Lists
Back The message list contains an entry for every answer machine assigned to the handset, e.g. for the local answer machine on a Gigaset base / CAT-iq router or for a network mailbox . Availability and operation of the functions... -
Page 23: Call Lists
The telephone saves different types of calls (missed, accepted and outgoing calls) in lists. The base/router to which the handset is registered provides information on call numbers. Detailed information can be found at www.gigaset.com/compatibility. List entry The following information is displayed in the list entries:: Example •... -
Page 24: Additional Functions
Additional information Regarding the telephone system, if the handset is connected to a Gigaset base: User guide for your Gigaset telephone Regarding the telephone system, if the handset is connected to another base/router:... - Page 25 Calendar ¤ Enter time: Time . . . use to enter hours and minutes of the appointment ¤ Set name: Text . . . use to enter a description of the appointment (e.g. evening meal, meeting) ¤ Set alarm tone: Signal .
-
Page 26: Alarm Clock
Alarm clock Displaying/changing/deleting stored appointments ¤ . . . use to select Additional Features Calendar . . . to select day OK . . . the appointment list is displayed . . . use to select date . . . possible options: Display appointment details: ¤... -
Page 27: Baby Monitor
Baby monitor Alarm An alarm is shown on the display and indicated by the selected ringtone melody. The alarm sounds for 60 seconds. If no key is pressed, the alarm is repeated after 5 minutes. After the second repetition, the alarm call is deactivated for 24 hours. During a call, the alarm is only indicated by a short tone. - Page 28 Baby monitor Activating and setting the baby monitor ¤ . . . use to select Additional Features Baby Monitor activated Baby Monitor OK . . . then Switch on/off: ¤ 07:15 Activation: . . . use to select On or Off Enter destination: INT 1 ¤...
-
Page 29: Protection Against Unwanted Calls
Protection against unwanted calls Protection against unwanted calls Time control for external calls Date and time have been set. Enter a time period during which the handset should suspend Example ringing to indicate external calls e.g. during the night. ¤ Time Control . -
Page 30: Setting The Handset
. . . the display changes to idle status Display of info services as screensaver (only on a Gigaset GO-Box 100 or other Gigaset-IP base) Info Services are activated via the web configurator. The telephone is connected to the Internet. - Page 31 Switching Info Services on/off (only on a Gigaset GO-Box 100 or other Gigaset-IP base) The text information from the Internet that is set for the screensaver Info Services can be displayed as a scrolling message in idle status.
- Page 32 Setting the handset Display backlight The display backlight always illuminates when the handset is taken out of the base station/ charging cradle or when a key is pressed. Any digit keys that are pressed appear on the display for pre-dialling. Switch the display backlight on/off when in idle status: ¤...
- Page 33 Setting the handset Changing the earpiece and handsfree volume You can set the volume of the earpiece and speaker at 5 levels independently of each other. During a conversation ¤ Handset Volume . . . use to select volume Save . . . the setting is saved Without saving, the setting is automatically saved after around 3 seconds.
- Page 34 Setting the handset Ringtones Ringtone volume Volume can be set at 5 levels or crescendo (increasing volume). ¤ . . . use to select Settings Audio Example Settings Ringtones (Handset) Volume Volume . . . use to select For internal calls and For internal calls alarms or External Calls .
- Page 35 Setting the handset Switching advisory tones on/off The handset notifies acoustically about different activities and statuses. These advisory tones can be switched on/off independently of each other. ¤ . . . use to select Settings Audio Settings Advisory Tones OK . . . then ¤...
- Page 36 Setting the handset Dialling a number ¤ Press and hold the digit key . . . the number is dialled immediately ¤ Briefly press the digit key . . . the number/name (possibly in abbreviated form) is shown on the left display key .
- Page 37 Setting the handset Changing the name of a connection (line) (only on a CAT-iq router) ¤ . . . use to select Settings Telephony Connections OK . . . all available connections (lines) are displayed . . . use to select connection Connection Name .
- Page 38 Setting the handset Resetting the handset to the default settings Reset any individual settings and changes that you have made. ¤ . . . use to select Settings System Handset Reset Yes . . . the handset's settings are reset The following settings are not affected by a reset •...
-
Page 39: Appendix
Please have your proof of purchase ready when calling. Please note that if the Gigaset product is not sold by authorised dealers in the national territory the product may not be fully compatible with the national telephone network. It is clearly specified on the box near the CE mark for which country/countries the equipment has been developed. - Page 40 This Guarantee shall apply to new devices purchased in the European Union. For Products sold in the United Kingdom and in the Republic of Ireland the Guarantee is issued by: Gigaset Communications UK Limited, 2 White Friars, Chester, CH1 1NZ.
-
Page 41: Manufacturer's Advice
Switzerland) is subject to national approval. Country-specific requirements have been taken into consideration. Hereby, Gigaset Communications GmbH declares that the radio equipment type Gigaset C570HX is in compli- ance with Directive 2014/53/EU. The full text of the EU declaration of conformity is available at the following internet address: www.gigaset.com/docs. - Page 42 Manufacturer's advice Care Wipe the device with a damp cloth or an antistatic cloth. Do not use solvents or microfibre cloths. Never use a dry cloth; this can cause static. In rare cases, contact with chemical substances can cause changes to the device’s exterior. Due to the wide variety of chemical products available on the market, it was not possible to test all substances.
-
Page 43: Technical Data
Capacity: 750 mAh Handset operating times/charging times The operating time of your Gigaset depends on the capacity of the battery, its age and the way it is used. (All times are maximum possible times.) Standby time (hours) 320 / 190 * Talktime (hours) Operating time with 1.5 hours of calls per day (hours) - Page 44 Technical data Character charts Standard characters 9x 10x Press the relevant key several times. ä á à â ã ç ë é è ê ï í ì î ö ñ ó ò ô õ ß ü ú ù û ÿ ý...
-
Page 45: Display Icons
Display icons Display icons The following icons are displayed depending on the settings and the operating status of your telephone. Icons in the status bar Icon Meaning Icon Meaning Signal strength (No Radiation off ) Keypad lock activated 1% -100% Battery charge status: white, if Maximum Range on;... - Page 46 Display icons Display icons to indicate . . . Icon Meaning Icon Meaning External call Reminder for appointment Internal call Reminder for anniversary Establishing a call (outgoing call) Alarm call Connection established Countdown timer No connection established/ Answer machine is recording connection terminated Other display icons Icon...
-
Page 47: Index
Index Index ... . . Charge status of the batteries Charging cradle (handset) ......Advisory tones . - Page 48 Index ..........Entering umlauts handsfree .
- Page 49 Index ........settings Switching the ringtone on/off .
- Page 50 Issued by Gigaset Communications GmbH Frankenstr. 2a, D-46395 Bocholt © Gigaset Communications GmbH 2017 Subject to availability. All rights reserved. Rights of modification reserved. www.gigaset.com Apple, the Apple logo and iPhone are trademarks of Apple Inc., registered in the U.S. and other countries.
Need help?
Do you have a question about the C570HX and is the answer not in the manual?
Questions and answers