CARDIOSTRONG RX40 Assembly And Operating Instructions Manual
For more information, please visit cardiostrong.com, sport-tiedje.com

Related Manuals for CARDIOSTRONG RX40


Summary of Contents for CARDIOSTRONG RX40
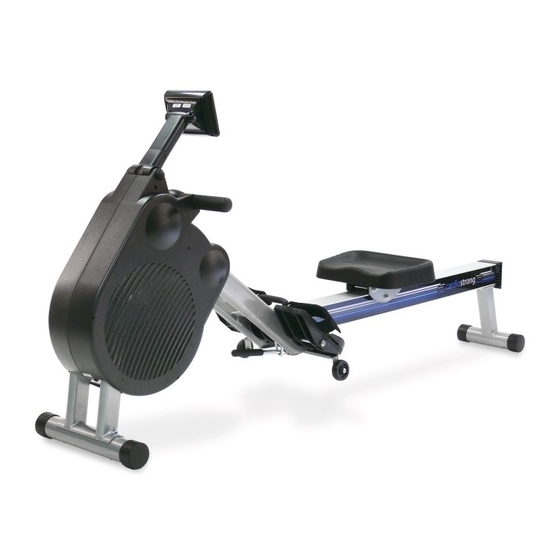
- Page 1 Assembly and Operating Instructions CSTRx40.01.02 Art. No. CST-RX40 Rowing machine RX40...
- Page 2 RX40...
-
Page 3: Table Of Contents
Content GENERAL INFORMATION Technical Data Personal Safety Electrical Safety Set-Up Place ASSEMBLY General Instructions Scope of Delivery Assembly Operation instructions / Adjustments OPERATING INSTRUCTIONS Console Display Button Functions Turning on the equipment Programs 3.4.1 Pacer program - also called Pace boat program 3.4.2 Race program 3.4.3... - Page 4 DISPOSAL RECOMMENDED ACCESSORIES ORDERING SPARE PARTS Serial Number and Model Name Parts List Exploded Drawing WARRANTY CONTACT RX40...
- Page 5 With cardiostrong® fitness equipment, the focus is on what sport is all about: maximum performance! Therefore, the equipment is developed in close consultation with athletes and sports scientists.
- Page 6 This notice indicates potentially hazardous situations which, if not avoided, will result in death or serious injuries! NOTICE This notice indicates further useful information. Retain these instructions in a safe place for future reference, maintenance or when ordering replacement parts. RX40...
-
Page 7: General Information
GENERAL INFORMATION Technical Data LCD - display of strokes, beats per minute training time in min training distance in m Time/500 m: average / current calories burnt heart rate (when using the hand sensors or a chest strap) Watt resistance level Resistance system: combination of air and magnetic resistance Resistance level: Watt:... -
Page 8: Personal Safety
Make sure that nobody is within the range of motion of the equipment during training so as not to endanger you or other persons. ࣑ ATTENTION Do not insert any objects of any kind into the openings of the device. RX40... -
Page 9: Electrical Safety
Electrical Safety DANGER ⚠ In order to reduce the risk of an electric shock, always unplug the equipment from the mains socket immediately after your workout, before assembly or dismantling, and before maintenance or cleaning. Do not pull on the cable. ⚠... -
Page 10: Set-Up Place
(over 70%) like swimming pools. A floor protective mat/equipment underlay can help to protect high-quality floor coverings (parquet, laminate, cork, carpets) from dents and sweat and can help to level out slight unevenness. Training zone Recommended free zone RX40... -
Page 11: Assembly
ASSEMBLY General Instructions ⚠ DANGER Do not leave any tools, packaging materials such as foils or small parts lying around, as otherwise there is a danger of suffocation for children. Keep children away from the equipment during assembly. ⚠ WARNING Pay attention to the instructions attached to the equipment in order to reduce the risk of injuries. -
Page 12: Scope Of Delivery
In the event of complaints, the contractual partner must be contacted directly. CAUTION ⚠ If parts of the scope of delivery are missing or damaged, the assembly must not be carried out. RX40... -
Page 13: Assembly
⚠ CAUTION Before unpacking the RX40, make sure you have a 2m x 2.5m working area. NOTICE First loosely screw all parts together and check that they fit properly. Tighten the screws using the tool only when you are instructed to do so. - Page 14 (007) on the aluminum rail (001) with four screws (300), four washers (401) and the rear screw plate (007A). Step 4: Mounting the end cap Mount the end cap (116) on the aluminum rail (001) with a screw (301). RX40...
- Page 15 Step 5: Mounting the front supporting food Mount the front supporting foot (005) with two screws (306A), two nuts (201A) and two washers (403). Step 6: Mounting the transport holder Press the locking lever (028A) down and lift the rotation angle (003) down until you hear it click.
- Page 16 Mount the right base (021) with the previously loosened nut (200) and washer (401). Move the pedal axle (012A) with a washer (402) through the frame (002) and mount it with a nut (200) and a washer (401), see figure below. Repeat the process for the left side. RX40...
- Page 17 Step 8: Connecting the two rowing machine parts Loosen the six screws (300), six washers (401), two stop bumpers (124) and two washers (402) from the rotation angle (003). ⚠ CAUTION Within the next step, make sure that the handle (003A) does not touch the rotation angle (003) in order to avoid scratches.
- Page 18 The equipment must not be connected to a multiple socket, otherwise it cannot be guaranteed that the equipment will be supplied with sufficient power. Technical errors can result. Plug the power plug (715) into a wall outlet that complies with the instructions in the chapter on electrical safety. RX40...
-
Page 19: Operation Instructions / Adjustments
Operation instructions / Adjustments Sit safely Sit safely on the rowing machine. Please make sure to sit directly on the seat, when it is placed under your body. Stand with spread legs above the aluminum rail. Place the seat directly under your body. Please make sure that when you sit down that the seat remains in this position. - Page 20 For safety reasons, please make sure while exercising that the pull rope does not touch the console. Hold the console with both hands as shown in the upper figure. Turn and swivel the console to the desired height and angle. RX40...
-
Page 21: Operating Instructions
OPERATING INSTRUCTIONS NOTICE Familiarise yourself with all the functions and setting options of the device before starting training. Have the proper use of this product explained to you by a specialist. Console Display Here, the program profiles and text messages are displayed. BAR CHART 8 rows high = 16 resistance levels 16 columns long = 16 times intervals... -
Page 22: Button Functions
Hold Enter for three seconds in order to skip the selection process. ENTER While exercising (training mode) Three functions Press Enter to change the bar chart. NOTICE It only refers to the HRC programs, Watt programs, and training programs. RX40... -
Page 23: Turning On The Equipment
Before the training (menu mode) Press Start in order to start the training. While exercising (training mode) START/STOP Press Stop to stop the training. NOTICE Three The console changes automatically to the training final display. functions At any time Hold Reset for three seconds to reset the console to the main menu. NOTICE Current data are deleted. -
Page 24: Programs
Choose one of four existing users (U1 – U4) or the GUEST USER with the Select buttons (+/-). Confirm with Enter. 3a. Time/500m Choose the TIME/500m with the Select buttons (+/-) or go to step 3b. Confirm with Enter. RX40... - Page 25 3b. Time and Distance Press Enter to skip the setting TIME/500m. Enter a time with the Select buttons (+/-). Confirm with Enter. Enter a distance (meters) with the Select buttons (+/-). Confirm with Enter. Press Start to start your training immediately. 4.
-
Page 26: Race Program
7. Ready = Start rowing When you have come to the end of the selection process, READY flashes on the console and you can start rowing. NOTICE While exercising, you can adjust the resistance level with the Select buttons (+/-). RX40... -
Page 27: Interval Distance & Interval Time Programs
3.4.3 Interval distance & interval time programs Both programs are designed for interval training – intensive training intervals alternate with short intervals of rest. It is scientifically proved that interval training burns more calories than classic cardio training. Due to an increased intensity, you should always make sure that you do not stress your body too much. - Page 28 10. Ready = Start rowing When you have come to the end of the selection process, READY flashes on the console and you can start rowing. NOTICE While exercising, you can adjust the resistance level with the Select buttons (+/-). RX40...
-
Page 29: 60%, 75%, 90% Heart Rate Controlled Programs
3.4.4 60%, 75%, 90% heart rate controlled programs ⚠ WARNING Your training equipment is not a medical device. The heart rate measurement of this equipment may be inaccurate. Various factors can affect the accuracy of the heart rate measurement. The heart rate measurement serves only as a training aid. -
Page 30: Thr - Target Heart Rate Program
We recommend to exercise with 60% of the maximum heart rate at the beginning and only increase the level, when your fitness has been improved. NOTICE The recommend maximum heart rate is 220 – age. Choose a target heart rate between 30 – 220 bpm (in 1 bpm increments). RX40... - Page 31 1. HCR program From the main menu, press the Select buttons (+/-) to scroll and select the HRC program. Confirm with Enter. Press Menu to return to the main menu. 2. User selection Choose one of four existing users (U1 – U4) or the GUEST USER with the Select buttons (+/-). Confirm with Enter.
-
Page 32: Watt Program
6. Ready = Start rowing When you have come to the end of the selection process, READY flashes on the console and you can start rowing. NOTICE While exercising, you can adjust the Watt number with the Select buttons (+/-). RX40... -
Page 33: Training Programs
3.4.7 Training programs The console adapts automatically the resistance level to the chosen training program. You can choose from 16 different training programs. FARTLEK Fartlek is a Swedish word for speed play and is a training type, which was developed in the 30ies of the 20th century. - Page 34 8. Ready = Start rowing When you have come to the end of the selection process, READY flashes on the console and you can start rowing. NOTICE While exercising, you can adjust the resistance level with the Select buttons (+/-). RX40...
-
Page 35: Performance Test
3.4.8 Performance Test Fitness Test A fitness test of five minutes, which evaluates your fitness based upon your recovery heart rate. You need to wear a chest strap for heart rate transmission throughout the test. Row as quickly as you can to achieve your maximum heart rate. - Page 36 POOR FITNESS 30~39 UNFIT 20~29 VERY UNFIT 10~19 EXTREMELY UNFIT 1. Activating the recovery program Press the recovery button right after the training. 2. Returning to main menu Press the menu button to return to the main menu. RX40...
-
Page 37: User Data
3.4.9 User Data Create a new user and enter the user data. The console can save user data for four different users. The saved information is used in combination with the % heart rate programs as well as for calculating the calorie consumption. Furthermore, they are used for determining the BMI, BMR, and TDEE. - Page 38 Choose the resistance level with the Select buttons (+/-) and confirm with Enter. Repeat this step until the training profile is complete. NOTICE Hold Enter to skip the remaining segments. This function is very practical, when you only want to make small changes of your training profile. RX40...
- Page 39 Delete a user Delete an existing user. 1. Delete user Choose USER DEL in the main menu with the Select buttons (+/-) and confirm with Enter. Press Menu to return to the main menu. 2. User selection Choose one of the four possible existing users with the Select buttons (+/-) and confirm with Enter. 3.
-
Page 40: Further Information
When you try to lose weight, you have to reduce the intake of calories. However, it should not happen too quickly, because it might affect your metabolism in a negative way. RX40... - Page 41 Target values Target values for time, distance, strokes, and calories are optional. When you do not choose a target value, the console counts starting from zero. When you set one or several of those target values, the console counts down to zero. The console stops the training and an alarm sounds once the first target value is achieved.
- Page 42 Four times a week= MODERATE ACTIVE moderate training three to five times a week Seven times a week= VERY ACTIVE hard training six to seven times a week Nine times a week= EXTREMELY ACTIVE daily, extremely active or physical work RX40...
- Page 43 Resistance selection RESISTANCE LEVEL 6 (1 to 6 in 1 level increments) Target values TIME 20 minutes (1:00 to 99:00 minutes and seconds in 1 minute increments) DISTANCE 2000 m (100 to 9900 m in 100 m increments) STROKES 300 strokes (10 to 9990 strokes in 10 strokes increments) CALORIES 160 calories (10 to 9990 calories in 10 calories increments) Maximum alarm...
-
Page 44: Notes On Correct Rowing
Right Pull the handle to the body with straight wrists and the elbows close to the body. The elbows are brought behind the head while the handle is pulled to your waist. RX40... - Page 45 Do not completely extend Wrong At the end of the movement, the user completely stretches the leg and knee. Right Keep your knee slightly bent at all times even at the end of the movement instead of stretching it completely. Leaning too far forward Wrong The body is bent too far forward.
- Page 46 Right The user begins by stretching out the legs, relaxing the back and stretching the arms. Bent wrists Wrong The user bents the wrists during the movement. Right Always execute the rowing movement with straight wrists. RX40...
-
Page 47: Storage And Transport
STORAGE AND TRANSPORT General Instructions ࣑ ATTENTION Make sure that the equipment is protected from moisture, dust and dirt in the selected storage location. The storage location should be dry and well ventilated and have a constant ambient temperature between 5°C and 45°C. WARNING ⚠... -
Page 48: Folding The Rowing Machine
After that, you easily can move the equipment to a new position. For long transport distances the equipment should be disassembled and safely packed. Select the new location by following the instructions in the section 1.4 of this manual. RX40... -
Page 49: Troubleshooting, Care And Maintenance
TROUBLESHOOTING, CARE AND MAINTENANCE General Instructions ⚠ WARNING Do not make any improper changes to the equipment. CAUTION ⚠ Damaged or worn components may affect your safety and the life of the equipment. Therefore, immediately replace damaged or worn components. In such a case, contact the contract partner. -
Page 50: Maintenance And Inspection Calendar
The materials can be recycled as per their symbols. Through the reuse, recycling of materials or other forms of recovery of old equipment, you make an important contribution to the protection of the environment. RX40... -
Page 51: Recommended Accessories
RECOMMENDED ACCESSORIES To make your training experience even more efficient and pleasant, we recommend that you add suiting accessories to your fitness equipment. This could be a floor mat, for example, which makes your fitness equipment stand more securely and also protects the floor from falling sweat, but it could also be additional handrails on some treadmills or silicone spray to keep moving parts in good shape. -
Page 52: Ordering Spare Parts
The exact position of this sticker is shown in the following illustration. Enter the serial number in the appropriate field. Serial number: Brand / Category: cardiostrong / rowing machine Model Name: RX40 Article Number: CST-RX40 ... -
Page 53: Parts List
Parts List Name Qty. Name ALUMINUM BEAM 118A SEAT CARRIAGE - GUIDE ROLLER MAIN FRAME 120A STRAP COVER PIVOT BRACKET PLUG 003A PIVOT HANDLE FOAM GRIP HANDLE GRIP 123A PIVOT LOCK BAR HANDLE COVER 1 004A TRANSPORTATION SEAT CARRIAGE STOPPER BRACKET STABILIZER - FRONT NUT COVER... - Page 54 708A PIVOT LOCK BAR SPRING SPRING WASHER DRIVE STRAP ASSEMBLY WASHER CHEST BAND RECEIVER 405A WASHER AC ADAPTOR CABLE SPACER COMPUTER 409A SPACER AC ADAPTOR 412A WASHER BALL BEARING SCREW BALL BEARING SCREW BALL BEARING SCREW BALL BEARING RX40...
-
Page 55: Exploded Drawing
Exploded Drawing... -
Page 56: Warranty
WARRANTY Training equipment from cardiostrong® is subject to strict quality control. However, if a fitness equipment purchased from us does not work perfectly, we take it very seriously and ask you to contact our customer service as indicated. We are happy to help you by phone via our service hotline. - Page 57 Warranty Service Within the warranty period, equipment which develops faults as a result of material or manufacturing defects, will be repaired or replaced at our discretion. Ownership of equipment or parts of equipment which have been replaced is transferred to us. The warranty period is not extended nor does a new warranty period begin following repair or replacement under the warranty.
-
Page 58: Contact
Mo - Fr 08:00 - 18:00 09:00 - 18:00 09:00 - 18:00 Please find a detailed overview including address and opening hours for all stores of the Sport-Tiedje Group in Germany and abroad on the following website: www.sport-tiedje.com/en/stores RX40... - Page 59 LIVE FITNESS WEBSHOP AND SOCIAL MEDIA Sport-Tiedje is Europe’s largest specialist store for www.sport-tiedje.co.uk home fitness equipment with currently 80 stores www.sport-tiedje.de/blog and one of the world’s most renowned online mail order companies for fitness equipment. Private customers order via the 25 web shops www.facebook.com/SportTiedje in the respective national language or have their desired equpiment assembled on site.
- Page 60 Notes RX40...
- Page 61 Notes...
- Page 62 Notes RX40...
- Page 64 Rowing machine RX40...
Need help?
Do you have a question about the RX40 and is the answer not in the manual?
Questions and answers