Advertisement
Table of Contents
- 1 Table of Contents
- 2 General Installation Procedure
- 3 Amplifier Feature Descriptions
- 4 P1-600.2 / P1-1000.2 2-Channel Amplifier Applications
- 5 Full Range Stereo / Mono
- 6 P1-600.4 / P1-1000.4 4-Channel Amplifier Applications
- 7 P1-600.4 / P1-1000.4 4-Channel Amplifier Applications
- 8 Parallel Mono
- 9 P1-5000.5 5 Channel Amplifier Applications
- 10 Features and Specifications
- 11 Setting up Systems after Installation for Best Performance
- 12 Troubleshooting a System
- 13 Troubleshooting and Diagnostics
- 14 Product Warranty
- Download this manual
Advertisement
Table of Contents

Summary of Contents for Crunch PowerOne P1-1000.2
- Page 1 P1-600.2 / P1-1000.2 P1-600.4 / P1-1000.4 P1-2000.1 / P1-5000.5...
-
Page 2: Table Of Contents
POWER ONE SERIES AMPLIFIERS The Power One Series products have been designed to a very high level of performance, with features unavailable in any other product. All of the amplifiers have variable crossovers built in, with added touches such as subsonic filter, bass equalization and a remote Level control module (some models) that allows subwoofer Level control from the drivers seat. -
Page 3: General Installation Procedure
GENERAL INSTALLATION PROCEDURE System Design The success of any car stereo system relies on several factors, such as the system design, execution of the installation, and system setup. Please remember that any system is only as good as its weakest link. Please remember that higher power systems are not necessarily useful purely for high sound pressure levels, but also to establish a headroom capability, to reproduce musical peaks cleanly without distortion. -
Page 4: Amplifier Feature Descriptions
BASS EQ: Is adjustable from 0dB to 12dB for channel 5 only. REMOTE: this is used for the Bass Remote module. All Crunch amplifiers feature a comprehensive diagnostic system, with speaker lead short circuit, and amplifier DC faults indicated by the red “PROTECT” LED. -
Page 5: P1-600.2 / P1-1000.2 2-Channel Amplifier Applications
N/A for full range operation. FULL RANGE STEREO LINE INPUT MONO This application illustrates the basic mono bridging method for all Crunch amplifiers. Interconnect cable checklist: A MONO signal source is required, such as would be available from the mono sub bass output of an active crossover, whether stand alone, or built into a head unit or equalizer. -
Page 6: P1-600.4 / P1-1000.4 4-Channel Amplifier Applications
Here we show how to use the 4 channel amplifiers as a 3 channel unit by taking advantage of the mono bridging capability of all Crunch amplifiers. The following example shows how to create a 3 channel system by mono bridging channel pair 3 / 4. -
Page 7: P1-600.4 / P1-1000.4 4-Channel Amplifier Applications
P1-600.4 / P1-1000.4 4-CHANNEL AMPLIFIER APPLICATIONS Front/Rear high pass, using a 2 channel amplifier for mono sub bass The combination of a 2 and a 4 channel amplifier, utilizing their built in crossovers, makes it a snap to put together a full system with front and rear highs, with mono sub bass. -
Page 8: Parallel Mono
P1-2000.1 MONO AMPLIFIER APPLICATION Basic application These sub bass amplifiers can be used in any of the bi-amplification systems described in this manual, replacing the 2 channel amplifiers as per the illustrations. Interconnect cable checklist: Connect the inputs to a suitable source, e.g. a head unit with good quality RCA cables. Connect the LINE OUT to the inputs of the system highs amplifier. -
Page 9: P1-5000.5 5 Channel Amplifier Applications
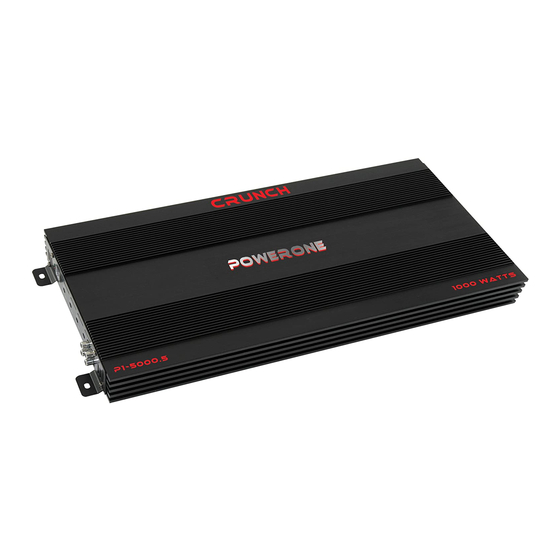
P1-5000.5 5-CHANNEL AMPLIFIER APPLICATION Basic application Here we show how to use the channel amplifier as straightforward discrete 5 channel full range units. Interconnect cable checklist: - Connect the four inputs of the amplifier to a Radio/CD with quality RCA cables. Switch setting checklist: - 1/2CH X-OVER: FULL - 3/4CH X-OVER: FULL... -
Page 11: Setting Up Systems After Installation For Best Performance
SETTING UP SYSTEMS AFTER INSTALLATION FOR BEST PERFORMANCE P1-600.2 / P1-1000.2 / P1-600.4 / P1-1000.4 / P1-5000.5 General: At this point you are ready to get more specific on the settings for your amplifier. High Pass: -When in HPF operation, this setting acts as a low frequency cut off for your system reproduction. The point that you set it at cuts off any frequencies from reproduction beyond this point. The 12 o’clock position is a great starting point. -
Page 12: Troubleshooting And Diagnostics
The key to finding the problem in a misbehaving sound system is to isolate parts of that system in a logical fashion to track down the fault. Description of the PROTECT system built into all Crunch amplifiers The diagnostic system will shut down the amplifier, until reset by turning the head unit off, and back on. This state of affairs will be indicated by the front panel PROTECT LED lighting up under the following conditions: 1 - A sort circuit on the loudspeaker leads. -
Page 13: Product Warranty
Maxxsonics Limited Warranty As the manufacturer of Maxxsonics, MB Quart, Autotek, Crunch and Hifonics car audio products, Maxxsonics USA Inc. Warrants to the original consumer purchaser the amplifier to be free from defects in material and workmanship for one (1) Year from date of purchase.


Need help?
Do you have a question about the PowerOne P1-1000.2 and is the answer not in the manual?
Questions and answers