DataRemote POTS in a BOX CDS-9010 User Manual
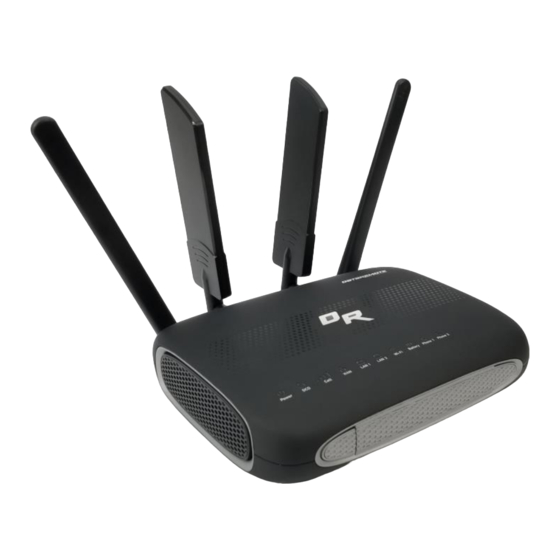
Lte voip dual band wi-fi router
Hide thumbs
Also See for POTS in a BOX CDS-9010:
- Quick start manual (2 pages) ,
- User manual (28 pages)

Related Manuals for DataRemote POTS in a BOX CDS-9010


Summary of Contents for DataRemote POTS in a BOX CDS-9010
- Page 1 Copyright © 2019 - All rights reserved by DataRemote Incorporated V1.0 ® POTS in a BOX CDS-9010 LTE VoIP Dual Band Wi-Fi Router User Manual V1.3...
-
Page 2: Table Of Contents
Copyright © 2019 - All rights reserved by DataRemote Incorporated V1.0 Table of Contents Preface ............................................................5 LED Indicators and Connectors ....................................................6 LED Indicators ......................................................6 DC ..............................................................7 Connector for a power adapter....................................................7 WAN ............................................................. 7 Connector for accessing the Internet. - Page 3 Copyright © 2019 - All rights reserved by DataRemote Incorporated V1.0 4.10.1 Calling phone or extension numbers ..............................................30 4.10.2 Direct IP calls ..................................................... 30 4.10.3 Call Hold ......................................................31 4.10.4 Blind Transfer ....................................................31 4.10.5 Attended Transfer ....................................................31 4.10.6...
- Page 4 Copyright © 2019 - All rights reserved by DataRemote Incorporated V1.0 5.8.5 TR069 ........................................................ 68 System Log ........................................................ 69 5.9.1 Logout ........................................................ 70 5.9.2 Reboot ........................................................ 70 Trouble shooting of the guide ....................................................71 Setting your PC to get IP automatically ..............................................71 Cannot connect to the configuration Website ............................................
-
Page 5: Preface
Copyright © 2019 - All rights reserved by DataRemote Incorporated V1.0 1 Preface Thank you for choosing CDS9010 wireless router with VoIP. This product will allow you to make ATA call using your broadband connection and provides Wi-Fi router function. -
Page 6: Led Indicators And Connectors
Copyright © 2019 - All rights reserved by DataRemote Incorporated V1.0 2 LED Indicators and Connectors Before you use the high-speed router, please get acquainted with the LED indicators and connectors first. 2.1 LED Indicators Front Panel Status Explanation On (GREEN) The router is powered on (External Power) and running normally. -
Page 7: Connector For A Power Adapter
Copyright © 2019 - All rights reserved by DataRemote Incorporated V1.0 Rear Panel Interface Description Connector for a power adapter. Connector for accessing the Internet. LAN1/2 Connectors for local networked devices. Phone 1/2 Connectors for analog phones... -
Page 8: Hardware Installation
Copyright © 2019 - All rights reserved by DataRemote Incorporated V1.0 2.2 Hardware Installation Before starting to configure the router, you have to connect your devices correctly. Step 1.Connect Line port to land line jack with a RJ-11 cable. Step 2.Connect the WAN port to a modem or switch or router or Internet with an Ethernet cable. -
Page 9: Interactive Voice Response
Copyright © 2019 - All rights reserved by DataRemote Incorporated V1.0 3 Interactive Voice Response In any circumstance, pressing the following command to enter relevant function. The following table lists command, and description. Voice Menu Setting Options Operation code Contents Step 1.Pick up phone and press “****”... - Page 10 Copyright © 2019 - All rights reserved by DataRemote Incorporated V1.0 Step 1.Pick up phone and press “****” to start IVR Step 2.Choose “6”, and CDS9010 report “Factory Reset” Step 3.Prompt "Please enter password", the method of inputting password is the same as operation 1.
- Page 11 Copyright © 2019 - All rights reserved by DataRemote Incorporated V1.0 Notice: ◆ When using Voice Menu, press * (star) to return the main menu. ◆ If any changes made in the IP assignment mode, please reboot the CDS9010 to take the setting into effect.
-
Page 12: Configuring Basic Settings
Copyright © 2019 - All rights reserved by DataRemote Incorporated V1.0 4 Configuring Basic Settings 4.1 Administrator Management This chapter explains how to setup a password for an administrator user and how to adjust settings for accessing Internet successfully. CDS9010 supports two-level management: administrator and user. For administrator mode operation, please type Username/Password and click Login button to configuration. -
Page 13: Accessing Web Page
Copyright © 2019 - All rights reserved by DataRemote Incorporated V1.0 4.2 Accessing Web Page 4.2.1 From LAN port 1. Make sure your PC have connected to the router’s LAN port correctly. Notice: You may either simply set up your computer to get IP dynamically from the router or set up the IP address of the computer to be the same subnet as the default IP address of router is 192.168.1.1. - Page 14 Copyright © 2019 - All rights reserved by DataRemote Incorporated V1.0 Notice: If you fail to access to the web configuration, please go to “Trouble Shooting” for detecting and solving your problem. 4. The web page can be logged out after 5 minutes without any operation.
-
Page 15: Webpage
Copyright © 2019 - All rights reserved by DataRemote Incorporated V1.0 4.3 Webpage Name Description Click navigation bar, many sub-navigation bar will Navigation bar appear in the place 2 Click sub-navigation choose Title configuration page Parameter To configuration the parameters ◆... -
Page 16: Setting Up The Time Zone
Copyright © 2019 - All rights reserved by DataRemote Incorporated V1.0 4.4 Setting up the Time Zone Open Administration/Management webpage as shown below, please select the Time Zone for the router installed and specify the NTP server and set the update interval in NTP synchronization. - Page 17 Copyright © 2019 - All rights reserved by DataRemote Incorporated V1.0 have a public subnet, you could assign an IP address to the WAN interface. WAN IP Mode The mode for obtain IP address LAN Connection Select to NAT or Bridge...
-
Page 18: Dhcp
Copyright © 2019 - All rights reserved by DataRemote Incorporated V1.0 4.5.2 DHCP It is not necessary for you to type any IP address manually. Simply choose this type and the system will obtain the IP address automatically from DHCP server. - Page 19 Copyright © 2019 - All rights reserved by DataRemote Incorporated V1.0 WAN IP The mode for obtain IP address Mode Connection Select to NAT or Bridge Mode Set the DNS Mode from Auto and Manual, If user choose manual, you should fill the primary DNS...
-
Page 20: Setting Up The Internet/Lte Connection
Copyright © 2019 - All rights reserved by DataRemote Incorporated V1.0 4.6 Setting up the Internet/LTE Connection 4.6.1 LTE LTE Modem Select to Disable, Auto Connect and Enable Always Connect. GSM Call Enable GSM voice call Enable Connection 4G connection type ,auto or manual... - Page 21 Copyright © 2019 - All rights reserved by DataRemote Incorporated V1.0 When LTE connected successfully, return the Status page, you can check the link status and the IP address obtained from the ISP. Note, this is a sample screenshot and certain fields will populate differently based on device model and included radio version.
-
Page 22: Setting Up The Wireless Connection
Copyright © 2019 - All rights reserved by DataRemote Incorporated V1.0 4.7 Setting up the Wireless Connection To set up the wireless connection, please skip the following steps. 4.7.1 Enable Wireless and Setting SSID Open 2.4G (5G) /Basic webpage as shown below Radio On/Off Select to enable or disable wireless. - Page 23 Copyright © 2019 - All rights reserved by DataRemote Incorporated V1.0 point (AP) form a basic access device (BSS), each computer in the BSS must be configured with the same BSSID. Frequency Choose channel frequency. In HT (High Throughput) Physical...
-
Page 24: Encryption
Copyright © 2019 - All rights reserved by DataRemote Incorporated V1.0 4.7.2 Encryption Open 2.4G (5G)/Security webpage to set the encryption of routers. WAP-PSK/WAP2-PSK/WAPPSKWAP2PSK Choose one SSID from Off-premises SSID Choice 1, off-premises 2 and Premises. Unless one of these encryption... - Page 25 Copyright © 2019 - All rights reserved by DataRemote Incorporated V1.0 OPENWEP card also need to correspond to this. Set the WEP key. Select 64-bit key to enter Hex is 10 characters, or ASCII WEP Keys code is 5characters; select 128-bit keys need to enter Hex is 26 characters, or ASCII is 13characters.
-
Page 26: Setting Up Wan Failover
Copyright © 2019 - All rights reserved by DataRemote Incorporated V1.0 4.8 Setting up WAN Failover 4.8.1 WAN Failover List WAN Failover works in multiple outbound links to assure that you maintain Internet connectivity if a loss of connectivity occurs on one of your WAN connections. -
Page 27: Connection Manager
Copyright © 2019 - All rights reserved by DataRemote Incorporated V1.0 4.8.2 Connection Manager Enable this function, WAN Failover is based on ping result. Disable this Enable function, WAN Failover is based on each interface physical status. Detect Interval time for detecting WAN Interval connection. -
Page 28: Register
Copyright © 2019 - All rights reserved by DataRemote Incorporated V1.0 4.9 Register 4.9.1 Get the Accounts CDS9010 has 2 RJ-11 phone port jacks, you can use it to make a SIP call, and before registering, you should get the SIP account from your administrator or provider. -
Page 29: View The Register Status
Copyright © 2019 - All rights reserved by DataRemote Incorporated V1.0 4.9.4 View the Register Status To view the status, please open Status webpage and view the value of register status. The value is registered like the following picture which... -
Page 30: Make Call
Copyright © 2019 - All rights reserved by DataRemote Incorporated V1.0 4.10 Make Call 4.10.1 Calling phone or extension numbers To make a phone or extension number call: a) Both ATA and the other VoIP device (i.e., another ATA or other SIP products) have public IP addresses, or b) Both ATA and the other VoIP device (i.e., another ATA or other SIP products) are on the same LAN using private or public IP addresses, or... -
Page 31: Call Hold
Copyright © 2019 - All rights reserved by DataRemote Incorporated V1.0 4.10.3 Call Hold While in conversation, pressing the “*77” to put the remote end on hold, then you will hear the dial tone and the remote party will hear hold tone at the same time. -
Page 32: Web Configuration
Copyright © 2019 - All rights reserved by DataRemote Incorporated V1.0 5 Web Configuration This chapter will guide users to execute full configuration through admin mode operation. 5.1 Login Step 1.Connect the LAN port of the router to your PC Step 2.Open a web browser on your PC and type in http://192.168.1.1. -
Page 33: Status
Copyright © 2019 - All rights reserved by DataRemote Incorporated V1.0 5.2 Status This webpage shows the status information about product information, Network and system. It shows the basic information of the product, such as product name, serial number, MAC address, hardware version and software version. -
Page 34: Network
Copyright © 2019 - All rights reserved by DataRemote Incorporated V1.0 5.3 Network You can configuration the WAN port, LAN port, DDNS, Multi WAN,DMZ, MAC Clone,Port Forward and so on in these two bars. 5.3.1 WAN This page allows you to set WAN configuration with different modes. Use the Connection Type drop down list to choose one WAN mode and then the corresponding page will be displayed. - Page 35 Copyright © 2019 - All rights reserved by DataRemote Incorporated V1.0 DHCP: It is not necessary for you to type any IP address manually. Simply choose this type and the system will obtain the IP address automatically from DHCP server.
- Page 36 Copyright © 2019 - All rights reserved by DataRemote Incorporated V1.0 WAN IP The mode for obtain IP address Mode Connection Select to NAT or Bridge Mode Set the DNS Mode from Auto and Manual, If user choose manual, you should fill the primary DNS...
-
Page 37: Lan
Copyright © 2019 - All rights reserved by DataRemote Incorporated V1.0 5.3.2 LAN LAN Port: The most generic function of router is NAT. What NAT does is to translate the packets from public IP address to local IP address to forward the right packets to the right host and vice versa. -
Page 38: Vpn/L2Tp
Copyright © 2019 - All rights reserved by DataRemote Incorporated V1.0 5.3.3 VPN/L2TP VPDN VPN Enable Enable PPTP or L2TP VPN Client Initial Service IP VPN server IP address User Name The account for authentication Password The password for authentication... - Page 39 Copyright © 2019 - All rights reserved by DataRemote Incorporated V1.0 L2TP Server L2TP Server Enable Select to enable L2TP server. Local IP Address Set the IP address of L2TP server. Set the IP pool start IP address which Pool Start Address will assign to the L2TP clients.
- Page 40 Copyright © 2019 - All rights reserved by DataRemote Incorporated V1.0 IPsec Connection IPSec Connection List The connection status of IPSec VPN IPSec Connection Select the specify VPN Connection Name The name of this IPSec VPN IPSec Enable Select to enable or disable IPSec VPN...
- Page 41 Copyright © 2019 - All rights reserved by DataRemote Incorporated V1.0 Encapsulated Mode Select the security protocols Enable NAT Traversal for IPSec. This NAT Enable item must be enabled when router under NAT environment. Select from “Main” and “aggressive” Mode...
-
Page 42: Dmz/Port Forward
Copyright © 2019 - All rights reserved by DataRemote Incorporated V1.0 5.3.4 DMZ/Port Forward DMZ Enable If or not enable DMZ. Enter the private IP address of the DMZ Host IP Address DMZ host Get the current PC’s IP address... - Page 43 Copyright © 2019 - All rights reserved by DataRemote Incorporated V1.0 Port Forward Port Forwarding Assign a meaningful name for port Comment forwarding. IP Address The IP address in LAN side The port range for LAN host, from 1 to...
-
Page 44: Ddns
Copyright © 2019 - All rights reserved by DataRemote Incorporated V1.0 5.3.5 DDNS Select the DDNS service which you Dynamic DNS Provider have established an account with. Enter account that DDNS server Account provided. Enter password that DDNS server Password provided. - Page 45 Copyright © 2019 - All rights reserved by DataRemote Incorporated V1.0 Source port range of the service that Src.Port Range you want to set it with QoS Control. Destination port number of the service Dst.Port Range that you want to set it with QoS Control.
-
Page 46: Mac Clone
Copyright © 2019 - All rights reserved by DataRemote Incorporated V1.0 5.3.7 MAC Clone Some ISPs will require you to register your MAC address. If you do not wish to re-register your MAC address, you can have the router clone the MAC address that is registered with your ISP. -
Page 47: Routing
Copyright © 2019 - All rights reserved by DataRemote Incorporated V1.0 5.3.8 Routing The IP address of packets that will take Destination this route. Host/Net Select the Host or Networking Specifies the next hop to be taken if Gateway this route is used. -
Page 48: Wireless
Copyright © 2019 - All rights reserved by DataRemote Incorporated V1.0 5.4 Wireless 5.4.1 Basic Radio On/Off Select to enable or disable wireless. Wireless Select to AP or Client. WiFi Client Connection Mode would be option for Active WAN. Choose one network mode from the Network Mode drop down list. - Page 49 Copyright © 2019 - All rights reserved by DataRemote Incorporated V1.0 Mixed Mode: In this mode packets are transmitted with a preamble compatible with the legacy 802.11a/g, the rest of the packet has a Operating Mode new format. Green Field: In this mode high throughput packets are transmitted without a legacy compatible part.
-
Page 50: Security
Copyright © 2019 - All rights reserved by DataRemote Incorporated V1.0 5.4.2 Security Open 2.4G (5G)/Security webpage to set the encryption of routers. Choose one SSID from Off-premises SSID Choice 1, off-premises 2 and Premises. Unless one of these encryption... - Page 51 Copyright © 2019 - All rights reserved by DataRemote Incorporated V1.0 card also need to correspond to this. OPENWEP Set the WEP key. Select 64-bit key to enter Hex is 10 characters, or ASCII WEP Keys code is 5characters; select 128-bit keys need to enter Hex is 26 characters, or ASCII is 13characters.
-
Page 52: Station List
Copyright © 2019 - All rights reserved by DataRemote Incorporated V1.0 5.4.3 Station list You could monitor stations which associated to this AP here. 5.4.4 Client Enable WiFi Client would be one option for WAN Failover, select as the default route. -
Page 53: Voip Qos
Copyright © 2019 - All rights reserved by DataRemote Incorporated V1.0 5.4.5 VoIP QoS QoS services can improve the quality of voice applications. The default value is SIP QoS(0-63) 46, and the range of values can be set from 0 to 63. -
Page 54: Blacklist
Copyright © 2019 - All rights reserved by DataRemote Incorporated V1.0 5.4.7 Blacklist You can upload or download the phone book, blacklist. 5.4.8 Call Log On this page, users can view replay lists (outgoing calls), received calls, and missed calls. -
Page 55: Sip Account
Copyright © 2019 - All rights reserved by DataRemote Incorporated V1.0 5.5 SIP Account 5.5.1 FXS1/2 SIP Account Line Enable Select to enable or disable Line Outgoing Call without Select to enable or disable this function Registration Display Name The display name of this SIP number... - Page 56 Copyright © 2019 - All rights reserved by DataRemote Incorporated V1.0 Vocoder in 200OK SDP Codec Priority Select from local or remote Packet Cycle Follows Select to enable or disable Remote SDP FAX Mode Select from T.30/ T.38/ ByPass Bypass Attribute Value...
-
Page 57: Fxs1/2 Supplementary Service Subscription
Copyright © 2019 - All rights reserved by DataRemote Incorporated V1.0 5.5.3 FXS1/2 Supplementary Service Subscription Call Waiting Select to enable or disable Hot Line Fill in the hotline number. After the subscriber is set up successfully, the hotline number will be automatically... -
Page 58: Security
Copyright © 2019 - All rights reserved by DataRemote Incorporated V1.0 5.6 Security 5.6.1 Filtering Setting Filtering Select to enable or disable Default Policy Select from Drop or Accept Interface Select from LAN or WAN Mac address Fill MAC address for Filtering control... -
Page 59: Content Filtering
Copyright © 2019 - All rights reserved by DataRemote Incorporated V1.0 5.6.2 Content Filtering Filtering Select to enable or disable Default Policy Select from Drop or Accept Local File Select the local file for upload Current Webs Existing URL filtering rules (blacklist) - Page 60 Copyright © 2019 - All rights reserved by DataRemote Incorporated V1.0...
-
Page 61: Application
Copyright © 2019 - All rights reserved by DataRemote Incorporated V1.0 5.7 Application 5.7.1 Advance Nat In this page, you can choose to enable / disable FTP, SIP, H323, PPTP, L2TP, IPSec services. -
Page 62: Upnp
Copyright © 2019 - All rights reserved by DataRemote Incorporated V1.0 5.7.2 UPnP UPnP (Universal Plug and Play) supports null-setting for networking, can automatically find a variety of networked devices. When UPnP is enabled, UPnP- enabled devices are allowed to... -
Page 63: Administration
Copyright © 2019 - All rights reserved by DataRemote Incorporated V1.0 5.8 Administration 5.8.1 Management Save Config File Local File Select the local file for configuration Use this option to restore previously Upload saved router configuration settings. This option allows you to export and then... - Page 64 Copyright © 2019 - All rights reserved by DataRemote Incorporated V1.0 Management using VPN Select to enable or disable Remote Web Login Allow host remote access from Active Local Web Port Enter the HTTP port number for accessing from local side...
-
Page 65: Firmware Upgrade
Copyright © 2019 - All rights reserved by DataRemote Incorporated V1.0 Sync with host Synchronize with your current host's system time NTP Settings Select your local time zone from pull down menu. Primary NTP Server Type the primary Network Time Server for synchronization. -
Page 66: Scheduled Tasks
Copyright © 2019 - All rights reserved by DataRemote Incorporated V1.0 5.8.3 Scheduled Tasks Scheduled WiFi Enable Select to enable or disable SSID Choose the specified SSID for scheduled WiFi Scheduled Mode Select the Schedule mode for cycle time WiFi Work Time... -
Page 67: Provision
Copyright © 2019 - All rights reserved by DataRemote Incorporated V1.0 5.8.4 Provision Please refer to the provision user manual to test provision. Provision Enable Select to enable or disable Resync On Reset Enable or disable DIV378 Resync after rebooting... -
Page 68: Tr069
Copyright © 2019 - All rights reserved by DataRemote Incorporated V1.0 User Agent The name of user agent Profile Rule The URL of the configuration file Note that the specified file path is relative to the root directory of the... -
Page 69: System Log
Copyright © 2019 - All rights reserved by DataRemote Incorporated V1.0 5.9 System Log If you enable the system log in Status/syslog webpage, you can view the system log in this webpage. -
Page 70: Logout
Copyright © 2019 - All rights reserved by DataRemote Incorporated V1.0 5.9.1 Logout Press the logout button to logout, and then the login window will appear. 5.9.2 Reboot Press the Reboot button to reboot CDS9010. -
Page 71: Trouble Shooting Of The Guide
Copyright © 2019 - All rights reserved by DataRemote Incorporated V1.0 6 Trouble shooting of the guide 6.1 Setting your PC to get IP automatically Following are the process of setting your PC to get IP automatically Step 1.Click “begin”... -
Page 72: Cannot Connect To The Configuration Website
Copyright © 2019 - All rights reserved by DataRemote Incorporated V1.0 6.2 Cannot connect to the configuration Website Solution: Check to ensure the Ethernet cable is properly connected, then Check to ensure the URL is correct, the format of URL is: http:// the IP address: 8080, 8080 must be added, then Check to ensure the version of IE is IE8, or use another browser such as Firefox or Mozilla, then Contact your administrator, supplier, or ITSP for more information or assistance. -
Page 73: Statement
FCC Radiation Exposure Statement DataRemote Incorporated. Declares that this device is in compliance with the essential requirements. This equipment has been tested and found to comply with the limits for a Class B digital device, pursuant to part 15 of the FCC rules. These limits are designed to provide reasonable protection against harmful interference in a residential installation. - Page 74 Copyright © 2019 - All rights reserved by DataRemote Incorporated V1.0 This equipment complies with Part 15 of the FCC Rules. Operation is subject to the following two conditions: (1) This device may not cause harmful interference, and (2) This device must accept any interference received, including interference that may cause undesired operation.
Need help?
Do you have a question about the POTS in a BOX CDS-9010 and is the answer not in the manual?
Questions and answers