
Related Manuals for Zenith XBV 443


Summary of Contents for Zenith XBV 443
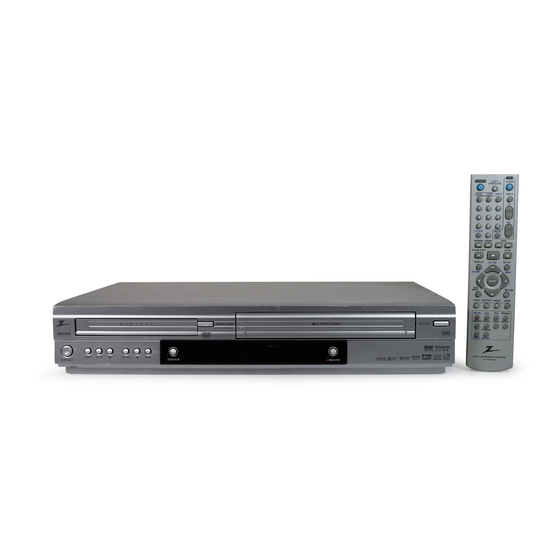
- Page 1 Installation and Operating Guide | Warranty Model Number | XBV443 | DVD Player + Video Cassette Recorder © Copyright 2004, LG Electronics U.S.A., Inc.
-
Page 2: Safety Precautions
Safety Precautions CAUTION RISK OF ELECTRIC SHOCK DO NOT OPEN CAUTION: TO REDUCE THE RISK OF ELECTRIC SHOCK DO NOT REMOVE COVER (OR BACK) NO USER-SERVICEABLE PARTS INSIDE REFER SERVICING TO QUALIFIED SERVICE PERSONNEL. This lightning flash with arrowhead symbol within an equilateral triangle is intended to alert the user to the presence of uninsulated dangerous voltage within the product’s enclosure that may be of... -
Page 3: Important Safety Instructions
IMPORTANT SAFETY INSTRUCTIONS CAUTION: PLEASE READ AND OBSERVE ALL WARNINGS AND INSTRUCTIONS IN THIS OWNER’S MANUAL. AND THOSE MARKED ON THE PRODUCT. RETAIN THIS BOOKLET FOR FUTURE REFERENCE. This product has been designed and manufactured to assure personal safety. Improper use can result in electric shock or fire hazard. -
Page 4: Table Of Contents
Table of Contents Introduction Safety Precautions ......2 IMPORTANT SAFETY INSTRUCTIONS ..3 Table of Contents . -
Page 5: Before Use
Before Use Playable Discs (8 cm/12 cm disc) Audio CD (8 cm/12 cm disc) In addition, this unit can play, Kodak Picture CDs DVD+R/RW, DVD-R/RW and CD-Rs or CD-RWs that contain audio titles, MP3, JPEG or WMA files. otes Depending on the conditions of the recording equipment or the CD-R/RW (or DVD±R/RW) disc itself, some CD-R/RW (or DVD±R/RW) discs cannot be played on the unit. -
Page 6: Precautions
Before Use (Continued) Precautions Handling the unit When shipping the unit The original shipping carton and packing materials come in handy. For maximum protection, re-pack the unit as it was originally packaged at the factory. When setting up the unit The picture and sound of a nearby TV, VCR, or radio may be distorted during playback. -
Page 7: Front Panel Controls
Front Panel Controls To scan up or down through memorized channels. OPEN/CLOSE (Z Z ) Opens or closes the disc tray. Disc Tray (DVD deck) Insert a disc here. DVD/VCR (output select) Select the DVD or VCR output source to view on the TV screen. X X /C C (PAUSE/STEP) Pause playback of a tape or a disc in the DVD or VCR deck... -
Page 8: Display Window
Display Window The DVD deck is selected. A disc is in the DVD deck. (Lights when a disc is in the DVD deck and Flashes when no disc.) Indicates when the Progressive scan is active. Indicates repeat mode. Indicates when the DVD+VCR is locked. DVD+VCR is in timer recording or a timer recording is programmed.(VCR part only) A cassette is in the VCR deck. -
Page 9: Remote Control
Remote Control POWER Turns DVD+VCR ON and OFF. Select the DVD+VCR function mode to Select the DVD+VCR function mode to INPUT Selects the VCR deck’s source (Tuner, LINE 1, or LINE 2). 0-9 numerical buttons Selects numbered options in a menu. Selects TV’s channel. -
Page 10: Connections Panel
Connections Panel VCR IN LINE 1 (VIDEO IN/AUDIO IN (Left/Right)) Connect the audio/video output of an external source (Audio system, TV/Monitor, Another VCR). DVD/VCR OUT (VIDEO/AUDIO (Left/Right)) Connect to a TV with video and audio inputs. COMPONENT/PROGRESSIVE SCAN VIDEO OUT (Y Pb Pr) (DVD OUT) Connect to a TV with Y Pb Pr inputs. -
Page 11: Connections
Connections Depending on your TV and other equipment you wish to connect, there are various ways you could connect the DVD+VCR. Use connections described on pages 11-13. Please refer to the manuals of your TV, VCR, Stereo System or other devices as necessary to make the best connections. -
Page 12: Basic Tv Connections
Connections (Continued) Basic TV Connections Make one of the following connections, depending on the capabilities of the equipment to be connected. RF coaxial connection Connect the RF.OUT jack on the DVD+VCR to the antenna in jack on the TV using the 75-ohm Coaxial Cable supplied (R). -
Page 13: Optional, Preferred Tv Connections
Connections (Continued) Optional, Preferred TV Connections You can ONLY listen to DVD playback using COAXIAL (X) and AUDIO OUT (A2) connections. The tuner and VCR will still be heard through the RF.OUT (R) or DVD/VCR AUDIO OUT (A1) jack. (See page 12.) Connecting to an amplifier equipped with two channel analog stereo or Dolby Surround Connect the Left and Right AUDIO OUT (or DVD/VCR... -
Page 14: Vcr Operation Setup
VCR Operation Setup On-Screen Display (OSD) Some of these functions will be displayed every time the DVD+VCR is operated. ❶ ❷ ❸ ❹ PLAY HI-FI CH 4 STEREO APR 30, FRI 2:15 PM ❻ ❼ ❶ TAPE SPEED DISPLAY Shows the current tape speed. ❷... -
Page 15: Vcr Setup Menu Options
VCR Operation Setup (Continued) VCR Setup Menu Options Press MENU and the MAIN menu will appear. Use v v /V V to select the SETUP menu, then press ENTER. The SETUP menu will appear. Use v v /V V to choose a desired option on the SETUP menu. -
Page 16: Setting The Clock
VCR Operation Setup (Continued) Setting the Clock The DVD+VCR gives you two ways to set the time and date: the Auto Clock Feature or manually. The Auto Clock feature enables the DVD+VCR to set up the clock while the DVD+VCR is turned off. Things to know before starting The clock uses the 12-hour system. -
Page 17: Dvd Operation Setup
DVD Operation Setup General Explanation This manual gives the basic instructions for operating the DVD+VCR. Some DVDs require specific operation or allow only limited operation during playback. When this occurs, the symbol appears on the TV screen, indicating that the operation is not permitted by the DVD+VCR or is not available on the disc. -
Page 18: Initial Settings
DVD Operation Setup (Continued) Initial Settings You can set your personal preferences on the DVD+VCR. General Operation Press SETUP. The Setup menu appears. Original Disc Audio Disc Subtitle English Disc Menu French Rating German Country Code Spanish TV Aspect Italian Menu Language Chinese Progressive Scan... -
Page 19: Sound
DVD Operation Setup (Continued) Sound Digital Audio Output Each DVD disc has a variety of audio output options. Set the DVD+VCR’s Digital Audio Output according to the type of audio system you use. DOLBY DIGITAL/PCM: Select DOLBY DIGITAL/PCM if you have connected the DVD+VCR’s DIGITAL AUDIO OUT jack to a Dolby Digital decoder (or an amplifier or other equipment with a Dolby Digital decoder). -
Page 20: Parental Control
DVD Operation Setup (Continued) Parental Control Rating Movies on DVDs may contain scenes not suitable for children. Therefore, discs may contain Parental Control information that applies to the complete disc or to certain scenes on the disc. These scenes are rated from 1 to 8, and alternatively, more suitable scenes are available for selection on some discs. -
Page 21: Vcr Operation
VCR Operation Normal Playback Preparation: Turn on the TV. Tune the TV to the DVD+VCR output channel (CH 3 or 4) or set the TV’s source selector to VIDEO. If a direct VIDEO/AUDIO connection is made between the DVD+VCR and the TV, set the TV’s source selector to VIDEO. -
Page 22: Normal Recording
VCR Operation (Continued) Normal Recording Preparation: Turn on the power of both the DVD+VCR and TV. Tune the TV to the DVD+VCR output channel (CH 3 or 4) or set the TV’s source selector to VIDEO. If a direct VIDEO/AUDIO connection is made between the DVD+VCR and the TV, set the TV’s source selector to VIDEO. -
Page 23: Timer Recording
VCR Operation (Continued) 1 1 0 0 Use V V to choose the SPEED option. Use b b /B B to choose the desired recording speed (AUTO, SP or SLP). AUTO mode determines how much tape is left and switches speed from SP to SLP, if necessary, to complete recording the program. -
Page 24: Instant Timer Recording
VCR Operation (Continued) Instant Timer Recording Instant Timer Recording allows you to make a recording easily of a preset length without using the program timer. Preparation: Turn on the power of both the DVD+VCR and the TV. Be sure the TV is tuned to the DVD+VCR output channel (3 or 4). -
Page 25: Vhs Hi-Fi Stereo System/Mts Broadcast
VCR Operation (Continued) VHS Hi-Fi Stereo System/ MTS Broadcast This DVD+VCR is equipped with the VHS Hi-Fi audio sound system for recording and playback. The informa- tion below gives a brief description of Hi-Fi audio and how to record and play a tape in the Hi-Fi audio mode. Playback with Hi-Fi Stereo Audio Sound A stereo TV with AUDIO/VIDEO input jacks or a stereo audio system is required for true stereo playback. -
Page 26: Tape Counter Memory Feature
VCR Operation (Continued) Tape Counter Memory Feature Real-Time Counter Shows length of tape run in hours, minutes, and seconds. Press CLK/CNT to select the real-time counter display. Every press of CLK/CNT changes the TV screen as illustrated below. 2:15 AM 0:05:25 CLOCK COUNTER... -
Page 27: Dvd Operation
DVD Operation Playing DVDs Playback Setup Turn on the TV and select the video input source con- nected to the DVD+VCR. Audio system: Turn on the audio system and select the input source connected to the DVD+VCR. Set the Output Source to DVD as shown in “Selecting the Viewing Source”... -
Page 28: Still Picture And Frame-By-Frame Playback
DVD Operation (Continued) General Features (Continued) Still Picture and Frame-by-Frame Playback 1 Press PAUSE/STEP (X) during playback. The DVD+VCR will go into PAUSE mode. 2 With a DVD, you can advance the picture frame by frame by pressing PAUSE/STEP (X) repeatedly on the remote control. -
Page 29: General Features
DVD Operation (Continued) General Features (Continued) Marker Search You can start playback from a memorized point. Up to nine points can be memorized. To enter a mark, follow these steps. 1 During disc playback, press MARKER when playback reaches the spot that you want to memorize. The Marker icon will appear on the TV screen briefly. -
Page 30: Audio Cd And Mp3/Wma Disc Operation
Audio CD and MP3/WMA Disc Operation Playing Audio CDs and MP3/WMA Discs The DVD+VCR can play MP3/WMA formatted record- ings on CD-ROM, CD-R or CD-RW discs. Before playing MP3/WMA recordings, read the notes on MP3/WMA Recordings on right. Insert a disc and close the tray. Audio CD;... -
Page 31: Pause
Audio CD and MP3/WMA Disc Operation (Continued) Pause 1 Press PAUSE/STEP (X) during playback. 2 To return to playback, press N (PLAY) or press PAUSE/STEP (X) again. Selecting other Tracks Press SKIP . or > briefly during playback to go to the next track or to return to the beginning of the current track. -
Page 32: Jpeg File Operation
JPEG File Operation Viewing JPEG Files on a Disc This DVD+VCR can play discs with JPEG files and Kodak Picture CDs. Before playing JPEG recordings, read the Notes on JPEG Files on right. Insert a disc and close the tray. The MP3/WMA-JPEG selection menu appears on the TV screen. -
Page 33: Programmed Playback
Programmed Playback Programmed Playback with Audio CDs and MP3/WMA Discs The Program function enables you to store your favorite tracks from any disc in the player memory. Program can contain 30 tracks. Press PROGRAM during playback or in the Stop mode to enter the Program Edit mode. -
Page 34: Controlling Your Tv With The Supplied Remote
If more than one code number is listed, try entering them one at a time until you find the one that works with your TV. Manufacturer Code Number LG / GoldStar 1 (Default), 2 Zenith 1, 3, 4 Samsung 6, 7 Sony 8, 9 Hitachi... -
Page 35: Troubleshooting
Troubleshooting Check the following guide for the possible cause of a problem before contacting service. Symptom The power cord is disconnected. No power. The power is on, but No disc is inserted. No tape is inserted. the DVD+VCR does not work. -
Page 36: Troubleshooting
Troubleshooting (Continued) Symptom Some channels are Those channels were deleted with the CH. ADD/DEL option. skipped over when using CH/TRK (v/V) Picture and sound of Antenna or cables are loose. broadcasting channel are weak or missing. Wrong TUNING BAND option is being used. -
Page 37: Language Code List
Language Code List Enter the appropriate code number for the initial settings “Disc Audio”, “Disc Subtitle” and/or “Disc Menu” (See page 18). Language Code Language Abkhazian 6566 Fiji Afar 6565 Finnish Afrikaans 6570 French Albanian 8381 Frisian Amharic 6577 Galician Arabic 6582 Georgian... -
Page 38: Country Code List
Country Code List Enter the appropriate code number for the initial setting “Country Code” (See page 20). Code Country Code Country Andorra Eritrea United Arab Emirates Spain Afghanistan Ethiopia Antigua and Barbuda Finland Anguilla Fiji Albania Falkland Islands Armenia Micronesia Netherlands Antilles Faroe Islands Angola... -
Page 39: Specifications
Specifications General Power requirements Power consumption Dimensions (approx.) Weight (approx.) Operating temperature Operating humidity Signal system Inputs AC 120V, 60 Hz 16.9" X 3.1" X 10.8" (430 X 78.5 X 273 mm) (w x h x d) 8.82 lbs (4.0 kg) 5˚C to 40˚C (41˚F to 104˚F) 5 % to 90 % NTSC... - Page 40 LG will repair or replace your product, at LG’s option, if it proves to be defective in material or workmanship under normal use, during the warranty period (“Warranty Period”) listed below, effective from the date (“Date of Purchase”) of original consumer purchase of the product.
Need help?
Do you have a question about the XBV 443 and is the answer not in the manual?
Questions and answers
how to record a vhs to dvd
The Zenith XBV443 DVD VCR Combo Player does not support recording from VHS to DVD.
This answer is automatically generated
how to record vhs to dvd
The Zenith XBV443 cannot record DVDs. The DVD side is a player only, meaning it does not have recording functionality. Therefore, it is not possible to record VHS to DVD using this device.
This answer is automatically generated