Table of Contents
Advertisement
Quick Links
Advertisement
Table of Contents

Related Manuals for Gigaset E260


Summary of Contents for Gigaset E260
- Page 1 E260/E310...
-
Page 3: Overview Of Handset
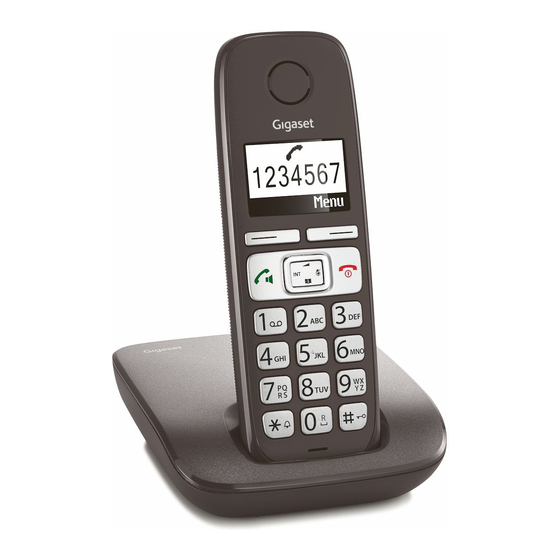
Overview of handset Overview of handset 1 Display in idle status (¢ page 16) 2 Display keys (¢ page 3) 3 Control key (¢ page 4) 4 Talk/speaker key Accept call; start dialling; toggle between earpiece and speaker mode (¢ page 27); Lights up: speaker mode activated;... -
Page 4: Icons And Keys
Icons and keys Icons and keys Display icons The display depends on the phone's settings and operating status. Signal strength ¨ (¢ page 34) or Eco Mode+ icon ½ (¢ page 34) Keypad locked (¢ page 20) Ringer melody switched off (¢ page 41) Batteries are charged (¢... -
Page 5: Main Menu Icons
Icons and keys Main menu icons é ç Alarm Clock è Audio Settings Settings ê Voice Mail “ ç Settings For information on using the menu and the menu tree, see page 18 and page 23. Display keys The functions of the display keys change depending on the particu- lar operating situation. -
Page 6: Control Key
Icons and keys Control key In the description below, the side of the control key (up, down, right, left) that you have to press in the different operating situations is marked in black e.g., v for "press the right edge of the control key". The control key has a number of different functions: When the handset is in idle status Open the main menu. -
Page 7: Table Of Contents
Contents Contents Overview of handset ........1 Base overview . - Page 8 Contents Directory ........... . . 27 Redial list .
- Page 9 Accessories ..........51 Mounting the E260/E310 base on the wall ....52 Mounting the charger on the wall .
-
Page 10: Safety Precautions
If you use a medical device (e.g. a pacemaker), please contact the device manufacturer. They will be able to advise you regarding the susceptibility of the device to external sources of high frequency energy (for the specifications of your Gigaset product see "Specifications"). -
Page 11: First Steps
Please note: u Never expose the telephone to the effects of heat sources, direct sunlight or other electrical devices. u Protect your Gigaset from moisture, dust, corrosive liquids and fumes. -
Page 12: Connecting The Base
First steps Connecting the base ¤ First, connect telephone jack 1. ¤ Then connect the power adapter and insert the cables into the cable ducts. Please note: u The power adapter must always be connected, as the phone will not operate without a mains connec- tion. -
Page 13: Setting Up The Handset For Use
Inserting the batteries and closing the battery cover Warning Use only rechargeable batteries (¢ page 48) recommended by Gigaset Communications GmbH i.e., never use a conventional (non-rechargeable) battery, as this could result in significant health risks and personal injury. For example, the outer casing of the batteries could be damaged or the batteries could explode. - Page 14 ¤ Charge the handset in the base for 7.5 hours. Please note The handset must only be placed in the designated Gigaset E260/E310 base or the corresponding charger. ¤ After charging, remove the handset from the base and only replace it when the batteries are fully discharged.
-
Page 15: Changing The Display Language
First steps Changing the display language Change the display language if you do not understand the language currently set. Û Menu ¤ Press the right-hand display key. ¤ Press keys 421 slowly one after the other. The display for setting languages ‰... -
Page 16: Setting The Date/Time
First steps Setting the date/time Set the date and time so that the correct date and time can be assigned to incoming calls, and so that the alarm can be used. Please note Depending on your network provider, the date and time may be displayed automatically. - Page 17 First steps ¤ The input field opens. The active line is marked [...]. Date 01.04.17 Enter the day, month and year “ as a 6-digit number via the keypad e.g., Q1Q41M for 1 April 2017. To correct errors: Press on the left or right edge of the control key to change the position of the cursor.
- Page 18 First steps Please note If your phone receives the date and time during calling line dis- play (e.g., via your network provider, a router or PABXs), you can specify whether this data should be copied to your phone: ¤ Press the following keys in sequence: v ¤...
-
Page 19: What Would You Like To Do Next
Customer Care team (¢ page 46). What would you like to do next? Now that you have successfully set up your Gigaset, you can imme- diately start calling – or you can adapt it to your personal require- ments. -
Page 20: Using The Phone
Using the phone Using the phone Menu guidance Your telephone's functions are accessed via a menu consisting of several levels (menu overview ¢ page 23). Main menu (first menu level) ¤ When the handset is in idle status, press the display key §Menu§... -
Page 21: Keys On The Keypad
Using the phone Returning to idle status Ð From any point in the menu: ¤ Press and hold the end call key a or INT 1 ¤ Do not press any key: after 2 minutes, 23.04. 10:53 the display will automatically revert to ‘... -
Page 22: Activating/Deactivating The Keypad Lock
Using the phone Activating/deactivating the keypad lock The keypad lock prevents any inadvertent use of the phone. In idle status, press and hold the hash key (confirmation tone). The keypad lock is activated or deactivated. If it is Ø activated, the icon appears in the display. -
Page 23: Understanding The Operating Steps
Understanding the operating steps Understanding the operating steps An example of a procedure is as follows: ¤ q Settings ¤ ¤ q Handset ¤ §Menu§ §OK§ §OK§ ¤ q Auto Answer ¤ §OK§ (‰ = on) This means you should proceed as follows: Please note Scroll upwards if you wish to select one of the last entries in a menu level with numerous entries. - Page 24 Understanding the operating steps Handset: ... the menu entry Handset appears on the screen. Handset “ ¤ §OK§ §OK§ Press the key below on the display screen to open the sub- menu. ¤ q: Press up or down on the control key until ...
-
Page 25: Menu Tree
Menu tree Menu tree §Menu§ If you press the display key in idle status, a list appears with menu entries. You can scroll through the list by pressing q. é Alarm Clock è Audio Settings ê Voice Mail ç Settings Some of these menu entries contain submenus. - Page 26 Menu tree ç Settings ¢ page 14 Date/Time ¢ page 38 Handset Language ¢ page 38 Big Dial Font ¢ page 39 Contrast ¢ page 39 Backlight In Charger ¢ page 39 Out of Char. ¢ page 39 Auto Answer ¢...
-
Page 27: Making Calls
Making calls Making calls a call automatically when you lift it out of the base. When the display backlight is If the ringer is intrusive, press ¤ Silent ¤ switched off, pressing any key will §Menu§ §OK§ activate the backlight. The relevant You can accept the call as long as it is key function is performed. -
Page 28: Notes On Phone Number Display (Clip)
Additional information on this sub- u Your telephone is connected via a ject can be found on the Gigaset PABX or a router with an inte- website at: grated PABX (gateway) that does www.gigaset.com/service... -
Page 29: Speaker Mode Operation
Using the directory and lists Speaker mode operation Using the directory and lists In speaker mode, you activate the loudspeaker so that you can hear The telephone offers a directory, the caller without having to hold the redial list, network mailbox list and handset to your ear. - Page 30 Using the directory and lists Storing further numbers in the Dialling with the directory directory Select an entry. s ¤ ¤ New Entry ¤ ¤ c §Menu§ §OK§ ¤ ~ (Enter number) ¤ §OK§ ¤ ~ (Enter name) ¤ §OK§ Managing directory entries Select an entry.
-
Page 31: Redial List
Using the directory and lists Using shortcuts If you have CNIP, the first 16 charac- ters of the transmitted name are also You can assign directory entries to the keys 2 to O: copied in the input field <Name>. s ¤ q (Select entry) A number is displayed. -
Page 32: Network Mailbox List
Using the directory and lists §OK§ Network mailbox list Press the display key to open the list. You can use this list to listen to mes- The last incoming call is displayed. sages on the network mailbox The display will alternate between (¢... -
Page 33: Opening Lists
Automatic network provider preselection Calling back a caller from the Automatic network calls list provider preselection ’ ¤ q CallsList 01+02 ¤ §OK§ ¤ q (Select entry) ¤ c You can store a call-by-call number (preselection number), which is automatically placed in front of Opening lists numbers when you dial them. - Page 34 Automatic network provider preselection Storing preselection numbers Permanently deactivating ¤ q Settings ¤ preselection §Menu§ §OK§ ¤ q Base ¤ Delete the preselection number §OK§ Ü ¤ q Preselection ¤ §OK§ with and press §OK§ ¤ q Presel. Number ¤ §OK§...
-
Page 35: Using The Network Mailbox
Using the network mailbox Using the network Please note Enter the network mailbox phone mailbox number into your directory along with the designation "Network The network mailbox is the answer- mailbox"; the display and the ing machine in your provider's tele- calls list will then show this desig- phone network. -
Page 36: Eco Dect
ECO DECT Switching off radiation Eco Mode+ You are helping to protect the envi- When you activate Eco Mode+, the ronment with your Gigaset. radiation (DECT transmission power) of base and handset is Reducing energy consumption switched off automatically and only turns on when calls are made. -
Page 37: Using The Handset As An Alarm Clock
Activating/deactivating the alarm on the base. clock Prerequisite: Registering a Gigaset handset The time is set (¢ page 14). manually to the Gigaset E260/ ¤ q Alarm Clock ¤ §Menu§ §OK§ E310 ¤ q Activation You must register the handset man- ¤... -
Page 38: De-Registering Handsets
(¢ page 1). Registering other handsets ¤ All handsets will ring at the same You can register other Gigaset hand- time ("paging"), even if the ringer sets and handsets for other devices melodies are switched off. -
Page 39: Making Internal Calls
Using multiple handsets Activating/deactivating the Calling all handsets function: ("group call") ¤ q Settings ¤ §Menu§ §OK§ Press and hold. ¤ q Base ¤ §OK§ ¤ q Listening in ¤ §OK§ (‰ = on) Initiate internal call. Listening in to the call: Press the star key. -
Page 40: Setting The Handset
Setting the handset Either Setting the handset Press the end call key. The You can change the settings on your external call is transferred handset to suit your individual to the other handset. requirements. ” Press the display key. You Changing the display are reconnected with the language... -
Page 41: Changing The Display Contrast
Setting the handset Changing the display Please note If the backlight is turned on out- contrast side the charger, the standby time for the handset is considera- You can set the display contrast to 9 bly reduced! levels. ¤ q Settings ¤ §Menu§... -
Page 42: Setting The Sound Of The Earpiece
Setting the handset Please note Please note You can also set the call volume You can also set the sound of via the menu (¢ page 23). the earpiece via the menu (¢ page 23). Extra loud setting Changing ringers During a conversation, the earpiece volume can also be set to Extra u Volume:... -
Page 43: Advisory/Warning Tones
Setting the handset Setting the ringer melody Advisory/warning tones Set different ringer melodies for Your handset uses advisory tones to external calls, internal calls and the tell you about different activities alarm clock. and statuses. The following tones In idle status: can be activated and deactivated t ¤... -
Page 44: Restoring The Handset Default Settings
Setting the base Restoring the handset and on again (¢ page 19). default settings Please note u Eco Mode / Eco Mode+ You can reset any individual settings (¢ page 34) and repeater sup- and changes that you have made. port cancel each other out, i.e., This will not affect entries in the if you use a repeater, you can-... -
Page 45: Resetting The Base To The Default Settings
Setting the base Resetting the system PIN Proceed as follows: ¤ Remove the mains cable from the If you have forgotten your system base. PIN, you can reset the PIN to the ¤ Hold down the registration/pag- original code 0000 using the but- ing key on the base (¢... -
Page 46: Operating The Base On The Pabx
Operating the base on the PABX Operating the base on Setting recall ¤ P#Q5#12 §Menu§ the PABX ¤ Enter digits for recall: Q = 80 ms; 1 = 100 ms; The following settings are only nec- 2 = 120 ms; I = 400 ms; essary if your PABX requires them;... -
Page 47: Questions And Answers
If you have any questions about the ¤ Activate the ringer melody use of your phone, you can contact (¢ page 41). us at www.gigaset.com/service You cannot hear a ringer/dialling for assistance 24/7. tone from the fixed line. In addition, the following table pro- The phone cord supplied has not vides troubleshooting assistance. -
Page 48: Authorisation
Environmental management system Hereby, Gigaset Communications GmbH declares that the radio equip- Gigaset Communica- ment type Gigaset E260/E310 is in tions GmbH is certi- compliance with Directive 2014/53/ fied pursuant to the international stand- The full text of the EU declaration of... -
Page 49: Exclusion Of Liability
Environment Disposal Correct disposal and separate col- lection of used equipment will help Batteries should not be disposed of to prevent potential negative conse- in general household waste. quences for the environment and Observe the local waste disposal human health. They are a prerequi- regulations, details of which can be site for the re-use and recycling of obtained from your local authority. -
Page 50: Appendix
The operating time of your Gigaset facing down in a dry, warm place depends on the capacity and age of for at least 72 hours (not in a mi- the batteries and the way it is used. - Page 51 10 mW battery development, the list of rec- power average power ommended batteries in the FAQ sec- per channel, tion of the Gigaset Customer Care 250 mW pulse pages is updated regularly: power www.gigaset.com/service Range Up to 300 m out-...
-
Page 52: Writing And Editing Names
Appendix Pin connections on the Writing names telephone jack Enter the individual letters/charac- ters by pressing the corresponding 1 unused key. 2 unused Briefly press the key several times in succession to select the required let- 5 unused ter/character. 6 unused Standard characters 1x 2x 3x 4x 5x 6x 7x 8x 9x 10x 11x 12x 13x 14x 15x Writing and editing... -
Page 53: Accessories
Talk/standby time of up to 20/240 hours u Standard batteries www.gigaset.com Gigaset repeater The Gigaset repeater can be used to increase the recep- tion range between your Gigaset handset and the base. www.gigaset.com Compatibility You can find more information about the handset functions in connection with the individual Gigaset bases at: www.gigaset.com/compatibility... -
Page 54: Mounting The E260/E310 Base On The Wall
Mounting the E260/E310 base on the wall Mounting the E260/E310 base on the wall 29.6 mm approx. 7.9 mm Mounting the charger on the wall 21 mm approx. 3.5 mm... -
Page 55: Index
Index Index Accepting a call ..... 25 Call Access protection ....42 internal . - Page 56 Index opening ......4 order of entries ....28 Handset saving entry .
- Page 57 Index end call key ......1 Network provider preselection hash key ......1 , 20 automatic .
- Page 58 Index Reducing energy consumption ..34 Reducing radiation ....34 Talk key ....... 1 Registering (handset) .
- Page 59 Issued by Gigaset Communications GmbH Frankenstr. 2a, D-46395 Bocholt © Gigaset Communications GmbH 2017 Subject to availability. All rights reserved. Rights of modification reserved. www.gigaset.com...
Need help?
Do you have a question about the E260 and is the answer not in the manual?
Questions and answers