
Related Manuals for WhisperKool XLT SERIES XLT 1600


Summary of Contents for WhisperKool XLT SERIES XLT 1600
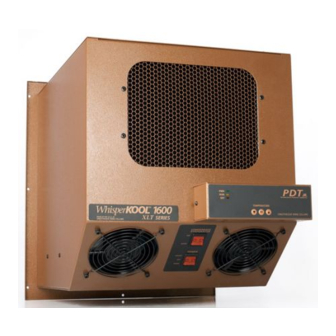
- Page 1 XLT SERIES OWNER’S MANUAL FOR: XLT 1600 XLT 3000 XLT 4200 XLT 6000 XLT 8000 The Coolest Thing In Wine Storage...
- Page 2 WhisperKOOL. Every effort has been made to ensure that the information in this manual is accurate. WhisperKOOL is not responsible for printing or clerical errors.
-
Page 3: Table Of Contents
Introduction ...2 Receiving and Inspecting ...3 Quick Start Guide ...4 Preparing the Wine Cellar ...5 Installation ...10 Using the WhisperKOOL System ...13 Liquid Measuring Thermostat System ...14 PDT JR. Operating Instructions ...15 PDT Operating Instructions ...16 Normal Operation ...17 Maintenance Schedule ...17 Ducting Option ...18... -
Page 4: Introduction
WhisperKOOL unit. What is the WhisperKOOL System? The WhisperKOOL system is a specialized piece of equipment designed to absorb heat from a cellar and discharge it through the rear of the unit into an adjacent room. The unit will operate 75 to 80 percent of the time in order to maintain an ideal temperature and humidity in a wine cellar. -
Page 5: Receiving And Inspecting
Please leave the WhisperKOOL System in its original box until you are ready for installation. This will allow you to move the product safely without damaging it. When you are ready to remove the product from the box, see Installation on page 10. -
Page 6: Quick Start Guide
Use a surge protector with the WhisperKOOL unit. Do not use a GFI (Ground Fault Interrupter) line. 4. For your convenience, the Whisperkool unit has two power sockets, one on the side of the unit and the other on the back. Both sockets come covered. Remove the cover from only the desired power socket in order to plug the unit in. -
Page 7: Preparing The Wine Cellar
PREPARING THE WINE CELLAR The performance and life of your WhisperKOOL System are contingent upon the steps you take in preparing the wine cellar. IT IS HIGHLY RECOMMENDED THAT YOU OBTAIN THE ASSISTANCE OF A WINE STORAGE PROFESSIONAL. Wine storage professionals work with licensed contractors, refrigeration technicians, and racking companies to build well-insulated, beautiful, and protective wine cellars. - Page 8 WhisperKOOL should be used. This will compensate for the insulation loss due to the lower insulating rating of glass.
- Page 9 However, you must have a fresh air inlet as well. If your unit requires ducting, please contact WhisperKOOL Customer Service to obtain a specially designed ducting accessory kit for the XLT unit (see page 29). Using any other ducting system voids warranty.
-
Page 10: Cutting The Hole For The Whisperkool Unit
WK 3000 WK 4200 WK 6000 WK 8000 Cutting the Hole for the WhisperKOOL Unit Tools Needed Hammer Locate the desired installation location. Using a stud finder, locate two adjacent studs in the walls, and mark them with vertical lines. - Page 11 Make sure that the internal height remains at 16" for the 1600, 3000 and 4200 models and 22.75" for the 6000 and 8000 models so that the WhisperKOOL system will fit snugly through the framed cut-out.
-
Page 12: Installation
The center position is OFF and is simply used when the owner does not need to utilize the equipment. Purchase a surge protector or power conditioner to plug your WhisperKOOL unit into. As with any sen- sitive electrical equipment, the WhisperKOOL unit’s circuitry may be damaged by power surges and spikes. - Page 13 Carefully remove your WhisperKOOL unit from the box. Do not destroy your packing material, as it provides the only safe means of transporting the unit. Units weigh 65–100 pounds and are cumbersome for one person to carry. We recommend that you get someone else to help you during the installation process.
-
Page 14: Installing Thermostat
WhisperKOOL System (see illustration). Seal all cracks and gaps around the WhisperKOOL unit with caulking to prevent air leakage. (If you use molding, it should be attached to the walls, never to the WhisperKOOL unit itself.) Electrical Outlet The unit is equipped with two electrical outlets, one for installation inside the cellar and the other for installation outside the cellar. -
Page 15: Using The Whisperkool System
The Condensate Evaporator is a heating element that automatically evaporates excess condensate that accumulates in the cooling system as a by-product of refrigeration. Only the WhisperKOOL units are equipped with sophisticated heating elements that automatically sense the presence of water and work continually until the water is gone. -
Page 16: Liquid Measuring Thermostat System
LIQUID MEASURING THERMOSTAT SYSTEM All WhisperKOOL units come equipped with our Pre- cision Digital Technology (PDT/PDT JR) liquid tem- perature measuring thermostat system. This system incorporates the following advantages: 1. Self-Calibrating Probe: The probe contains a sensor chip, which actually communicates back and forth to the thermostat. -
Page 17: Pdt Jr Operating Instructions
PDT JR OPERATING INSTRUCTIONS Operating Instructions for WhisperKOOL PDT JR. Thermostat Indicators There are three colored lights on the left side of the thermostat: • PWR (Green) – When this light is on, the unit is powered. • RUN (Yellow) – When this light is on, the compressor is running. If the light is flashing, the unit is currently in the five-minute lockout. -
Page 18: Pdt Operating Instructions
PDT OPERATING INSTRUCTIONS The unit is set at 55°F at the factory. To raise or lower the set temperature, press the set button while at the same time pressing either the arrow up or arrow down button. WINE Temperature Indicator WINE Unit ON Indicator Button 1. -
Page 19: Normal Operation
50-70%. The WhisperKOOL units do not create humidity. If you live in a dry area of the country you many need to create humidity in the wine cellar. This can be done by introducing a non-heat humidifier, or installing a small fountain within the cellar. -
Page 20: Ducting Option
A WhisperKOOL XLT ducting kit is available for purchase. The kit allows the warm air to exhaust to several places such as an attic, an adjacent room, or outside. The goal is to get the warm exhaust air away from the rear intake of the unit. -
Page 21: Troubleshooting Guide
Airflow Proper airflow is critical to the performance of the WhisperKOOL unit. Any obstruction to the intake and exhaust ports on either side of the unit will compromise the unit’s ability to cool. Make sure the WhisperKOOL unit fan vents are clear. -
Page 22: Door Seal
Eventually, the unit cannot keep up and the temperature inside the cellar climbs. To solve the problem, make sure that the WhisperKOOL vents into a space where heat cannot build up or use XLT Duct Kit to remove heat build up. - Page 23 The unit should be ran for 24hr. If you continue to run the WhisperKOOL you will need to turn off the WhisperKOOL unit periodically to keep it from icing up. We recommend cycling the unit on and off every eight hours if possible or as needed.
-
Page 24: Power Requirements
Icing up can occur if the airflow through the coil is limited or obstructed by any type of cover or obstruction, such as racking & bottles in front of unit. In the unlikely event that your WhisperKOOL unit is icing up in front, unplug the unit for 24 to 36 hours and allow the ice to melt away (collect liquid in pan to avoid damaging racks). - Page 25 1. Unplug the WhisperKOOL unit. 2. Remove the WhisperKOOL unit from the wall mounting and set it on a sturdy workbench. 3. Drill out the rivets on the top panel that hold the case together, using a 5/32 (size) drill bit. This will destroy the rivets.
-
Page 26: Troubleshooting Checklist
6) Are any of the cellar walls in the direct path of the sun? 7) Are any of the walls on an exterior wall? 8) Is there foam attached to the ange of the Whisperkool unit? See page 11 of the owner’s manual. General Ventilation 9) Is there at least 3’... - Page 27 Specific Performance Issues: Unit is Not Cooling Sufficiently or Not Cooling at All: 19) On a thermostat with digital readout, what is the set temperature? To check, hold down the “SET” button on the thermostat to see the set temperature. Refer to page 15 - 16 of the owner’s manual.
-
Page 28: Temperature Differential Testing
(back) side of the unit; therefore, taking these measurements is critical in ensuring the optimal performance of the product while minimizing costs of operation. The WhisperKOOL unit is designed to maintain relative humidity between 50-70%, which is accom- plished by cooling the cellar slowly. You should anticipate an approximate 10 - 15 degree temperature... - Page 29 THIRD TEMPERATURE TEST: 10. Once the unit has run for 24 hours, perform the third temperature test. 11. Record information and calculate temperature differential in table below for the condenser/back side section under the second test. TEMPERATURE DATA FROM TESTING Temperature / Test (time) Inlet Air...
- Page 30 After completing the temperature differential test, determine if the unit is not cooling at all or if it is not cooling enough. If the unit is not cooling at all, contact WhisperKOOL Customer Service at 800.343.9463. Be sure to have the measurements and results from your Temperature Differential test available.
-
Page 31: Technical Assistance
Please make sure that you have the following information available before you call: • The model and serial number of your WhisperKOOL unit. The serial number is located behind the thermostat on a silver sticker and starts with letter "A" followed by five numbers. -
Page 32: Limited Warranty & Terms And Conditions
Terms and Conditions, is hereby expressly objected to and rejected by WhisperKOOL, and shall NOT become a part of the contract of sale of any Product. WhisperKOOL’s failure to object to any such conflicting term and/or condition of sale contained in any communication (including a purchase order) from a Purchaser shall not be considered as acceptance of such term and/or condition or as a waiver of these Terms and Conditions. - Page 33 (5) Proof of purchase of the Product in the form of a bill of sale or receipted invoice, which is evidence that the Product is within the Limited Warranty Period, must be presented by the End User to WhisperKOOL in order to obtain limited warranty service.
- Page 34 Terms and Conditions, except that these Terms and Conditions shall be interpreted as through drafted jointly by WhisperKOOL and Purchaser. Any dispute will be resolved by the courts in the County of San Joaquin, State of California, and all parties, WhisperKOOL, Purchaser and End User, hereby irrevocably submit to the personal jurisdiction of such courts for that purpose.
- Page 35 If you have any questions regarding these Terms and Conditions or wish to obtain additional information, contact us via phone at 1-800-343-9463 or please send a letter via U.S. Mail to: Model ______________________________________ Serial Number __________________________ Installed by __________________________________________ Date __________________________ Page 33 WhisperKOOL 1738 E. Alpine Ave Stockton, CA 95205 support@whisperkool.com XLT 020111...
- Page 36 WhisperKOOL 1738 E. Alpine Ave Stockton, CA 95205 1(800) 343-9463 www.whisperkool.com...
Need help?
Do you have a question about the XLT SERIES XLT 1600 and is the answer not in the manual?
Questions and answers