Advertisement
Quick Links
thank you for purchasing a sealey product. manufactured to a high standard, this product will, if used according to these instructions,
and properly maintained, give you years of trouble free performance.
IMPORTANT: PLEASE READ THESE INSTRUCTIONS CAREFULLY. NOTE THE SAFE OPERATIONAL REQUIREMENTS, WARNINGS & CAUTIONS. USE
THE PRODUCT CORRECTLY AND WITH CARE FOR THE PURPOSE FOR WHICH IT IS INTENDED. FAILURE TO DO SO MAY CAUSE DAMAGE AND/OR
PERSONAL INJURY AND WILL INVALIDATE THE WARRANTY. KEEP THESE INSTRUCTIONS SAFE FOR FUTURE USE.
Refer to
Wear
instruction
protective
manual
gloves
1. safEtY
‰‰ WarnInG! The lathe (not included) is heavy - it is recommended that two persons lift and lower the lathe onto the assembled stand.
‰
‰
Avoid trapping hands/fingers beneath the lathe, when lowering onto the stand.
9
Ensure the stand is positioned on firm, level ground (we recommend concrete or a similar hard surface).
9
Ensure the surrounding environment is not conducive to rust. Rust will damage the stand, rendering it structurally unsafe.
9
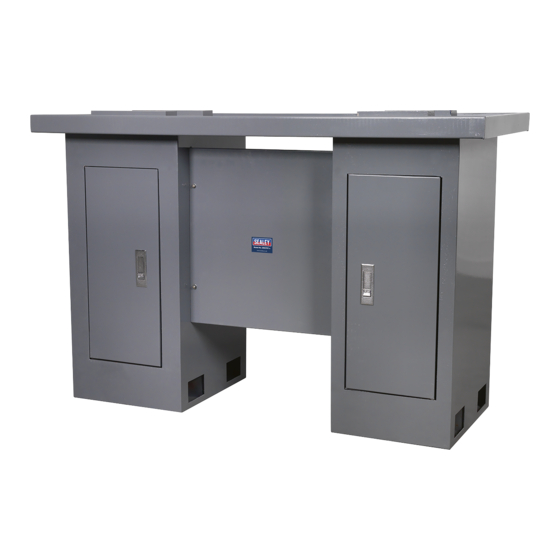
2. IntroductIon
Suitable for model no. Sm27 metal turning lathe an other similar lathes. Includes suds tray.
3. spEcIfIcatIon
model no ............................................................. Sm27ST.V2
Weight ............................................................................ 50kg
4. contEnts
ItEm
dEscrIptIon
1
SUdS TRAY
2
R/H CABIneT
3
l/H CABIneT
4
AnGle BRACKeT
5
KICK PlATe
6
R/H SHIm BloCK 150mm
7
l/H SHIm BloCK 200mm
8
SCReW m6x25
9
SCReW m5x12
10
Ø5 FLAT WASHER
11
Ø5 SPRING WASHER
12
m5 HeX nUT
13
BolT m10x100
14
Ø10 FLAT WASHER
15
Ø10 SPRING WASHER
16
m10 HeX nUT
5.
assEmblY
a
note: Assemble with fixings left loose in order to align parts
then tighten before use.
5.1.
Attach the three hole side of the angle brackets (4) to the
cabinets (2 & 3) using M5x12 screws (9), Ø5 flat washers (10),
5.2.
Ø5 spring washers (11) and the M5 hex nuts (12).
5.3.
Attach the kick plate (5) to the two hole side of the angle
brackets (4) using M5x12 screws (9), Ø5 flat washers (10), Ø5 spring washers (11) and the M5 hex nuts (12), joining the cabinets (2 &
3) together.
5.4.
Place the suds tray (1) on top of the cabinets (2 & 3) and align the screw holes.
5.5.
Align the l/H and R/H shim blocks (6 & 7) over the screw holes in the suds tray (1) and the cabinets (2 & 3). Secure into place using
the m6x25 screws (8).
© Jack Sealey limited
floor stand for sm27.v2
sm27st.v2
model no:
QtY
1
1
1
2
1
2
2
8
10
10
10
10
4
4
4
4
Original Language Version
fig.1
SM27ST.V2 | Issue:3 (H,F) 06/06/18
Advertisement

Related Manuals for Sealey SM27ST.V2


Summary of Contents for Sealey SM27ST.V2
- Page 1 IMPORTANT: PLEASE READ THESE INSTRUCTIONS CAREFULLY. NOTE THE SAFE OPERATIONAL REQUIREMENTS, WARNINGS & CAUTIONS. USE THE PRODUCT CORRECTLY AND WITH CARE FOR THE PURPOSE FOR WHICH IT IS INTENDED.
- Page 2 6.7. 6.8. 6.9. Parts support is available for this product. Please email sales@sealey.co.uk or telephone 01284 757500 EnvIronmEnt protEctIon Recycle unwanted materials instead of disposing of them as waste. All tools, accessories and packaging should be sorted, taken to a recycling centre and disposed of in a manner which is compatible with the environment. When the product becomes completely unserviceable and requires disposal, drain any fluids (if applicable) into approved containers and dispose of the product and fluids according to local regulations.