Yaesu FT-857 Operation Manual
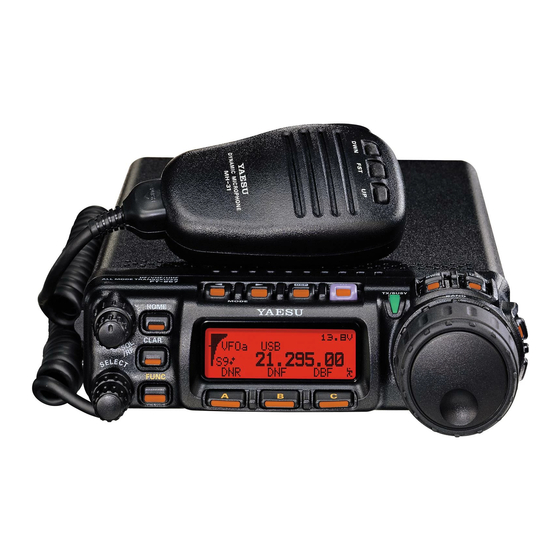
Hf/vhf/uhf ultra-compact transceiver
Hide thumbs
Also See for FT-857:
- Technical supplement (108 pages) ,
- Manual (6 pages) ,
- Installation manual (4 pages)
Table of Contents
Advertisement
Quick Links
O
M
PERATING
ANUAL
VERTEX STANDARD CO., LTD.
4-8-8 Nakameguro, Meguro-Ku, Tokyo 153-8644, Japan
VERTEX STANDARD
US Headquarters
10900 Walker Street, Cypress, CA 90630, U.S.A.
International Division
8350 N.W. 52nd Terrace, Suite 201, Miami, FL 33166, U.S.A.
YAESU EUROPE B.V.
P.O. Box 75525, 1118 ZN Schiphol, The Netherlands
YAESU UK LTD.
Unit 12, Sun Valley Business Park, Winnall Close
Winchester, Hampshire, SO23 0LB, U.K.
VERTEX STANDARD HK LTD.
Unit 5, 20/F., Seaview Centre, 139-141 Hoi Bun Road,
Kwun Tong, Kowloon, Hong Kong
Advertisement
Table of Contents

Related Manuals for Yaesu FT-857


Summary of Contents for Yaesu FT-857
- Page 1 PERATING ANUAL VERTEX STANDARD CO., LTD. 4-8-8 Nakameguro, Meguro-Ku, Tokyo 153-8644, Japan VERTEX STANDARD US Headquarters 10900 Walker Street, Cypress, CA 90630, U.S.A. International Division 8350 N.W. 52nd Terrace, Suite 201, Miami, FL 33166, U.S.A. YAESU EUROPE B.V. P.O. Box 75525, 1118 ZN Schiphol, The Netherlands YAESU UK LTD.
-
Page 2: Table Of Contents
Introduction ... 1 Specifications ... 2 Accessories & Options ... 4 Installation ... 5 Preliminary Inspection ... 5 Installation Tips ... 5 Safety Information ... 6 Installing the Microphone and Front Panel ... 7 Power connections ... 8 Grounding ... 10 Mobile Station Grounding ... -
Page 3: Introduction
MF/HF/VHF/UHF bands. Providing coverage of the 160-10 meter bands plus the 6 m, 2 m, and 70 cm bands, the FT-857 includes operation on the SSB, CW, AM, FM, and Digital modes, yielding the most comprehensive performance package available for mobile and field operation. -
Page 4: Specifications
AM: Early Stage (Low Level), FM: Variable Reactance ±5 kHz (FM-N: ±2.5 kHz) –50 dB (1.8-29.7 MHz) –60 dB (50/144/430 MHz) >40 dB 400 Hz-2600 Hz (–6 dB) 200-10k Ohms (Nominal: 600 Ohms) FT-857 Operating Manual AM Carrier 25 W 12.5 W... - Page 5 Selectivity (–6/–60 dB): AF Output: AF Output Impedance: Specifications are subject to change without notice, and are guaranteed within the amateur bands only. FT-857 Operating Manual PECIFICATIONS Double-Conversion Superheterodyne (SSB/CW/AM/FM) Superheterodyne (WFM) 1st: 68.33 MHz (SSB/CW/AM/FM); 10.7 MHz (WFM) 2nd: 455 kHz SSB/CW 100 kHz-1.8 MHz...
-
Page 6: Accessories & Options
ATAS-100 Active-Tuning Antenna System ATAS-120 Active-Tuning Antenna System ATBK-100 VHF/UHF Antenna Base/Counterpoise Kit VL-1000 Solid-State Linear Amplifier CT-62 CAT Interface Cable CT-39A Packet Cable CT-58 BAND DATA Cable & O PTIONS UPPLIED CCESSORIES ... 1 VAILABLE PTIONS FT-857 Operating Manual... -
Page 7: Installation
Do not install the transceiver on top of another heat-generating device (such as a power supply or amplifier), and do not place equipment, books, or papers on top of the FT-857. Avoid heating vents and window locations that could expose the transceiver to excessive direct sunlight, especially in hot climates. -
Page 8: Safety Information
NSTALLATION The FT-857 is an electrical apparatus, as well as a generator of RF (Radio Frequency) energy, and you should exercise all safety precautions as are appropriate for this type of device. These safety tips apply to any device installed in a well-designed amateur radio station. -
Page 9: Installing The Microphone And Front Panel
5. To remove the Front Panel, use your left thumb to push rearward (slightly) the latch on the left-hand of the panel, then slide the Front Panel to the right and away from the transceiver. FT-857 Operating Manual ICROPHONE AND MODE... -
Page 10: Power Connections
NSTALLATION The DC power connector for the FT-857 must only be connected to a DC source providing 13.8 Volts DC (±15%), and capable of at least 22 Amperes of current. Always observe proper polarity when making DC connections: The Red DC power lead connects to the Positive (+) DC terminal; and the Black DC power lead connects to the Negative (–) DC terminal. - Page 11 When operating with the vehicle turned off, or operating from a stand-alone car battery (in a camp site, etc.), be mindful of the minimum operating voltage (11.73 Volts) for the FT-857. If the battery is not charged sufficiently to maintain at least 11¾ Volts at the radio, erratic operation or shut-down may occur.
-
Page 12: Grounding
RF grounding can nullify such filtering. Bonding the rear panel Ground lug of the FT-857 transceiver to the vehicle or vessel’s ground system should clear up any such difficulties. -
Page 13: Base Station Earth Grounding
This so-called “Daisy Chain” grounding technique may nullify any attempt at effective radio frequency grounding. See the drawings below for examples of proper and improper ground connections. Improper Ground Connection Proper Ground Connection Transceiver Linear Power Transceiver Linear Power Amplifier Supply Amplifier Supply "Daisy Chain" FT-857 Operating Manual... -
Page 14: Antenna Considerations
Standing Wave Ratio (SWR) of 1.5:1). Two antenna jacks are provided on the rear panel of the FT-857. The “HF/50 MHz ANT” jack is used for HF and 50 MHz, while the “144/430 MHz ANT” jack is used for 144 MHz and 430 MHz. -
Page 15: Base Station Antenna Installations
Base Station Antenna Installations When installing a “balanced” antenna such as a Yagi or dipole, remember that the FT-857 is designed for use with an (unbalanced) coaxial feedline. Always use a balun or other balanc- ing device so as to ensure proper antenna system performance. -
Page 16: Rf Field Exposure
NTENNA ONSIDERATIONS Do not allow disconnected cables to touch the case of your FT-857 transceiver or accesso- ries, as lightning can easily jump from the cable to the circuitry of your transceiver via the case, causing irreparable damage. If a lightning storm is in progress in your immediate area, do not attempt to disconnect the cables, as you could be killed instantly if lightning should strike your antenna structure or a nearby power line. -
Page 17: Electromagnetic Compatibility
To ensure long life of the components, be certain to provide adequate ventilation around the cabinet of the FT-857. The cooling system of the transceiver must be free to draw cool air in from the side of the transceiver and expel warm air from the rear of the transceiver. -
Page 18: Linear Amplifier Interfacing
ALC input capability on the tip connection. The main shaft is the ground return. The ring connection of the ACC jack, when closed to ground, places the FT-857 into the transmit mode, and sends a steady CW carrier, for amplifier (or antenna tuner) adjustment purposes. -
Page 19: Cw Key/Keyer Connections
When using an external electronic keyer, be absolutely certain that it is configured for “posi- tive” keying, not “negative” or “grid block” keying. The “key-up” voltage of the FT-857 is +5V, and the “key-down” current is only about 1 mA. -
Page 20: Receiver Accessories (Tape Recorder Etc.)
The two front feet of the transceiver allow the transceiver to be tilted upward for better viewing. Simply fold both feet forward to raise the front of the transceiver, and fold them back against the bottom case to lower the front of the FT-857. ECORDER ETC... - Page 21 NSTALLATION FT-857 Operating Manual...
-
Page 22: Front Panel Control & Switches
Press and hold in this key for one second to activate the IF Shift feature, which allows you to use the SELECT knob to adjust the center frequency of the IF filter’s passband response. & S ONTROL FT-857 Operating Manual WITCHES... - Page 23 CW operation, this indicator will glow blue when an incoming signal is tuned to the center of the passband (with IF Shift off). And during FM reception, this indicator will glow blue when a signal is received with a CTCSS/DCS tone matching that to which your transceiver is set. FT-857 Operating Manual...
- Page 24 This is the main tuning dial for the transceiver. It is used both for frequency tuning as well as “Menu” setting in the transceiver. Liquid Crystal Display The Liquid Crystal Display (LCD) provides indication of the operating frequency and other aspects of transceiver status. & S ONTROL FT-857 Operating Manual WITCHES...
- Page 25 SP/PH Jack, to prevent injury your ears. METER Jack This 3.5-mm 2-pin jack is used for connection to an analog meter (not produced by Vertex Standard). Please refer to the MENU, No-060 and No-061. SP/PH Jack This 3.5-mm, 2-pin jack provides variable audio output for an external...
-
Page 26: Multi Function Key Detail
Press the [ C ]( TAG ) key to select the display type (Frequency or Al- pha-numeric Tag) during Memory operation. Press and hold in this key for one second, while on a recalled channel, to open Menu No.- 056, for quick programming of an Alphanumeric Tag. ô FT-857 Operating Manual WITCHES DIAL... - Page 27 Ó Ó [ A ] [ B ] [ C ] FT-857 Operating Manual ONTROL UNCTION ETAIL [ A ] Key: STO Press the [ A ]( STO ) key to store the contents of the VFO into the QMB (Quick Memory Bank) register.
- Page 28 [ B ] Key: PRI Press the [ B ]( PRI ) key to activate the Priority Scan feature. [ C ] Key: DW Press the [ C ]( DW ) key to activate the Dual Watch feature. ô FT-857 Operating Manual WITCHES...
- Page 29 Multi Function Row “i” ( MFi ) [ MTR, – – –, DISP ] Ó Ó Ó [ A ] [ B ] [ C ] FT-857 Operating Manual ONTROL UNCTION ETAIL [ A ] Key: SCOP Press the [ A ]( SCOP ) key to activate the Spectrum Scope Monitor fea- ture.
- Page 30 Press the [ B ]( AGC ) key to disable the receiver’s AGC system. Nor- mally, the AGC should be left On. [ C ] Key Press the [ C ] key to select the recovery time (Slow, Fast, or Auto) for the receiver’s AGC system. ô FT-857 Operating Manual WITCHES...
- Page 31 Ó Ó Ó [ A ] [ B ] [ C ] FT-857 Operating Manual ONTROL UNCTION ETAIL [ A ] Key: IPO Press the [ A ]( IPO ) key to bypass the receiver preamplifier, thereby activating Intercept Point Optimization for improved overload char- acteristics while operating on the HF and 50 MHz bands.
- Page 32 Press the [ C ]( ATC ) key to activate a 1750-Hz burst tone for 2 seconds when pressing the PTT switch while the channel is clear. You may program the configuration of this key via Menu Item No- 067 [ PG C ] . ô FT-857 Operating Manual WITCHES...
- Page 33 & S RONT ANEL ONTROL WITCHES FT-857 Operating Manual...
-
Page 34: Rear Panel Connectors
Negative (–) side of the power source. This Jack also provides an Transmit Power Control terminal. If you connect pin-3 (BATT SENS) of the DC power jack to the ground, the FT-857 automatically switches to 20 Watts (430 MHz: 10 Watts) of output power. - Page 35 Connect your 144 and/or 430 MHz antenna’s 50 W coaxial cable to this M-type (“SO- 239”) connector. HF/50 MHz Antenna Jack Connect your HF and/or 50 MHz antenna’s 50 W coaxial cable to this M-type (“SO- 239”) connector. FT-857 Operating Manual ANEL DASH ONNECTORS DATA OUT...
-
Page 36: Operation
Hi! I’m R.F. Radio, and I’m here to guide you through the fine points of the setup and use of your new FT-857. I know you’re anxious to get on the air, but I encour- age you to read the “Operation” section of this manual as thoroughly as possible, so you’ll get the most out of this fantastic new rig. -
Page 37: Adjusting The Audio Volume Level
Multi Function keys ( [ A ] , [ B ] , and [ C ] ) by the SELECT knob, you’ll need to press it again after exiting the Menu mode. FT-857 Operating Manual UDIO OLUME... -
Page 38: Adjusting The Rf Gain And Squelch
Menu Mode No-080 [ SQL/RF GAIN ] is “RF Gain.” If this control is configured for “SQL” operation, the FT-857’s RF Gain will be set for maximum sensitivity in all modes, and the SQL/RF Gain control will function solely as a Squelch control. -
Page 39: Changing The Dial Speed
HANGING THE By default, the FT-857 begins operation in the “fine tuning” mode for the main tuning dial. However, a faster tuning rate may be selected, for quick navigation up and down the band. To engage the “Fast Tuning” mode, just press the POWER switch momentarily while the transceiver is on. -
Page 40: Receiver Accessories
When the controls are locked out (small “ ” icon will appear at the bottom right-hand corner of the LCD), press the LOCK button once more to release them to normal operation. CCESSORIES RONT ANEL ONTROLS LOCK FT-857 Operating Manual... -
Page 41: Clarifier
2) You may change the knob that controls the Clarifier off- set from the DIAL to the SELECT knob via Menu Mode No-021 [CLAR DIAL SEL]. FT-857 Operating Manual ECEIVER ECEIVER NCREMENTAL... -
Page 42: If Shift
See page 99. CCESSORIES IF SHIFT SELECT [ CLAR (more shifted to the upper side) (slightly shifted to the upper side) (slightly shifted to the lower side) (more shifted to the lower side) FT-857 Operating Manual... -
Page 43: Agc
4. Press the [ A ]( NB ) key again to turn the Noise Blanker off. During very crowded band conditions, you may wish to turn the Noise Blanker off, as its use will degrade the strong-signal-handling capability of the receiver somewhat. FT-857 Operating Manual ECEIVER UTOMATIC ONTROL... -
Page 44: Ipo
3. Press the [ B ]( ATT ) key once more to switch the Attenuator out of the receiver front end circuit. Signals will again be received at a level 10 dB louder than was the case when the Attenuator was engaged. CCESSORIES OINT PTIMIZATION RONT TTENUATOR FT-857 Operating Manual... -
Page 45: Dsp Bandpass Filter (Dbp)
Ÿ When done, press and hold in the [ FUNC ] key for one second to save the new setting(s) and return to normal operation. 4. Press the [ C ]( DBF ) key once more to disable the DSP Bandpass Filter. FT-857 Operating Manual ECEIVER ( DBF ) -
Page 46: Dsp Cw Peaking Filter (Dbf)
This adjustment raises the AGC threshold of the receiver. CCESSORIES ( DBF ) ILTER ( DNR ) EQUIRES DSP-2 U EQUIRES PTIONAL DSP-2 U PTIONAL ” notation will appear at FT-857 Operating Manual... -
Page 47: Dsp Notch Filter (Dnf)
The “channelized” mode of tuning on AM and FM automatically rounds off the frequency to the next “logical” step when you rotate the SELECT knob one “click” in either direction. This eliminates the inconvenience of having to preset the frequency to an “even” channel. FT-857 Operating Manual ECEIVER ( DNF ) ILTER EQUIRES ”... -
Page 48: Automatic Power-Off Feature
Just press and hold in the POWER switch for one second to turn the transceiver back on after an APO shutdown, as usual. The APO feature will be disabled while using the Beacon or ARTS features, even if the APO feature is set to “ON.” CCESSORIES OWER EATURE FT-857 Operating Manual... - Page 49 ECEIVER CCESSORIES FT-857 Operating Manual...
-
Page 50: Transmitter Operation
“talk power” in many instances. The “1” position is primarily used in countries like Japan, where vowel sounds are of critical importance in conveying information; in Western languages, consonant sounds (which are rich in high-frequency components) are frequently more important. PERATION RANSMISSION FT-857 Operating Manual... -
Page 51: Vox Operation
The delay time for return to the receive mode is set independently on CW and voice modes; for CW, use Menu Mode No-024 [CW DELAY] (see next chapter). FT-857 Operating Manual RANSMITTER RANSMISSION... -
Page 52: Af Speech Processor Operation
Excessive advancement of the Compression Level may lead to distortion. Each operator’s voice pattern is different, so try several settings to find the one which is best for your voice. PERATION RANSMISSION FT-857 Operating Manual... -
Page 53: Dsp Microphone Equalizer
BOTH:High/Low Cut (mid-range frequencies are emphasized) 3. When you have made your selection, press and hold in the [ FUNC ] key for one second to save the new setting and exit to normal operation. FT-857 Operating Manual RANSMITTER RANSMISSION... -
Page 54: Cw Transmission
Ÿ When done, press and hold in the [ FUNC ] key for one second to save the new setting and exit to normal operation. 8. You also can adjust the CW sidetone pitch using Menu Mode No-027 [ CW PITCH ] . PERATION CW T RANSMISSION FT-857 Operating Manual... - Page 55 Ÿ When done, press and hold in the [ FUNC ] key for one second to save the new setting and exit to normal operation. 9. The FT-857 also has a “CW SPOT” feature, utilizing the sidetone. Because the sidetone is a representation of the actual pitch of your transmitted signal, it may be used for zeroing in on another station.
-
Page 56: Using The Built-In Electronic Keyer
Ÿ When done, press and hold in the [ FUNC ] key for one second to save the new setting and exit to normal operation. 7. You may select “normal” or “reverse” paddle polarity via Menu Mode No-025 [ CW PERATION CW T RANSMISSION FT-857 Operating Manual DASH COMMON DASH COMMON Dot : Dash = 1 : 3 (Default) - Page 57 Ÿ When done, press and hold in the [ FUNC ] key for one second to save the new setting and exit to normal operation. Menu Mode No-025 [CW KEY REV] is most frequently utilized five minutes be- fore a contest, when you realize your keyer paddle is wired backwards! FT-857 Operating Manual RANSMITTER CW T RANSMISSION...
-
Page 58: Fm Transmission
10. The VOX feature is operational during FM transmission. From Multi Function Row “d” [ RPT, REV, VOX ] , press the [ C ]( VOX ) key to activate/deactivate VOX. PERATION FM T RANSMISSION FT-857 Operating Manual... -
Page 59: Repeater Operation
Ÿ If the default repeater access tone is not appropriate for the repeater on which you are operating, it may be set easily: (1) Press and hold in the [ A ]( TON ) key for one second. This instantly recalls Menu FT-857 Operating Manual RANSMITTER FM T RANSMISSION 145.1... -
Page 60: Tone Search Scanning
CTCSS TONE FREQUENCY ( Hz ) 67.0 69.3 82.5 85.4 100.0 103.5 123.0 127.3 151.4 156.7 171.3 173.8 189.9 192.8 210.7 218.1 250.3 254.1 FT-857 Operating Manual 71.9 74.4 77.0 79.7 88.5 91.5 94.8 97.4 107.2 110.9 114.8 118.8 131.8 136.5 141.3 146.2 159.8 162.2 165.5... -
Page 61: Dcs Operation
4. When the radio detects the correct DCS code, it will halt on that code, and audio will be allowed to pass. 5. The DCS code detected will be stored as the “current” code, so it may be used for memory storage purposes, and you may now exit to normal operation. FT-857 Operating Manual RANSMITTER FM T RANSMISSION... -
Page 62: Split Tone Operation
RANSMITTER Split Tone Operation The FT-857 can be configured in a “Split Tone” configuration via the Menu mode. This allows you to encode a CTCSS Tone but decode a DCS code, encode and decode different CTCSS Tones, encode (only) a DCS code, etc. -
Page 63: Arts Tm Operation
2. Rotate the DIAL to select the desired ARTS™ Beep mode (see above). 3. When you have made your selection, press and hold in the [ FUNC ] key for one second to save the new setting and exit to normal operation. FT-857 Operating Manual RANSMITTER FM T... -
Page 64: Cw Identifier Setup
9. Rotate the DIAL to set the CW ID function to “ON.” 10. Press and hold in the [ FUNC ] key for one second to save the new setting and exit to normal operation. PERATION FM T RANSMISSION FT-857 Operating Manual... -
Page 65: Digital Mode Operation (Ssb-Based Afsk)
Use this basic technique to set up any digital mode. RTTY (Radio TeleType) Operation The “RTTY” mode on the FT-857 is available in either LSB-side or USB-side BFO injec- tion. Long-standing Amateur practice calls for the use of LSB-side injection, but some ap- plications require that you use USB-side injection. -
Page 66: Psk31 Operation
YF-122CN 300 Hz filter may also be utilized, as described previously. “USER” Defined Digital Modes Also provided in the FT-857 are two convenient “USER” Digital modes, one each provid- ing USB- and LSB-side injection, which may be used for SSTV, Fax, Pactor, and other digital operating modes. -
Page 67: Packet (1200/9600 Bps Fm) Operation
( 1200/9600 ACKET The FT-857 is designed for operation on either 1200 bps or 9600 bps packet, and setup is similar to that described previously for SSB-based modes. A separate Data input adjustment is provided, allowing you to optimize the deviation on the FM Packet modes separately from the levels set for SSB-based Digital modes. -
Page 68: Weatherfax Monitoring
Use your terminal software’s “test” protocol to send out test tones, and adjust the deviation by rotating the DIAL knob, which will vary the data input level to the FT-857’s modulator. Remember to press and hold in the [ FUNC ] key for one second when adjust- ments are completed, so as to save the new setting for Menu Mode No-071 [ PKT 1200 ] or No-072 [ PKT 9600 ] . -
Page 69: Time-Out Timer
[ A ]( A/B ) key again to return to reception on the DX station’s frequency. 7. Press the [ C ]( SPL ) key once more to cancel split operation; the “u” icon and “SPL” icon will disappear from the display. FT-857 Operating Manual RANSMITTER IMER... -
Page 70: Atas-100/-120 Operation
NTENNA The optional ATAS-100/-120 Active-Tuning Antenna System provides operation on a number of HF bands (7/14/21/28 MHz) plus 50 MHz, 144 MHz, and 430 MHz. The FT-857 pro- vides microprocessor control of the tuning mechanism in the ATAS-100/-120 for conve- nient automatic tuning. -
Page 71: Manual Tuning
50 W cable during the tuning process). 4) If you are able to achieve an SWR of less than 2:1 via manual tuning, the FT-857 will “accept” the manual setting, and you may then re-tune automatically when changing bands. -
Page 72: Atas-100/-120 Operating Tips
ATAS-100/-120 generally can be tuned successfully on these bands (some manual adjustment may be required). Operation of the ATAS-100/-120 on these bands will not damage the antenna’s components; please feel free to experiment on these bands, if you like. FT-857 Operating Manual... -
Page 73: Automatic Antenna Tuner Operation
2. Press the [ A ]( TUNE ) key to turn the FC-30 on. The “TUNE” will appear on the LCD. 3. Press and hold in the [ A ]( TUNE ) key to initiate automatic tuning. The FT-857 transmit- ter will be activated, a carrier signal will be sent out, and the coils and capacitors in the FC-30 will be selected/adjusted for optimum SWR. -
Page 74: Antenna Tuner Memory System
PERATION Antenna Tuner Memory System The FC-30, working in concert with the FT-857, can store impedance matching data in its micro-computer memory, so as to provide instant adjustment as you transmit in different areas of a particular band. A total of 100 memories are provided: 11 of these are “general”... -
Page 75: Memory Operation
[ MODE ( t )] or [ MODE ( u )] key. When either change is performed, “MTQMB” will appear in the display, where “MT” represents “Memory Tun- ing.” Press the [ B ]( RCL ) key once more to return to the originally-stored QMB frequency. FT-857 Operating Manual EMORY EMORY... -
Page 76: Memory Operation On "Regular" Memory Channel
When the Tag is complete, press the [ A ]( MW ) key momentarily. This will complete • the storage of the frequency and Alpha-Numeric label. “R ” M EGULAR EMORY character, then rotate the SELECT FT-857 Operating Manual HANNELS... -
Page 77: Split-Frequency Memory Storage
In step 7 above, pressing the PTT switch does not activate the transmitter. It sim- ply sends a signal to the microprocessor that an independent Transmit frequency is being stored on the same channel as a previously-stored Receive frequency. FT-857 Operating Manual EMORY “R ”... -
Page 78: Memory Channel Recall
1) When operating on a “Split” frequency memory, a special “–+” indication will appear on the LCD. 2) If some memory channels appear to be “missing,” be sure you are not operating in the “Memory Group” mode, and in the wrong Memory Group. “R ” M EGULAR EMORY FT-857 Operating Manual HANNELS... -
Page 79: Masking ("Hiding") A Memory
6. Memory Channel 1 is used for Priority operation, and frequency information may only be over-written (not masked) on this channel. FT-857 Operating Manual EMORY “R ” M... -
Page 80: Memory Operation On "Home" Channel Memories
(HF, 50 MHz, 144 MHz, or 430 MHz). The “HOME” indication will appear on the display. 2. Press the [ HOME ] key once more to return to the previously-used frequency (either a VFO frequency or a memory channel). “HOME” C HANNEL FT-857 Operating Manual EMORIES... -
Page 81: Labeling Memories After Programming Channel Data
“Frequency” display and “Tag” display. You can recall Menu Mode No-056 [MEM TAG] instantly by pressing and hold- ing in the [ C ]( TAG ) key for one second. FT-857 Operating Manual EMORY PERATION ROGRAMMING HANNEL [ “Frequency”... -
Page 82: Spectrum Scope Monitor
6. To disable the Spectrum Scope, press the [ A ]( SCOP ) key once more. The receiver’s audio output and S-meter are disabled when using the Continuous Sweep. COPE ONITOR FT-857 Operating Manual... -
Page 83: Smart Search Tm
6. To disable Smart Search™ operation, press the [ B ]( SRCH ) key momentarily. The Smart Search you initiate a new Smart Search or Memory system.. FT-857 Operating Manual EARCH memories are so-called “soft” memories; they will be lost if sweep of the band, or if you switch to the VFO PERATION ™... -
Page 84: Scanning Operation
In the Programmable Memory Scan (PMS) mode, the scanner will scan the band within user-programmed frequency limits. In order for the FT-857 to scan automatically, the Squelch must be set so that the back- ground noise is silenced, because the command to “Stop Scanning” driven by the same circuit that causes the green “Busy”... -
Page 85: Scan-Resume Choices
Scan-Resume Choices Scanning operation requires that you have the FT-857’s audio squelched. The transceiver then “assumes” that the opening of the squelch corresponds to the discovery of a signal you may wish to listen to. Once the scan has been halted, one of three things may happen: TIME (default action): In this mode, the transceiver pauses on the signal and stays locked on its frequency for five seconds. - Page 86 [ B ]( SKIP ) key momentarily so that the “dot” changes to become a “hyphen.” It is not possible to Skip Memory Channel M-001 (the Priority Channel). See the next chapter for details on Priority operation. PERATION CANNING PERATION FT-857 Operating Manual...
-
Page 87: Priority Channel" Scanning
“Priority” channel into Memory Channel “M-001.” 2. Set the FT-857 for operation on another memory channel, or on a VFO frequency. 3. Press the [ FUNC ] key momentarily, then rotate the SELECT knob, as needed, until Multi Function Row “g”... -
Page 88: Programmable Memory Scan (Pms) Operation
8. Press the [ C ]( PMS ) key momentarily. Tuning and scanning are now limited to the 144.30 - 148.00 MHz range until you press the [ V/M ] key to return to memory or VFO operation. PERATION ( PMS ) O EMORY FT-857 Operating Manual PERATION... -
Page 89: Dual Watch Operation
6. Press the [ C ]( DW ) key again to cancel Dual Watch operation (the “ ” icon will disap- pear). Pressing the PTT switch on the microphone does not cancel Dual Watch opera- tion. FT-857 Operating Manual CANNING ATCH PERATION... -
Page 90: Miscellaneous Settings
The FT-857 includes the capability for transmission and reception on 5167.5 kHz under such emergency conditions via the Menu system. To activate this feature: 1. -
Page 91: Cw Training Feature
CW T The FT-857 provides a CW Training feature, which sends random Morse Code five-charac- ter groups via the sidetone (heard in the speaker), so you can improve your CW proficiency whether or not the bands are open. 1. Press and hold in the [ FUNC ] key for one second to enter the Menu mode. -
Page 92: Beacon Feature
ISCELLANEOUS The FT-857’s unique “Beacon” feature allows you to set up the transceiver to send a repeti- tive message. For example, on a DX-pedition, the FT-857 beacon might be activated on a 50 MHz frequency, to alert DXers as to possible band openings. -
Page 93: Beacon Text Sending (On The Air)
6. Press the [ A ] (PLY1) key momentarily to send the “BEACON TEXT 1” message. Alterna- tively, pressing the [ B ] (PLY2) or [ C ] (PLY3) key will initiate the message at those re- spective break points. FT-857 Operating Manual ISCELLANEOUS EACON... -
Page 94: Display Customization
Disables the LCD illumination. AUTO1: Illuminates the LCD for three seconds when any button is pressed, or if you rotate the SELECT knob. AUTO2: Illuminates the LCD continuously while the FT-857 is operating on an exter- nal power supply. Illuminates the LCD continuously. -
Page 95: Display Color
3. 5. When you have completed your selection(s), press and hold in the [ FUNC ] key button for one second to exit the Menu mode. FT-857 Operating Manual ISCELLANEOUS ISPLAY... -
Page 96: Menu Operation
018 CAR USB T Sets the Tx Carrier Point for USB 019 CAT RATE Sets the transceiver’s circuitry for the CAT baud rate to be used. PERATION SELECT [ FUNC FT-857 Operating Manual DIAL Available Values Default ON/OFF ø1 ON/OFF ø1... - Page 97 057 MEM/VFO DIAL MODE Selects the function which is engaged when you press the MEM/VFO CH knob. 058 MIC SCAN Enables/disables scanning access via the microphone’s [UP]/[DWN] keys. FT-857 Operating Manual PERATION Available Values CAT/LINEAR/TUNER SEL, MAIN ON/OFF USB/LSB/AUTO...
- Page 98 50 Standard CTCSS tones 88.5 Hz OFF/1 ~ 20 (min) OFF/ATAS(HF)/ ATAS(HF&50)/ATAS(ALL)/ TUNER CFIL/FIL1/FIL2 CFIL 100 ~ 3000 (ms) 500 ms 1 ~ 100 0,000,00 ~ 9999,999,00 (kHz) OFF/X VTR A/X VTR B FT-857 Operating Manual – ø2 ø2 ø1 – –...
- Page 99 Function: Selects the tuning steps for the SELECT knob on the AM mode. Available Values: 2.5/5/9/10/12.5/25kHz Default: 5 kHz (depending on transceiver version) MENU MODE No-007 [ APO TIME ] Function: Selects the Auto Power Off time (time before power goes off). Available Values: OFF/1h ~ 6h Default: OFF FT-857 Operating Manual...
- Page 100 SELECT knob one click clockwise to move to the next character. 5. Repeat step 4 as many times as necessary to complete the Beacon Text. 6. If the Beacon Text is less than 40 characters or more than 40 characters, see page 90 for details. FT-857 Operating Manual...
-
Page 101: Cat
Function: Sets the transceiver’s circuitry for the CAT baud rate to be used. Available Values: 4800bps/9600bps/38400bps Default: 4800bps MENU MODE No•020 [ CAT/LIN/TUN ] /LINEAR jack on the rear panel. Function: Selects the device which is connected to the Available Values: CAT/LINEAR/TUNER Default: CAT FT-857 Operating Manual... - Page 102 Default: NORMAL NORMAL: Keyer paddle polarity is normal. The “tip” plug connection produces dots, and the “ring” plug connection produces dashes. REVERSE: Keyer paddle polarity is inverted. The “tip” paddle produces dashes, and the “ring” paddle produces dots. FT-857 Operating Manual...
- Page 103 MENU MODE No•031 [ CW TRAINING ] Function: Sends random Morse Code five-character groups via the sidetone. Available Values: N / A / AN Default: N N: Numeric characters only A: Alphabet characters only AN: Numeric and Alphabet characters (Mixed) FT-857 Operating Manual...
- Page 104 445 446 452 454 455 462 464 465 466 503 506 516 523 526 532 546 565 606 612 624 627 631 632 654 662 664 703 712 723 731 732 734 743 754 – – – FT-857 Operating Manual – – –...
- Page 105 MENU MODE No-041 [ DISP COLOR ] Function: Selects the illumination color for each operating status. Available Values: ARTS/BAND/FIX/MEMGRP/MODE/MTR/VFO Default: FIX: 26 MENU MODE No-042 [ DISP CONTRAST ] Function: Setting of the display contrast level. Available Values: 1 ~ 13 Default: 5 FT-857 Operating Manual...
- Page 106 Disables the LCD illumination. AUTO1: Illuminates the LCD for three seconds when any button is pressed, or if you rotate the SELECT knob. AUTO2: Illuminates the LCD continuously while the FT-857 is operating on an external power supply. Illuminates the LCD continuously.
- Page 107 Default: ON Recall the HOME channel, then rotate the DIAL or SELECT knob. The data will now have been copied to the current VFO, although the original HOME contents will remain intact on the previously-stored HOME channel. FT-857 Operating Manual PERATION...
- Page 108 “Frequency” display and “Tag” display. You can recall Menu Mode No-056 [ MEM TAG ] instantly by pressing and holding in the [ C ]( TAG ) key for one second. FT-857 Operating Manual...
- Page 109 Applies a calibration signal (1 mA for full scale) at the METER Jack on the trans- ceiver bottom, for adjustment of an external meter’s calibration. This lets you adjust the external potentiometer in your metering system so that the external meter reading is full scale. OFF: Disables the meter. FT-857 Operating Manual Remote Microphone. PERATION...
- Page 110 MENU MODE No•067 [ PG C ] Function: Programming the [ C ] key [in Operating Function Row “q” (MFq)] function. Available Values: All Multi Functions, all Menu Items (except Menu #065 through 070), MONI, Q.SPL, TCALL, ATC and USER. Default: ATC FT-857 Operating Manual...
- Page 111 Function: Setting of the maximum power level for the current band. Available Values: Depends on operating band and transceiver version. Default: Depends on operating band and transceiver version. FT-857 Operating Manual PERATION microphone’s [ ACC ] button assignment. microphone’s [ P1 ] button assignment.
- Page 112 Function: Adjusts the microphone gain level for the SSB mode. Available Values: 0 ~ 100 Default: 50 MENU MODE No-082 [ SSB STEP ] Function: Selects the tuning steps for the SELECT knob on the SSB mode. Available Values: 1 kHz/2.5 kHz/5 kHz Default: 2.5 kHz FT-857 Operating Manual...
- Page 113 Default: 500 (ms) MENU MODE No-088 [ VOX GAIN ] Function: Sets the gain of the VOX circuitry’s input audio detector. Available Values: 1 ~ 100 Default: 50 FT-857 Operating Manual CTCSS TONE FREQUENCY ( Hz ) 67.0 69.3 71.9 74.4...
- Page 114 X VTR A: Activates the transverter operation feature. The display frequency may be set via MENU No-089 [ XVTR A FREQ ] . X VTR B: Activates the second transverter operation display. The display frequency may be set via No-090 [ XVTR B FREQ ] . FT-857 Operating Manual...
- Page 115 (such as contest logging software) to communicate with the FT-857 without (redundant) operator intervention. The Optional CAT Interface Cable CT-62 is a connection cable for the FT-857 and your computer. The CT-62 has a built-in level converter, allowing direct connection from the rear...
- Page 116 ï CAT DATA BYTE FORMAT There are 17 instruction opcodes for the FT-857, listed in the chart on next page. Many of these opcodes are On/Off toggle commands for the same action (e.g. “PTT On” and “PTT Off”) Most of these commands require some parameter or parameters to be set. Irrespective of the number of parameters present, every Command Block sent must consist of five bytes.
- Page 117 Repeater Offset Frequency Repeater Offset CTCSS/DCS Mode CTCSS Tone DCS Code ø Read RX Status ø Read TX Status ø Read Frequency & Mode Status FT-857 Operating Manual CAT O PCODE OMMAND HART Parameter Opcode Notes ø ø ø CMD = 00: LOCK ON CMD = 80: LOCK OFF ø...
- Page 118 1: PTT “OFF” (RX) Note 5: Read Frequency & Mode Status DATA 1 DATA 2 DATA 3 DATA 4 DATA 5 10/1kHz MODE 100/10MHz 1MHz/100kHz 100/10Hz 00=LSB, 01=USB 02=CW, 03=CWR 82=CW-N, 04=AM 06=WFM, 08=FM 88=NFM, 0A=DIG 0C=PKT FT-857 Operating Manual...
-
Page 119: Power-On Microprocessor Reset Procedures
Menu #06 (AM STEP), 33 (DCS CODE), 52 (FM STEP), 56 (MEM TAG), 76 (RPT SHIFT), 82 (SSB STEP), and 83 (TONE FREQ). r [ HOME ] + POWER on: CPU master reset for all memories and menu settings. FT-857 Operating Manual ICROPROCESSOR ESET... -
Page 120: Cloning
They both may be turned on now for normal operation. TX D RX D CAT/LINEAR /LINEAR jack of each transceiver. RX D FT-857 Operating Manual [ Distination Radio ] [ Source Radio ] TX D CAT/LINEAR... -
Page 121: Installation Optional Accessories
5. Replace the top cover and its seven screws (remember to replace the internal speaker’s plug). 6. DSP-2 installation is now complete. Connect the DC cable to the INPUT jack. MODE Figure 1 FT-857 Operating Manual PTIONAL IGNAL ROCESSING DSP-2... -
Page 122: Optional Filters:yf-122S, Yf-122C, And Yf-122Cn
TER ] to “FIL1” or “FIL2” (the slot into which you in- stalled the optional YF-122S filter). MODE Figure 1 PTIONAL : YF-122S, YF-122C, FIL-1 TX/BUSY BAND CCESSORIES YF-122CN Optional Filter ê MAIN UNIT FIL-2 TX/BUSY MODE BAND Figure 2 FT-857 Operating Manual... -
Page 123: Optional High Stability Reference Oscillator Tcxo-9
4. Replace the top case and its seven screws (remember to replace the internal speaker’s plug). 5. TCXO-9 installation is now complete. Connect the DC cable to the INPUT jack. MODE Figure 1 FT-857 Operating Manual PTIONAL EFERENCE TX/BUSY BAND... -
Page 124: Appendix
PPENDIX ETUP OF EMORIES FOR Although the FT-857 is not capable of “full duplex” operation (simultaneous transmission and reception), its flexible memory system is ideal for configuring a set of memories for LEO satellite work. The example below is designed around the popular satellite UO-14, but the same principles apply to operation using AO-27, and other such satellites. - Page 125 VFO adjustments during the brief satellite passes. The FM passbands used on LEO satellites are sufficiently broad that more precise frequency adjustment is not needed. To aid in channel identification, remember that you can use Menu Mode No-056 [ MEM FT-857 Operating Manual...
- Page 126 TAG ] to label each satellite memory (for example, “UO-14a” ~ “UO-14e” for the above five channels). A complete set of frequencies may be stored for each LEO satellite you wish to utilize, and once configured, the FT-857 provides a flexible and easy-to-use earth station capability for these popular satellites. ( LEO ) FM S...
-
Page 127: A8J Remote Microphone
4. Press and hold in the [ FUNC ] key for one second to save the new setting and exit to normal operation. MH-59 Switches and Control LOCK Switch Pressing this key locks the FT-857’s front panel keys so as to prevent accidental frequency change. PTT Switch Press this switch to transmit, and release it to receive. Keypad... - Page 128 18 MHz ð 21 MHz ð 24 MHz ð 28 MHz ð 50 MHz ð 88 MHz ð 108 MHz ð 144 MHz ð 430 MHz ð 1.8 MHz ... This key generates the DTMF “9” tone during transmission, and frequency entry digit “9” during Direct Keypad Frequency Entry. EMOTE ICROPHONE FT-857 Operating Manual DTMF MICROPHONE MH-59...
- Page 129 This key generates the DTMF “E (#)” tone during transmission. [ A ] key This key emulates the function of the FT-857’s front panel [ A ] key. This key generates the DTMF “A” tone during transmission. [ B ] key This key emulates the function of the FT-857’s front panel [ B ] key.
- Page 130 Press (or hold in) either of these keys to tune (or scan up or down) the operating fre- quency or through the memory channels. In many ways, these keys emulate the function of the FT-859’s DIAL knob. EMOTE ICROPHONE FT-857 Operating Manual DTMF MICROPHONE MH-59...
- Page 131 Domestic public Cellular Telecommunications Service in Part 22. Part 15.21: Changes or modifications to this device not expressly approved by Vertex Standard could void the user’s authorization to operate this device. DECLARATION BY MANUFACTURER The Scanner receiver is not a digital scanner and is incapable of being converted or modified to a digital scanner receiver by any user.
- Page 132 Copyright 2002 Printed in Japan VERTEX STANDARD CO., LTD. All rights reserved. No portion of this manual may be reproduced without the permission of VERTEX STANDARD CO., LTD. 0212u-AK...
Need help?
Do you have a question about the FT-857 and is the answer not in the manual?
Questions and answers