
Related Manuals for Venturer PLV1615S


Summary of Contents for Venturer PLV1615S
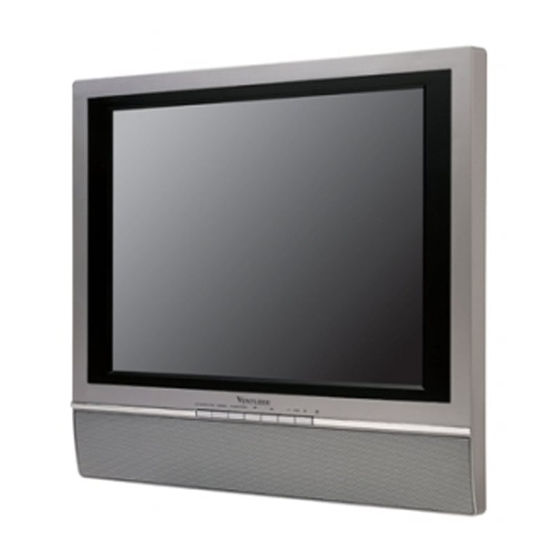
- Page 1 PLV16151S1 IB Cover Size: 148 X 210 MM 15” LCD TV PLV1615S Owner’s Manual Owner’s Manual 811-161S91WXXX...
-
Page 2: Safety Precautions
SAFETY PRECAUTIONS CAUTION RISK OF ELECTRIC SHOCK DO NOT OPEN RISQUE DE CHOC ÉLECTRIQUE NE AVIS PAS OUVRIR * SEE REAR OF UNIT FOR GRAPHIC SYMBOLS * WARNING: TO REDUCE THE RISK OF ELECTRIC SHOCK, DO NOT REMOVE COVER (OR BACK). NO USER-SERVICEABLE PARTS INSIDE. -
Page 3: Important Safety Instructions
IMPORTANT SAFETY INSTRUCTIONS 1. Read these instructions. 2. Keep these instructions. 3. Heed all warnings. 4. Follow all instructions. 5. Do not use this apparatus near water. 6. Clean only with a dry cloth. 7. Do not block any ventilation openings. Install in accordance with the manufacturer’s instructions. -
Page 4: Table Of Contents
TABLE OF CONTENTS SAFETY PRECAUTIONS ... 2 IMPORTANT SAFETY INSTRUCTIONS ... 3 REMOTE CONTROL ... 4 ACCESSORIES ... 4 REMOTE CONTROL REFERENCE GUIDE ... 5 UNIT REFERENCE GUIDE ... 6 CONNECTIONS ... 8–13 Connecting a TV antenna/Cable/Satellite ... 8 Connecting to A/V devices (VCR, PVR Camcorder, Game System, etc.) ... 9 Connecting to Devices with a composite (yellow RCA-type) Video Output ... -
Page 5: Remote Control Reference Guide
REMOTE CONTROL USING THE REMOTE CONTROL • Point the remote control at the REMOTE SENSOR located on the unit. • When using this unit in very bright light, the infrared REMOTE CONTROL SENSOR may not work properly. • The recommended effective distance for using the remote control is about 16 feet (5 meters). -
Page 6: Unit Reference Guide
REMOTE CONTROL REFERENCE GUIDE 1) FUNCTION button Toggle between AV/YUV/PC/TV. 2) TV button Press to select TV channel mode. 3) Number (0 - 9) buttons Use to change the TV channels. 4) EXIT button Press to exit the menu and return directly to normal viewing. - Page 7 UNIT REFERENCE GUIDE FRONT & BOTTOM VIEW 1) Color LCD Screen 2) STANDBY indicator Indicates whether the unit is ON or in STANDBY (OFF) mode. Light On: The unit is in STANDBY. Light Off: The unit is turned ON. 3) STANDBY/ON button Turns the unit on and off.
-
Page 8: Connections
CONNECTIONS CONNECTING A TV ANTENNA/CABLE/SATELLITE To view television channels correctly, a signal must be received from one of the following sources: - An indoor or outdoor aerial antenna - A cable system - A satellite system Note: For receiving over-the-air TV broadcasts, we recommend that you use an external fixed antenna. -
Page 9: Connecting To A/V Devices (Vcr, Pvr Camcorder, Game System, Etc.)
CONNECTIONS CONNECTING TO A/V DEVICES (VCR, PVR, CAMCORDER, GAME SYSTEM, ETC.) Connecting to Devices with an S-Video Output To connect to A/V devices such as a VCR or camcorder: - Connect to a VCR Connect the right (red) and left (white) audio output from the VCR to the right (red) and left (white) input on this unit (Audio cable not included). -
Page 10: Connecting To Devices With A Composite (Yellow Rca-Type) Video Output
CONNECTIONS CONNECTING TO DEVICES WITH A COMPOSITE (YELLOW RCA- TYPE) VIDEO OUTPUT To connect to A/V devices such as a VCR or camcorder: - Connect to a VCR Connect the right (red) and left (white) audio output from the VCR to the right (red) and left (white) input on this unit and connect the video (yellow) output from the VCR to the video input on this unit (Video/ Audio cable not included). -
Page 11: Connecting To Devices With A Composite (Yellow Rca-Type) Video Input
CONNECTIONS CONNECTING TO DEVICES WITH A COMPOSITE (YELLOW RCA- TYPE) VIDEO INPUT To connect to A/V devices such as a VCR, PVR or camcorder: - Connect to a VCR/PVR Connect the right (red) and left (white) audio input from the VCR/PVR to the right (red) and left (white) output on this unit and connect the video (yellow) input from the VCR/PVR to the video output on this unit (Video/Audio cable not included). -
Page 12: Connecting To Sources With Component Video Output (Dvd - Only 480I, 480P, 720P & 1080I Are Supported)
CONNECTIONS CONNECTING TO SOURCES WITH COMPONENT VIDEO OUTPUT (DVD - ONLY 480I, 480P, 720P & 1080I ARE SUPPORTED) Devices with component video output must be connected to the YUV input: Connect the three video outputs (Y, Pb, Pr) from the source to the corresponding video inputs on this unit (Component video cable not included). -
Page 13: Connecting A Pc
CONNECTIONS CONNECTING A PC Connect the 15-pin D-SUB PC/VGA connector from your computer to the 15-pin D-SUB PC/VGA input on this unit using a monitor cable (not included). Connect a stereo audio cable (not included) to the PC AUDIO IN jack on the bottom of this unit, and the other end to the AUDIO OUT jack on your computer’s sound card. -
Page 14: Installation
INSTALLATION MOUNTING ON THE WALL This unit is VESA-compliant, and is designed to be wall-mounted with a VESA-compliant 75mm x 75mm mounting kit designed for flat-panel TVs (sold separately). Mount this unit according to the directions included with the mounting kit. 75mm USING HEADPHONES •... -
Page 15: Tv Setup
TV SETUP MAIN MENU 1. Press the MENU button. 2. Use button to select the options (Picture / Sound / Setup / TV Setting / Restore Setting). 3. The screen will change to your selected mode immediately. 4. To exit the MAIN MENU and return to the normal screen, press the EXIT button on remote control. -
Page 16: Sound Menu
TV SETUP In PC mode Use or button to select the options (Brightness, Contrast, Frequency, Phase, H offset, V offset, Auto config, Color Temp, Mode) and adjust them using the (The screen will change to your desired setting). Resolution : 1024 x 768 max Refresh Frequency : 60Hz max •... -
Page 17: Setup Menu
TV SETUP SETUP MENU 1. Press the MENU button. 2. Use button to select the Setup menu, then press setting. 3. Use button to select the options (OSD Size, Language, Parental, Timers) to be adjusted, then use the 4. Repeat step 3 to adjust other settings. 5. -
Page 18: Parental Setting
TV SETUP PARENTAL SETTING Lock code 1. Press the MENU button. 2. Use button to select the Setup menu, then press setting. 3. Use button to select the Parental menu, then press the setting and the menu locked screen will be displayed. 4. - Page 19 TV SETUP Child lock 1. Press the MENU button. 2. Use button to select the Setup menu, then press setting. 3. Use button to select the Parental menu, then press 4. Enter a 4-digit to select the Lock code and turn on/off the Child lock using button.
-
Page 20: Tv Setting
TV SETUP TV SETTING 1. Press the TV MENU button. 2. Use the button to select the TV setting menu, then press the confirm the setting. 3. Use the button to select the Channel no. setting and use the to change the channel no. 4. -
Page 21: Mts Setting
TV SETUP MTS (Multi-channel Television Sound) setting This feature allows reception of sound other than the main audio for the program. 1. Press the MENU button. 2. Use button to select the TV setting menu, then press button to confirm the setting. -
Page 22: Troubleshooting Guide
TROUBLE SHOOTING GUIDE SYMPTOM No power. The remote does not function. Bad Picture (snow, multiple images, distortion, blurry) No sound. Black and white picture. No picture or sound. Colored patches of picture. PLV16151S1 VEN - WM CANADA.pmd CAUSE (AND REMEDY) •... -
Page 23: Maintenance
MAINTENANCE CLEANING THE UNIT • Be sure to turn the unit off and disconnect the AC power cord before maintaining the unit. • Wipe the unit with a dry soft cloth. If the surfaces are extremely dirty, wipe clean with a cloth which has been dipped in a weak soap-and-water solution and wrung out thoroughly, then wipe with a dry cloth.
Need help?
Do you have a question about the PLV1615S and is the answer not in the manual?
Questions and answers