Table of Contents
Advertisement
Advertisement
Table of Contents

Related Manuals for Toshiba TLP-ET1E


Summary of Contents for Toshiba TLP-ET1E
- Page 1 OWNER’S MANUAL 3LCD PROJECTOR TLP-ET1B TLP-ET1E TLP-ET1U...
-
Page 2: Before Using
– Connect the equipment into an outlet on a circuit different from that to which the receiver is connected. – Consult the dealer or an experienced radio/TV technician for help. WARNING: Changes or modifications made to this equipment, not expressly approved by Toshiba, or parties authorized by Toshiba, could void the user’s authority to operate the equipment. -
Page 3: Important Safety Instructions
Before Using IMPORTANT SAFETY INSTRUCTIONS CAUTION: PLEASE READ AND OBSERVE ALL WARNINGS AND INSTRUCTIONS PROVIDED IN THIS OWNER'S MANUAL AND THOSE MARKED ON THE UNIT. KEEP THIS BOOKLET FOR FUTURE REFERENCE. This set has been designed and manufactured to assure personal safety. Improper use can result in electric shock or fire hazard. - Page 4 Before Using IMPORTANT SAFETY INSTRUCTIONS (Continued) 7. Cleaning Unplug this product from the wall outlet before cleaning. Do not use liquid cleaners or aerosol cleaners. Use a soft cloth for cleaning. 8. Power-Cord Protection Power-supply cords should be routed so that they are not likely to be walked on or pinched by items placed upon or against them, paying particular attention to cords at plugs,...
-
Page 5: Replacement Parts
15. Accessories Do not place this product on an unstable cart, stand, tripod, bracket, or table. The product may fall, causing serious injury to a child or adult, and serious damage to the product. Use only with a cart, stand, tripod, bracket, or table recommended by the manufacturer, or sold with the product. -
Page 6: Label Locations
Doing these things by yourself may cause injury due to a fall, etc. TLP-ET1B MODEL NO. / RATING Label TLP-ET1E TLP-ET1U WARNING Label WARNING Label... -
Page 7: Important Precautions
Retain this information for future reference. EXEMPTION CLAUSES • Toshiba Corporation bears no responsibility in the case of damages arising from natural disaster (such as earthquakes, lightning, etc.), fires not liable to Toshiba Corporation, operating by third parties, other accidents, or use under abnormal conditions including erroneous or improper operation and other problems. -
Page 8: Other Cautions And Informations
Before Using OTHER CAUTIONS AND INFORMATIONS Copyrights Showing or transmitting commercial imaging software or broadcast or cable-broad casting programs with the purpose of other than the personal and private viewing, including modifying images using the freeze or resize functions, or displaying with the varying aspect ratio of the images, could violate the direct or indirect copyrights of the imaging software or broadcast program, etc., if done without first consulting with the copyright holder. -
Page 9: Table Of Contents
Before Using CONTENTS Before Using SAFETY PRECAUTIONS ... 2 IMPORTANT SAFETY INSTRUCTIONS ... 3 LABEL LOCATIONS ... 6 IMPORTANT PRECAUTIONS ... 7 EXEMPTION CLAUSES ... 7 OTHER CAUTIONS AND INFORMATIONS ... 8 Checking the package contents ... 8 CONTENTS ... 9 Selecting the Power Cord ... -
Page 10: Preparations
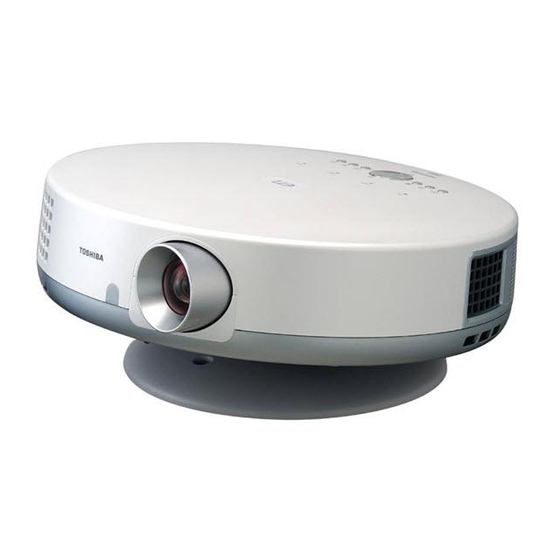
Preparations Parts of the main unit Bottom (15) (14) Name (1) Control panel (2) Focusing ring (3) Lens (4) Infrared remote sensor (5) Air exhaust (6) Speaker (Right) (7) Connection terminals (8) AC IN socket (9) Speaker (Left) (10) Air intake (11) Air filter cover (12) Anti-theft lock hole (13) Tilt stand... -
Page 11: Parts On The Control Panel And Remote Control
Preparations Parts on the control panel and remote control Control panel (10) (2) (3) Name : Main function (1) ON/STANDBY button : Turns the power on/off (standby). ( (2) INPUT buttons : Select input. ( (3) MENU button : Displays menus. ( (4) Select buttons : Make menu selections and adjustments, etc. -
Page 12: Connection Terminals
* Although the AV IN terminal is included in illustrations in this manual, the terminal exists only on the TLP-ET1B and TLP-ET1E. TLP-ET1U is not equipped with the AV IN terminal. The AV IN terminal automatically identifies the RGB and composite signals. -
Page 13: Preparing And Using The Remote Control
Preparations Preparing and using the remote control Loading batteries into the remote control Remove the battery cover. Insert dry cell batteries. Check the positive and negative terminals of each battery to load it correctly. Use two AAA (LR03 or R03) dry cell batteries. Put back the battery cover. -
Page 14: Placing The Projector
Preparations Placing the projector • Always obey the instructions listed in IMPORTANT SAFETY INSTRUCTIONS when placing the unit. • If you wish to mount the projector on the ceiling, be sure to ask your dealer to do so. Mounting the projector on a ceiling requires special ceiling brackets (sold separately) and specialized knowledge. -
Page 15: Connecting An Input Source Device
Preparations Connecting an input source device Before connection • Read the owner’s manual of the device to connect to the projector. • Turn off the power of both devices before connecting. Connecting a video device I Using the AV or S-Video cable To audio output(R) White To audio output(L) -
Page 16: Connecting A Dvd Player With Component Video Terminals
Preparations Connecting an input source device (Continued) Connecting a DVD player with component video terminals Component video cable (not supplied) To component video output Connecting a computer • Some types of computer cannot be connected to or used with this projector. Check the computer for an RGB output terminal, supported signal, and so on. -
Page 17: Operations
Operations Turning the power on and off Before turning the power on Connect the power cord. q Insert the power cord connector into the AC IN socket on the projector. w Insert the power cord plug into a wall or other power outlet. When the power cord is plugged in, the ON indicator comes on in orange, indicating that the unit is on standby. -
Page 18: Turning The Power On
Operations Turning the power on and off (Continued) Turning the power on • Do not look into the lens during operation. Doing so could damage your vision. • Families with children should be particularly careful. • Do not block the air intake or exhaust. Doing so could cause a fire due to •... -
Page 19: Turning The Power Off
Turning the power off Press the ON/STANDBY button. Remote control Control panel Press the ON/STANDBY button again. Remote control Control panel Note • The projector consumes about 1 W (AC 100 - 120 V) or 3 W (AC 220 - 240 V) of power in standby. You should unplug the power cord if you will not use the projector for an extended period. -
Page 20: Projecting
Operations Projecting Turn on the power. Turn on the power by following the instructions in “Turning the power on” (see p.18). Adjust the projection angle. Adjust the angle of the main unit as you like. • The angle can be adjusted within a range of approximately ±10°... - Page 21 Turn on the connected device such as a video device. Select the connected input. • Pressing the VIDEO/S button switches the projected picture between • Pressing the YP • “AV” is available only for the TLP-ET1B and TLP-ET1E. Adjust the volume with the buttons. Remote control Control panel Notes •...
-
Page 22: Easy Setup Using The Easy Button
Operations Easy setup using the EASY button You can use the EASY button to configure frequently used adjustments and settings. For any settings (adjustments) other than the settings (adjustments) described in this section, see “Using the menus” ( p.30) to make the settings (adjustments) as required. Press the EASY button. - Page 23 Item Projection size Change the picture area size on the screen. p.24 for details. Keystone Correct the keystone (trapezoid) distortion of the screen. (For keystone distortion, see “Correction of keystone distortion” described below.) Picture mode Switch to the picture mode suitable for movie or game screens. Press OK button first, and then set the item with Standard/Cinema/Game Screen size...
-
Page 24: Changing The Projection Size
Operations Changing the projection size You can change the projection size (picture area size on the screen). Notes • The “Projection size” can also be adjusted via the “Easy setting” menu. (See • Decreasing the projection size may degrade the images more or less. Press the ( ) button. -
Page 25: Changing The Screen Size
Operations Changing the screen size The projection screen of this projector is 16:9, though the screen size can be changed depending on the input signal. Press the SIZE button on the remote control. Full Theater wide : This mode is best for 4:3-signal video images on the wide screen. Zoom Input signal 4:3 signal... -
Page 26: Cutting Off The Sound/Pausing The Picture
Operations Cutting off the sound/Pausing the picture Cutting off the sound temporarily (Mute) You can turn off the projector’s sound temporarily. Notes • The • Operating any other function cancels the muting. • It can also be canceled by pressing the EXIT button on the remote control. Cutting off both the picture and sound temporarily (Sleep) You can turn off both the projector’s picture and sound temporarily. -
Page 27: Switching The Picture And Sound
Operations Switching the picture and sound Setting the picture mode You can switch the picture mode suitable for the movie or game screen. Press a PICTURE MODE button (STD./CINEMA/ GAME) on the remote control. STD. CINEMA GAME • Select the desired picture mode. Switching to surround sound Surround sound reproduces deep and expanded atmospheres through natural, realistic sensations. -
Page 28: Enlarging The Picture (Zoom)
Operations Enlarging the picture (Zoom) You can enlarge (zoom in) the image being projected. Notes • The icon will appear while Zoom is in effect. • An enlarged image can be frozen using the FREEZE button. The Zoom function on the frozen image can also be used. -
Page 29: Calling Up A User Profile
Operations Calling up a user profile You can easily switch the projector to the settings saved on the “User memory” menu (see Press the USER button. Remote control Control panel Use the settings saved (as a user profile) in user memory, then press the OK button. -
Page 30: Using The Menus
Operations Using the menus How to use the menus You can call up on-screen menus, and conduct a number of adjustments and settings using the operation buttons on the remote control and on the main unit’s control panel. For details on each adjustment and setting item, see the corresponding page. Menus shown below are only for operation instructions and might be different from the actual display. - Page 31 Use the buttons to select a desired adjustment or setting item. Picture adjustment e.g. Sharpness Item Standard Auto. (When an adjustment item is selected) Use the buttons to adjust the selected item. e.g. Picture adjustment Sharpness Adjustment bar Standard indicate you can adjust the current item.
-
Page 32: Picture Adjustment Menu
Operations Using the menus (Continued) Picture adjustment menu Use this menu to adjust image-related items. e.g. Enter Menu Picture adjustment Contrast Brightness Sharpness TrueLife by Faroudja Noise reduction Standard Picture mode Color Tint R-gain G-gain B-gain Video mode Auto. Item Contrast Adjust picture contrast. - Page 33 Item Auto setting Adjust items, such as the sampling phase, depending on the type of input signal. Press the OK button. Phase Adjust with Frequency Adjust with patterns and flickering when many vertical lines appear on the screen. H-position Adjust the horizontal position of the picture screen.
-
Page 34: Audio Adjustment Menu
Operations Using the menus (Continued) Audio adjustment menu Use this menu to adjust audio-related items. e.g. Menu Enter Audio adjustment Volume Treble Bass Balance Surround Item Volume Adjust the volume of sound. Treble Adjust the higher frequency range of audio output. Bass Adjust the lower frequency range of audio output. -
Page 35: Default Setting Menu
Default setting menu Use this menu to make settings such as the placement style (projection mode). e.g. Menu Enter Exit Default setting Keystone Screen size Zoom Up/down shift Lamp power Projection mode 1 Front Projection mode 2 Standard Language English NTSC mode All reset Lamp time reset... -
Page 36: Status Display Menu
Operations Using the menus (Continued) Status display menu This menu displays information about the input signal, lamp use time, etc. e.g. Menu Exit Status display Input Mode name H-resolution V-resolution H-frequency V-frequency Sync Lamp time Version Item Input Displays the input source name. Mode name Displays the RGB signal mode name. -
Page 37: User Memory Menu
User memory menu Use this menu to register up to three sets of adjustments and settings made on the menu screen as user profiles. You can call any of the user profiles later using the USER button. (See Press the MENU button. Use the button to select the user memory menu icon [ Remote control Control panel... - Page 38 Operations Using the menus (Continued) Press the button, move the cursor to the user memory registration name, then press the OK button. Remote control Control panel Use the , and want to enter, then press the OK button. Remote control Control panel When you finish entering characters, use the buttons to select “...
-
Page 39: Maintenance
Maintenance Removing the tilt stand Do not remove the tilt stand unless when you replace the lamp or mount the projector on a ceiling. Removing the tilt stand leaves the projector unstable and may block the air intake at the bottom. Usually, the projector must be used with the tilt stand. -
Page 40: Air Filter Cleaning
Maintenance Air filter cleaning The air filter prevents dust and debris from getting inside the projector. Never run the projector with the filter removed. The air filter should be cleaned regularly. • The icon message, “Check the air filter for dirt,” is displayed every 100 hours. (If the usage time exceeds 100 hours, this message is displayed for 30 seconds when the image is displayed for the first time after the power is turned on. -
Page 41: Lens And Main Unit Cleaning
Maintenance Lens and main unit cleaning • Request cleaning and maintenance of a ceiling-mounted unit to your projector dealership. Lens cleaning • Clean the lens with a commercially available blower and/or lens cleaner. • The lens is easily scratched, so do not rub it with hard objects, or strike Main unit cleaning •... -
Page 42: Lamp Replacement
Maintenance Lamp replacement A lamp is a consumable supply. If the lamp is used for an extended period, images will appear dark, and the lamp could burn out. This is a characteristic of a lamp, and is not a malfunction. (The lifetime of the lamp depends on conditions of use.) If this happens, replace it with a new one. - Page 43 Remove the lamp cover. Loosen the screw, put your fingers on the hollow, then pull up to the direction of the arrow as shown in the figure to remove the lamp cover. Hollow Pull out the lamp. Loosen the two lamp locking screws, and pull up the handle to remove the lamp.
- Page 44 Maintenance Lamp replacement (Continued) Reset the lamp timer. q Turn on the power of this unit. The startup screen appears, followed by the replacement message screen. w Press the MENU button. The menu screen appears. e Select “Lamp time reset” in the “Default setting” menu and press the OK button. r Select “Yes”...
-
Page 45: Others
Others Trouble indications The indicator lights inform you of internal abnormalities. No power LAMP TEMP ⇒ Problem with projector (Off) • Unplug the power cord, and contact your dealer. Lamp went out during use LAMP TEMP ⇒ Lamp temperature is high so that it is difficult to turn on, the lifetime of the lamp (Red lit) (Red lit) (Green lit) has ended, or the projector is malfunctioning. -
Page 46: Before Calling Service Personnel
Others Before calling service personnel If you think something is wrong, check the followings before contacting customer service. Please see “Trouble indications” ( If This Happens No power Power goes out during use No picture No audio Picture not displayed correctly Picture blurred Part of picture out of focus Image is dark... -
Page 47: Specifications
Others Specifications List of general specifications Item Power consumption 220 W (At standby: 1 W (AC 100 - 120 V) or 3 W (AC 220 - 240 V)) Weight 3.5 Kg 320 × 85 × 320 (W × H × D) (Tilt stand excluded) External dimensions 320 ×... -
Page 48: List Of Supported Signals
Others Specifications (Continued) List of supported signals Note • If the resolution of input signals exceeds the LCD panel’s maximum number of pixels, the picture is displayed expanded/compressed and thus some information may be lost or image quality may be affected. If the functions of changing the projection size and correcting the keystone distortion are used together, the screen may not be displayed properly. -
Page 49: Pin Assignment Of Computer Terminal
I List of supported signals (Y/P Signal format fh(kHz) 480i(525i)@60Hz 15.73 480p(525p)@60Hz 31.47 576i(625i)@50Hz 15.63 576p(625p)@50Hz 31.25 720p(750p)@60Hz 45.00 720p(750p)@50Hz 37.50 1080i(1125i)@60Hz 33.75 1080i(1125i)@50Hz 28.13 1035i(1125i)@60Hz 33.75 1152i(1250i)@50Hz 31.25 I List of supported signals (Video and S-Video signals) Video mode fh(kHz) NTSC 15.73...