
Related Manuals for Kyocera TASKalfa 9003i


Summary of Contents for Kyocera TASKalfa 9003i
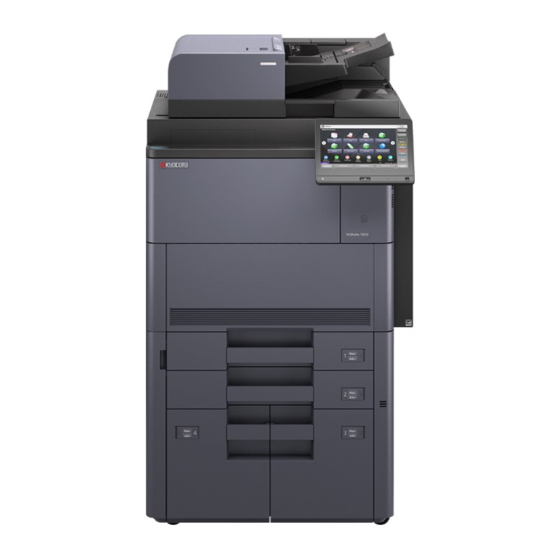
- Page 1 First Steps Quick Guide TASKalfa 9003i TASKalfa 8003i TASKalfa 7003i...
- Page 2 Login If this screen is displayed during operations, enter following login user name and password. Login User Name: Login Password: TASKalfa 9003i - 9000 TASKalfa 9003i - 9000 Login abcdef User Name TASKalfa 8003i - 8000 TASKalfa 8003i - 8000...
- Page 3 Preface Operation Guide First Steps Quick Guide This guide (A) only explains the basic operations of the machine. For other information, see Operation Guide (B) on the Product Library disc. En aquesta guia (A) només es descriuen les operacions bàsiques de la màquina. Per obtenir més informació, consulteu la Guia de Funcionament (B) al disc Biblioteca del producte (Product Library).
- Page 4 Niniejszy podręcznik (A) objaśnia jedynie podstawowe sposoby używania urządzenia. Więcej informacji można znaleźć w Podręczniku Obsługi (B) lub na dysku Product Library. Este guia (A) somente explica as operações básicas da máquina. PT-BR Para obter outras informações, consulte o Guia de Operação (B) no disco Product Library. Este guia (A) explica apenas as operações básicas da máquina.
- Page 5 Install Drivers and Utilities If Found new Hardware window appears, click Cancel. Si es mostra la finestra "Found new Hardware" (S'ha detectat maquinari nou), feu clic a Cancel·la. Pokud se zobrazí dialogové okno Nalezen nový hardware, klepněte na tlačítko Storno. Vælg Annuller, hvis dialogboksen Der er fundet ny hardware.
- Page 6 Install Wizard Follow the instructions in the installation wizard. Seguiu les instruccions de l'auxiliar d'instal·lació. Řiďte se pokyny v průvodci instalací. Følg instruktionerne i installationsguiden. Folgen Sie den Anweisungen des Schnelleinstellung Assistenten. Ακολουθήστε τις οδηγίες στον οδηγό εγκατάστασης. Siga las instrucciones del asistente de instalación. Noudata asennusohjelman ohjeita.
- Page 7 Cancelling Copy/Scan Authentic./ Admin Logout Select the function. System Menu /Counter Interrupt Copy Send Custom Box Numeric Keypad Reset Job Box USB Drive FAX Box Internet Browser Stop Status/ Device Language Paper Wi-Fi Direct Help Program Start Job Cancel Information Settings 08/08/2018 14:00 Status...
- Page 8 Copy Authentic./ Admin Logout Select the function. System Menu /Counter Interrupt Copy Send Custom Box Numeric Keypad Reset Job Box USB Drive FAX Box Internet Browser Stop Status/ Device Language Paper Wi-Fi Direct Help Program Start Job Cancel Information Settings 08/08/2018 14:00 Status Accessibility...
- Page 9 Copies Copies Authentic./ Admin Logout Select the function. System Menu /Counter ID Card Copy Preview Preview Interrupt Original Paper Mixed Size Original Size Selection Originals Orientation Copy Send Custom Box Numeric Keypad Auto 100% Normal 0 Fold Collate/ Staple Paper Output Paper Zoom Density...
-
Page 10: Status Page
Scan (E-mail) Setup https://192.168.48.21/ Launch your Web browser. Status Page Inicieu el navegador web. Network TCP/IP Spusťte váš webový prohlížeč. Printer Host Name: KMA2FA6A IPv4 Start din webbrowser. IP Address: 192.168.48.21 Starten Sie Ihren Webbrowser. In the Address or Location bar, enter the machine’s Εκκινήστε... - Page 11 User Name: Admin Password: Admin Enter "Admin" and log in to Command Center RX From the [Function Settings] menu, click [E-mail]. with administrator authority. Introduïu “Admin” i inicieu sessió al Command Al menú [Configuració de funcions], feu clic a Center RX com a administrador. [E-mail].
- Page 12 Set SMTP Protocol [On], and then enter the Stel SMTP-protocol in op [Aan] en voer following items. vervolgens de volgende items in. • SMTP Server Name • SMTP-servernaam • E-mail Size Limit • Groottebeperking e-mail • Sender Address • Adres afzender Establiu el Protocol SMTP en [Activat] i introduïu Sett SMTP-protokoll [På], og tast deretter inn les dades següents.
- Page 13 Send Authentic./ Admin Logout Select the function. System Menu /Counter Interrupt Copy Send Custom Box Numeric Keypad Reset Job Box USB Drive FAX Box Internet Browser Stop Status/ Device Language Paper Wi-Fi Direct Help Program Job Cancel Information Settings Start Status 08/08/2018 14:00 Status/...
- Page 14 Destination Destination Enter Destination. Destination Detail Address Sending Image Book Recall Original Mixed Size 2-sided/Book Original E-mail Size Originals Original Orientation Addr Entry Folder Path Entry Sending Size File Format File Long FAX Server On Hook Direct Chain Detail/Edit Delete Dest.
- Page 15 Authentic./ Destination Admin Logout Select the function. System Menu /Counter Sending Image Interrupt Original Mixed Size 2-sided/Book Original Size Originals Original Orientation Copy Send Custom Box Numeric Keypad Sending Size File Format File Long Separation Original Reset Original Zoom 100% Job Box USB Drive FAX Box...
- Page 16 FAX (Option) Authentic./ Admin Logout Select the function. System Menu /Counter Interrupt Copy Send Custom Box Numeric Keypad Reset Job Box USB Drive FAX Box Internet Browser Stop Status/ Device Language Paper Wi-Fi Direct Help Program Job Cancel Information Settings Start Status 08/08/2018 14:00...
- Page 17 Destination Sending Image Original Mixed Size 2-sided/Book Original Size Originals Original Orientation Sending Size Long Original Original Zoom 100% Send Preview Destination Quick Setup Org./Sending Image Quality Advanced Program Data Format Setup f0103 Status Specify destination. Select the functions. Especificació de la destinació. Seleccioneu les funcions.
- Page 18 Authentic./ Destination Admin Logout Select the function. System Menu /Counter Sending Image Original Mixed Size 2-sided/Book Original Interrupt Size Originals Original Orientation Copy Send Custom Box Numeric Keypad Sending Size Long Original Reset Original Zoom 100% Job Box USB Drive FAX Box Internet Browser Send...
-
Page 19: Private Printing
Private printing From a PC To activate the private printing from the PC, set the items No. 1 and 2 in the screen. Per activar la impressió privada des d'un PC, configureu els elements núm. 1 i núm. 2 de la pantalla. Pro aktivaci soukromého tisku z počítače vyberte položku č.1 a 2 na obrazovce. - Page 20 From the Operation Panel Authentic./ Admin Logout Select the function. System Menu /Counter Interrupt Copy Send Custom Box Numeric Keypad Reset Job Box USB Drive FAX Box Internet Browser Stop Status/ Device Language Paper Wi-Fi Direct Help Program Job Cancel Information Settings Start...
- Page 21 File: File (1 - 9999, ---) copy(s) Cancel Start Print b0303 Enter the password. Specify the number of copies to print as desired > [Start Print] Introduïu la contrasenya. Indiqueu el nombre de còpies que voleu imprimir. > [Imprimeix] Zadejte požadovaný počet kopií. > [Zahájit tisk] Zadejte heslo.
-
Page 22: Troubleshooting
Troubleshooting Authentic./ Admin Logout Select the function. The slit glass requires cleaning. System Menu /Counter 1. Open the document processor. 2. Clean the slit glass surface and the white Interrupt reading guide on the document processor with the dry accessory cloth. 3. - Page 23 Als er een fout optreedt op het apparaat, dan verschijnt de foutmelding op het scherm. Bovendien gaat ook het Opgelet-indictorlampje op het bedieningspaneel branden of knipperen. Volg de instructies op het scherm om de fout te wissen. Voor meer informatie, raadpleeg de Gebruikershandleiding op de Product Library schijf.
-
Page 24: Clear Paper Jam
Clear Paper Jam Paper jam. 1. Open cassette 1. 2. Remove the paper. To remove paper which is difficult to get access to, the cassette can be removed. 3. Close the cassette. JAM s e011001 If paper jam occurs, follow the guidance on the operation panel to remove paper. Si s'encalla el paper, seguiu els passos indicats al tauler d'operacions per extraure el paper. - Page 25 MEMO...
- Page 26 MEMO...
- Page 28 2019.4 302XT5602001...
Need help?
Do you have a question about the TASKalfa 9003i and is the answer not in the manual?
Questions and answers