
Related Manuals for Nexo PS Series


Summary of Contents for Nexo PS Series
- Page 1 PS Series PS8 – LS400 – PS8 Analogue TD Controller PS10R2 –LS600 -PS10 Analogue TD Controller PS15R2 – PS15 Analogue TD Controller User Manual PS Series User Manual V1.03 DP2538...
-
Page 2: Please Read Carefully Before Proceeding
Water exposure: Do not expose the speaker system to direct rain, do not use it near water or in wet conditions. Do not place containers with liquid on speaker system as they might spill into openings. If any liquid such as water seeps into the speaker system, have it inspected by qualified NEXO personnel. - Page 3 PLEASE READ CAREFULLY BEFORE PROCEEDING Page 3/82 SAFETY INSTRUCTIONS FOR NEXO TD CONTROLLERS NEXO ANALOGUE PSTDCONTROLLERS, NX242 DIGITAL CONTROLLER, NXAMP4x1 NXAMP4x4 POWERED CONTROLLERS CLASS APPARATUS AND MUST BE EARTHED. THE GREEN AND YELLOW WIRE OF THE MAINS CORD MUST ALWAYS BE CONNECTED TO AN INSTALLATION SAFETY EARTH OR GROUND.
- Page 4 Page 4/82 PLEASE READ CAREFULLY BEFORE PROCEEDING HIGH SOUND PRESSURE LEVELS Exposure to extremely high noise levels may cause permanent hearing loss. Individuals vary considerably in susceptibility to noise-induced hearing loss but nearly everyone will lose some hearing if exposed to sufficiently intense noise for a sufficient period of time.
-
Page 5: Table Of Contents
PS and LS recommended amplification ....................12 3.1.1 Current rating ..........................12 3.1.2 Amplifier settings ......................... 12 PS Series systems and NXAMP TDControllers ................... 14 3.2.1 NXAMP connectors ........................14 3.2.2 PS Series and NXAMP recommended configurations ..............15 PS Series Setups on NEXO TD Controllers....................16 Analogue PSTDControllers ........................ - Page 6 7.3.3 PS10R2 and PS15R2 mounted on a ceiling (vertical or horizontal) ........... 35 7.3.4 PS10R2 and PD15R2 wall suspension (vertical or horizontal) ..........36 PS Series in touring applications ......................39 7.4.1 Touring Accessories ........................39 7.4.2 PS on speaker stand or on RS15 horizontally ................40 7.4.3...
- Page 7 9.6.5 9.6.6 Wall suspension for PS8 & PS10 (VNI-WS10)................77 9.6.7 Wall suspension for PS15R2 (VNI-WS15) .................. 78 PS Series Parts & Accessories List ...................... 79 10.1 Modules & Control Electronics List ...................... 79 10.2 Accessories List ........................... 80 USER NOTES ............................82...
-
Page 8: Introduction
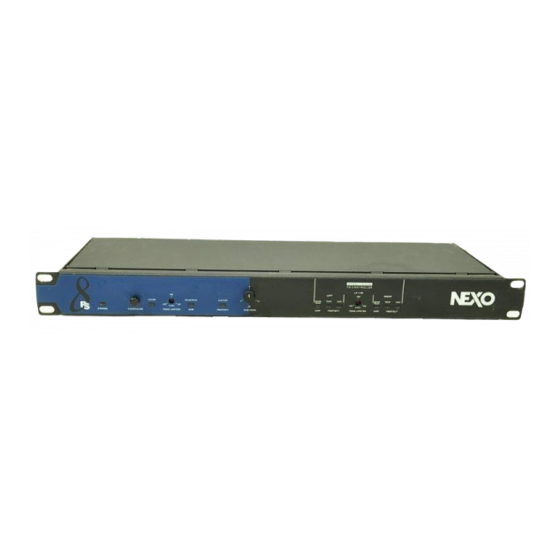
PS10 Analogue TD Controller (for PS10 and LS600) PS15 Analogue TD Controller (for PS15 and RS15) A full range of accessories that provides safe, flexible and simple means of installing PS Series in fixed installation as well as in touring applications. - Page 9 Page 9/82 NTRODUCTION As for all NEXO systems, PS Series are controlled, powered and monitored by dedicated NEXO TDControllers: PS analogue TDController provides full control for PS Series and dedicated subwoofers. It has 2 analogue inputs (Left and Right) and 3 analogue outputs (Sub-Bass, PS Left and PS Right);...
-
Page 10: Ps General Set-Up Instructions
NSTRUCTIONS 2.1 Speaker connection PS Series connected with Speakon NL4FC plugs (not supplied). A wiring diagram is printed on the connection panel located on the back of each cabinet.The 4 pins of the 2 Speakon sockets identified in / out are connected in parallel within the enclosure. -
Page 11: Configuring Ps15 For Passive Or Active Mode
ACTIVE MODE 2.1.5 Cabling NEXO recommends the exclusive use of multi-conductor cables to connect the system: the cable kit is compatible with all the cabinets, and there is no possible confusion between LF, MF and HF sections. Cable choice consists mainly of selecting cables of the correct sectional dimension (size) in relation to the load resistance and the cable length. -
Page 12: Amplifier Selection For Use With Ps-Series
ELECTION FOR USE WITH ERIES NEXO recommends high power amplifiers in all cases. Budget constraints are the only reason to select lower power amplifiers. A lower power amplifier will not reduce the chances of driver damage due to over-excursion, and may actually increase the risk of thermal damage due to sustained clipping. If an incident occurs on an installation without protection, the fact that amplifiers only generating half their rated output power (-3dB) are used will not change anything in respect of possible damage. - Page 13 Remember that constant sensitivity settings will give a different gain value when the amplifier power is different. NEXO recommends low gain amplifiers: +26dB is recommended, as it is at the same time adequately low and quite common amongst amplifier manufacturers. This gain setting improves signal to noise ratio and allows all preceding electronic equipment, including the NX242 TDcontroller or PS TDControllers, to operate at optimum level.
-
Page 14: Ps Series Systems And Nxamp Tdcontrollers
These functions are not adapted to specific system requirements and may interfere with the complex protection algorithms used in the NEXO TD Controllers. NEXO do not advise using other protection systems in conjunction with the NEXO TD Controllers and they should be disabled. -
Page 15: Ps Series And Nxamp Recommended Configurations
1 RS15 Omni 1 channel of NXAMP4x1 in Bridge Stereo Mode 1 channel of NXAMP4x4 in 4 channels Mode Please refer to following documents (available at www.nexo-sa.com) for detailed information on specific configurations: NXAMP4x1 and NXAMP4x4 User Manual NXAMP Application Guideline... -
Page 16: Ps Series Setups On Nexo Td Controllers
Digital NX242-ES4 PS Series setups reproduce Analogue PS TDControllers parameters, with 4 independent processing channels. 4.3 NXAMP TDControllers At PS Series User Manual current version printing time, 3 families of PS Series setups for NXAMP have been defined: standard, reproducing Analogue PS TDControllers parameters;... -
Page 17: Connection Diagrams
Page 17/82 ONNECTION DIAGRAMS ONNECTION DIAGRAMS 5.1 PS8 & LS400 with PS8 TDController... -
Page 18: Ps8 & Ls400 With Nxamp4X1
Page 18/82 ONNECTION DIAGRAMS 5.2 PS8 & LS400 with NXAMP4x1... -
Page 19: Ps8 & Ls400 With Nxamp4X4
Page 19/82 ONNECTION DIAGRAMS 5.3 PS8 & LS400 with NXAMP4x4... -
Page 20: Ps10 & Ls600 With Ps10 Tdcontroller
Page 20/82 ONNECTION DIAGRAMS 5.4 PS10 & LS600 with PS10 TDController... -
Page 21: Ps10 & Ls600 With Nxamp4X1
Page 21/82 ONNECTION DIAGRAMS 5.5 PS10 & LS600 with NXAMP4x1... -
Page 22: Ps10 & Ls600 With Nxamp4X4
Page 22/82 ONNECTION DIAGRAMS 5.6 PS10 & LS600 with NXAMP4x4... -
Page 23: Ps15 Passive & Rs15 Omni With Ps15 Tdcontroller
Page 23/82 ONNECTION DIAGRAMS 5.7 PS15 Passive & RS15 Omni with PS15 TDController... -
Page 24: Ps15 Passive & Rs15 Omni With Nxamp4X1
Page 24/82 ONNECTION DIAGRAMS 5.8 PS15 Passive & RS15 Omni with NXAMP4x1... -
Page 25: Ps15 Passive & Rs15 Omni With Nxamp4X4
Page 25/82 ONNECTION DIAGRAMS 5.9 PS15 Passive & RS15 Omni with NXAMP4x4... -
Page 26: Ps15 Active With Nxamp4X4
Page 26/82 ONNECTION DIAGRAMS 5.10 PS15 Active with NXAMP4x4... -
Page 27: Configurable Asymetrical Horn
SYMETRICAL 6.1 Principle The Asymmetrical Dispersion Constant Directivity horn is an important feature of the PS Series. This concept was previously only available for highly specialized applications; in the general purpose PS it is fully exploited thanks to a practical design that makes user configuration of the horn practical and quick. -
Page 28: Front Of House " Configuration (Default Configuration)
(below cabinet axis) and narrow coverage ("long-throw") for distant areas (on or above axis). The PS Series horizontal horn coverage varies from "short-throw" to "long-throw" along the vertical axis to precisely match these practical requirements in a single system. For the majority of applications, the asymmetrical horn should be used with its "wide"... -
Page 29: Ps Series Hardware Setup Procedure
PS Series accessories structural computations and related documents are available at Nexo (info@nexo.fr) upon request. We include this section to remind you of safe practice when flying the PS Series. Please read it carefully. However, user must always apply his or her knowledge, experience and common sense. If in any doubt, seek advice from your supplier or NEXO agent. -
Page 30: Ground Stacking Safety
PS S ERIES HARDWARE SETUP PROCEDURE The PS Series Rigging System requires regular inspection and testing by a competent test centre. NEXO recommend that the system is load tested and certified annually or more frequently if local regulations require. -
Page 31: General Description
WARNING 2 All PS Series accessories have been designed so that cabinets are installed as single standalone speakers. PS Series assemblies as shown in figure below are UNSAFE and STRICTLY PROHIBITED. -
Page 32: Ps Series In Fixed Installations
IMPORTANT In order to prevent screws from getting loose in fixed installations, use blocking liquid LOCTITE 243 or equivalent for all screws used with PS Series fixed installation accessories. LOCTITE 243 is available at NEXO or at your local distributor upon request. -
Page 33: Ps Rigidly Mounted On A Wall Or A Ceiling (Vertical Or Horizontal)
PS S Page 33/82 ERIES HARDWARE SETUP PROCEDURE 7.3.2 PS rigidly mounted on a wall or a ceiling (vertical or horizontal) Required items 1 x VNI-UBRK (8 / 10 / 12) (allows all angles to be implemented) 4 x 12mm diameter screws (not provided) IMPORTANT Ensure that the surface –... - Page 34 Page 34/82 PS S ERIES HARDWARE SETUP PROCEDURE “U” BRACKET MOUNTING PROCEDURE FOR PS10R2 “U” BRACKET MOUNTING PROCEDURE FOR PS15R2...
-
Page 35: Ps10R2 And Ps15R2 Mounted On A Ceiling (Vertical Or Horizontal)
PS S Page 35/82 ERIES HARDWARE SETUP PROCEDURE 7.3.3 PS10R2 and PS15R2 mounted on a ceiling (vertical or horizontal) Required items Ceiling Cable suspension: 1 or 2 x VNI-LBRK (holes for cable suspension are 10mm diameter); 2 or 4 slings and corresponding shackles (not provided) Ceiling Rigid suspension ... -
Page 36: Ps10R2 And Pd15R2 Wall Suspension (Vertical Or Horizontal)
Page 36/82 PS S ERIES HARDWARE SETUP PROCEDURE Horizontal (PS15R2 only) Remove the four TORX screws holding connector plates on both side of PS15R2; Remove the connector plates from PS15R2; Fill each screw hole with Locktite 243 or equivalent; ... - Page 37 PS S Page 37/82 ERIES HARDWARE SETUP PROCEDURE Procedure Vertical 12mm diameter screws (not provided) are required to secure the wall suspension plate on the wal; Remove the 2 rear TORX screws holding connector plates on both sides of PS10R2 or PS15R2; ...
- Page 38 Page 38/82 PS S ERIES HARDWARE SETUP PROCEDURE Horizontal Install the “U” bracket as described in preceding section Connect the “U” bracket to the connector plate by using the srews provided with the VNI-WS kit; Secure the screws; ...
-
Page 39: Ps Series In Touring Applications
PS S Page 39/82 ERIES HARDWARE SETUP PROCEDURE 7.4 PS Series in touring applications 7.4.1 Touring Accessories Accessories are : « U » bracket for horizontal suspension of PS8 (VNT-SSBRK8); “Flying Adaptor for PS8 (VNT-ADPT) « U » bracket for horizontal suspension of PS10R2 (VNT-SSBRK10);... -
Page 40: Ps On Speaker Stand Or On Rs15 Horizontally
1 x Speaker stand diameter 35mm (K&M 213 or equivalent); Or NEXO PS pole stand (STDPS) for mounting on top of SubBass; IMPORTANT (SPEAKER STAND) - Speaker stand must be rated for PS cabinet weight; - Speaker stand must always be installed on a horizontal surface;... -
Page 41: Ps Flown Vertically
In order to prevent screws from getting loose from the PS8, use blocking liquid LOCTITE 243 or equivalent the two screws securing the PS8 flying adaptor. LOCTITE 243 is available at NEXO or at your local distributor upon request. PS8 FLYING ADAPTOR INSTALLATION All PS series cabinets: ... - Page 42 Connect truss hook VNT-TCBRK to flying bar by inserting 8x45 quick release pin in required holes for proper vertical aiming; Ensure truss hook is properly locked to flying bar; Lift and position assembly, lock hook on truss suspension point and secure with hook cable. PS SERIES VERTICAL SUSPENSION PROCEDURE...
-
Page 43: Ps Flown Horizontally
In order to prevent screws from getting loose from the PS8, use blocking liquid LOCTITE 243 or equivalent the two screws securing the PS8 flying adaptor. LOCTITE 243 is available at NEXO or at your local distributor upon request. PS8 FLYING ADAPTOR INSTALLATION All PS series cabinets: ... - Page 44 Ensure truss hook is properly locked to “U” bracket; Lift and position assembly, lock hook on truss suspension point and secure with hook cable. PS SERIES HORIZONTAL SUSPENSION PROCEDURE Unlocking the “u” bracket safety locker Lift the metal plate located at the corner of the bracket and unfold the side bar...
-
Page 45: Testing And Maintenance Of The System
After cleaning, the PS accessories must be treated with a suitable lubricant to prevent rusting. NEXO recommends the use of Scottoil FS365 which is a water-based lubricant with a mixture of machine oil, surfactant and anti-rust treatment. -
Page 46: Nexo Analogue Pstd Controllers
FCC Rules, any changes or modifications to this equipment not expressly approved by been dropped. NEXO S.A. may cause, harmful interference and void the FCC authorization to operate this equipment. -
Page 47: Analogue Tdcontroller Setting-Up Advice
8.3.1 Mains Power NEXO TDcontrollers don’t provide a mean to switch off the unit from the front panel. As they are intended to be rack mounted the back panel is not accessible during use. Therefore it is left to the user to provide a disconnection mean readily operable. -
Page 48: Recommendations For Wiring The Sense Lines
The emission (this word describes all types of electromagnetic noise radiated by the equipment) requirements which have been applied to Nexo’s TDcontrollers are the stringent requirements of the ”Commercial and light industrial environment” of the product family EMC standard for emission. -
Page 49: Analogue Tdcontroller User Guide
NEXO A PSTD C Page 49/82 NALOGUE ONTROLLERS It is sometimes claimed that connecting cable shield at both ends creates ground loop, and that the current flowing in such loop will produce noise. This is not the case for most professional audio equipment. -
Page 50: Read Before Use
Page 50/82 NEXO A PSTD C NALOGUE ONTROLLERS 8.4.1 Read before use The Analogue TDcontroller is designed to be used with its proper set of speaker cabinet. They are not interchangeable. Its main functions are: To optimize the response of the system ... -
Page 51: Rear Panel
NEXO A PSTD C Page 51/82 NALOGUE ONTROLLERS Adjusting the Subbass level (Sub Level) The potentiometer adjusts the level of the Subbass channel, a range of 12 dB allows a variety of configurations and application conditions to be accommodated. Center position of the knob is calibrated for 1 Subbass used with 2 distant PS. - Page 52 Page 52/82 NEXO A PSTD C NALOGUE ONTROLLERS Output Level Switch The 3-position output level switch is used to match the processor gain to the amplifier gain for optimum signal to noise ratio. The three gain values available are +6, 0 or -6 dB. For minimum noise floor the - 6dB setting should be chosen, for maximum headroom the +6dB position should be used.
-
Page 53: Tdcontroller Reference Guide
NEXO A PSTD C Page 53/82 NALOGUE ONTROLLERS 8.5 TDcontroller REFERENCE GUIDE 8.5.1 Linear section The characteristics of the linear section are independent of signal level, as opposed to the servo control functions described in next paragraph. Subsonic and VHF filtering... - Page 54 Page 54/82 NEXO A PSTD C NALOGUE ONTROLLERS Displacement control The signal from the sense input is fed through a shaping filter producing a signal proportional to the voice coil displacement. This control signal is compared to a fixed value and if exceeded, the LF-VCEQ is activated with very short attack time to reduce speaker excursion.
-
Page 55: Technical Specifications
1 PS8. As part of a policy of continual improvement, NEXO reserves the right to change specifications without notice. [a] Response curves & data : Anechoïc Far Field for the PS8 + PS8TD. Half-Space Anechoïc radiation for the LS400 + PS8TD. -
Page 56: Dimensions
Page 56/82 ECHNICAL PECIFICATIONS 9.1.2 Dimensions... -
Page 57: Diagrams
Page 57/82 ECHNICAL PECIFICATIONS 9.1.3 Diagrams On-axis response LS400 (grey) & PS8 (black) Impedance LS400 (grey) & PS8 (black) Horizontal plane coverage, vertical orientation +25° Horizontal plane coverage, vertical orientation 0° Horizontal plane coverage, vertical orientation -25° Vertical plane coverage... -
Page 58: Ps10R2 - Ls600
2.9 kg (6.6 Lbs) net As part of a policy of continual improvement, NEXO reserves the right to change specifications without notice. [a] Response curves & data : Anechoïc Far Field for the PS10 + PS10TD. Half-Space Anechoïc radiation for the LS600 + PS10TD. -
Page 59: Dimensions
Page 59/82 ECHNICAL PECIFICATIONS 9.2.2 Dimensions... -
Page 60: Diagrams
Page 60/82 ECHNICAL PECIFICATIONS 9.2.3 Diagrams On-axis response LS600 (grey) & PS10 (black) Impedance LS600 (grey) & PS10 (black) Horizontal plane coverage, vertical orientation +25° Horizontal plane coverage, vertical orientation 0° Horizontal plane coverage, vertical orientation -25° Vertical plane coverage... -
Page 61: Ps15R2
2.9 kg (6.6 Lbs) net As part of a policy of continual improvement, NEXO reserves the right to change specifications without notice. [a] Response curves & data : Anechoic Far Field for the PS15 + PS15TD. Half-Space Anechoic radiation for the RS15 + PS15TD. -
Page 62: Dimensions
Page 62/82 ECHNICAL PECIFICATIONS 9.3.2 Dimensions... -
Page 63: Diagrams
Page 63/82 ECHNICAL PECIFICATIONS 9.3.3 Diagrams Impedance RS15 – 1 channel - (grey) & PS15 (black) On-axis response RS15 (grey) & PS15 (black) Horizontal plane coverage, vertical orientation +25° Horizontal plane coverage, vertical orientation 0° Horizontal plane coverage, vertical orientation -25° Vertical plane coverage... -
Page 64: Ps Analogue Tdcontrollers
Page 64/82 ECHNICAL PECIFICATIONS 9.4 PS Analogue TDcontrollers 9.4.1 Specifications SPECIFICATIONS +22 /+16/+10 dBm typical into 600 load (+6/0/-6dB back panel switch). Output Section Input Section Maximum input level : 22dBu. CMRR 80dB @ 1kHz typical. THD+N 0.1% @ 1kHz Typ. for +10dBm output Noisefloor PSTD -100 dBv for 0dB switch position (22 Hz - 22 kHz, unweighted) Dynamic Range... -
Page 65: Ps Touring Applications Accessories
Page 65/82 ECHNICAL PECIFICATIONS 9.5 PS Touring Applications Accessories 9.5.1 “U” Bracket for PS8 (VNT-SSBRK8, includes VN-ADPT) Parts Dimensions... -
Page 66: U" Bracket For Ps10R2 (Vnt-Ssbrk10)
Page 66/82 ECHNICAL PECIFICATIONS 9.5.2 ”U” Bracket for PS10R2 (VNT-SSBRK10) Parts Dimensions... -
Page 67: U" Bracket For Ps15R2 (Vnt-Ssbrk15)
Page 67/82 ECHNICAL PECIFICATIONS 9.5.3 ”U” Bracket for PS15R2 (VNT-SSBRK15) Parts Dimensions... -
Page 68: Flying Rail For Ps8* / Ps10R2 / Ps15R2 (Vnt-Ttc)
Page 68/82 ECHNICAL PECIFICATIONS 9.5.4 Flying Rail for PS8* / PS10R2 / PS15R2 (VNT-TTC) * VNT-ADPT required for PS8 Parts Dimensions... -
Page 69: Lifting Ring For "U" Bracket Or Flying Rail (Vnt-Xhbrk, Includes Bl845)
Page 69/82 ECHNICAL PECIFICATIONS 9.5.5 Lifting Ring for ”U” bracket or Flying Rail (VNT-XHBRK, includes BL845) Parts Dimensions... -
Page 70: Truss Hook For "U" Bracket Or Flying Rail (Vnt-Tcbrk)
Page 70/82 ECHNICAL PECIFICATIONS 9.5.6 Truss hook for “U” bracket or Flying Rail (VNT-TCBRK) Parts Dimensions... -
Page 71: Flying Adaptor For Ps8 (Vnt-Adpt)
Page 71/82 ECHNICAL PECIFICATIONS 9.5.7 Flying Adaptor for PS8 (VNT-ADPT) (mandatory for use in conjunction with VNT-SSBRK8 or VNT-TTC) Parts Dimensions... -
Page 72: Ps Fixed Installations Accessories
Page 72/82 ECHNICAL PECIFICATIONS 9.6 PS Fixed Installations Accessories 9.6.1 PS8 “U” Bracket (VNI-UBRK8) Parts Dimensions... -
Page 73: Ps10R2 "U" Bracket (Vni-Ubrk10)
Page 73/82 ECHNICAL PECIFICATIONS 9.6.2 PS10R2 “U” Bracket (VNI-UBRK10) Parts Dimensions... -
Page 74: Ps15R2 "U" Bracket (Vni-Ubrk12)
Page 74/82 ECHNICAL PECIFICATIONS 9.6.3 PS15R2 “U” Bracket (VNI-UBRK12) Parts Dimensions... -
Page 75: L" Bracket For Cable Suspension For Ps10R2 And Ps15R2 (Vni-Lbrk)
Page 75/82 ECHNICAL PECIFICATIONS 9.6.4 “L” Bracket for cable suspension for PS10R2 and PS15R2 (VNI-LBRK) Parts Dimensions... -
Page 76: U" Bracket For Rigid Suspension For Ps10R2 And Ps15R2 (Vni-Abrk)
Page 76/82 ECHNICAL PECIFICATIONS 9.6.5 “U” Bracket for rigid suspension for PS10R2 and PS15R2 (VNI-ABRK) Parts Dimensions... -
Page 77: Wall Suspension For Ps8 & Ps10 (Vni-Ws10)
Page 77/82 ECHNICAL PECIFICATIONS 9.6.6 Wall suspension for PS8 & PS10 (VNI-WS10) Parts Dimensions... -
Page 78: Wall Suspension For Ps15R2 (Vni-Ws15)
Page 78/82 ECHNICAL PECIFICATIONS 9.6.7 Wall suspension for PS15R2 (VNI-WS15) Parts Dimensions... -
Page 79: Ps Series Parts & Accessories List
PS S & A Page 79/82 ERIES ARTS CCESSORIES 10 PS S & A ERIES ARTS CCESSORIES 10.1 Modules & Control Electronics List MODEL DRAWING DESCRIPTION PS8 speaker LS400 LS400 Subwoofer for PS8 PS10R2-L PS10R2-R PS10R2 speaker Left and Right versions LS600 LS600 subwoofer for PS10R2 PS15R2-L... -
Page 80: Accessories List
Page 80/82 PS S & A ERIES ARTS CCESSORIES 10.2 Accessories List MODEL DRAWING DESCRIPTION Touring “U” bracket for PS8 VNT-SSBRK8 VNT-ADPT Touring Flying Adaptor for PS8 Touring “U” bracket for PS10R2 VNT-SSBRK10 Touring “U” bracket for PS15R2 VNT-SSBRK15 Truss hook for all VNT-SSBRKs (includes 8x45 Quick VNT-TCBRK Release Pin) Lifting Ring for all VNI-SSBRKs (includes 8x45 Quick... - Page 81 PS S & A Page 81/82 ERIES ARTS CCESSORIES MODEL DRAWING DESCRIPTION VNI-WS10 Fix installation wall mounting for PS8 & PS10R2 VNI-WS15 Fix installation wall mounting for PS15R2...
-
Page 82: User Notes
Page 82/82 USER NOTES 11 USER NOTES France Nexo S.A. Parc d’activité de la dame jeanne F-60128 PLAILLY Tel: +33 3 44 99 00 70 Fax: +33 3 44 99 00 30 E-mail: info@nexo.fr www.nexo-sa.com...
Need help?
Do you have a question about the PS Series and is the answer not in the manual?
Questions and answers