Table of Contents
Advertisement
Quick Links
Advertisement
Table of Contents

Related Manuals for Canon LBP5000 Series


Summary of Contents for Canon LBP5000 Series
- Page 1 Service Manual LBP5000/5100 Series Feb 26 2007...
- Page 3 Canon will release technical information as the need arises. In the event of major changes in the contents of this manual over a long or short period, Canon will issue a new edition of this manual.
- Page 4 Introduction Symbols Used This documentation uses the following symbols to indicate special information: Symbol Description Indicates an item of a non-specific nature, possibly classified as Note, Caution, or Warning. Indicates an item requiring care to avoid electric shocks. Indicates an item requiring care to avoid combustion (fire). Indicates an item prohibiting disassembly to avoid electric shocks or problems.
- Page 5 Introduction The following rules apply throughout this Service Manual: 1. Each chapter contains sections explaining the purpose of specific functions and the relationship between electrical and mechanical systems with refer- ence to the timing of operation. In the diagrams, represents the path of mechanical drive; where a signal name accompanies the symbol , the arrow indicates the direction of the electric signal.
-
Page 7: Table Of Contents
Contents Contents Chapter 1 PRODUCT DESCRIPTION 1.1 Features ..............................1- 1 1.1.1 Feature ..................................1- 1 1.1.2 Feature ..................................1- 1 1.2 System construction ...........................1- 1 1.2.1 System Construction ............................... 1- 1 1.2.2 System Construction ............................... 1- 2 1.3 Product Specifications ..........................1- 2 1.3.1 Product Specifications ............................. - Page 8 Contents 2.4.2 High-Voltage Control..............................2- 13 2.4.2.1 Outline....................................2- 13 2.4.2.2 Outline....................................2- 13 2.4.2.3 Generation of the Primary Charging Bias ..........................2- 14 2.4.2.4 Generation of the Developing Bias ............................2- 14 2.4.2.5 Generation of the Transfer Bias............................. 2- 14 2.4.2.6 Generation of the Fixing Bias..............................
- Page 9 Contents 2.8.1.1 Outline....................................2- 36 2.8.2 DC Controller................................. 2- 36 2.8.2.1 Outline....................................2- 36 2.8.2.2 Operation of Individual Blocks ............................... 2- 37 2.8.2.3 Fan/Motor Control .................................. 2- 38 2.8.2.4 Fan/Motor Control .................................. 2- 38 2.8.2.5 Main Motor Fault Detection..............................2- 38 2.8.2.6 Fan Motor Fault Detection ..............................
- Page 10 Contents 3.2.10.4 Removing the Main Motor ..............................3- 13 3.2.11 DC Controller PCB ...............................3- 13 3.2.11.1 Preparation for Removing the DC Controller PCB ....................... 3- 13 3.2.11.2 Removing the DC Controller PCB............................3- 13 3.2.11.3 The former procedure of removing the DC Controller PCB ....................3- 13 3.2.11.4 Removing the DC Controller PCB............................
- Page 11 Contents 3.4.3 ETB Unit ................................3- 26 3.4.3.1 Preparation for Removing the ETB Unit..........................3- 26 3.4.3.2 Removing the ETB Unit ................................. 3- 26 3.4.3.3 The former procedure of removing the ETB Unit ........................3- 27 3.4.3.4 Removing the ETB Unit ................................. 3- 27 3.4.4 Static Charge Eliminator............................
- Page 12 Contents 3.6.3.3 The former procedure of removing the Fixing Pressure Roller ....................3- 40 3.6.3.4 Removing the Fixing Pressure Roller ............................ 3- 41 3.6.4 Fixing Motor ................................3- 41 3.6.4.1 Preparation for Removing the Fixing/Delivery Motor ......................3- 41 3.6.4.2 Removing the Fixing/Delivery Motor ............................3- 41 3.6.4.3 The former procedure of removing the Fixing/Delivery Motor....................
- Page 13 Contents 5.5.1 Error Code ................................5- 7 5.5.2 Error Code ................................5- 9 5.6 Service Mode............................5- 11 5.6.1 Outline ................................... 5- 11 5.6.1.1 Outline....................................5- 11 5.6.2 Service Mode Table............................... 5- 11 5.6.2.1 Service Mode Items ................................5- 11 5.6.2.2 Service Mode Items ................................5- 11 Chapter 6 APPENDIX 6.1 OUTLINE OF ELECTRICAL COMPONENTS ....................6- 1 6.1.1 Clutch/Solenoid ...............................
- Page 14 Contents...
-
Page 15: Chapter 1 Product Description
Chapter 1 PRODUCT DESCRIPTION... - Page 17 Contents Contents 1.1 Features ..................................1-1 1.1.1 Feature......................................1-1 1.1.2 Feature......................................1-1 1.2 System construction ...............................1-1 1.2.1 System Construction ..................................1-1 1.2.2 System Construction ..................................1-2 1.3 Product Specifications..............................1-2 1.3.1 Product Specifications ................................. 1-2 1.3.2 Product Specifications ................................. 1-3 1.4 Name of Parts.................................1-4 1.4.1 External View ....................................
-
Page 19: Features
7. High-Performance Printing System (CAPT) The machine draws on the latest developments in CAPT (Canon Advanced Printing Technology), which promises high performance in a Windows operating system. Thanks to the technology, data processing usually assigned to the printer is now fully undertaken by a PC to take full advantage of the use of a PC for higher printing speed. -
Page 20: System Construction
Chapter 1 1 0 0 L N K E R R N B -C F-1-1 [1] Paper Feeder PF-92 [2] Network Board NB-C1 1.2.2 System Construction 0015-8325 LBP5100 The following shows the machine's system construction: 1 0 0 L N K E R R N B -C F-1-2... -
Page 21: Product Specifications
Chapter 1 Toner type non-magnetic, 1-component dry toner Toner supply type By EP cartridge (for A4/LTR, about 2500 impressions of Bk; about 2000 impressions of M, C, and Y) Warm-up time 195 sec or less (approx.; at power-on, at 20 deg C) Image margin (Leading edge) 5.0+1.5/-1.5mm Image margin (Trailing edge) -
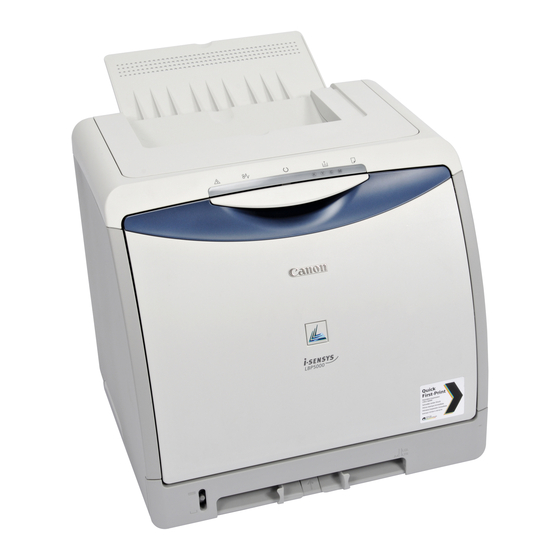
Page 22: Name Of Parts
Chapter 1 Warm-up time 0 second 195 seconds or less immediately after the toner cartridges are replaced Image margin (Leading edge) 5.0+1.5/-1.5mm Image margin (Trailing edge) 5.0+1.5/-1.5mm Image margin (Left/right) 5.0+1.0/-1.0mm Number of gradations 16 gradations Printing resolution 600dpi x 600dpi First print time 20 sec or less (approx.;... - Page 23 Chapter 1 F-1-3 Delivery tray Right cover Paper guide Cassette Manual feeder slot Front cover Lamp unit...
-
Page 24: Cross Section View
Chapter 1 F-1-4 Left cover Rear cover Cassette protective cover Expansion board slot USB port Grounding wire terminal Power supply switch Power supply receptacle Test Print Switch (On the DC controller PCB) 1.4.2 Cross Section View 0010-7393 LBP5000 / LBP5100... -
Page 25: Using The Machine
Chapter 1 [14] [13] [12] [11] [10] F-1-5 Delivery roller Fixing pressure roller Transfer roller Registration shutter Registration roller Separation pad Pickup roller Developing cylinder [10] Photosensitive roller [11] Primary charging roller [12] Fixing film unit [13] Toner cartridge [14] Laser/scanner block 1.5 Using the Machine 1.5.1 Control Panel... -
Page 26: Safety
Chapter 1 T-1-1 On/Flash Description Service call is occurring. Alarm Indicator [1] flash An error is occurring, disabling printing. Paper Jam Indicator [2] flash A paper jam is occurring, disabling printing. The printer is in the sleep mode and ready to print. engine in operation, printing The printer is busy performing some Ready Indicator [3] flash... - Page 27 Chapter 1 2. Do not use warm or hot water, which will cause the toner to jell, permanently fusing it with the fibers of the clothes. 3. Do not bring toner into contact with vinyl material. They are likely to react with each other.
-
Page 29: Chapter 2 Technical Reference
Chapter 2 TECHNICAL REFERENCE... - Page 31 Contents Contents 2.1 Functional Configuration ...............................2-1 2.1.1 Outline......................................2-1 2.2 Basic Sequense................................2-1 2.2.1 Basic Sequence of Operation ............................... 2-1 2.2.2 Power-On Sequence..................................2-1 2.3 LASER EXPOSURE SYSTEM.............................2-2 2.3.1 Overview/Configuration ................................2-2 2.3.1.1 Outline..........................................2-2 2.3.2 Laser Control ....................................2-4 2.3.2.1 Outline..........................................2-4 2.3.2.2 Laser Emission Control....................................2-4 2.3.2.3 Automatic power control (APC) ..................................2-5 2.3.2.4 Horizontal synchronous control ..................................2-5...
- Page 32 Contents 2.4.5.2 ETB Cleaning ....................................... 2-20 2.5 Pickup/Feeding/Delivery System ..........................2-21 2.5.1 Overview/Configuration ................................2-21 2.5.1.1 Outline .......................................... 2-21 2.5.2 Other Control ..................................... 2-23 2.5.2.1 Outline .......................................... 2-23 2.5.2.2 Picking Up Paper from the Cassette ................................2-24 2.5.2.3 Picking Up Paper from the Manual Feeder ..............................2-24 2.5.2.4 Moving the Print Paper ....................................
- Page 33 Contents 2.8.3.2 Overview of the Block ....................................2-39...
-
Page 35: Functional Configuration
Chapter 2 2.1 Functional Configuration 2.1.1 Outline 0010-6039 LBP5000 / LBP5100 The machine may be broadly divided into the following 6 functional blocks: engine control system, laser exposure system, image formation system, pickup/trans- port/delivery system, fixing system, and externals/auxiliary control system. Laser exposure system Image formation system Pickup/transport/delivery system... -
Page 36: Laser Exposure System
Chapter 2 2.3 LASER EXPOSURE SYSTEM 2.3.1 Overview/Configuration 2.3.1.1 Outline 0010-6044 LBP5000 / LBP5100 The machine's laser/scanner system serves to form latent images on the photosensitive drum according to the video signals coming from the video controller PCB, and its principal components include the laser driver PCB and the scanner motor. These components are grouped as a laser scanner unit, and are controlled by the DC controller PCB. - Page 37 Chapter 2 VDO4, /VDO4 VDO3, /VDO3 VDO2, /VDO2 VDO1, /VDO1 F-2-3 The machine's laser/scanner unit is designed in such a way that a single scanner mirror is used to guide 2 laser beams (colors) at the same time (4-laser/2-mirror method). Instead of the 4 scanner mirrors and scanner motors, the machine uses 2 mirrors and motors to perform the same mechanism, permitting the use of a smaller laser unit and, ultimately, a smaller machine size.
-
Page 38: Laser Control
Chapter 2 4) The scanner mirror reflects the laser beam while rotating at a specific speed so that the beam scans the surface of the photosensitive drum at a corresponding speed. 5) When the photosensitive drum rotates at a specific speed and, in addition, the laser beam scans the surface of the photosensitive drum at a corresponding speed, a latent image appears on the drum surface. -
Page 39: Automatic Power Control (Apc)
Chapter 2 2.3.2.3 Automatic power control (APC) 0011-1371 LBP5000 / LBP5100 The machine makes sure that the intensity of the laser diode (LD) remains at a specific level at all times. The APC mechanism may be either initial APC or between-line APC, and both are controlled by the laser driver circuit as follows: 1) When the DC controller PCB switches the operating mode of the laser driver circuit to LD forced activation mode, the laser driver circuit forces the LD to go on. -
Page 40: Fault Detection
Chapter 2 2.3.2.6 Fault Detection 0010-6049 LBP5000 / LBP5100 The machine possesses a mechanism used to check the laser diode for a fault. In the course of initial APC, the laser IC converts the laser current of the laser diode into its corresponding level of voltage (PDOUT), and sends the result to the DC control PCB. -
Page 41: Fault Detection
Chapter 2 3) If the phase of /BDI12 is behind that of the phase reference clock signal, the DC controller generates /SCNACC12; if ahead, it generates /SCNDEC12 to correct any variation in rotation between lines. 2.3.3.4 Fault Detection 0010-6051 LBP5000 / LBP5100 The CPU monitors the frequency comparator of the ASIC to find out whether the scanner motor is rotating at a specific speed. -
Page 42: Image Formation Process
Chapter 2 Fixing pressure roller Photosensitive drum Laser beam Transfer roller Primary charging Laser/scanner roller unit VDO4, /VDO4 VDO3, /VDO3 VDO2, /VDO2 VDO1, /VDO1 Developing cylinder Memory tag Memory controller PCB Print command Video High-voltage power DC controller PCB controller supply PCB Video signal F-2-8... -
Page 43: Electrostatic Latent Image Formation Block
Chapter 2 Step 4:Transfer Step 5:Separation 4. Fixing block Fix the toner image on paper Step 6:Fixing 5. Drum cleaning block Clean the residual toner on the photosensitive drum. Step 7:Drum cleaning Fixing block Delivery 6. Fixing Transfer block 5. Separation 4. -
Page 44: Developing Block
Chapter 2 Exposed area Time (t) -100 Unexposed area -500 Primary Laser beam Primary Transfer charging exposure charging (step 4) (step1) (step2) (step1) F-2-10 Step 1: Primary charging To prepare for the formation of a latent image, the surface of the drum is charged to a uniform negative potential. The primary charging roller operates in keeping with the photosensitive drum, and directly charges the surface of the drum. -
Page 45: Transfer Block
Chapter 2 Developing sheet Photosensitive drum Developing blade Developing cylinder Toner feed roller AC bias DC bias F-2-13 The toner (developer) used by the machine has insulating properties, and is charged to a negative potential as a result of friction against the surface of the developing cylinder and the developing blade. -
Page 46: Fixing Block
Chapter 2 ETB belt Static charge eliminator Paper Transfer roller Photosensitive drum DC bias F-2-15 The rigidity of print paper is used to separate it from the drum. (curvature separation) To prevent a toner splash in print images (in the form of dots, mostly occurring in a low temperature, low humidity environment), the machine is equipped with a static eliminator. -
Page 47: High-Voltage Control
Chapter 2 2.4.2 High-Voltage Control 2.4.2.1 Outline 0010-6081 LBP5000 A high-voltage circuit is used in conjunction with the application of various biases to the primary charging roller, developing cylinder, transfer roller, and fixing pressure roller. These high-voltage biases are generated by the DC controller PCB through control of the high-voltage power supply circuit. High-voltage Fixing pressure roller power supply... -
Page 48: Generation Of The Primary Charging Bias
Chapter 2 Sub high-voltage High-voltage power supply PCB power supply PCB Fixing high-voltage generation circuit Electrostatic Fixing pressure eliminate roller high-voltage generation circuit ETB drive roller Electrostatic eliminator unit Transfer roller Primary charging high-voltage generation circuit Bk cartridge DC controller DEV4 Developing DEV3... -
Page 49: Generation Of The Fixing Bias
Chapter 2 - Print Bias (positive DC bias) While printing sequence is under way, the machine uses the print bias to transfer the toner from the surface of the photosensitive drum to print paper. - Sheet-to-Sheet Bias (positive DC bias) While continuous printing is under way, the machine uses the sheet-to-sheet bias to make sure that the residual toner on the photosensitive drum will not move to the surface of the ETB. -
Page 50: Image Halftone Corrective Control (D-Half Control)
Chapter 2 2.4.3.4 Image halftone corrective control (D-half control) 0010-6077 LBP5000 / LBP5100 The machine uses the video controller PCB to execute gradation control based on the measurements of the halftone density taken by the DC controller PCB. When D-max control ends, the DC controller PCB and the video controller PCB executes D-half control in the following sequence: 1. -
Page 51: Toner Cartridge
Chapter 2 presence (color displacement pattern) and the absence (ETB) of toner. 2) The DC controlled PCB checks the location of the detection pattern with reference to the timing at which the intensity of reflected light changes. SR10 SR11 Light receiver (PC) Light emitter (PT) Direction of belt rotation... -
Page 52: Memory Tag Control
Chapter 2 DC controller PCB Memory controller PCB Photosensitive drum Primary charging roller Main motor Memory tag Developing cylinder Developing cylinder drive solenoid Toner feed roller Stirrer plate F-2-22 The cartridge consists of the following: photosensitive drum, primary charging roller, developing cylinder, toner feed roller, stirring plate, memory tag. The developing cylinder, toner feed roller, stirring plate, and photosensitive drum are rotated by the main motor, and the primary charging roller operates in con- junction with the photosensitive drum. -
Page 53: Detecting The Level Of Toner
Chapter 2 If the Bk toner absence is detected, the machine will stop working. If the color toner absence is detected, only monochrome print can be done. 2.4.4.5 Detecting the Level of Toner 0010-7907 LBP5000 / LBP5100 The machine monitors the level of toner inside the cartridge. To find out how much toner remains, the DC controller PCB refers to the time it takes for light to move through the cartridge while printing is under way. -
Page 54: Etb Cleaning
Chapter 2 DC controller PCB MAIN MOTOR DRIVE signal Main motor Color misregistration/Density sensor unit ETB feed roller ETB belt Direction of belt rotation Transfer roller ETB driven roller F-2-24 The ETB unit consists of the following: ETB, ETB feed roller, ETB slave roller, transfer roller, color displacement/density sensor. The ETB is driven by the main motor through the ETB feed roller. -
Page 55: Pickup/Feeding/Delivery System
Chapter 2 Positive potential waste toner Negative potential waste toner Waste toner container Bk cartridge Y cartridge C cartridge DC positive bias M cartridge DC negative bias DC negative bias F-2-25 2.5 Pickup/Feeding/Delivery System 2.5.1 Overview/Configuration 2.5.1.1 Outline 0010-6129 LBP5000 / LBP5100 The machine's pickup/transport system serves to pick up and move print paper, and includes various feed rollers. - Page 56 Chapter 2 F-2-26 The presence of paper in the manual feeder slot is checked by the manual feeder paper sensor (SR3), and paper in the cassette is checked by the cassette paper sensor (SR2). The machine's various feed rollers are controlled by the DC controller PCB through control of 3 motors (main motor M1, fixing/delivery motor M2, pickup motor M3) and 3 solenoids (SL1, SL2, SL3).
-
Page 57: Other Control
Chapter 2 DC controller PCB F-2-27 Registration paper sensor Cassette paper sensor Manual feed slot paper sensor Fixing delivery paper sensor Pre-fixing paper sensor Paper width sensor Pressure alienation sensor Main motor Fixing/Delivery motor Pick-up motor Cassette pick-up solenoid MCY developing cylinder drive solenoid Bk developing cylinder drive solenoid 2.5.2 Other Control 2.5.2.1 Outline... -
Page 58: Picking Up Paper From The Cassette
Chapter 2 The machine picks up sheets of paper from inside the cassette one by one. The machine uses the cassette paper sensor to check the presence/absence of paper inside the cassette. Picking Up Paper from the Manual Feeder The machine picks up the sheet of paper from the manual feeder. (Only one sheet of paper may be placed in the manual feeder at a time.) The machine uses the manual feeder paper sensor to check the presence/absence of paper in the manual feeder, and uses the registration roller to move the paper inside the machine. -
Page 59: Transport Speed Control
Chapter 2 Registration Shutter Skew Correction Print Paper warp warp F-2-28 2.5.2.5 Transport Speed Control 0010-9411 LBP5000 / LBP5100 The machine is designed to switch the speed at which paper is moved according to type so as to prevent fixing faults. Specifically, the DC controller switches the speed over 2 settings in response to the media selection command coming from the video control. -
Page 60: Automatic Release Of Fixing Pressure Mechanism
Chapter 2 Fixing pressure roller Pre-fixing paper sensor Fixing pressure roller Fixing pressure roller ETB rotational speed ETB rotational speed rotational speed rotational speed F-2-29 2.5.2.7 Automatic release of fixing pressure mechanism 0010-6138 LBP5000 / LBP5100 The machine is equipped with a mechanism that causes the fixing pressure roller and the fixing film to disengage for removal of jams. When a jam occurs in the fixing assembly, the fixing film assembly is moved away from the fixing pressure roller. -
Page 61: Detecting Jams
Chapter 2 2.5.3 Detecting Jams 2.5.3.1 Jam Detection Outline 2.5.3.1.1 Outline 0010-6139 LBP5000 / LBP5100 The machine is equipped with the following paper sensors used to check the presence/absence of paper and also the movement of paper if any. 1: registration paper sensor (SR1) 2: pre-fixing paper sensor (SR5) 3: fixing delivery sensor (SR4) The machine checks for the presence/absence of paper at a specific sensor at such times as programmed in the CPU. -
Page 62: Duplex Feeding
Chapter 2 2.5.4 Duplex Feeding 2.5.4.1 Outline 0015-7760 LBP5100 The duplexing mechanism of this printer is to feed paper to the reversing unit once after the one side is printed and then to return it to the duplexing feed unit. So that the paper is reversed to ready for the other side printing. - Page 63 Chapter 2 DC controller PCB Duplexing driver Duplexing deflector F-2-32 Registration paper sensor Cassette paper sensor Manual feed slot paper sensor Fixing delivery paper sensor Pre-fixing paper sensor Top cover open sensor Paper width sensor Pressure alienation sensor Main motor Fixing/Delivery motor Pick-up motor Duplexing feed motor...
-
Page 64: Duplexing Feed Operation
Chapter 2 MCY developing cylinder drive solenoid Bk developing cylinder drive solenoid Reverse solenoid 2.5.4.2 Duplexing feed operation 0015-7766 LBP5100 In this control, the paper printed on the one side is reversed its feeding direction in order to operate the duplex print. The operational sequence of the duplexing feed is described below. -
Page 65: Fixing Unit System
Chapter 2 Duplexing driver PCB DC controller PCB Reverse motor Duplexing feed motor Top cover open sensor Reverse solenoid F-2-34 - CPU(IC1) The CPU is a eight bit microcomputer in single chip with built-in ROM and RAM. It controls the following printer operations in response to the command from the CPU(IC7). -
Page 66: Various Control Mechanisms
Chapter 2 2.6.2 Various Control Mechanisms 2.6.2.1 Fixing Temperature Control 2.6.2.1.1 Fixing Temperature Control 0010-6160 LBP5000 The machine monitors the surface temperature of the fixing heater, and controls the drive signal of the fixing heater so that the temperature will be identical to the target temperature. -
Page 67: Fixing Temperature Control
Chapter 2 Temperature Temperature Temperature Temperature Temperature Mode control 1 control 2 control 3 control 4 control 5 Heavy paper 2 Number of sheets passed 7-13 14-25 Initial rotation temperature Printing temperature Sheet-to-sheet temperature Thin paper Number of sheets passed 6-17 18-37 38-73... -
Page 68: Protective Functions
Chapter 2 T-2-6 No. 1 through No. 5 temperature Paper type Printer driver setting control Plain paper plain Paper 194 to 169 75 to 90g/m2 Plain paper Plain Paper L 189 to 164 60 to 74g/m2 Heavy paper Heavy Paper 1 165 to 150 91 to 120g/m2 Heavy paper... -
Page 69: Other Function
Chapter 2 The low-voltage power supply circuit serves to convert the AC voltage coming from the power receptacle into DC power for provision to various loads. The fol- lowing is a block diagram of the circuit: Power supply unit Fixing unit Fixing Fuse DC controller PCB... -
Page 70: Engine Control System
Chapter 2 Once the protective mechanism has gone on, you must turn off the power (by turning off the power switch or disconnecting the power cord), leave the machine alone for 3 min or more and then turn it back on to reset the low-voltage power supply. 2.7.1.2.2 Sleep function 0010-6168 LBP5000 / LBP5100... -
Page 71: Operation Of Individual Blocks
Chapter 2 DC controller PCB Option Pick-up motor Fixing/Delivery motor Manual feed slot paper sensor Cassette paper sensor Registration paper sensor Main motor Paper width sensor Laser/Scanner unit Scanner motor Pre-fixing paper sensor Laser driver Fixing delivery paper sensor Pressure alienation sensor ETB unit Color misregistration sensor Transfer roller... -
Page 72: Fan/Motor Control
Chapter 2 5) write/read operation to and from EEPROM 6) control of memory controller c. Reset IC (IC6) The reset IC serves to reset the CPU and ASIC at power-on with reference to the +3.3V voltage. d. EEPROM(IC5) The EEPROM is used to store various backup data. 2.8.2.3 Fan/Motor Control 0010-6173 LBP5000... -
Page 73: Overview Of The Block
Chapter 2 When printing is executed in a Microsoft Windows or Macintosh environment, CAPT (Canon Advanced Printing Technology) serves to reduce processing speed and enhance the ease of operation to provide a user-friendly printing environment. To that end, CPU is designed for the following: - The print data from the application is turned into dot data and sent to the printer without conversion into the printer's page description language (PDL). - Page 74 Chapter 2 Notation Name Description IC12 Logic IC Converts voltage levels. 2-40...
-
Page 75: Chapter 3 Disassembly And Assembly
Chapter 3 DISASSEMBLY AND ASSEMBLY... - Page 77 Contents Contents 3.1 Before Parts Replacement ..............................3-1 3.1.1 Outline......................................3-1 3.2 EXTERNAL AND CONTROLS SYSTEM ........................3-2 3.2.1 Rear Cover ....................................3-2 3.2.1.1 Preparation for Removing the Rear Cover..............................3-2 3.2.1.2 Removing the Rear Cover ....................................3-2 3.2.1.3 Removing the Rear Cover ....................................3-2 3.2.2 Right Cover ....................................
- Page 78 Contents 3.2.12.2 Removing the Video Controller PCB ................................. 3-14 3.2.12.3 The former procedure of removing the Video Controller PCB ........................3-14 3.2.12.4 Removing the Video Controller.................................. 3-14 3.2.13 Memory Controller PCB................................3-15 3.2.13.1 Preparation for Removing the Memory Controller PCB ..........................3-15 3.2.13.2 Removing the Memory Controller PCB ..............................
- Page 79 Contents 3.5 PICKUP/FEEDING/DELIVERY SYSTEM .......................3-28 3.5.1 Paper Pick-up Feeder Unit ................................. 3-28 3.5.1.1 Preparation for Removing the Pickup Feeding Assembly ..........................3-28 3.5.1.2 Removing the Pickup Feeding Assembly ..............................3-28 3.5.1.3 The former procedure of removing the Pickup/Transport Assembly ......................3-29 3.5.1.4 Removing the Pickup/Transport Assembly ..............................3-29 3.5.2 Pickup Motor .....................................
-
Page 81: Before Parts Replacement
Chapter 3 3.1 Before Parts Replacement 3.1.1 Outline 0010-6977 LBP5000 The pages that follow contain instructions on how to disassemble and assemble the machine. Be sure to follow the instructions whenever you have to replace parts to correct a fault or at the end of the part life. All work must be performed with the following in mind: 1. -
Page 82: External And Controls System
Chapter 3 Tray] 2) Detach the rear cover. (page 3-2)Reference [Removing the Rear Cover] 3.2 EXTERNAL AND CONTROLS SYSTEM 3.2.2.2 Removing the Right Cover / Right Cassette Cover 3.2.1 Rear Cover 0015-7552 LBP5100 3.2.1.1 Preparation for Removing the Rear Cover 1) Open the front cover [1]. -
Page 83: Removing The Right Cover/Right Cassette Cover
Chapter 3 F-3-8 F-3-12 3) Open the front cover [1]. F-3-9 F-3-13 4) Remove the 4 screws [1]. F-3-10 F-3-14 When detaching the right cover, be sure not to lift up the upper cover too 5) Lift the upper cover [1] slightly, and detach the right cover [2]. much. -
Page 84: Left Cover
Chapter 3 F-3-17 F-3-20 F-3-18 F-3-21 2) Detach the left cassette cover [1] from the left cover. - 2 claws [2] When detaching the right cover, take care not to lift the upper cover exces- sively; otherwise, the control panel flat cable connected to the cover may suf- fer damage. -
Page 85: Upper Cover
Chapter 3 - 1 screw [2] 1) Detach the upper cover [1]. - 1 claw [3] - 1 connector [2] - 2 hook [4] F-3-28 F-3-24 3.2.4.3 The former procedure of removing the Upper Cover 0011-0987 LBP5000 1) Remove the delivery tray. (page 3-7)Reference[Removing the Delivery Tray] Remove right... -
Page 86: The Former Procedure Of Removing The
Chapter 3 1) Remove the delivery tray. (page 3-7)Reference[Removing the Delivery Tray] Remove right cover/right cassette cover. (page 3)Reference[Removing the Right Cover/Right Cassette Cover] 3) Remove the upper cover. (page 3-5)Reference[Removing the Upper Cover] Remove left cover/left cassette cover. (page 4)Reference[Removing the Left Cover/Left Cassette Cover] 3.2.5.4 Removing the Front Cover 0010-6470... -
Page 87: Delivery Tray
Chapter 3 F-3-39 8) Slide the shaft [1] in the direction of the arrow to detach. F-3-43 3.2.7 Face-down Cover 3.2.7.1 Preparation for Removing the Face-Down Cover 0015-7561 LBP5100 1) Remove the delivery tray. (page 3-7)Reference [Removing the Delivery Tray] 2) Detach the rear cover. -
Page 88: Main Drive Unit
Chapter 3 F-3-48 F-3-45 4) Disconnect the 7 connectors [1], and disengage the cable from the cable 3.2.8 Main Drive Unit guide. 3.2.8.1 Preparation for Removing the Main Drive Assembly 0015-7563 LBP5100 1) Remove the delivery tray. (page 3-7)Reference [Removing the Delivery Tray] 2) Detach the rear cover. - Page 89 Chapter 3 F-3-52 7) Remove the pickup motor plate [1]. F-3-57 - 5 screws [2] 11) Lower the right and left ETB lock levers [1]. F-3-53 F-3-58 8) Remove the conductive cap [1] and the pickup gear [2]. - 1 claw [3] 12) Remove the bushing [1].
-
Page 90: The Former Procedure Of Removing The Main Drive Assembly
Chapter 3 F-3-62 F-3-65 2) Remove the flat cable [1]. The main drive assembly requires adjustments at the time of assembly; thus, disassembly is not possible. Do not disassembly the main drive assembly in the field. Points to Note When Mounting Main Drive Assembly In case the cartridge coupling arm [1] is disengaged when disassembling the main drive assembly, make sure to attach it under the protrusions [2] of the plate. - Page 91 Chapter 3 5) Remove the plate [1]. - 1 screw [2] F-3-75 10) Remove the bearing [1]. F-3-70 6) Remove the pickup motor plate [1]. - 5 screws [2] F-3-76 11) Remove the gear [1]. F-3-71 7) Remove the gears. - 1 claw [1] - 1 bearing [2] - 1 spring [3]...
-
Page 92: Duplexing Drive Unit
Chapter 3 sheet metal. F-3-83 F-3-80 3) Disconnect the 3 connectors [1], and disengage the cable from the cable guide [2]. After installing the main drive unit, check if the coupling [1] of the cartridge works in conjunction with the open/close movement of the ETB unit. If not, remove the main drive assembly to check if the CRG coupling arm is mount- ed correctly, as there is a possibility it is not F-3-84... -
Page 93: Removing The Main Motor
Chapter 3 7) Remove the main drive assembly. (page 3-8)Reference [Removing the Main Drive Assembly] 3.2.10.2 Removing the Main Motor 0015-7566 LBP5100 1) Remove the main motor [1]. - 4 screws [2] F-3-89 2) Remove the DC controller PCB [1]. - 5 flat cables [2] - 11 connectors [3] - 4 screws [4]... -
Page 94: Video Controller Pcb
Chapter 3 2) Remove the DC controller PCB [1]. - 4 flat cables [2] - 11 connectors [3] - 4 screws [4] F-3-96 F-3-93 F-3-97 When replacing the video controller PCB, make sure to remove the NVRAM F-3-94 (ICS1) [1] from the old PCB and mount it to the new one. 3.2.12 Video Controller PCB 3.2.12.1 Preparation for Removing the Video Controller 0015-7569... -
Page 95: Memory Controller Pcb
Chapter 3 F-3-99 F-3-103 2) Remove the video controller PCB [1]. - 1 connector [2] 3.2.13 Memory Controller PCB - 2 flat cables [3] - 4 screws [4] 3.2.13.1 Preparation for Removing the Memory Controller 0015-7571 LBP5100 1) Remove the delivery tray. (page 3-7)Reference [Removing the Delivery Tray] 2) Detach the rear cover. -
Page 96: The Former Procedure Of Removing The Memory Controller Pcb
Chapter 3 F-3-109 F-3-106 5) Remove the 2 FFC retainers [1]. 4) Remove the memory controller PCB [1]. - 4 claws [2] - 4 screws [2] F-3-110 F-3-107 6) Remove the memory controller PCB [1]. - 4 screws [2] Be sure not to touch the surface of the ETB when removing the memory con- troller PCB. -
Page 97: Low-Voltage Power Supply Assembly
Chapter 3 F-3-115 3) Disengage the cable guide [1]. F-3-112 - 2 claws [2] 2) Remove the duplexing driver PCB [1]. - 2 screws [2] F-3-116 4) Slide the cable guide [1] to the left, and then detach the cable guide. F-3-113 3.2.15 Low-Voltage Power Supply Assembly 3.2.15.1 Preparation for Removing the Low-Voltage... -
Page 98: The Former Procedure Of Removing The Low-Voltage Power Supply Pcb
Chapter 3 - 2 claws [2] F-3-120 F-3-124 8) Remove the low-voltage power supply PCB [1]. 4) Slide the cable guide [1] to the left to detach. - 4 screws [3] F-3-125 F-3-121 5) Disconnect the 3 connectors [1]. 3.2.15.3 The former procedure of Removing the Low- Voltage Power Supply PCB 0011-1007 LBP5000... -
Page 99: High-Voltage Pcb
Chapter 3 F-3-129 F-3-132 F-3-130 3.2.16 High-voltage PCB 3.2.16.1 Preparation for Removing the High-Voltage Power Supply PCB 0015-7575 LBP5100 1) Remove the delivery tray. (page 3-7)Reference [Removing the Delivery Tray] 2) Detach the rear cover. (page 3-2)Reference [Removing the Rear Cover] 3) Detach the right cover. -
Page 100: Removing The High-Voltage Power Supply Pcb
Chapter 3 1) Remove the delivery tray. (page 3-7)Reference[Removing the Delivery Tray] 2) Remove the rear cover. (page 3-2)Reference[Removing the Rear Cover] Remove right cover/right cassette cover. (page 3)Reference[Removing the Right Cover/Right Cassette Cover] 4) Remove the upper cover. (page 3-5)Reference[Removing the Upper Cover] Remove left... -
Page 101: Removing The Sub High-Voltage Power Supply Pcb
Chapter 3 3.2.17.2 Removing the Sub High-Voltage Power Supply 1) Remove the delivery tray. (page 3-7)Reference [Removing the Delivery Tray] 0015-7619 LBP5100 2) Detach the rear cover. (page 3-2)Reference [Removing the Rear Cover] 3) Detach the right cover. (page 3-2)Reference [Removing the Right Cover 1) Remove the sub high-voltage power supply PCB [1]. -
Page 102: Removing The Fixing Fan
Chapter 3 3.2.20.2 Removing the Fixing Fan 0015-7610 LBP5100 1) Remove the fixing fan [1]. - 1 connector [2] - 3 claws [3] F-3-149 3.3 LASER EXPOSURE SYSTEM F-3-151 3) Disconnect the 5 flat cables [1]. 3.3.1 Laser Scanner Unit 3.3.1.1 Preparation for Removing the Laser Scanner Unit 0015-7579 LBP5100... -
Page 103: The Former Procedure Of Removing The Laser Scanner Unit
Chapter 3 F-3-155 6) Disengage the cable guide [1]. - 2 claws [2] F-3-160 11) Remove the laser scanner unit [1]. - 3 screws [2] F-3-156 7) Slide the cable guide [1] to the left, and then detach it. F-3-161 F-3-157 8) Detach the rear plate [1]. - Page 104 Chapter 3 F-3-163 F-3-168 2) Remove the 5 flat cables [1]. 7) Remove the rear plate [1]. - 11 screws [2] F-3-164 F-3-169 3) Disconnect the 11 connectors [1]. 8) Remove the FFC stopper [1]. - 2 claws F-3-165 F-3-170 4) Free the cable from the cassette guide [1].
-
Page 105: Image Formation System
Chapter 3 3.4.1.4 Removing the MCY Developing Cylinder Drive not disassemble it in the field. Solenoid 0011-0094 LBP5000 3.4 IMAGE FORMATION SYSTEM 1) Remove the cable guide [1]. - 1 connector [2] 3.4.1 MCY Developing Cylinder Drive Solenoid - 2 claws [3] - 1 screw [4] 3.4.1.1 Preparation for Removing the MCY Developing Cylinder Drive Solenoid... -
Page 106: The Former Procedure Of Removing The Bk Developing Cylinder Drive Solenoid
Chapter 3 2) Remove the Bk developing cylinder drive solenoid [1]. - 3 screws [2] - 1 connector [2] - 1 screw [3] F-3-180 2) Remove the cam [1]. - 1 screw [2] F-3-178 3.4.2.3 The former procedure of removing the Bk Developing Cylinder Drive Solenoid 0011-1024 LBP5000... -
Page 107: The Former Procedure Of Removing The Etb Unit
Chapter 3 F-3-184 F-3-187 8) Remove the ETB unit [1]. 3) Remove the cable cover [1]. F-3-185 F-3-188 4) Remove the screw [1]. 5) Disconnect the connector [2]. 6) Remove the harness retainer [3]. When removing the ETB, be sure not to touch the surface of the ETB. 3.4.3.3 The former procedure of removing the ETB Unit 0011-1026 LBP5000... -
Page 108: Static Charge Eliminator
Chapter 3 3.4.4 Static Charge Eliminator 3.5 PICKUP/FEEDING/DELIVERY SYSTEM 3.4.4.1 Preparation for Removing the Static Eliminator 3.5.1 Paper Pick-up Feeder Unit 0015-7946 LBP5100 3.5.1.1 Preparation for Removing the Pickup Feeding 1) Remove the delivery tray. (page 3-7)Reference [Removing the Delivery Assembly Tray] 0015-7587... -
Page 109: The Former Procedure Of Removing The Pickup/Transport Assembly
Chapter 3 - 1 bushing [2] - 1 spring [3] - 1 gear [4] - 1 bushing [5] F-3-198 F-3-203 3.5.1.3 The former procedure of removing the Pickup/ Transport Assembly 0011-1027 LBP5000 1) Remove the delivery tray. (page 3-7)Reference[Removing the Delivery Tray] 2) Remove the rear cover. -
Page 110: Pickup Motor
Chapter 3 F-3-206 F-3-211 8) Remove the pickup/transport assembly [1]. - 1 connector [2] - 4 screws [3] F-3-207 4) Remove the ETB drive cam [1]. - 1 E-ring [2] F-3-212 F-3-208 5) Remove the conducting cap [1] and the pickup gear [2]. F-3-213 3.5.2 Pickup Motor 3.5.2.1 Preparation for Removing the Pickup Motor... -
Page 111: The Former Procedure Of Removing The Pickup Motor
Chapter 3 2) Remove the pickup motor [1]. - 2 screws [2] F-3-218 F-3-215 3) Remove the pickup roller [1]. - 2 claws [2] 3.5.2.3 The former procedure of removing the Pickup Motor 0011-1030 LBP5000 1) Remove the delivery tray. (page 3-7)Reference[Removing the Delivery Tray] 2) Remove the rear cover. -
Page 112: Removing The Cassette Pickup Solenoid
Chapter 3 3.5.5 Cassette Separation Pad 3) Detach the right cover. (page 3-2)Reference [Removing the Right Cover / Right Cassette Cover] 3.5.5.1 Removing the Separation Pad 3.5.4.2 Removing the Cassette Pickup Solenoid 0015-7608 LBP5100 0015-7592 LBP5100 1) Remove the separation pad [1]. 1) Remove the pickup solenoid [1]. -
Page 113: The Former Procedure Of Removing The Manual Feeder Paper Sensor
Chapter 3 F-3-228 F-3-231 2) Remove the manual feed paper sensor [1]. 3.5.7 Registration Before Sensor - 1 connector [2] - 2 claws [3] 3.5.7.1 Preparation for Removing the Registration Sensor 0015-7595 LBP5100 1) Remove the delivery tray. (page 3-7)Reference [Removing the Delivery Tray] 2) Detach the rear cover. -
Page 114: Removing The Registration Sensor
Chapter 3 Remove right cover/right cassette cover. (page 3)Reference[Removing the Right Cover/Right Cassette Cover] 4) Remove the upper cover. (page 3-5)Reference[Removing the Upper Cover] Remove left cover/left cassette cover. (page 4)Reference[Removing the Left Cover/Left Cassette Cover] 6) Remove the front cover. (page 3-6)Reference[Removing the Front Cover] 7) Remove the ETB unit. -
Page 115: Removing The Duplexing Feed Motor
Chapter 3 Left Cassette Cover] 6) Detach the front cover. (page 3-5)Reference [Removing the Front Cover] 7) Remove the ETB unit. (page 3-26)Rerefence [Removing the ETB Unit] 3.5.9.2 Removing the Duplexing Feed Motor 0015-7612 LBP5100 1) Detach the cover [1]. - 2 claws [2] F-3-242 2) Remove the cable. -
Page 116: The Former Procedure Of Removing The Fixing Assembly
Chapter 3 3.6.1.3 The former procedure of removing the Fixing Assembly 0011-1036 LBP5000 1) Remove the delivery tray. (page 3-7)Reference[Removing the Delivery Tray] Remove right cover/right cassette cover. (page 3)Reference[Removing the Right Cover/Right Cassette Cover] 3) Remove the upper cover. (page 3-5)Reference[Removing the Upper Cover] Remove left... - Page 117 Chapter 3 8) Remove the inlet guide [1]. - 1 claw [2] F-3-253 4) Remove the face-down roller [1]. F-3-258 - 1 gear [2] - 1 bushing [3] 9) Detach the fixing base cover [1]. - 5 screws [2] F-3-254 F-3-259 5) Remove the 2 photo interrupters [1].
-
Page 118: The Former Procedure Of Removing The Fixing Film
Chapter 3 F-3-262 F-3-267 When removing the fixing film, be sure not to touch the surface of the fixing film. 3.6.2.3 The former procedure of removing the Fixing Film 0011-1037 LBP5000 1) Remove the delivery tray. (page 3-7)Reference[Removing the Delivery Tray] Remove right... - Page 119 Chapter 3 8) Remove the inlet guide [1]. - 1 claw [2] F-3-270 4) Remove the face-down roller [1]. F-3-275 - 1 gear [2] - 1 bushing [3] 9) Remove the fixing base cover [1]. - 5 screws [2] F-3-271 F-3-276 5) Remove the 2 photointerrupters [1].
-
Page 120: Fixing Pressure Roller
Chapter 3 F-3-279 F-3-284 When removing the fixing film, take care not to touch the surface of the fix- ing film. 3.6.3 Fixing Pressure Roller 3.6.3.1 Preparation for Removing the Fixing Pressure Roller 0015-7601 LBP5100 1) Remove the delivery tray. (page 3-7)Reference [Removing the Delivery Tray] F-3-280 2) Detach the rear cover. -
Page 121: Removing The Fixing Pressure Roller
Chapter 3 4)Reference[Removing the Left Cover/Left Cassette Cover] 5) Remove the face-down cover. (page 3-7)Reference[Removing the Face- Down Cover] 6) Remove the fixing assembly. (page 3-36)Reference[Removing the Fixing Assembly] 7) Remove the fixing film. (page 3-38)Reference[Removing the Fixing Film] 3.6.3.4 Removing the Fixing Pressure Roller 0010-7591 LBP5000 1) Remove the fixing pressure roller [1]. - Page 123 Chapter 4 MAINTENANCE AND INSPECTION...
- Page 125 Contents Contents 4.1 Periodically Replaced Parts ............................4-1 4.1.1 Periodically Replaced Parts ................................. 4-1 4.2 Consumables ..................................4-1 4.2.1 Durables Replaced by the User..............................4-1 4.2.2 Durables Replaced by the Service Person ........................... 4-1 4.3 Periodical Service ................................4-1 4.3.1 Periodic Service ................................... 4-1 4.4 Cleaning ..................................4-1 4.4.1 Pickup Roller ....................................
- Page 127 Chapter 4 4.1 Periodically Replaced Parts 4.1.1 Periodically Replaced Parts 0010-6222 LBP5000 / LBP5100 The machine does not have parts that require periodical replacement. 4.2 Consumables 4.2.1 Durables Replaced by the User 0010-6223 LBP5000 / LBP5100 The machine does not have durables that require replacement by the user. 4.2.2 Durables Replaced by the Service Person 0010-6224 LBP5000 / LBP5100...
- Page 128 Chapter 4 F-4-1 3) Make the following selections: option>utility>cleaning. F-4-2 4) Click the OK button to print out the cleaning page. F-4-3 5) Place the printout with the printed side facing up. The printout will be fed into the machine, thereby cleaning the fixing pressure roller. 4.4.10 Electrostatic Eliminator Unit 0015-7977 LBP5100...
- Page 129 Chapter 4 F-4-4 3) Put the electrostatic eliminator unit cleaner back to the its original position (left side). 4) Close the front door unit. 4.4.11 Fixing Pressure Roller 0015-9390 LBP5100 1) Start up the printer driver. 2) Click [printer status window icon] [1] found under [page setup] of [Printer Properties]. F-4-5 3) Make the following selections: option >...
- Page 130 Chapter 4 F-4-7 2. Press a button of 'Advanced Setting' on the screen of 'Finishing detail' 3. Change 'Special print Mode'. 4.5.2 List Of Special Print Mode 0011-4037 LBP5000 T-4-1 Problem Setting in Printer driver Cause and Remedy A printer is installed under high-humidity When using the printer under high-humidity environment or depending on environment and the print density becomes lighter.
- Page 131 Chapter 4 When a copy image fault occurs, the image can be improved if the Special print processing is set in the printer driver. Setting procedure of Special print processing 1. Press a button of 'Finishing detail' on the 'Finishing' page in the printer driver. F-4-8 2.
- Page 133 Chapter 5 TROUBLESHOOTING...
- Page 135 Contents Contents 5.1 Countermeasures................................5-1 5.1.1 Image Faults....................................5-1 5.1.1.1 Out of Focus........................................5-1 5.1.1.1.1 Color Misalignment ....................................5-1 5.2 MEASUREMENT AND ADJUSTMENT ........................5-1 5.2.1 Test Print ...................................... 5-1 5.2.1.1 Test Print .........................................5-1 5.2.2 Adjustment of Electrical Components ............................5-2 5.2.2.1 After Replacing the DC controller PCB................................5-2 5.2.2.2 After Replacing the Video Controller PCB ..............................5-2 5.2.2.3 Replacing EEPROM (When E747-000 occurs) ..............................5-2 5.2.3 Adjustment of Fixing System ..............................
-
Page 137: Countermeasures
Chapter 5 5.1 Countermeasures mally. When the printer is in stand-by mode, a sheet with test pattern (horizontal lines) can be output if pressing the test print switch on the DC controller PCB 5.1.1 Image Faults at the back side of the printer. 5.1.1.1 Out of Focus Accessing the Test Print Switch 1) Remove the rear cover [1]. -
Page 138: Adjustment Of Electrical Components
Chapter 5 F-5-7 5.2.2.2 After Replacing the Video Controller PCB 0015-8261 LBP5100 In the case that the video controller PCB has been replaced, remove EEP- F-5-5 ROM (ICS11S) from the old PCB and mount it in the new PCB. Execute the following procedure when replacing the video controller PCB. 5.2.2 Adjustment of Electrical Components 1) Turn on the power supply of the host machine. -
Page 139: Adjustment Of Pickup/Feeding/Delivery System
Chapter 5 Paper feed direction Center of A-4 sized paper F-5-8 5.2.4 Adjustment of Pickup/Feeding/Delivery System 5.2.4.1 When Replacing the Registration Roller 0015-9295 LBP5100 If you have replaced the registration roller of the printer, be sure to reset the following counter: service mode >... -
Page 140: Service Tools
Chapter 5 5.3 SERVICE TOOLS 5.3.1 Standard Tools 0010-6267 LBP5000 / LBP5100 The table below lists the standard tools required for servicing the printer. T-5-1 Tool name Tool No. Remark Tool case TKN-0001 With a clip Jumper wire TKN-0069 0.02 to 0.3 mm Clearance gauge CK-0057 0 to 600 g for checking the cassette spring pressure... - Page 141 Chapter 5 F-5-9...
- Page 142 Chapter 5 F-5-10...
-
Page 143: Error Code
Chapter 5 F-5-11 5.5 ERROR CODE 5.5.1 Error Code 0010-7634 LBP5000 T-5-3 Code Description Remedial action E001 The fixing assembly is overheating. 0000 Particulars - Check the connector of the low-voltage power supply PCB. The reading of the main thermistor is 225 deg C (equivalent of 0.84 V) or more - Replace the fixing film unit. - Page 144 Chapter 5 Code Description Remedial action 0000 Particulars - Replace the low-voltage power supply PCB. The reading of the main thermistor is 100 deg C (equivalent of 2.60 V) or less for - Replace the fixing film unit. 0.5 sec or more. - Replace the DC controller PCB.
-
Page 145: Error Code
Chapter 5 Code Description Remedial action Particulars - Replace the ETB unit. The color displacement detection pattern is not recognized. The result of - Suspect that a high-voltage contact is faulty. (Check the contacts measurement is outside a specific range. from the high-voltage contact of each color to the high-voltage Cause PCB.) - Page 146 Chapter 5 Code Description Remedial action 0000 Particulars - Replace the main motor. The revolution of the main motor fails to reach a specific value within 100 msec - Replace the DC controller. after the main motor is started. Cause The main motor is faulty.
-
Page 147: Service Mode
Chapter 5 Code Description Remedial action 0000 DC controller PCB ROM update failed. - Replace the DC controller PCB. 0001 During the EEPROM backup of the DC controller PCB, read/write could not be performed on the EEPROM. E197 An error has occurred in engine communication An error has occurred in engine communication - Replace the DC controller PCB. - Page 148 Chapter 5 T-5-6 Group Description Settings Service Chart Print Service Chart Print 1 Service Chart Print 2 Service Chart Print 3 Counter Details Use it to check the number of printed pages using respective toner cartridges. Service Settings Fixing Temperature Use it to set the fixing temperature.
-
Page 149: Chapter 6 Appendix
Chapter 6 APPENDIX... - Page 151 Contents Contents 6.1 OUTLINE OF ELECTRICAL COMPONENTS......................6-1 6.1.1 Clutch/Solenoid.................................... 6-1 6.1.1.1 Solenoids .........................................6-1 6.1.1.2 Solenoids .........................................6-1 6.1.2 Motor/Fan ....................................6-2 6.1.2.1 Motors and Fans ......................................6-2 6.1.2.2 Motors and Fans ......................................6-3 6.1.3 Sensor......................................6-4 6.1.3.1 Sensors ..........................................6-4 6.1.3.2 Sensors ..........................................6-5 6.1.4 PCBs ......................................6-6 6.1.4.1 PCBs..........................................6-6 6.1.4.2 PCBs..........................................6-7...
-
Page 153: Outline Of Electrical Components
Chapter 6 6.1 OUTLINE OF ELECTRICAL COMPONENTS 6.1.1 Clutch/Solenoid 6.1.1.1 Solenoids 0010-9628 LBP5000 F-6-1 Ref. Notation Name Pickup solenoid MCY developing cylinder drive solenoid Bk developing cylinder drive solenoid 6.1.1.2 Solenoids 0015-9296 LBP5100... -
Page 154: Motor/Fan
Chapter 6 F-6-2 Ref. Notation Name Pickup solenoid MCY developing cylinder drive solenoid Bk developing cylinder drive solenoid 6.1.2 Motor/Fan 6.1.2.1 Motors and Fans 0010-9633 LBP5000... - Page 155 Chapter 6 F-6-3 Ref. Notation Name Main motor Fixing/delivery motor Pickup motor Cartridge fan 6.1.2.2 Motors and Fans 0015-8400 LBP5100...
-
Page 156: Sensor
Chapter 6 F-6-4 Ref. Notation Name Main motor Fixing/delivery motor Pickup motor Duplexing feed motor Reverse motor Cartridge fan Fixing fan 6.1.3 Sensor 6.1.3.1 Sensors 0011-0930 LBP5000... - Page 157 Chapter 6 [10] F-6-5 Ref. Notation Name Registration paper sensor Cassette paper sensor Manual feeder paper sensor Fixing delivery paper sensor Pre-fixing paper sensor Paper width sensor Pressure alienation sensor Color misregistration/Density sensor Color misregistration sensor [10] Environment sensor 6.1.3.2 Sensors 0015-9298 LBP5100...
- Page 158 Chapter 6 [10] F-6-6 Ref. Notation Name Registration paper sensor Cassette paper sensor Manual feeder paper sensor Fixing delivery paper sensor Pre-fixing paper sensor Paper width sensor Pressure alienation sensor Color misregistration/Density sensor Color misregistration sensor [10] Environment sensor 6.1.4 PCBs 6.1.4.1 PCBs 0010-9631 LBP5000...
- Page 159 Chapter 6 F-6-7 Ref. Name DC controller PCB Low-voltage power supply PCB High-voltage paper supply PCB Memory controller PCB Video controller PCB 6.1.4.2 PCBs 0015-8405 LBP5100...
- Page 160 Chapter 6 F-6-8 Ref. Name DC controller PCB Low-voltage power supply PCB High-voltage paper supply PCB Memory controller PCB Duplexing driver PCB Sub high-voltage power supply PCB Video controller PCB...
- Page 161 Feb 26 2007...