Table of Contents
Advertisement
Quick Links
Advertisement
Table of Contents

Related Manuals for Belling SANDRINGHAM


Summary of Contents for Belling SANDRINGHAM
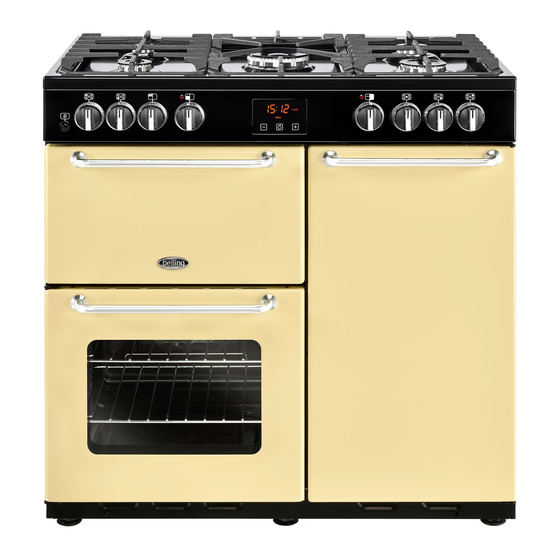
- Page 1 SA ND RI N G HA M /CO O KC EN T R E/ FA R MH O U S E User manual - Gas (90 cm)
- Page 2 0800 952 1068 ES - Spain Spares Store 0344 815 3745 FR - French To register your appliance online: www.belling.co.uk IT - Italy To contact us by email: PL - Poland gdhainfo@gdha.com To register your appliance by mail: Please NL - Netherlands...
-
Page 3: Table Of Contents
CO NT E N TS INTRODUC TION SAFETY GETTING TO KNOW YOUR PRODUCT USING YOUR APPLIANCE USING THE G RILL USING THE MAIN OVEN - GAS USING THE TALL FAN N ED OVEN CO OKING GU IDE BAKING GUIDE ROAS TING GUIDE CLOCK/P ROG RAMM ER REMOVING SHELF RU N NER S CLEANING YOU R AP PL IANCE... -
Page 4: Introduc Tion
I N T R O D U C T I O N Thank you for buying this British-built appliance from E U R O P E A N D I R E C T I V E S As a producer and a supplier of cooking appliances we This user guide book is designed to help you through are committed to the protection of the environment each step of owning your new product. -
Page 5: Safety
S A F E T Y 6 The appliance is not intended to be WA RNING operated by means of an external timer 6 Never put items directly on the base or separate control system. of the oven or cover the oven with foil, as this can cause the base element to 6 Unattended cooking on a hob with fat or overheat. - Page 6 C AUTION OT H ER SA FE T Y A DVI C E 6 The use of a gas cooking appliance 6 Servicing should be carried out only by results in the production of heat, authorised personnel. moisture and products of combustion in the room in which it is installed.
-
Page 7: Getting To Know Your Product
G E T T I N G T O K N O W Y O U R P R O D U C T Note: Your appliance layout may differ O V E R V I E W 90cm depending on the model. H O B Fascia Grill... - Page 8 O V E N C O N T R O L S A P P L I A N C E F U N C T I O N S Gas oven Note: Your oven may not have all of the functions shown here.
-
Page 9: Using Your Appliance
U S I N G Y O U R A P P L I A N C E O V E N S A N D G R I L L TA L L FA N N E D O V E N 6 The door must be open when the grill is Press the control knob to ignite the gas for up to 15 used for conventional grilling. - Page 10 F I T T I N G B U R N E R C A P S A N D H E A D S Inverted 6 The door must be open when the grill is used for conventional grilling. PA N P L A C E M E N T Always make sure that your pans are placed centrally H O B...
-
Page 11: Using The G Rill
U S I N G T H E G R I L L B E F O R E YO U S TA R T G R I L L I N G ..A L U M I N I U M F O I L 6 Never cover the grill pan or grill trivet Before you use the grill, make sure you have placed the with foil, or allow fat to build up in the... - Page 12 U S I N G T H E G R I L L T H E C O O L I N G FA N Open the grill door. Push in and turn the control During use the fan may cycle on and off, this is knob to the ‘FULL ON’...
-
Page 13: Using The Main Oven - Gas
U S I N G T H E M A I N O V E N - G A S 6 Accessible parts may be hot when the Shelf positions oven is used. Young children should be kept away. As a general guide, when cooking frozen or chilled food, use the highest possible shelf position, while allowing some clearance between the food and the top element. - Page 14 Z O N E S O F H E AT The temperature at the centre of the oven corresponds with the selected gas mark and is slightly higher towards the top of the oven and slightly lower towards the oven base. These zones of heat can be useful as different dishes requiring different temperatures can be cooked at the same time, when more than one shelf is used.
-
Page 15: Using The Tall Fan N Ed Oven
U S I N G T H E T A L L F A N N E D O V E N 6 Accessible parts may be hot when the To help the air circulate freely oven is used. Young children should be kept away. - Page 16 There is no need to interchange dishes If you are used to cooking with a conventional oven onto different shelves part way through you will find a number of differences to cooking with cooking, as with a conventional oven. a fan oven which will require a different approach: Defrosting and cooling in the main oven There are no zones of heat in a fan oven as the...
-
Page 17: Co Oking Gu Ide
C O O K I N G G U I D E G R I L L Food Type Time Approx (mins) 8 - 15 Bacon 12 - 15 Sausages Chops - Lamb 10 - 15 - Pork 15 - 25 Toast - 2 rounds 1 - 2 (per side) -
Page 18: Baking Guide
B A K I N G G U I D E T O P O V E N Dish Recommended gas mark Suggested shelf Approximate cooking time position (preheated oven) Scones top - middle 10 - 15 mins Meringues “S” slow cook setting bottom 2 - 3 hours Cakes... - Page 19 M A I N O V E N Dish Recommended gas mark Suggested shelf position Approximate cooking time (preheated oven) Scones middle - top 8 - 15 mins Meringues “S” slow cook setting bottom 2 - 3 hours Cakes Small cakes middle - top 15 - 25 mins Whisked sponge...
- Page 20 TA L L FA N N E D O V E N Note: This is a high efficiency oven, temperatures need to be converted to ‘A’ therefore some adjustment will have efficiency temperatures. to be made to conventional cooking temperatures. The table below shows For example, an item which would conventional cooking temperatures, ‘A’...
- Page 21 Trouble-shooting - fruit cakes Trouble-shooting - sponge cakes Problem Possible Cause Problem Possible Cause Low oven temperature which Insufficient creaming of may cause the cake to take mixture. Cake baked on longer to set, allowing the too high a shelf position, or Fruit sinking to fruit to sink.
-
Page 22: Roas Ting Guide
R O A S T I N G G U I D E The times given in the roasting guide are only Cook in oven at Gas Approximate Cooking approximate, because the size and age of the bird will Mark 5 Time (preheated oven) influence cooking times as will the shape of a joint 20 minutes per 450g... - Page 23 R O A S T T U R K E Y Roasting turkey involves cooking two different types of meat - the delicate light breast meat, which must not be allowed to dry out, and the darker leg meat, which takes longer to cook. The turkey must be roasted long enough for the legs to cook, so frequent basting is necessary.
-
Page 24: Clock/P Rog Ramm Er
C L O C K / P R O G R A M M E R Please be aware that only the main oven U S I N G T H E T O U C H C O N T R O L S is controlled by the programmer. - Page 25 Once set, the minute minder will start to countdown in steps of seconds. The display will show the minute minder symbol and the remaining time. The countdown will continue in the background, if other functions are being set. When the set time for the minute minder has completed, an alarm is heard and the minute minder symbol will flash on the display.
- Page 26 The auto cooking symbol disappears from the display once the time, the required cooking settings and temperature have been set. The appliance will not be switched on until the set cooking start time, that is the difference between the cooking end time and the cooking duration.
- Page 27 A C T I VAT I N G / D E A C T I VAT I N G K E Y L O C K 1. Press and hold the plus button for 3-5 seconds Once the Key lock is active, the buttons will be inactive.
-
Page 28: Removing Shelf Ru N Ner S
R E M O V I N G S H E L F R U N N E R S R E M O V I N G S H E L F R U N N E R S 1. -
Page 29: Cleaning You R Ap Pl Iance
C L E A N I N G Y O U R A P P L I A N C E D O ' S D O N ’ T S ∙ Warm, soapy water ∙ Undiluted bleaches ∙ Chloride products ∙... -
Page 30: Tec Hnical Data
T E C H N I C A L D A T A 6 WARNING - This cooker must be earthed G A S - R A N G E Lower part of the front frame Data badge Class 1 - freestanding cooker Appliance class 220 - 240 V Electrical supply... - Page 32 W W W. B E L L I N G . C O . U K Stoney Lane, Prescot, Merseyside L35 2XW belling.co.uk Customer Care 0344 815 3740 Product Information Helpline 0344 248 4149 084012700...
Need help?
Do you have a question about the SANDRINGHAM and is the answer not in the manual?
Questions and answers