
Related Manuals for Philips DC315/12


Summary of Contents for Philips DC315/12
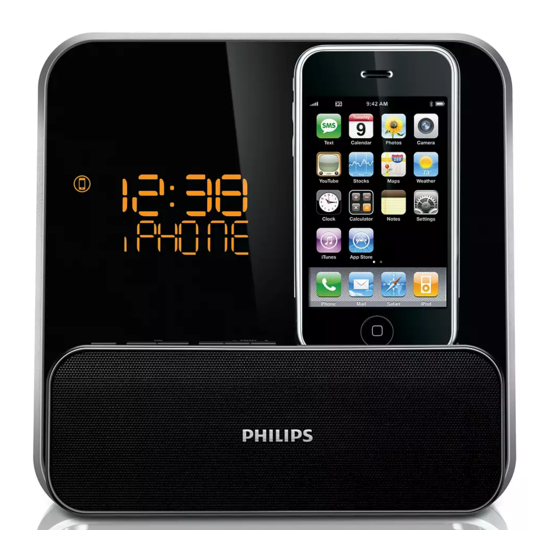
- Page 1 Register your product and get support at Docking Entertainment System www.philips.com/welcome DC315 User manual...
-
Page 3: Important Safety Instructions
Important Safety Important Safety Instructions Read these instructions. Keep these instructions. Heed all warnings. Follow all instructions. Do not use this apparatus near water. Clean only with dry cloth. Do not block any ventilation openings. Install in accordance with the manufacturer’s instructions. Do not install near any heat sources such as radiators, heat registers, stoves, or other apparatus (including amplifiers) that produce heat. - Page 4 Unplug this apparatus during lightning storms or when unused for long periods of time. Refer all servicing to qualified service personnel. Servicing is required when the apparatus has been damaged in any way, such as power-supply cord or plug is damaged, liquid has been spilled or objects have fallen into the apparatus, the apparatus has been exposed to rain or moisture, does not operate normally, or has been dropped.
- Page 5 This product complies with the requirements of the following directives and guidelines: 2004/108/EC + 2006/95/EC Any changes or modifications made to this device that are not expressly approved by Philips Consumer Lifestyle may void the user’s authority to operate the equipment. Recycling...
-
Page 6: Your Docking Entertainment System
System Congratulations on your purchase, and welcome to Philips! To fully benefit from the support that Philips offers, register your product at www.philips.com/welcome. Introduction With this unit, you can enjoy audio from the iPod, iPhone, other audio devices, or the radio. - Page 7 ALM 1/ALM 2 • Set the alarm timer. • Turn off the alarm tone. • Start or pause iPod/iPhone play. SOURCE • Select a source: iPod/iPhone, FM tuner or MP3 link. VOL +/- • Adjust volume. Adjuster • Adjust the mechanism to fit different iPod/iPhone. iPod/iPhone dock •...
-
Page 8: Get Started
Always follow the instructions in this chapter in sequence. If you contact Philips, you will be asked for the model and serial number of this apparatus. The model number and serial number are on the bottom of the apparatus. Write the numbers here: Model No. -
Page 9: Set Time And Date
Note • The type plate is located on the bottom of the main unit. Prepare the AC power adaptor. Connect one end of the AC adaptor to the DC IN socket on the main unit. Connect the other end of the AC adaptor to the wall outlet. Set time and date In standby mode, press and hold TIME SET/AUTO SCAN for 2 seconds. -
Page 10: Switch To Standby
Press TIME SET/AUTO SCAN to confirm. The minute digits are displayed and begin to blink. » Repeat steps 2-3 to set the minute, year, month, day and 12/24 hour format. Turn on Press POWER. The unit switches to the last selected source. »... -
Page 11: Compatible Ipod/Iphone
Compatible iPod/iPhone Apple iPod and iPhone models with a 30-pin dock connector: • iPod classic, iPod touch, iPod nano, iPod 5th generation (video), iPod with color display, iPod mini. • iPhone, iPhone 3G. Load the iPod/iPhone Place the iPod/iPhone in the dock. -
Page 12: Remove The Ipod/Iphone
Turn the adjuster to fit the iPod/iPhone. Remove the iPod/iPhone Pull the iPod/iPhone out of the dock. Listen to the iPod/iPhone Ensure that the iPod/iPhone is loaded correctly. Press SOURCE repeatedly to select iPod/iPhone source. The connected iPod/iPhone plays automatically. »... -
Page 13: Tune To A Radio Station
Play from an external device You can also listen to an external audio device through this unit. Press SOURCE repeatedly to select MP3 link source. Connect the supplied MP3 link cable to: MP3 LINK jack (3.5mm) on the back of the unit. •... -
Page 14: Program Radio Stations Automatically
Repeat step 2 to tune to more stations. • To tune to a weak station, press until you find optimal reception. Program radio stations automatically You can program a maximum of 20 preset radio stations. In the tuner mode, press and hold TIME SET/AUTO SCAN for more than 2 seconds to activate automatic program mode. -
Page 15: Select A Preset Radio Station
Note • To overwrite a programmed station, store another station in its place. Select a preset radio station Press PRESET +/- to select a preset number. Other features Set the alarm timer You can set two alarms which go off at different time. Ensure that you have set the clock correctly. -
Page 16: Set The Sleep Timer
Activate and deactivate the alarm timer Press ALM 1 or ALM 2 repeatedly to activate or deactivate the timer. If the timer is activated, » If the timer is deactivated, » Repeat alarm When the alarm rings, press REPEAT ALARM/BRIGHTNESS CONTROL. -
Page 17: Adjust Display Brightness
Press SLEEP repeatedly until [SLP OFF] (SLP off ) is displayed. When the sleep timer is deactivated, » display. Note • When the sleep timer is activated, the volume will gradually decrease. Adjust display brightness Press BRIGHTNESS CONTROL repeatedly to select different levels of display brightness. -
Page 18: General Information
- Main Unit 500mV RMS 10 kohm 87.5 - 108 MHz 50 KHz <22 dBu <45 dBu <28 dBu <3% >45 dB Input: 100-240V~, 50/60Hz, 1.0A; Output: 9.0V 2.78A; Brand name: Philips; Model No.: AS250-090- AQ278) 173 x185 x 144mm 0.66 kg... -
Page 19: Troubleshooting
If you encounter problems when using this apparatus, check the following points before requesting service. If the problem remains unsolved, go to the Philips web site (www.philips.com/welcome). When you contact Philips, ensure that the apparatus is nearby and the model number and serial number are available. No power •... - Page 20 • Power has been interrupted or the power plug has been disconnected. • Reset the clock/timer. Norge Typeskilt finnes på apparatens underside. Observer: Nettbryteren er sekundert innkoplet. Den innebygde netdelen er derfor ikke frakoplet nettet så lenge apparatet er tilsluttet nettkontakten. For å...
- Page 21 © Royal Philips Electronics N.V. 2009 All rights reserved. Specifications are subject to change without notice.Trademarks are the property of Koninklijke Philips Electronics N.V. or their respective owners. DC315_12_UM_V3.0...