GRE KPCOR60 Instruction Manual
Hide thumbs
Also See for KPCOR60:
- Instruction manual (68 pages) ,
- Instruction manual (67 pages) ,
- Instruction manual (73 pages)
Advertisement
Quick Links
www.grepool.com
KPCOR60
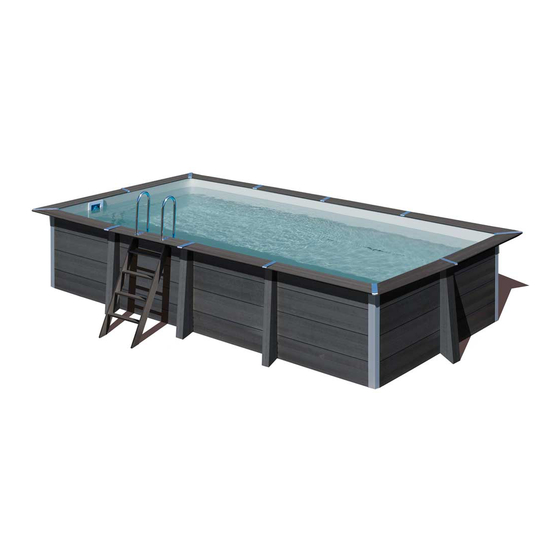
6,06 x 3,26 H 1,24m
KPCOR60L
6,06 x 3,26 H 1,24m
KPCOR46
4,66 x 3,26 H 1,24m
KPCOR28
3,26 x 3,26 H 0,96m
KPCOR2814
3,26 x 1,86 H 0,96m
NON-CONTRACTUAL PHOTOS AND PICTURES - IZVANUGOVORNE FOTOGRAFIJE I SLIKE - ILUSTRATIVNE SLIKE IN FOTOGRAFIJE IZDELKA
INSTRUCTION MANUAL
EN
Take the reference number of your pool into account
when you do the assembly
PRIRUČNIK ZA RUKOVANJE
HR
Pri slaganju uzmite referentni broj svog bazena.
NAVODILA ZA UPORABO
SL
Priporočamo, da pri sestavljanju upoštevajte
referenčno številko vašega bazena.
Advertisement

Related Manuals for GRE KPCOR60


Summary of Contents for GRE KPCOR60
- Page 1 PRIRUČNIK ZA RUKOVANJE Pri slaganju uzmite referentni broj svog bazena. NAVODILA ZA UPORABO Priporočamo, da pri sestavljanju upoštevajte referenčno številko vašega bazena. www.grepool.com KPCOR60 6,06 x 3,26 H 1,24m KPCOR60L 6,06 x 3,26 H 1,24m KPCOR46 4,66 x 3,26 H 1,24m...
- Page 3 SUMARY: 1 - SAFETY PRECAUTIONS. 2 - COMPONENTS. 3 - PREPARATION OF THE SITE. 4 - INSTALLATION. 5 - MAINTENANCE AND USE. SAŽETAK 1 - SIGURNOSNE MJERE OPREZA. 2 - KOMPONENTE. 3 - PRIPREMA NA LOKACIJI. 4 - UGRADNJA. 5 - ODRŽAVANJE I UPOTREBA. POVZETEK : 1 - VARNOSTNI UKREPI.
- Page 4 Contractual elements such as illustrations may vary, regarding on shape, colour and aspect. Manufacturas Gre in its commitment to ongoing improvement of their products, reserves the right to modify at any time and without previous warning the features, the technical details, the standardized equipment and the different options of its products.
- Page 5 The guarantee is valid in all the UE countries, UK and Switzerland. The pool’s structure has a 5 year warranty since the date that the GRE offers the buyer -in addition to the rights of guarantee from product has been purchased. This warranty covers insect attacks the seller that correspond by law and without limiting them- and rotting.
- Page 6 PROLOGUE SAFETY INSTRUCTIONS PACKAGING, CLASSIFICATION AND RECYCLING The filter kit (filter + pump) should be installed at least 3.5 metres • Some pool components are packed in plastic bags. To avoid all from the pool to avoid the risk of electrocution. risk of asphyxia, never allow babies or children to play with these.
- Page 7 Jamstvo je valjano u svim državama EU, UK i Švicarskoj. Jamstveno razdoblje za bazen s obzirom na neispravnosti u proizvodnji GRE kupcu nudi dodatno jamstvo prodavača u skladu s važećim iznosi 2 godine. Preduvjet je strogo pridržavanje svih uputa iz zakonom, a s obzirom na uvjete dodatnih obveza koje vrijede za nove korisničkog priručnika s obzirom na pripremu, montažu, upotrebu i...
- Page 8 UVOD SIGURNOSNE UPUTE • Poštujte zakone Europske unije i čuvajte okoliš. Komplet filtra (filtar + crpka) treba se montirati najmanje 3,5 metra od bazena, kako bi se izbjegao rizik od strujnog udara. S obzirom na regulaciju, treba biti postavljen poseban uređaj za zaštitu električnog diferencijala za bazene s električnim crpkama.
- Page 9 Garancija velja v vseh državah EU, Združenem kraljestvu in Švici. 2 leti. Potrebno je, da se natančno upoštevajo vsi priporočeni napotki v Družba »GRE« stranki ponuja razen garancijskih pravic prodajalca, zvezi z načinom priprave, montažo, uporabo in varnostnimi ukrepi, ter ki ustrezajo zakonu in brez omejevanja le-teh, dodatno pravico po navodili, ki so priložena bazenu.
- Page 10 UVODNI DEL VARNOSTNI NAPOTKI ali otrokom, da se igrajo z njimi. • Hvala ker upoštevate zakone Evropske unije in sodelujete pri varovanju Set filtra (filter + črpalka) naj bo nameščen vsaj 3,5 metra od bazena, okolja. da se izognete nevarnosti električnega udara. Za bazene z električnimi filtrirnimi črpalkami naj bi po uredbi obstajala posebna naprava za diferencirano električno zaščito.
- Page 11 SAFETY PRECAUTIONS SIGURNOSNE MJERE OPREZA VARNOSTNI UKREPI...
- Page 12 SAFETY ADVICES SAVJETI O SIGURNOSTI VARNOSTNI NASVETI Carefully read, understand, and follow all information Prije postavljanja i upotrebe bazena za plivanje Pred namestitvijo in uporabo bazena natančno in this user manual before installing and using the pažljivo i s razumijevanjem pročitajte i slijedite sve preberite, pravilno dojemite in upoštevajte vse swimming pool.
- Page 13 COMPONENTS Draw and clasify all components included before assembly. It’s time to assemble the ladder and the pump, follow the respective instructions. Kits with missing parts will be covered by the warranty only if reported to the after-sales service within 15 days as from the date of purchase of the swimming pool.
- Page 14 (*za komplete). V tabeli spodaj poiščite model vašega bazena in preverite, ali se število ENOT v vsaki škatli ali posodi ujema s podatki v tej tabeli (*velja za posamezne komplete). IMAGE KPCOR60 KPCOR60L KPCOR46 KPCOR28 KPCOR2814 PNCOMRF331400 PNCOMRF140090 PNCORF331400SK...
- Page 15 IMAGE KPCOR60 KPCOR60L KPCOR46 KPCOR28 KPCOR2814 SABOT SABOTCOVER ETCOMP ETCOMP90 AR1174CO AR1173CO KITENCOR46 KITENCOR2814 KITENVCOR60 (L) KITENVCOR28 LINER FILTER SK101G SILEX MPROV PLWPB...
- Page 16 PREPARATION OF THE SITE PRIPREMA NA LOKACIJI PRIPRAVA MESTA ZA NAMESTITEV...
- Page 17 First level Above ground Semi in-ground In-ground This is a determining stage in the construction of your pool. Certain works performed in situ, like the preparation of the land, the concrete slab, the draining... could need the intervention of professionals that will suggest the most adequate solutions. Select the ideal location, in the sunniest spot possible, taking into account the local regulations (distance from the paths, public rights of way, networks...) and the landscaping after installing the pool.
- Page 18 Prva razina iznad tla napola u tlu u tlu Ovo je ključna faza u izgradnji vašeg bazena. Određeni radovi izvode se na lokaciji, uključujući pripremu zemlje, betona, ispusta... što može zahtijevati intervenciju profesionalaca koji će predložiti adekvatna rješenja. Odaberite idealnu lokaciju, na najsunčanijem mogućem mjestu, uzimajući pritom u obzir lokalne propise (udaljenost od staza, javnih prolaza, mreža...) i izgled okruženja nakon montaže bazena.
- Page 19 Prva stopnja Nadzemna Napol vgrajen v tla Vgrajen v tla To je odločilna faza pri sestavljanju vašega bazena. Določena dela, ki se izvajajo na mestu samem, kot so priprava zemljišča, betonska plošča, drenaža itd., bi lahko zahtevala posredovanje strokovnjakov, ki bi predlagali najustreznejše rešitve. Izberite idealen položaj, na najbolj sončnem mestu, pri čemer upoštevajte krajevne predpise (oddaljenost od poti, javne prometne pravice, omrežja ...) in ureditev okolice po postavitvi bazena.
- Page 20 lnstallation place: Our pols are desIgned to be erected above ground an for an outdoor family use. The ground has to be firm, flat and perfectly horizontal. Remenber: 1000 lts of water = 1 m = 1000 Kgs. Advices to chose the best location for your pool: •...
- Page 21 KPCOR60 KPCOR60L KPCOR46 800cm 660cm KPCOR28 KPCOR2814 520cm 520cm Mark the installation area: Identify your pool model in this table for the dimensions needed for installation. To mark the ground, use wooden stakes, a screwdriver, funnel or plastic bottle and flour or lime. It is essential to level the total surface necessary before the marking to ensure the correct pool installation.
- Page 22 KPCOR60 KPCOR60L KPCOR46 680cm 540cm KPCOR28 KPCOR2814 400cm 360cm INSTALLATION OF THE SWIMMING POOL IN CONCRETE SLAB - Prior to installing the pool, you need to create a reinforced concrete slab which is a minimum 150 Kg/m³ of 15 cm thick. It must be a perfectly flat and horizontal slab.
- Page 23 INSTALLATION MONTAŽA NAMESTITEV...
- Page 24 KPCOR60 KPCOR60L KPCOR46 560cm 420cm KPCOR28 KPCOR2814 280cm 280cm INTERIOR DIMENSIONS: Once the floor is properly leveled, the ground will be marked with the lines where the inside face of the panels of the swimming pool will be supported. It is time to check the measurements.
- Page 25 PLACEMENT OF THE PANELS. Your pool must be centred on the concrete base. -All your pool’ s panels are identical except the one that carries filtration. Place it in the center of one of the two longer areas of your swimming pool. (photo 1) (KPCOR60) -The inside face of the panels (smooth surface) must be above the polygon just marked in the previous paragraph.
- Page 26 LAYOUT OF THE WEDGES: Now is the time to remove the outer protection of the vertical aluminum profiles Revise the internal measurements of your pool. Take the metallic wedges and place them as in photo 1. The parts must be centred on the vertical profiles (photo 3).
- Page 27 - It is normal that there is space left between the panels and the columns ( photo 7 ). When you fill the pool of water, the panels will touch the columns due to the force of the water. - Normalno je da između ploča i stupaca ostane prostora (slika 7). Kada napunite bazen s vodom, ploče će dodirivati stupove zbog sile vode.
- Page 28 A = PLYCOMP90 B = PLYCOMP9045 C = PLYCOMP9045SK D = PLYCOMP45SK KPCOR60 KPCOR46 KPCOR60L KPCOR2814 KPCOR28 KPCOR60(L) KPCOR46 C1 = B1...
- Page 29 PLACEMENT OF THE SKIMMER - Completely assemble the skimmer and screw it from the inside of the pool. - If you find it difficult to screw it to the wall, you can use a 2 mm drill bit and make a guide for the screw. This will make the work easier. - With the glue, place the seal facing inward.
- Page 30 PROTECTIVE GROUND BLANKET - It is recommended the duck tape be used to cover the rivets of the vertical profiles, which will be in contact with the swimming pool liner. This prevents the liner from being pricked. (Photo 14). - Before covering the ground, it is advisable to sweep and vacuum the concrete floor to remove dirt, such as pebbles, branches, leaves, etc. - Place the cover to protect the sleeve.
- Page 31 To bo preprečilo nastanek gub. - Ko je nameščen, napolnite bazen z 2 - 3 cm vode in dobro razširite gube. Če na dnu ostanejo gube, to ni vzrok za zamenjavo tulca z drugim, saj ne gre za proizvodno napako.
- Page 32 - Maybe the liner does not perfectly adjust to the corners of your pool. This is not a structural problem, simply aesthetic. Do not be surprised. - When you start to sill the pool, remember to fill only up to 2-3 cm and remove all the wrinkles on the bottom from the interior, without any footwear. Also, you must adjust the corners at the bottom and sides of your pool.
- Page 33 INSTALLATION OF THE COPPING’S TRIMS This piece covers the joints of the copping (there must be a space between the copping). It is aesthetic. Possibly and due to irregularities of the terrain the trim does not fit completely. If this happens, do not worry because it does not affect the structural system. In that case we suggest using double faced tape or Velcro.
- Page 34 INSTALATION OF THE STRUCTURAL SYSTEM TRIM This is to cover the vertical pols (photo 22) to give the swimming pool a nicer aesthetic. This piece is for decoration only. Look for some brackets and screws (4 x 16 mm) that you will find in the bag KITENV. Screw the bracket as you prefer.
- Page 35 FITTING THE RETURN VALVE (V): (IMPELLER NOZZLE: V) This valve is located at the bottom of the pool wall, and the water is returned to the pool through it after being treated in the treatment unit. Start pouring water into the pool through a garden hose, and stop 4 cm below the bottom of the valve hole.
- Page 36 Insert the nozzle from the inside of the pool through the cut already made with a friction ring (F) and a gasket (J) once the are placed. This way, the gasket (J) is in contact with the liner. Cut the piece of the liner that is visible from the outside (Picture 26). The other gasket (J) is put into place from the outside, place it at the very back in contact with the liner (Photo 27).
- Page 37 Insert the return hose (M) which goes from the outlet of the treatment unit to the return valve (V), and secure it with the clamp (A) (photo 31). When the filtering is working, the safety cover must be installed as seen in photo 32. Use the screws included in the kit. Tip: You can use a 2 mm drill bit to make a guide on the panel, this way it is easier to screw it.
- Page 38 ATTACHING THE SKIMMER BODY (S) TO THE OUTSIDE OF THE POOL: Fill the pool with water until it reaches 4 cm from the bottom of the die of the skimmer. Affix the seal ring and position the skimmer frame. Screw it with a screwdriver.
- Page 39 PLACEMENT OF THE INTERNAL LADDER - Take out the ladder and follow the installation instructions. Think about where you want to have the entry for your swimming pool. You can also mount it and put it into pool without attaching the fastenings to see how it looks. Just support it on the shore. - Look for two metal plates.
- Page 40 PLACEMENT OF THE EXTERNAL LADDER - Remove the ladder from the box with great care. Look for 8 screws (3.5 x 25 mm) and two hooks in the box: KITENV... - Place the ladder against the pool wall (photo 41) and make a mark as shown (Photo 42). Measure 2 cm from the ladder and 1 cm from the marks of the panel.
- Page 41 NOTE 1: KPCOR60L: Your pool consists of 10 standard panels, 1 filtration panel and one led panel. We recommend one of these 4 options at the time of placing the led panel. This way, the light will spread throughout the pool evenly. NAPOMENA 1: KPCOR60L: Vaš...
- Page 42 NAMESTITEV SISTEMA ZA LED PROJEKTOR Gre za pokrivanje LED projektorja in kabla, kot smo to storili pri kritju konstrukcijskega sistema. Poiščite kos in ga postavite, kot je prikazano na sliki A. Strukturni sistem je sestavljen iz 4 objemk in ustreznih vijakov.
- Page 43 FILTER FILTAR FILTER ASSEMBLY SUGGESTIONS: • The filter should be located at least 3.50 m from the pool. The following diagrams explain the movement direction of the water. Check the manual that comes with the filter group for the assembly instructions. Note: Fill the filter with 2/3 of clean, calibrated sand: only one calibration is supplied guaranteeing good use of the filer.
- Page 44 All the threaded connections should be assembled with the watertight Teflon tape *, except the connection with O rings. The Teflon should be wound round the thread in a counter clockwise direction. LAND-FILLING: Finish filling the pool. The water level should be situated between the upper third part and the second half of the skimmer mouth.
- Page 45 This is the oldest of filtering systems. The filtered water passes through the sand (calibrated SAND FILTER silicon) that retains all impurities. This type of filter is equipped with a multi-directional flap that allows easy manipulations and cleaning. FILTAR ZA PIJESAK DIFFERENT POSITIONS OF THE MULTI-DIRECTIONAL FLAP (4 OR 6)*: When you perform changes the position of the multi-directional flap that pump should always be stopped, PEŠČENI FILTER...
- Page 46 3. RINSE POSITION / DRAINING OF THE FILER** (OR RINSE): Operation that follows washing the filter. When you have cleaned the filter, you should rinse and re-compress the filtering mass. In this position the water circulates through the filter as in the filtering position but is evacuated through the drain at the filter outlet. This operation should be performed between 20 and 30 seconds.
- Page 47 5. CLOSED POSITION (OR CLOSED): This position does not allow the water to pass and is used to put the pool into complete wintering when the filtering stops. 5. ZATVORENI POLOŽAJ: Taj položaj ne dopušta prolazak vode, a služi za pripremu bazena za skladištenje. Skimmer 5.
- Page 48 MAINTENANCE AND USE ODRŽAVANJE I UPOTREBA VZDRŽEVANJE IN UPORABA...
- Page 49 WATER ACQUA ACQUA RESPECT THE ENVIRONMENT O MEIO AMBIENTE AGRADECE DO NOT TAKE APART THE POOL UNLESS IT IS STRICTLY NECESSARY. IF YOU DO SO, PLEASE REUSE THE WATER. WATER IS A SCARCE GOOD “DESMONTAR A PISCINA SE ABSOLUTAMENTE NECESSÁRIO. NESTE CASO, POR FAVOR REUTILIZE A ÁGUA. A ÁGUA PRECAUZIONE PER L'ECOSISTEMA AMBIENTALE When your pool reaches the end of its useful life, it should be disassembled;...
- Page 50 WATER ACQUA ACQUA POŠTUJTE OKOLIŠ O MEIO AMBIENTE AGRADECE NE RASTAVLJAJTE BAZEN, OSIM AKO TO NIJE APSOLUTNO NEOPHODNO. AKO TO UČINITE, PONOVNO UPOTRIJEBITE ISTU VODU. VODU TREBA ČUVATI “DESMONTAR A PISCINA SE ABSOLUTAMENTE NECESSÁRIO. NESTE CASO, POR FAVOR REUTILIZE A ÁGUA. A ÁGUA PRECAUZIONE PER L'ECOSISTEMA AMBIENTALE Kad vaš...
- Page 51 WATER ACQUA ACQUA UPOŠTEVAJTE OKOLJEVARSTVENE PREDPISE O MEIO AMBIENTE AGRADECE BAZENA NE RAZSTAVLJAJTE, RAZEN, ČE JE TO NUJNO POTREBNO. ČE TO STORITE, PROSIMO, DA VODO UPORABITE PONOVNO. VODA NI DOVOLJ ČISTA “DESMONTAR A PISCINA SE ABSOLUTAMENTE NECESSÁRIO. NESTE CASO, POR FAVOR REUTILIZE A ÁGUA. A ÁGUA PRECAUZIONE PER L'ECOSISTEMA AMBIENTALE Na koncu njegove življenjske dobe, je bazen treba razstaviti;...
- Page 52 MADE BY – PROIZVEO - PROIZVAJALEC: MANUFACTURAS GRE, S.A. ARITZ BIDEA Nº 57 BELAKO INDUSTRIALDEA, APARTADO 69 - 48100 MUNGUIA (VIZCAYA) ESPAÑA Nº Reg. Ind. 48-06762 Made in Spain - Proizvedeno u Španjolskoj - Izdelano v Španiji 01/04/2022...
Need help?
Do you have a question about the KPCOR60 and is the answer not in the manual?
Questions and answers