Advertisement
Quick Links
Thank you for purchasing a Sealey product. Manufactured to a high standard, this product will, if used according to these
instructions, and properly maintained, give you years of trouble free performance.
IMPORTANT: PLEASE READ THESE INSTRUCTIONS CAREFULLY. NOTE THE SAFE OPERATIONAL REQUIREMENTS, WARNINGS & CAUTIONS. USE
THE PRODUCT CORRECTLY AND WITH CARE FOR THE PURPOSE FOR WHICH IT IS INTENDED. FAILURE TO DO SO MAY CAUSE DAMAGE AND/OR
PERSONAL INJURY AND WILL INVALIDATE THE WARRANTY. KEEP THESE INSTRUCTIONS SAFE FOR FUTURE USE.
Refer to
instructions
1. SAFETY
WARNING! Ensure Health & Safety, local authority, and general workshop practice regulations are adhered to when using this
‰
unit.
Locate the unit in a suitable work area.
9
Keep the work area clean, uncluttered and ensure there is adequate lighting.
9
WARNING! Use unit on level and solid ground, preferably concrete.
‰
Keep the unit clean and tidy in accordance with good workshop practice.
9
Keep children and unauthorised persons away from the work area.
9
DO NOT use the unit for any purpose other than that for which it is designed.
8
DO NOT use the unit outdoors.
8
DO NOT place the unit in a damp or wet location or an area where there is condensation.
8
DO NOT clean the unit with any solvents which may damage the surfaces or the protective coating.
8
DO NOT move the unit when there are items placed inside.
8
DO NOT step on the shelves.
8
DO NOT overload the unit.
8
Consult an electrician if installing near an electrical supply.
9
2. INTRODUCTION
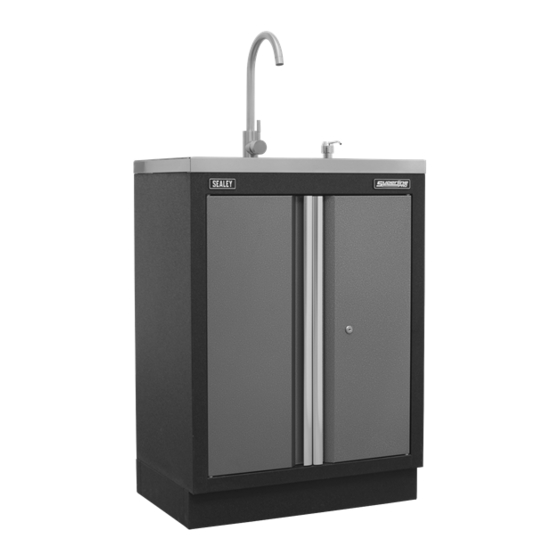
Use as part of a complete garage storage system or as an individual unit. This modular sink unit fits well within the garage storage system.
The unit includes a brushed aluminium mono block mixer tap, matching soap dispenser with a large basin and basket strainer waste catcher.
Supplied with flexible hot and cold-water tap connectors and service valves plus a waste trap. Lockable cabinet high quality lock and two keys.
Large space underneath to allow for extra storage. Unit is supplied fully assembled; tap, soap dispenser and any connection to mains water
will need to be completed by a professional.
3. SPECIFICATION
Overall Size (W x D x H): ........................685 x 460 x 950mm
Cupboard (W x D x H): ............................680 x 430 x 600mm
Basin (W x D x H): ..................................630 x 350 x 203mm
Tap Height: ................................................................. 360mm
4. ASSEMBLY
NOTE:
The valve cartridge and other parts of tap have been assembled correctly by manufacturer, please don't disassemble them yourself.
NOTE:
Connect the stainless steel knitted hose to the tap body, make sure the hot water port is on the left and the cold water port is
on the right.
NOTE:
After installation, inspect all connections for leaks.
NOTE:
When the room temperature is under 1°C, unscrew the hose adapter and discharge the water in the tap, otherwise the tap may be
broken by ice.
NOTE:
If you have no plumbing experience we recommend you consult a qualified expert/plumber.
4.1.
TAP INSTALLATION
4.1.1.
Remove the mounting nut, fixing plate, fixing washer from the screw stem one by one (if necessary). Connect the supply hose to the
tap body.
4.1.2.
Install the escutcheon, keep the supply hoses staggered and insert the supply hoses and screw stem through the deck hole.
4.1.3.
Install the fixing washer, fixing plate, mounting nut onto the screw stem of tap body one by one, then tighten the mounting nut.
4.1.4.
Connect the supply hose to the angle valve. Turn off the tap, turn on the angle value, keep pressure for 30 minutes, inspect all
connections for leaks.
4.2.
INSTALLING THE SOAP DISPENSER
4.2.1.
Remove plunger from the connector.
4.2.2.
Remove the nut from the bottom of the connector barrel.
4.2.3.
Position the connector in hole on the right hand side of the sink. You may need some assistance with screwing the nut onto the
bottom of the connector. Make sure that the nut is finger tight.
4.2.4.
Screw the bottle onto the bottom of the connector. It would be useful to have assistance whilst screwing the bottle in to ensure the
connector isn't spinning.
© Jack Sealey Limited
680MM MODULAR SINK UNIT
APMS67
MODEL NO:
Original Language Version
APMS67 Issue 1 21/06/2021
Advertisement

Related Manuals for Sealey APMS67


Summary of Contents for Sealey APMS67
- Page 1 APMS67 MODEL NO: Thank you for purchasing a Sealey product. Manufactured to a high standard, this product will, if used according to these instructions, and properly maintained, give you years of trouble free performance. IMPORTANT: PLEASE READ THESE INSTRUCTIONS CAREFULLY. NOTE THE SAFE OPERATIONAL REQUIREMENTS, WARNINGS & CAUTIONS. USE THE PRODUCT CORRECTLY AND WITH CARE FOR THE PURPOSE FOR WHICH IT IS INTENDED.
- Page 2 Important: No Liability is accepted for incorrect use of this product. Warranty: Guarantee is 12 months from purchase date, proof of which is required for any claim. Sealey Group, Kempson Way, Suffolk Business Park, Bury St Edmunds, Suffolk. IP32 7AR 01284 757500 01284 703534 sales@sealey.co.uk...