Advertisement
Advertisement
Table of Contents

Related Manuals for COMGROW COMGO Z1 LaserGRBL


Summary of Contents for COMGROW COMGO Z1 LaserGRBL
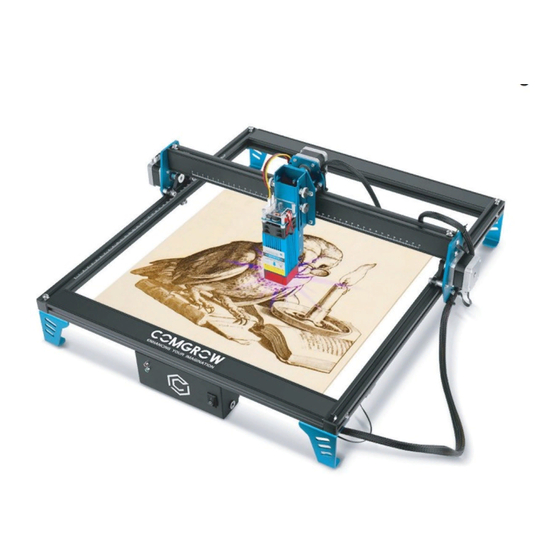
- Page 1 COMGO Z1 LaserGRBL Beginner's Guide User Manual V1.1...
-
Page 2: Table Of Contents
If this manual does not effectively solve your problem, please contact our support team. Connect COMGO Z1 Laser Engraver Comgrow was founded in 2017 by people who have a serious Reset passion for technology that helps you make things. With this... -
Page 3: Paramenters
Paramenters Machine Size 575*575*205mm/22.64*22.64*8.07inch Working Area 400*400mm/15.75*15.75 inch How to level the focus Machine Weight 5.0 KG/11lbs Frame Material Aluminum Stepper Motor 42mm*42mm*34mm Laser module type Diode lasers Wavelength 445nm Compatible Software Laser GRBL 、Lightburn LaserGRBL : Windows XP 、 Windows7 、 Compatible System Windows8 、... -
Page 4: Disclaimer
Disclaimer Please read the following carefully before using LaserGRBL on the Comgrow Z1 COMGO Z1 Laser Engraver supports the most popular engraving software LaserGRBL. LaserGRBL is an open source, easy to use and powerful software, but LaserGRBL only sup-ports Windows (Win XP/Win 7/ Win 8/XP/ Win 10). -
Page 5: Install Lasergrbl
Install LaserGRBL Section 1. Download LaserGRBL software(Only apply to Windows system) 1. Open the file with the machine or from the LaserGRBL website(LaserGRBL website: 3. Choose the installation path, Default path( http://lasergrbl.com/download/.)to download C:\Program Files\LightBurn) . 2. Double click “Install”. software installation packages. -
Page 6: Connect Comgo Z1 Laser Engraver
Tip: One computer can open several LightGRBL softwares to connect several engraving machines. When you operate several engraving Connect COMGO Z1 Laser Engraver machines, please make sure to confirm whether the COM port information corresponds to the device you are using. 1. -
Page 7: Reset
Reset 1:the connect button 2:Prompt for firmware version number after the connection 3:the reset button... -
Page 8: Import Images
Import images 1. Open File and add the image to be engraved Adjust the brightness and contrast of the picture according to the set mode; (if you wanna use the cut mode, please select vector image and no fill) 2. Set engraving parameters (please see the next page Set up conversion tools (e.g. -
Page 9: Setting Parameters 1
Setting parameters 1 1. Please carefully set the engraving parameters LaserGRBL can adjust the brightness, contrast, and other attributes of the target image. When the parameters are adjusted, you can see the actual effect in the preview window on the right and can try to adjust it to what you think is satisfactory. - Page 10 Setting parameters 2 Tip: Please make sure the size 2. After completing the previous step of setting, then select the of the graphics you need to engrave carving speed, carving power, and the carving size (The carving and cut does not exceed 400*400 power can be set according to the recommended parameters) 1:The engraving speed is recommended to use 100-5000.
-
Page 11: Start Engraving 1
Start engraving 1 Manually move the laser head of the machine to the engraving position, click the reset button, then click the unlock button. When the green button appears, please click to start engraving 3. When the green button appears, click it to start engraving 1. - Page 12 Start engraving 2 1. Click to start engraving, please ill in the box with the number of repeat engravings Start engraving and control 2. Emergency stop: Priority recommended to use the reset button. If you wanna continue engraving, please click the reset button, unlock button and then the start button to start again.
-
Page 13: Engraving Parameters
Engraving Parameters 01 11... - Page 14 Engraving Parameters 01 12...
-
Page 15: Introduction Of Lasergrbl
Introduction of LaserGRBL Reset button:You can click the reset button when need to pause the engraving or when there is an abnormal situation. Return button: Click the button, the X, Y-axis will run to the mechanical origin. It is recommended that when in large size carving, you could click the button to return to zero before the engraving. -
Page 16: Troubleshooting
Troubleshooting 1:The product can’t connect to GRBL; Solutions: 1: Confirm whether the driver (CH340) has been installed,and reinstall the driver;successful installation, USB connection prod- ucts in GRBL is displayed COM port, you can also choose other ports to try to connect, as shown in the figure. 2: Confirm whether the baud rate in the setting parameter is 115200;... - Page 17 Troubleshooting 2:When grayscale engraving and the zero return engraving is used as the starting point, the X-axis keeps hitting the edge of the product after a period of normal engraving Solutions: 1:Please check whether the setting size of the engraving image is more than 400*400;...
Need help?
Do you have a question about the COMGO Z1 LaserGRBL and is the answer not in the manual?
Questions and answers