Table of Contents
Advertisement
Advertisement
Table of Contents

Related Manuals for Zanussi ZOHTC2X2


Summary of Contents for Zanussi ZOHTC2X2
- Page 1 User Manual GETTING STARTED? EASY. ZOHTC2X2 EN User Manual Oven...
-
Page 2: Table Of Contents
VISIT OUR WEBSITE TO: Get usage advice, brochures, trouble shooter, service and repair information: www.zanussi.com/support Subject to change without notice. CONTENTS 1. SAFETY INFORMATION....................2 2. SAFETY INSTRUCTIONS....................4 3. INSTALLATION.......................7 4. PRODUCT DESCRIPTION..................... 8 5. CONTROL PANEL......................8 6. BEFORE FIRST USE......................9 7. - Page 3 be kept away from the appliance unless continuously supervised. Children should be supervised to ensure that they do not • play with the appliance. Keep all packaging away from children and dispose of it • appropriately. WARNING: The appliance and its accessible parts become •...
-
Page 4: Safety Instructions
Always use oven gloves to remove or insert accessories or • ovenware. To remove the shelf supports first pull the front of the shelf • support and then the rear end away from the side walls. Install the shelf supports in the opposite sequence. Do not use a steam cleaner to clean the appliance. - Page 5 • Make sure not to cause damage to the mains plug and to the mains cable. Should the mains cable need to be replaced, this must be carried out by our Authorised Service Centre. 2.3 Use • Do not let mains cables touch or come near the appliance door or the niche WARNING! below the appliance, especially when it...
- Page 6 2.5 Internal lighting • Discoloration of the enamel or stainless steel has no effect on the performance of the appliance. WARNING! • Use a deep pan for moist cakes. Fruit Risk of electric shock. juices cause stains that can be permanent.
-
Page 7: Installation
3. INSTALLATION 3.1 Building in WARNING! Refer to Safety chapters. (*mm) min. 550 min. 560 (*mm) min. 550 min. 560 3.2 Securing the oven to the cabinet ENGLISH... -
Page 8: Product Description
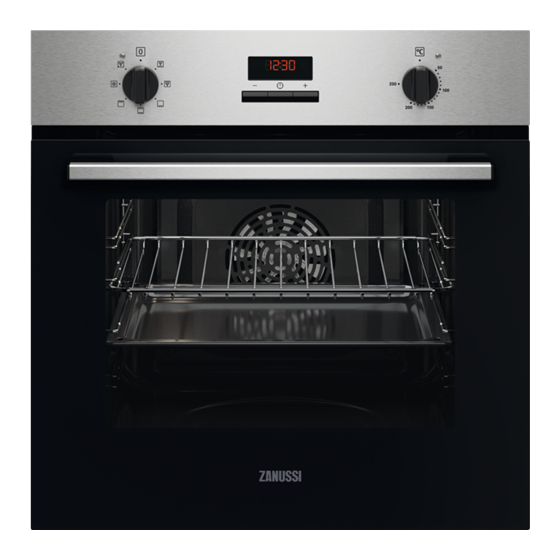
4. PRODUCT DESCRIPTION 4.1 General overview Control panel Power lamp / symbol Knob for the heating functions Display Control knob (for the temperature) Temperature indicator / symbol Air vents for the cooling fan Heating element Lamp Shelf support, removable Cavity embossment - Aqua cleaning container Shelf positions 4.2 Accessories... -
Page 9: Before First Use
5.3 Display A. Clock functions B. Timer 6. BEFORE FIRST USE WARNING! Refer to Safety chapters. 6.1 Before first use The oven can emit an odour and smoke during preheating. Make sure that the room is ventilated. Step 1 Step 2 Step 3 Set the clock Clean the oven... -
Page 10: Clock Functions
Heating Application Heating Application function function The oven is off. This function is designed to save energy during cooking. When you use this function, the temperature in Off position Moist Fan the cavity may differ from the set Baking temperature. The heating power To roast or roast and bake food with may be reduced. - Page 11 8.2 How to set: Clock functions How to set: Time of Day - flashes when you connect the oven to the electrical supply, when there was a power cut or when the timer is not set. - press to set the time. After approximately 5 sec., the flashing stops and the display shows the time.
-
Page 12: Using The Accessories
9. USING THE ACCESSORIES devices. The high rim around the shelf WARNING! prevents cookware from slipping of the shelf. Refer to Safety chapters. 9.1 Inserting accessories A small indentation at the top increases safety. The indentations are also anti-tip Wire shelf: Push the shelf between the guide bars of the shelf support and make sure that the feet point down. -
Page 13: Additional Functions
Step 2 Put the deep pan on the recommended shelf position. Roasting larger pieces of meat or poultry on one Grilling and toasting thin pieces of food in large shelf position. quantities. Make sure the supports of the wire shelf point up. Make sure the supports of the wire shelf point down. - Page 14 11.2 Moist Fan Baking - recommended accessories Use the dark and non-reflective tins and containers. They have better heat absorption than the light colour and reflective dishes. Ramekins Pizza pan Baking dish Flan base tin Ceramic Dark, non-reflective Dark, non-reflective Dark, non-reflective 8 cm diameter, 5 28 cm diameter...
- Page 15 (°C) (min) Savory pastry, 16 baking tray or dripping pan 35 - 45 pieces Short crust biscuits, 20 baking tray or dripping pan 40 - 50 pieces Tartlets, 8 pieces baking tray or dripping pan 20 - 30 Vegetables, poached, baking tray or dripping pan 35 - 40 0.4 kg...
-
Page 16: Care And Cleaning
12. CARE AND CLEANING WARNING! Refer to Safety chapters. 12.1 Notes on cleaning Clean the front of the oven with a soft cloth with warm water and a mild detergent. Clean and check the door gasket around the frame of the cavity. Use a cleaning solution to clean metal surfaces. - Page 17 12.3 How to use: Aqua Clean Step 3 Set the temperature to 90 °C. This cleaning procedure uses humidity to remove remaining fat and food particles from Step 4 Let the oven work for 30 min. the oven. Step 5 Turn off the oven.
-
Page 18: Troubleshooting
90° Step 7 Clean the glass panels with water and soap. Dry the glass panels carefully. Do not clean the glass panels in the dishwasher. Step 8 After cleaning, install the glass panel and the oven door. When installed correctly the door trim clicks. Make sure that you install the internal glass panel in the seats correctly. -
Page 19: Energy Efficiency
14. ENERGY EFFICIENCY 14.1 Product Information Sheet according to UK Ecodesign and Energy Labelling Regulations Supplier's name Zanussi Model identification ZOHTC2X2 944068252 Energy Efficiency Index 95.1 Energy efficiency class Energy consumption with a standard load, conventional mode 0.89 kWh/cycle Energy consumption with a standard load, fan-forced mode 0.78 kWh/cycle... -
Page 20: Environmental Concerns
14.2 Energy saving Residual heat When the cooking duration is longer than 30 min, reduce the oven temperature to The oven has features which minimum 3 - 10 min before the end of help you save energy during cooking. The residual heat inside the oven everyday cooking. - Page 24 WWW.ZANUSSI.COM/SHOP...