Table of Contents
Advertisement
Advertisement
Table of Contents

Related Manuals for W6 W6 N 454D


Summary of Contents for W6 W6 N 454D
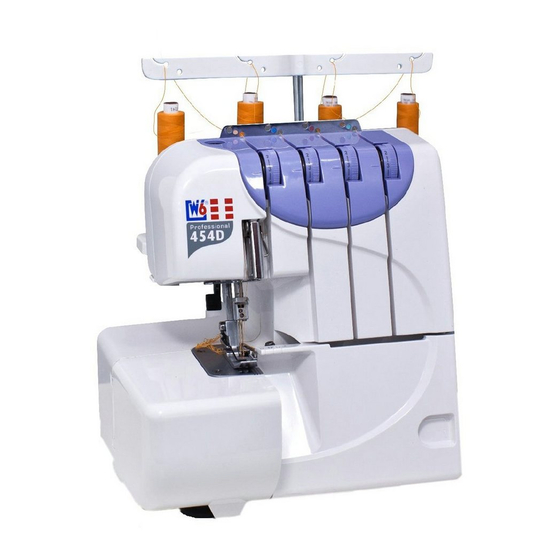
- Page 1 W6 N 454D overlock sewing machine Manual N 454D-120201...
- Page 2 Dear customer Thank you very much for buying a W6 product. Discover the reliability of our products for yourself. We have included a comprehensive manual, so that you can easily learn how to operate your new machine. Please read the manual and the safety notes carefully before operating the machine.
-
Page 3: Table Of Contents
Test seam ............................27 Continuous sewing ......................... 27 End of a seam ..........................27 Securing the thread ends ....................... 28 At the beginning of the seam ........................28 Tying off ................................ 28 At the end of the seam ..........................28 www.w6-wertarbeit.de... - Page 4 Oiling ................................39 Cleaning the cutting mechanism ....................... 40 Cleaning the feed dog ..........................40 Changing the upper knife ........................... 41 Setting the upper knife ..........................41 Useful tips for troubleshooting ...................... 42 Technical data ..........................43 Service information ......................... 44 www.w6-wertarbeit.de...
-
Page 5: Safety Notes
2 When cleaning the machine, only use dry or damp cloths. Never use benzine, thinners or other chemical cleaning agents for cleaning. 3 Do not expose the machine to strong vibrations. 4 The machine is not designed or intended for commercial use. www.w6-wertarbeit.de... -
Page 6: Machine Components
Machine components *Model 454D with product no. 502.054 only www.w6-wertarbeit.de... - Page 7 Machine components www.w6-wertarbeit.de...
- Page 8 Front flap • Opening Push the front flap as far to the right as possible and swivel it forwards. • Closing Lift the front flap until it rests against the machine. In this position, it automatically engages to the left. www.w6-wertarbeit.de...
-
Page 9: Accessories
Only use the original accessories supplied with the sewing machine. The following accessories are supplied with the overlock sewing machine: • Screwdriver • Screwdriver (small) • Tweezers • Needle set • Spool cap • Spool net • Brush • Needle threader www.w6-wertarbeit.de... -
Page 10: Setting Up The Machine
Regulating the sewing speed The sewing speed can be adjusted steplessly with the foot controller. The harder you press the foot controller the faster the machine sews. Do not place any objects on the foot controller. www.w6-wertarbeit.de... -
Page 11: Lifting, Lowering And Changing The Presser Foot
Turn the adjusting screw (D) clockwise for heavy materials. • Turn the adjusting screw anti-clockwise for thin and stretchable materials. In the default setting, the upper edge of the adjusting screw is approx. 2 mm below the top of the machine (see figure). www.w6-wertarbeit.de... -
Page 12: Changing The Needles
Checking the needle Place the needle on an even surface with the flat side down and check whether the needle is parallel to the surface. Also check the tip of the needle for damage. www.w6-wertarbeit.de... -
Page 13: Needle And Thread Table
Bulk thread (textured thread) can also be used for the hook threads. Bulk thread results in a low bulk seam with a soft surface with good coverage. Therefore, it is especially suitable for sewing rolled hems and decorative seams. *Model 454D with product number 502.054 only www.w6-wertarbeit.de... -
Page 14: Setting The Stitch Length
The differential feed can be changed during sewing. The standard setting of the differential feed is 1.0. * Model 454D with product number 502.054 only www.w6-wertarbeit.de... -
Page 15: Functioning Of The Differential Feed (Model 454D Only)
Change the differential feed to 2.25 until you have a smooth seam. Puckering of the seam may occur with woven materials or very thin fabrics. Change the differential feed to 0.5 until the material distortion no longer occurs. www.w6-wertarbeit.de... -
Page 16: Activating/Deactivating The Cutting Mechanism
Press the rotary knob for the upper knife and turn the pressed knob to the left (anti- clockwise). • Close the side cover and the front flap. Note: The setting of the upper knife is described in the chapter “Maintenance”. www.w6-wertarbeit.de... -
Page 17: Setting The Cutting Width
They serve as guiding aid for cutting the edge of the fabric with an even spacing. The “L” marking refers to the left needle and “R” to the right needle. • The spacing of the markings to the right needle is 10, 16 and 23 mm. www.w6-wertarbeit.de... -
Page 18: Adjusting The Rolled Hem Slider
Now, the rolled hem slider can be moved between the markings “S” (standard) and “R” (rolled hem). • Let the cutting width rotary knob snap back slowly. • Activate the upper knife (upper position). • Close the side cover and the front flap. www.w6-wertarbeit.de... -
Page 19: The Telescopic Thread Guide
Expose the thread upwards and pull the net over the spool from below. The net must cover the lower edge of the spool. Polyester or bulk thread may unwind unevenly during sewing. The thread can get entangled. www.w6-wertarbeit.de... -
Page 20: Threading A Thread
Should it become necessary to re-thread the machine, proceed in the following order: Upper looper – lower looper – right needle – left needle. Always lift the lifter lever for threading. Incorrect threading results incorrect stitches, broken threads or other problems. www.w6-wertarbeit.de... - Page 21 Pull the thread forward through the eyelet of the thread guide. • Guide the thread through the thread guide as shown. • Hold the thread with one hand and pull it through the tension discs with the other hand. www.w6-wertarbeit.de...
-
Page 22: Threading The Upper Looper
The thread must be pulled through the red eyelet of the looper thread lever (2) and then threaded into the thread guide (3). Insert the end of the thread into the eye the looper using tweezers and pull it through by approx. 10 cm. www.w6-wertarbeit.de... -
Page 23: Threading The Lower Looper
Pull the thread forward through the eyelet of the thread guide. • Guide the thread through the thread guide as shown. • Hold the thread with one hand and pull it through the tension discs with the other hand. www.w6-wertarbeit.de... -
Page 24: Threading Bulk Thread
Pull a thread loop of normal thread through the eye of the looper and put the bulk thread through the loop. Then pull both through the eye of the needle of the looper. The upper looper can also be threaded in this way. www.w6-wertarbeit.de... -
Page 25: Threading The Right Needle
(3). Place the thread into the right slot of the thread guide. Pull the thread through the eyelet on the needle bar and thread the needle from front to back. Pull out the thread by approx. 10 cm. www.w6-wertarbeit.de... -
Page 26: Threading The Left Needle
(3). Place the thread into the left slot of the thread guide. Pull the thread through the eyelet on the needle bar and thread the needle from front to back. Pull out the thread by approx. 10 cm. www.w6-wertarbeit.de... -
Page 27: Test Seam
At the end of a seam, continue sewing SLOWLY and slightly pull the thread chain until it is approx. 12 cm long. Separate the thread chain on the thread cutter so that 2 cm of the thread chain remain at the end of the fabric. www.w6-wertarbeit.de... -
Page 28: Securing The Thread Ends
Turn the fabric so that the bottom is on top and the seam is on the right. • Lower the presser foot and sew approx. 2.5 cm along the seam. Make sure that the cutting mechanism does not damage any seam threads. www.w6-wertarbeit.de... -
Page 29: Adjusting The Thread Tensions (4-Thread Seam)
Please read the instructions for adjusting the correct thread tension on the following pages. Incorrect thread tension Incorrect thread tension Increase the thread tension for the left needle Increase the thread tension for the right thread. needle thread. www.w6-wertarbeit.de... - Page 30 (decrease if necessary) • the differential feed* is set to “1.0” <<Figure>> If the stitch length and the differential feed* are set correctly, reduce the thread tension of the left and right needle thread. *Model 454D with product no. 502.054 only www.w6-wertarbeit.de...
-
Page 31: The 3-Thread Seam
Incorrect thread tension Incorrect thread tension Increase the thread tension for the upper looper Decrease the thread tension for the upper thread and/or decrease it for the lower looper looper thread and/or increase it for the lower thread. looper thread. www.w6-wertarbeit.de... -
Page 32: Rolled Hem, Scalloped Hem And Narrow Overlock Stitch
Remove the left needle, right needle (130/705H) size 80 Needle thread Synthetic (continuous polyester thread) weight 100/3 or 120/3 Bulk thread Synthetic 100/3-120/3 Synthetic Looper thread Synthetic 100/3- Sewing silk 100 Bulk thread 120/3 *Model 454D with product number 502.054 only www.w6-wertarbeit.de... -
Page 33: Adjusting The Thread Tension
Increase the needle thread tension. Increase the tension for the upper Increase the thread tension for the looper thread. lower looper thread and/or decrease it for the upper looper thread. www.w6-wertarbeit.de... -
Page 34: Decorative Overlocking
The stitch length also affects the effect. Increasing the needle thread tensions enhances the gathering effect. Test the best settings with a piece of the fabric to be worked with. *Model 454D with product number 502.054 only www.w6-wertarbeit.de... -
Page 35: Sewing Tucks
Iron the edge of the fabric. • Reactivate the upper knife. Type of Thread/synthetic thread fabric Right needle 100/3 or thread 120/3 Lightweight to medium Upper looper 100/3 or fabrics and lower 120/3 looper thread *Model 454D with product number 502.054 only www.w6-wertarbeit.de... -
Page 36: Special Accessories Set
Sewing of rounded-off pieces To overlock rounded-off pieces such as a skirt hem or a trouser leg with the blind stitch, leave a side seam open approx. 10 to 15 cm. Sew the hem and close the side seam afterwards. www.w6-wertarbeit.de... -
Page 37: The Bias Binding Foot
Cut the band such that the ends touch each other or overlap slightly and continue sewing. Reinforce the seam by sewing over the already finished seam for about 5 cm. www.w6-wertarbeit.de... -
Page 38: Maintenance
• Push the light bulb up and turn it to the left. Inserting a new light bulb • Insert the light bulb into the lamp socket from below. Push it up and turn it to the right (anti-clockwise). • Attach the face plate and retighten the clamp screw. www.w6-wertarbeit.de... -
Page 39: Oiling
• The sewing machine must be cleaned of cutting and thread dust. • Lubricate the areas marked with an arrow with a few drops of high-quality sewing machine oil. • Open the side cover and the front flap and oil the marked areas. www.w6-wertarbeit.de... -
Page 40: Cleaning The Cutting Mechanism
• Remove all lint from the area of the feed dog area with a brush. • First, remount the needle plate, then the presser foot and the needles. The front flap and the side cover must be closed last. www.w6-wertarbeit.de... -
Page 41: Changing The Upper Knife
The lower knife is tipped with extremely resistant carbide and only needs to be replaced after a long period of use. Both knives can be damaged e.g. by sewing over pins. It is recommended to have the knives exchanged by a customer service centre. www.w6-wertarbeit.de... -
Page 42: Useful Tips For Troubleshooting
While sewing, guide the fabric without pulling it. Loud noise during Threads, lint or dust under the needle Clean the area under the needle plate. operation plate. Machine must be oiled. See “Oiling”. *Model 454D with product number 502.054 only www.w6-wertarbeit.de... -
Page 43: Technical Data
130/705 H Dimensions (l x w x h) 28 x 26 x 26 Weight 7.5 kg ) Overlock sewing machine 444 with product number 705.304 only ) Overlock sewing machine 454D with product number 502.054 only Subject to technical changes. www.w6-wertarbeit.de... -
Page 44: Service Information
Do you have questions that the manual does not provide an answer for? Do you require specific spare parts? Visit our website at www.w6-wertarbeit.de or call us! Our telephone number, contact information as well as further information can be found on the warranty card which you have received together with the machine. - Page 45 Threading the lower looper 23 Threading the right needle 25 Needle and thread table 13 Threading the upper looper 21, 22 Troubleshooting 42 Tucks 35 Overcasting finger 18 Overlocking 34 Upper knife 16, 17 Upper knife (rotary knob) 16 Presser foot 11 www.w6-wertarbeit.de...
- Page 46 www.w6-wertarbeit.de...
- Page 47 www.w6-wertarbeit.de...
Need help?
Do you have a question about the W6 N 454D and is the answer not in the manual?
Questions and answers