Table of Contents
Advertisement
Advertisement
Table of Contents

Related Manuals for Toslon TF750 Duo


Summary of Contents for Toslon TF750 Duo
- Page 2 Preface As Yachting Electronic Co., Ltd is continuously improving this product, we retain the right to make changes to the product at any time which may not be reflected in this version of the manual. Please contact your dealer if you require any further assistance. It is the owner’s sole responsibility to install and use the instrument and transducers in a manner that will not cause accidents, personal injury or property damage.
-
Page 3: Table Of Contents
Contents Overview Check the Content Installation Transducer Installation GPS Receiver Instrallation Antenna Installation Connection Powering Using Instruction Some warnnings What’s on the display Key Function Quickly Operation Start Using Set HOME position Save a waypoint Go to target waypoint Import KML Go back Add Waypoints to [Waypoints list] from KML file Import a multi-waypoints route from KML file... - Page 4 Background Color Adjust Color Style Route Color Advanced Mode Sonar Depth Range Sonar Gain Sonar Beam Load New Color Overlap Data Depth Offset Temp. Offset Boat Vtg. Offset Shallow Alarm GPS SETTINGS GPS Filter Distance Unit Speed Unit Time Zone 24-Hour Time Sample Step Arrive Alarm...
- Page 5 System Simulator Backlight Key Tone Language Baud Rage Battery Alarm Boat Vtg. Alarm Default Settings System Info. Radio Bind Update R-Boxes. Quick Qperation Quick Marker Waypoint Route Go back Set Home Pos. Go to Home Stop Autopilot Clear Map Import Outline Overlap Data Data Logger Work Mode...
-
Page 6: Overview
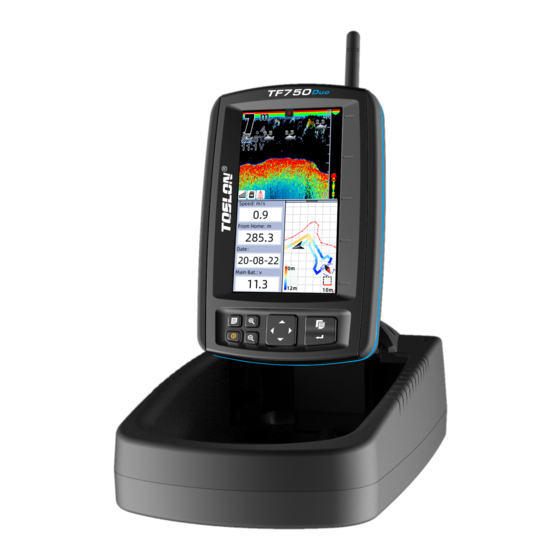
Overview TF750 is an ALL-IN-ONE Autopilot navigation and sonar system, it provides users multi-target autopilot function for the boat. And sonar data of TF750 can be saved as *.csv file to SD card, which can be imported to Reefmaster to create 3D map. Users also can connect TF750 to laptop, and save depth/coordinate by Reefmaster or Thirdpart software What’s the advantage of TF750? -
Page 7: Check The Content
Check the content 15 15 14 14 12 12 13 13 11 11 10 10 18 18 16 16 17 17 1.Display 7. SonarBox extending cable 13. Screws (4pcs) 2. SonarBox-740w 8. Power cable 14. Valco 3. Autopilot CCU740 9. Servo cable 15. -
Page 8: Installation
Installation Transducer Installation 1) for XBOAT730 Transducer Mounting Instruction Transducer Knob Rubber Screw down the 2 screws to loose the knob of fixed loose the battery support dummy transducer by hand take the knob and dummy hold the transducer(with transducer down rubber) through the boat screw tight the knob installation was finished... - Page 9 2) for general bait boats ( like Carp Madness, Viper, etc) For these bait boats, there is no transducer groove on the bottom housing. So, you need to drill a hole on the boat bottom to fix the transducer. Transducer Mounting Instruction Transducer Knob...
- Page 10 4) for Anatec catamaran bait boat For the boat, you only need simply match the transducer to the boat with the rubber Transducer Mounting Instruction Transducer Knob Rubber keep the sharp end the same direction with head of 1) Take off the transducer boat cover from the boat.
-
Page 11: Gps Receiver Instrallation
GPS receiver Installation 1) for XBOAT730 Transducer GPS bracket Screws GPS receiver Take the GPS lid down from Fix the GPS bracket on the XBoat GPS lid Slid the GPS receiver to the Hold the assembled GPS receiver GPS lid and lid going through the boat... - Page 12 2) for general bait boats ( like Anatec, Vegaboat, etc) Find a proper location on the boat, then fix the GPS bracket on the boat. And finally install the GPS receiver on the bracket. Note: when begin installing the GPS receiver, some key points should be noted: 1) The antenna for transmitter should be at least 30cm away from any other antennas.
-
Page 13: Antenna Installation
Antenna Installation for transmitter Install antenna for transmitter In the package, you can find 2 antennas. one is for transmitter, another is for display. for display 1) for xboat730 Screwing the antenna to the boat will be ok. 2) for general bait boats ( like Anatec, Vegaboat, etc) Following is the instruction to install the antenna on boat: 1) Choose an proper installation position. -
Page 14: Connection
Connection After all the installatiion are finished, please make the connection as following fiture. Sonar Box Power Signal port to antenna (DC 12V) Autopilot CCU to remote receiver to Sonar Box-740W to servo / ESC of boat... - Page 15 Connection of CCU-Autopilot The following figures instruct how to connect the Autopilot CCU740 with your bait boat. The system could control most 2 engineers or 1 engine (with rudder) boat with proper settings. Port A is connected to Speed Port B is connected to Contorller(ESC) or Servo Reciver of the remote Transmitter connection &...
-
Page 16: Powering
Powering For display For transmitter Recomended voltage 9-15V 6-12V Absolute Maximum voltage 16.0V 14.8V There are 2 ways to power the TF750 display 1) Use a inner 3S lithium (12.6v) battery pack as shown in the picture. 2) Use a outer lithium battery 1) charging port 3S lithium battery pack 2) outer battery connection... - Page 17 Note: overvoltage may burn the elements in the device! From bellow shows the voltage range of the most popular batteries in the market: Battery Type Voltage Permission 12V Lead-acid 10.8v~14.8V 8*AA NiMH 7.8V~10.6V 7.5V~12.8V 8*AA Alkaline 2S Lithium 5.6~8.4V 3S Lithium 8.4~12.6V 4S Lithium 11.2V~16.8V...
-
Page 18: Using Instruction
Using instruction Special Notifications Before you start using the device, there is something you should know: please do not put the display on ground during the operation, which could cause a short R/C distance. The proper way is using an tripod to support the display, and keep it at least 1.2m above the ground. -
Page 19: What's On The Display
What’s on the display Icon of Recording Surface Depth clutter readout Water temp Voltage of Fish symbol bait boat Sonar Beam Bottom Structure SD Card in Lower range Strength of of detection Radio signal Compass(screen) Speed calibrate required of boat Compass(boat) Distance calibrate required... -
Page 20: Key Function
Key Function ZOUT/ZIN KEYPAD MENU PAGE POWER PUSH-GO ENTER MENU Open Menu settings( Basic, Sonar Setting and GPS Setting). ZOUT /ZIN Used to zoom out GPS route on the screen. One push to command the boat "Back-home/Go-to-cursor-position/ PUSH-GO Enter-Way points-list/Go-to-target" PAGE Used to switch between main menus or some sub menus. -
Page 21: Quickly Operation
Quickly Operation Quickly enter into 【Waypoint】 Enter into 【QUICK OPERATION】 Note: pushing the key for 3s will start autopilot: back to home. - Page 22 Change the displayed option on screen You can use Overlap Data to determin which option will be displayed on screen: Time of day, Heading, Speed, date, etc. How to set the Overlap Data? Key to enter into [QUICK OPERATION], then choose[Overlap Data] 1) Press 2) Use keypad to choose an option which you hope to change, then press key to...
-
Page 23: Start Using
Start Using Set HOME position QUICK OPERATION. 1) Press key to enter into [Set Home Pos.], , 2) Use keypad to choose then press to confirm. Note: After the device is powered on, it will set the current location as default HOME Position. Save a waypoint When the boat arrive at a positon, you can choose to save it as a waypoint:... -
Page 24: Go To Target Waypoint
Go to target waypoint 1) Press key to enter into QUICK OPERATION 2) Use keypad to choose [Waypoint], then press to enter into waypoint list. 3) Choose one target waypoint then press to select [Autopilot to target]. -
Page 25: Import Kml
Import KML You can import KML file( from Google earth) to TF750. And run the boat with autopilot to a spot on the map simply by moving the cursor. 2) Import a kml file from the 3) Move the cursor to a 1) Press key to enter into QUICK... -
Page 26: Go Back
Go-Back Go-Back can guide the boat running to the first target, and after delaying specified time, then automatically run to the second target. 1) Press key to enter into 2) Select the Target 1 and 3) The boat arrived the QUICK OPERATION., then Target 2 from Waypoint list... -
Page 27: Add Waypoints To [Waypoints List] From Kml File
Add waypoints to [Waypoints list] from KML file Add waypoints to [Waypoints list] from KML file 1) Create KML file by GoogleEarthPro Operating steps: Left button->[1] add: folder-> [2]add : Placemark->[3]save place as *.kml For more details, please check the video-manual-channel of [ToslonMarine] on www.youtube.com Placemark 2) import to waypoints list... - Page 28 2) import to waypoints list 2.1 ) Press to quickly enter into Waypoint list. 2.2) move courser to a blank slot, press to select the【Import】menu. 2.3) select the KML file and confirm the slot number to be imported to.
-
Page 29: Import A Multi-Waypoints Route From Kml File
Import a multi-waypoints route from KML file 1) create a multi-waypoints route on GoogleEarth. Operating steps: Left button->[1] add: path-> [2]click on map to define points of path ->[3]save place as *.kml For more details, please check the video-manual-channel of [ToslonMarine] on www.youtube.com Note: 1.1) Up to 100 waypoints can be added to the route. - Page 30 Set delay me for each waypoint a er boat arrive Import from KML file Select waypoints from waypoints list Run Cancel 2) Press bu on to select exis ng route file. 【Import】 Imported waypoints file Note: A er enable “message when arrived”, user can define the standby me when boat reached each spot, and show warnning message on display.
-
Page 31: Save *.Csv File To Sd Card
Save *.csv file to SD card, which can be imported to Reefmaster to create 3D map 1) Press button first to active [Quick Operation] menu. 2) Enter [Data-logger] menu to select logger media interface. - Serial Port: connect to laptop by RS232 - SD card: save data for SD card as *.csv file. -
Page 32: Record All Real-Time Data To Sd Card
Record all real-time data to SD card, which was saved in folder SD:\TF7xx\Record you can choose recording all real- me data (in *.tslw format) to a SD card, which can be opened with TOSLON SonarViewer so ware. 1) Press button first to active [Quick Operation] menu. - Page 33 * informa on of csv and tslw format file Menu File Loca on Filename File Format Remark 1) A red icon is displayed at the top *.csv of the sonar image during recording Data-logger-> SD Card TF7xx\Export TF750_Data_+Date (Record la tude, 2) Can be opened with Excel longitude, date, depth) 3) Can be imported into Reefmaster...
- Page 34 Select better Sonar beam for the different water environment 1) For most lake, [Wide beam] is recommended when water depth more than 1.5m. 2) For ultra-shallow water, [Narrow Beam] is recommended when depth less than 1.2m. and setting [Sonar Gain] to 4X can help to find more details. 3) For accurate depth survey, [Narrow Beam] provide smaller sonar footprint, and give more accurate depth reading.
-
Page 35: Basic
Menu Operation Basic Sensitivity Determines how echoes will be displayed on the screen. Increasing the sensitivity will make you see more details on the screen. In deep water, increasing the sensitivity. whereas in shallow decreasing the sensitivity. Surface Clarify Reduces surface clutter by decreasing the sensivity of the receiver near the surface. -
Page 36: Background
Background Choose a background for echo style. Dark background for night time, and white background for daytime is recommended. Color Adjust Adjust the contrast & brightness of sonar image. Color Style Users can choose different color style for sonar image. Route Color On the route, TF750 use different color to indicate depth changing. -
Page 37: Sonar
Sonar Depth Range Determine in which portion the bottom will be displayed on the screen. Sonar Gain The gain controls the sensitivity of the hardware receiver. A higher gain makes the sonar more sensitive to echo returns, allowing it to display weaker targets. -
Page 38: Load New Color
Load New Color Load a nw color file from SD card. Overlap Data Used to select data shown on the top left conor of display (Depth, temperature, Boat Bat.) Depth Offset Adjust the digital depth readout to indicate depth from the waterline. Temp. -
Page 39: Gps Settings
GPS SETTINGS GPS Filter Determines in what satellite condition the device will stop GPS navigation automatically. For higher setting, the system will give up low HDPO (a factor in determining the relative accuracy of horizontal position) coordinate data to avoid error data. -
Page 40: Sample Step
Sample Step Set the distance for GPS data sampling. If you set 3, it means the GPS will sample data every Note: the smaller the value is, the more GPS data the device will generate. However that will correspondingly cause the system react slow. -
Page 41: Calibrate Compass Of Boat
Calibrate Compass of Boat Used for compass calibration of the boat Note: to calibrate compass of boat, just put the boat on water, and run it clockwise and anticlock- wise. -
Page 42: Compass Test
Compass Test Test if compass calibration of the display and boat are made successfully or not. In some cases, after you made calibrate compass of display and boat, it may fail due to the using enviroment. Then you need use Compass Test check the result of compass calibration. -
Page 43: Autopilot
TF750 autopilot function can work with most kinds of bait boats( with 2 engines or 1engine & rudder) . So, before you start the operation, please select the corresponding boat type. X-Boat: specially for Toslon X-Boat. 1 Engine: for the boat designed with 1 engine (and rudder). 2 Engine:... -
Page 44: Channels Reverse
Channels Reverse [Wiring Test], [CH Reverse] During you made is used to correct the running direction of motor (or rudder) after you found them did not run the correct direction as expected. For example, if your boat are with 2 engines, and you found the motor was running the counter direction [Go Forwarder] [Wiring Test]... -
Page 45: System
System Simulator Used to let you practicing using the Fishfinder as if you were on the water. Backlight Adjust the brightness of backlight. Key Tone Set if the sonar unit sound a tone or not when a key is pressed. Language Select the display language for menus. -
Page 46: Battery Alarm
Battery Alarm Sounds when the input battery voltage of display is equal to or less than the setting. Boat Vtg. Alarm Sounds when the input battery voltage of transmitter is equal to or less than the setting. Default Settings Used to restore original factory setting. System Info. -
Page 47: Update R-Boxes
How to make a Radio Bind? [Radio Bind] 1) first, select the menu from the operation menu, and confirm it by pressing ENTER key. A message will appear: 2) Now power on the SonarBox-740. 3) Press OK,then Radio Bind was finished: Update R-Boxes. -
Page 48: Quick Marker
Quick Operation Quick Marker Used to quickly creat an waypoint. How to use Quick Marker to creat a waypoint? 1) Press ENTER key to enter into QUICK OPERATION menu, then select Quick Marker. 2) Press ENTER key to enter into Detail information. 3) Press OK, the device will mark the current location as a waypoint with default name. -
Page 49: Waypoint
Waypoint List of waypoints which you have created. These waypoints can be edit or delete Detail: enter into waypoint details. Delete: delete the waypoint. Autopilot To Target: run the boat to the target by autopiloting. Set as Target: set the waypoint as target. New: ceat the currelnt location (of boat) as a new waypoint. -
Page 50: Route
Route List of all the routes you have saved. You can chose to save a route or load a route as target. Save current: save the current route. Delete: delete the route. Rename: rename the route. Show Route: show the route on screen. Copy To SD: copy the route to SD card. -
Page 51: Go Back
Go back Guide the boat running to the first target, and after the specified time, it will go to the second target automatically. For the detailed operation, please refer to Page 25. Set Home Pos. Set the current position of boat as HOME point. Go to Home Guide the boat to HOME point Stop Autopilot... -
Page 52: Overlap Data
Overlap Data For the digital information panel under the sonar image, you can change the displayed information by 【Overlap Data】. The info of "speed/distance to home/dis- tance to target/date... " can be selected to show. How to set the Overlap Data? QUICK OPERATION. -
Page 53: Data Logger
Data Logger Choose how to save the data. Off: do not save data Serial Port: save depth/coordinate data by Reefmaster or Thirdpart software SD Card: record all real-time data to SD card Work Mode Select work mode for the device. Normal: work in normal mode. -
Page 54: Multi-Target Autopilot
Multi-Target Autopilot To guide the boat running on a multi target, which could be multi waypoints, or a pre-designed outline imported from Google Map. Set delay me for each waypoint a er boat arrive Import from KML file Select waypoints from waypoints list Run Cancel... - Page 55 1) Guide boat running on multi-waypoint target 1) Use to select waypoints from waypoints list. 1.1) Move courser to a blank slot, then press ENTER to enter into Waypoint list. 1.2) Choose a waypoint, then press ENTER to confirm. 1.3) After multi-waypoint target was successfully set, move cursor to button, then press ENTER...
-
Page 56: Specifications
Specifications TFT Color Screen 5" Power DC 9~15V Battery 3S 18650 (Optional) BASIC Built-in Li-ion Charger AC-DC power supply Optional Water Proof Splashproof Max. Depth Sonar Frequency 455/115Khz Sonar coverage 35/60degree Ping Rate Sonar Software Engine Gen3 Echo Sounder Hardware Gain Adjustable User Defined Color Scheme Support Color Route to Indicate Depth(2D Map) tsl2 logger for SonarViewer... -
Page 57: Warranty
Warranty 1) Warranty Period Yachting electronic warrants that its products, when properly installed and used will be free from defects in material and workmanship for the period of 24 months from the date of first purchase. For Distributors only, the Warranty Period shall run for an additional three (3) months to that stated for first retail customers. -
Page 58: Unit Care
This can prevent sufficient power from flowing to the unit. Clean the connections to be sure. Sometimes the substance is clear and not easily seen. Contact & Service Information For spare parts or service information, please contact one of our local sales offices or visit our website: www.toslon.com... - Page 59 FAQ (frequently asked question) corrective action failure 1) Please power on the SonarBox first, then power on the display. If power on in wrong sequence, please restart the display again. Why the models self-check 2) Please make sure the radio environment is in good condition. failed when the display Too close to the WIFI, BLUETOOTH device, or noisy R/C controller power on ?
- Page 60 corrective action failure 4) keywords: ENVIRONMENT Is there a high-voltage line within 100m near the instrument? The radiation of the high-voltage line will shorten the wireless transmission distance. Particles (water, dust) in the air will significantly affect the Why the radio range 2.4G R/C distance, such as rainy, foggy, or high humidity could not reach 300m? weather.
- Page 61 4) If the device (SonarBox) use the same power with boat, the motor noise will affect the sonar operation. 5) Please use a separate power for the device, or use a Toslon isolation filter to elimite noise interference from motor.
Need help?
Do you have a question about the TF750 Duo and is the answer not in the manual?
Questions and answers