Philips 5000 Series Manual
Hide thumbs
Also See for 5000 Series:
- Manual (826 pages) ,
- User manual (187 pages) ,
- Guidance (58 pages)
Table of Contents
Advertisement
Quick Links
Advertisement
Table of Contents

Related Manuals for Philips 5000 Series


Summary of Contents for Philips 5000 Series
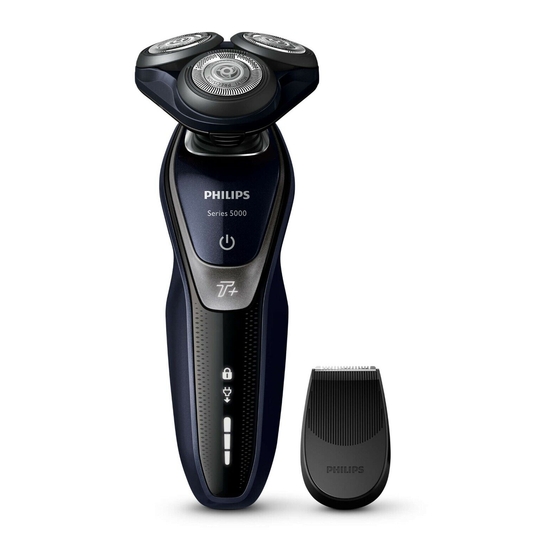
- Page 1 Series5000 S5000 series S5444 フィリ ップス 電動シェーバー 品 S5444/03 取 扱 説 明 書 番...
- Page 2 フィリ ップス シェーバーをお買い上げいただき、 まことにありがとう ございます。 長 い 間ご愛 用 いただくために、 ご使 用 前にこの 取 扱 説明書をよくお読みのうえ、 正しくお使いください。 また、 お読みになった後は、 お使いになる方がいつでも見られる ところに必ず保管してください。 商品のご確認 商品をご確認ください。 保護キャ ップ 本体 充電アダプタ ※改良の為、仕様を予告なく変更することがあります。 お買い上げのお客様へ 初めてご使用になる際は、 ご使用前に充電してください。...
-
Page 3: Table Of Contents
目 次 ● は じ め に 商品のご確認 目次 必ずお守りください ・ 各部の名称 表示について 充電のしかた ● ご 使 用 方 法 シェービングのしかた 〜 お手入れ方法 保護キャ ップの取り付けかた 保管のしかた 刃の交換 ● 廃棄について シェーバーを廃棄するとき ● 困 っ た と き 故障かな? と思ったら ● 英 文 解 説 〜... - Page 4 安 全 上 の ご 注 意 必ずお守り ●ここに示した注意事項は、 安全に関する重要 ください な内容ですので、 必ず守ってください。 ●誤った取扱いをしたときに想定される内容を 「警告」 、 「 注意」 に区分けしています。 ○絵表示について 危険 人が死亡または重傷を負う可能性が大きい内容。 警告 人が死亡または重傷を負う可能性が想定される内容。 人が傷害を負う可能性および物的損害のみの発生が想定 注意 される内容。 記号は、 「 危険、 警告、 注意」 を示します。 図の中や近くに具体的な注意 ○絵表示の例 内容 (左図の場合は高温注意) を示します。 記号は、 してはいけない 「禁止」 を示します。 図の中や近くに具体的な 禁止内容 (左図の場合は分解禁止) を示します。 記号は、...
-
Page 5: 必ずお守りください 3
警 告 ● 充電アダプタは、 完全に乾いているこ ● 補助を必要とする人 (子どもを含む) に とを確認してからコンセントに差して 使用させないでください。 またお体の ください。 ショート・感電の原因にな 不自由な人だけでは使用しないでくだ ります。 さい。 ● 乳幼児の手の届くところに本製品を置 ● 充電アダプタには変圧器が内蔵されて かないでください。 またお子様が本製 います。 充電アダプタを切り離して別 品で遊ぶことがないように監視してく のプラグに接続するのは危険ですので ださい。 おやめください。 注 意 ● 刃は強く押さえないでください。 破損 ● 電源コネクタ受部にピンやごみを付着 して皮膚を傷つけることがあります。 させないでください。 感電・ ショート・ 発火の原因になります。 ● 充電アダプタを抜くときは、 電源コード ●... -
Page 6: 各部の名称
各部の名称 シェービング ユニッ ト シェービングユニッ ト 保護キャ ップ リリースボタン 本体 電源ボタン 電源プラグ部 トラベ ルロック 表示ランプ 充電アダプタ プラグ解除お知らせ 表示ランプ 充電表示ランプ 電源コネクタ受部 電源コネクタ部 電源コー ド部 ● シェービングユニット シェービングヘッ ド分解図 シェービング ヘッ ドホルダー 保持板 内刃 外刃 シェービング ヘッ ドホルダー受部 (替刃品番: ) SH50... -
Page 7: Led
初めてお使いになるときや、 長い間ご使 表示について 用にならなかったときは、 表示が出 るまでに時間がかかる場合があります。 主な表示 (本体) ロック機能表示ランプ プラグ解除お知らせ表示ランプ 充電表示ランプ ●ロック機能 (カギマークが表示されていると電源は入りません) 電源ボタンを約 秒長押しすると、 カギマークが表示されてロック がかかります。 再度約 秒長押しすると解除できます。 充電アダプ 3 sec. タに接続すると、 ロックは自動的に解除されます。 ● 充電表示 充電中は充電表示ランプが白色に点滅します。 ● 充電完了表示 充電が完了すると、 白色の充電表示ランプが点灯します。 満充 電後、 約 分経過すると充電表示ランプが消えます。 ※充電中に電源ボタンを押すと、 プラグ解除お知らせ表示ランプが点滅します。 ● 充電催促表示 動作中に充電残量が少なくなると (使用可能時間が残り約 分 以下) 、 充電表示ランプがオレンジ色に点滅します。 電源を にすると、... -
Page 8: 充電のしかた
充電のしかた 水場や浴室で充電をしないでください。 ※ 充電をしながらシェービングはできま せん。 初めてお使いになるときは、 充電表示ランプが充電完了を表示するまで、 シェーバーを 時間以上 連続で充電してください。 長い間ご使用にならなかったとき、 または充電残量が少なくなったときは、 ご使用前に充電してください。 充電時間は約 時間です。 充電開始後数分間、 充電表示ランプが点滅し ないことがありますが、 そのまま充電すると充電表示ランプが点滅します。 海外 ( 〜 ) での 240V ご使用も可能です。 ただし、 コンセン トの形状や電圧など現地で充分お確かめのうえご使用ください。 シェーバー本体の電源が になって 充電が完了すると充電表示ランプが点 いることを確認してください。 灯します。 ※ 満充電後、 約 分経過すると充電表示ラン プが消えます。 充電アダプタの電源コネクタ 部をシェーバー本体の電源コ... - Page 9 シェービングの 肌が乾いた状態でのシェービングの しかた ( ドライ) しかたです。 ご使用の際は本体から充電アダプタを抜いてご使用ください。 接続されていると作動し ません。 シェーバー本体は防水加工をしており、 水場や浴室でも使用できますが、 警告 水や液体の中に浸けないでください (故障の原因となります) 。 ●モーターの始動時、 微弱な振動がシェーバー本体に伝わりますが、 問題はありません。 ●ほこりなどで肌が汚れている場合、 ふきとってからご使用ください。 ●ご使用の前に外刃の破れや変形がないか確認してください (外刃に破れや変形があると肌を傷つける原因になります) 。 ●ヒゲ剃り以外の目的 (頭髪など) には、 使用しないでください。 電源ボタンを押し、 電源を にします。 ※ カギマークが表示される場合はロック機能が になって います。 ロックを解除してから電源を にしてください。 刃を肌に軽く押しあて、 円を描くように動かしながら 剃ります。 シェービング後は電源ボタンを押し、...
- Page 10 上手に 肌に強く押しつけるのではなく、 軽く押しあてて 剃るには 自分から見て時計回りに回転させながら剃るのがコツです。 ほお あごの裏側 肌を伸ばし、 ヒゲを立たせるように円を描く 刃を肌に軽くあて、図のようにあごを上げて円 ように小さく回転させながら剃ります。 を描くように小さく回転させながら剃ります。 ほおの奥から首筋 鼻の下 片方の手で肌を後ろに引っ張りながら剃り 鼻の下を伸ばし、円を描くように小さく回転 ます。 させながら剃ります。 フィリップスのシェーバーを初めてお使いの方は、 剃りかたに慣れるまで 〜 週間かかることがあ ります。 初めてのシェービングで思い通りの結果が得られないことや、 少し肌にヒリヒリ感が残る場 合がありますが、 これは普通のことです。 フィリップスのシェーバーに限らずシェービング方法を変 える時には、 肌もヒゲも新しいシェービング方法に慣れる時間が必要です。 新しいシェーバーに肌を 慣らす為、 まずは 週間このシェーバーを使い続けてみてください (最低でも 週間に 回以上) 。 この 週間は、 あまりシェービング方法を変えたりせず、 同じシェーバーで肌を慣らすことが大切です。...
-
Page 11: ご 使 用 方 法 シェービングのしかた 8
シェービングフォームやシェービング シェービングの ジェルを使ったシェービングのしかた しかた (ウェ ッ ト) です。 剃った部分を実感しながら、 なめ らかなシェービングができます。 シェーバー本体は防水加工をしており、 水場や浴室でも使用できますが、 警告 水や液体の中に浸けないでください (故障の原因となります) 。 ●モーターの始動時、 微弱な振動がシェーバー本体に伝わりますが、 問題はありません。 ●ご使用の前に外刃の破れや変形がないか確認してください (外刃に破れや変形があると肌を傷つける原因になります) 。 ●ヒゲ剃り以外の目的 (頭髪など) には、 使用しないでください。 ●石けんもお使いいただけますが、 肌の上での滑りをよくするため、 シェービングフォームやジェルの使用をお勧めします。 顔を濡らし、 市販のシェービングフォーム シェービング後は電源ボタンを押し、 電 またはシェービングジェルを付けます。 源を にします。 シェーバーをきれいに洗います ( 「お手 シェービングヘッ... - Page 12 シェービングユニッ トはご使用の都度、 お手入れ方法 水洗いによるお手入れをしてください。 水洗いによるお手入れ方法 ●お手入れの際は、 電源を にしてから水洗いしてください。 ●シェービングユニッ トは水洗いできますが、 本体は水中に浸けないでください。 注意 ●シェービングユニッ トを乾燥させる時に、 タオルやティ ッシュペーパーを使 用しないでください。 刃を傷める場合があります。 ※洗剤は使用しないでください。 ※ ぬるま湯 ( ℃前後) でのお手入れをおすすめします。 臭いのもととなる皮脂や汗などが取れやすくなり ます。 ただし、 熱湯はお止めください。 故障の原因となります。 ※お手入れ中にシェーバーの底から水が漏れてくる場合がありますが、 異常ではありません。 シェービングユニッ トのお手入れ方法 シェービングヘッ ドホルダーの内側の シェービングユニッ ト表 面 の 汚 れを 汚...
- Page 13 シェービングユニッ トのお手入れ方法(分解+水洗い) ※ カ月に 度、 またはシェーバーの切れ味が落ちてきたら、 シェービングヘッ ドを分解して水洗いすることを おすすめします。 ※お手入れの際は、 電源を にしてから分解や水洗いをしてください。 リリースボタンを押して、 シェービン 内刃を外刃か ら取り外 し、 流水で洗います。 グユニットを開きます。 水を切ります。 内刃と外刃をシェービングユニットに シェービングヘッ ドホルダ ー 内 側と 取り付けます (詳しい手順については、 シェービングヘッ ドホルダー 受 部 の 「刃の交換」 ( ) をご参照ください) 。 P.14 汚れを水で洗い流します。 シェービングヘッ...
-
Page 14: 保護キャ ップの取り付けかた
保護キャ ップの 保護キャップを取り付ける前にシェー 刃の交換 取り付けかた バーをきちんと乾燥させてください。 ● 保護キャ ップを図のように、 シェービングユニッ ト に取り付け、 保護します。 保管のしかた シェーバーを保管する前に きちんと乾燥させてください。 ※室温 ℃〜 ℃の環境で保管してください。 ※直射日光の当たる場所には保管しないでください。 ※夏場、 車の中には放置しないでください。... -
Page 15: 刃の交換
刃の交換 専用の替刃品番は です。 SH50 ※シェービング性能を維持するために、 刃は 年ごとに交換することをおすすめします。 ※交換する際は、 必ずフィリップス社製の専用の替刃 (品番: ) とお取り替えください。 SH50 シェービングヘッ ドホルダーからシェー シェービングユニッ トリリースボタン ビングヘッ ドの内刃と外刃を取り外し、 新 を押し、 シェービングユ ニッ トを開 け しい替刃に交換してください。 ます。 刃は つとも○印の位置に外刃の突起部がくるよう にセットしてください。 シェービングヘッ ドホルダーをシェービ 保持板をシェービングヘッドに戻し (図 ) 時計回りに回して (図 ) シェー ングユニッ トから引き抜きます。 ビングヘッドホルダーにセットしま... -
Page 16: シェーバーを廃棄するとき
シェーバーを ※お客様による充電池の 廃棄するとき 修理交換はできません。 ニッケル水素充電池のリサイクルについて 本製品はニッケル水素充電池を使用しています。 ニッケル水素充電池はリサイクル可能な貴重な資源です。 ご使用済みの製品の廃棄に際しては、 ニッケル水素充電池 を取り出し、 各自治体の処理方法に従い、 リサイクル協力店 にお持ちください。 ●製品を廃棄するとき以外は、 絶対に本体を分解しないでください。 注意 ●本体内部の金具は鋭いので、 ご注意ください。 充電池の取り外しかた 電源を にして、 完全に動作しなくなるまで充電池を放電させてから、 行ってください。 シェービングユニッ トをはずし、 本体下 モーターユニッ トのカバーにあるツメを 部のネジを⊖ドライバーではずし、 ユ はずし、 カバーを開けます。 ニッ トカバーをはずします。 充電池ホルダーを持ち上げて工具でワ イヤーを切断し、 取り出します。 フロン トカバーを曲げて、 モーターユ ニッ... -
Page 17: 困 っ た と き 故障かな? と思ったら
故障かな? 故障かな?と思ったら、 と思ったら お調べください。 だんだん切れ味が悪くなった ▶シェービングヘッド部が汚れていないか確認してください。 ▶シェービングヘッド部が損傷または摩耗していないか確認してください。 損傷または摩耗しているときは、 シェービングヘッドを交換してください。 (替刃品番 : ) SH50 ▶シェービングヘッドに長いヒゲがからまっていないか確認してください。 充電しても使用時間が極端に短い ▶シェーバーが完全に止まるまで作動させてから、 もう一度充電してください。 それでも改善されないときは、 充電池の寿命です。 シェーバーの電源ボタンを押しても作動しない ▶ シェーバーに充電アダプタが接続されている場合は充電アダプタを外してくだ さい。 ▶ 充電されてない場合は 時間以上の充電をしてください。 ▶ カギマーク が表示する場合はロックを解除してください。 ▶ 刃が破損している場合は交換をしてください。 シェーバー本体のモーターは回転しているが、 内刃が回転しない ▶ 外刃にキズ、 ヘコミがある場合はシェービングヘッドを交換してください。 (替刃品番: ) SH50 充電できない ▶... - Page 18 English ENGLISH S5444/03...
- Page 19 English Important safety information Read this important information carefully before you use the appliance and its accessories and save it for future reference. The accessories supplied may vary for different products. Danger Keep the supply unit dry. Warning To charge the battery, only use the detachable supply unit (HQ8505) provided with the appliance.
- Page 20 Do not use the supply unit in or near wall sockets that contain an electric air freshener to prevent irreparable damage to the supply unit. Electromagnetic fields (EMF) This Philips appliance complies with all applicable standards and regulations regarding exposure to electromagnetic fields. General This shaver is waterproof.
- Page 21 7 Battery charge indicator 8 Supply unit 9 Small plug Introduction Congratulations on your purchase and welcome to Philips! To fully benefit from the support that Philips offers, register your product at www. philips.com/welcome. The display Battery charge indicator Quick charge: When the shaver does not contain enough energy for one shave, the battery charge indicator flashes orange quickly.
- Page 22 English Battery low When the battery is almost empty, the battery charge indicator flashes orange. ’Unplug for use’ reminder The ‘unplug for use’ symbol flashes to remind you that you have to disconnect the product from the power outlet before you can switch it Travel lock When you are going to travel, you can lock the shaver to prevent it from accidentally turning...
- Page 23 English - While you deactivate the travel lock, the travel lock symbol lights up briefly and the shaver produces a short sound. The shaver turns on and is now ready for use again. Charging Before first use, charge the shaver for at least 2.5 hours without interruption and until the battery charge indicator shows that the battery is full.
- Page 24 English Turning the shaver on and off - To turn on the shaver, press the on/off button once. - To turn off the shaver, press the on/off button once. After turning the shaver off, the display lights up for a few seconds and shows the remaining battery charge.
- Page 25 English Wet shaving For a more refreshing shave, you can also use this shaver on a wet face with shaving foam or gel. 1 Apply some water to your skin. 2 Apply shaving foam or gel to your skin. 3 Rinse the shaving unit with warm water to ensure that the shaving unit glides smoothly over your skin.
- Page 26 English Cleaning and maintenance Cleaning the shaver Clean the shaver after every use for optimal performance (see 'Cleaning and maintenance'). Note: While rinsing shaving heads, water may drip out of the base of shaver. This is a normal occurrence. Internal electric parts are in a waterproof compartment so the shaver will be protected against water damage.
- Page 27 English Thorough cleaning method Note: We advise you to clean the shaving heads thoroughly once a month or when the shaver does not shave as well as it used to. 1 Turn off the shaver. 2 Press the release button to open the shaving unit.
- Page 28 English 7 Put the cutter back into the guard. 8 Place the shaving heads in the shaving head holder. Note: Make sure that the projections of the shaving heads fit exactly into the recesses of the shaving head holder. 9 Place the retaining rings back onto the shaving head holder and turn them clockwise ('click').
- Page 29 English Note: Hold the shaving head holder in your hand when you reinsert the shaving heads and reattach the retaining rings. Do not place the shaving head holder on a surface, as this may cause damage to the shaving heads. 10 Reinsert the hinge of the shaving head holder into the slot of the shaving unit.
- Page 30 Replace damaged shaving heads immediately. Always replace the shaving heads with original Philips shaving heads (see 'Ordering accessories'). 1 Switch off the appliance. 2 Press the release button to open the shaving unit.
- Page 31 English 6 Place the new shaving heads in the shaving head holder. Note: Make sure that the projections of the shaving heads fit exactly into the recesses of the shaving head holder. Place the retaining rings back onto the shaving heads and turn them clockwise to reattach the retaining ring.Each retaining ring has two recesses and two projections that fit exactly in the projections and recesses of the...
- Page 32 English Ordering accessories To buy accessories or spare parts, visit www. philips.com/parts-and-accessories or go to your Philips dealer. You can also contact the Philips Consumer Care Center in your country (see the international warranty leaflet for contact details). The following accessories and spare parts are...
- Page 33 English Take any necessary safety precautions when you handle tools to open the appliance. Be careful, the battery strips are sharp. 1 Remove the screw in the back of the shaver. 2 Remove the back panel. 3 Take out the power unit. 4 Bend the snap hooks aside and remove the transparent cover of the power unit.
- Page 34 This chapter summarizes the most common problems you could encounter with the appliance. If you are unable to solve the problem with the information below, visit www. philips.com/support for a list of frequently asked questions or contact the Consumer Care Center in your country. Shaver...
-
Page 35: 英 文 解 説 Guidance In English 17
English Problem Possible cause Solution The appliance The shaving heads Replace the shaving does not shave as are damaged or heads. well as it used to. worn. Hairs or dirt obstruct Clean the shaving the shaving heads. heads in the regular way or clean them thoroughly. -
Page 36: 保証とアフターサービス
● 本製品の保証は海外においても有効です。 ( 同シリーズ製品の取り扱いがある国に限ります) ● 日本国以外のフィリ ップスサービス部門においても保証期間内及び保証期間の経過後の アフターサービスを受けることができますが、 この場合多少日数を要することもあります。 ● 海外にてアフターサービスを受けられる場合は、 現地のフィ リ ップスサービス部門に お問い合わせください。 尚、 お困りの点がございましたら下記までご連絡ください。 Philips Consumer Lifestyle Service Department P.O.Box 20100 9200 CA DRACHTEN The Netherlands Fax:+31 51 259 2785 【お客様の個人情報のお取り扱いについて】 ● お受けしましたお客様の個人情報は、 株式会社フィリップス ・ ジャパンのホームページ に掲載されている 「プライバシーに関する通知」 に基づき適切... - Page 37 便 利 メ モ お買い上げ お買い上げ日 年 月 日 店 名 ( ) TEL. ご使用の時、 このような症状はありませんか? ●本体にさわると時々電気を感じる。 ●こげくさい臭いがする。 ●電源コー ド部を動かすと通電したり、 しなかったりする。 ●その他の異常、 故障がある。 このような症状の時は、 故障や事故防止のため、 電源を にし、 充電アダプタをコンセン トから外して、 必ずフィ リ ップスサポー トセンターにお問い合わせください。 仕 様 品 番 S5444/03 ハ ン ド ル 品 番 S5444 替...
-
Page 39: 無料修理規定
※ 保証書は、 本書に明示した条件のもとにおいて無料修理をお約束するもの です。 従って保証書を発行している者 (保証責任者) 、 及びそれ以外の事業者 に対するお客様の法律上の権利を制限するものではありません。 保証期間経過後の修理についてご不明の場合は、 フィリップスサポートセン ターにお問い合わせください。 ※ 保証期間経過後の修理 ・ 補修用性能部品の保有期間について詳しくは取扱 説明書の保証とアフターサービスの項目をご覧ください。 ※ お客様にご記入いただいた個人情報 (保証書の控え) は保証期間内のサービス 活動及びその後の安全点検活動のために利用させていただく場合がございま す。 ご了承ください。 また個人情報は、 株式会社フィ リ ップス ・ ジャパンのホーム ページ に掲載されている 「プライバシーに関す http:/ /www.philips.co.jp/ キ リ る通知」 に基づき適切に管理いたします。 ト リ 線... - Page 40 ★ 製品の使用方法や修理に関するお問い合わせ からの フィリップスサポートセンター お問い合わせ ( ) 0120 受付時間 : : 〜 : (年末年始除く) 登録のご案内 MyPhilips フィ リ ップスでは、 製品をより快適にご使用いただくために 製品登録をおすすめしております。 キ では製品の保証書や購入証明書の写真も保管でき、 MyPhilips リ 万が一購入証明書を紛失された場合にも安心です。 ト リ http:/ /www.philips.co.jp/myphilips-about 線 ( ) この印刷物は再生紙を使用しております。 3000.074.1310.1 11/21 ©2021 Philips Japan, Ltd.