Advertisement
Quick Links
EN
IMPORTANT SAFETY INSTRUCTIONS - SAVE THESE INSTRUCTIONS
Thank you for choosing a Sanus Systems VisionMount™ VMSA wall mount.
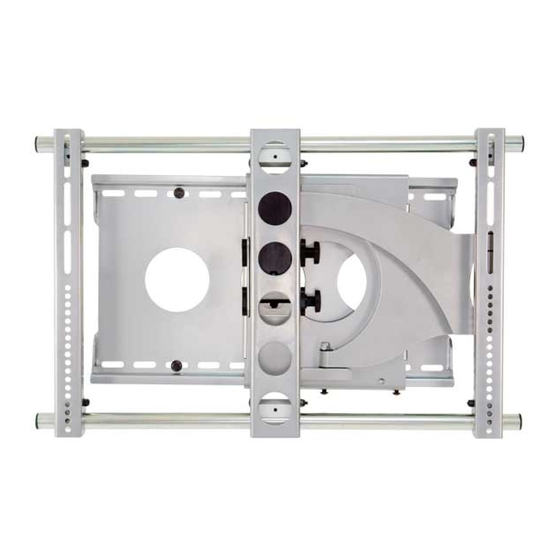
The VMAA26 is designed to mount LCD flat panels weighing up to 60 kg (130
lb) to a vertical wall. It is a full motion mount that allows the TV to roll ±6°, tilt
+5° to -15°, swivel ±90°, and extend 65 cm (25.75") from the wall.
CAUTION:
frame walls only! The wall must be capable of supporting up to five times the
weight of the monitor and mount combined. If you have any doubts about
the ability of the wall to support the monitor, contact Customer Service, or a
qualified contractor.
INFORMATIONS IMPORTANTES CONCERNANT LA SÉCURITÉ –
FR
CONSERVEZ CES INSTRUCTIONS
Merci d'avoir choisi un support mural VisionMount™ VMSA de Sanus Systems.
Le modèle VMSA est conçu pour installer sur un mur vertical un écran plat
ACL pesant jusqu'à 60 kg (130 lb). Ce support est multidirectionnel il permet
d'incliner le téléviseur entre +5° et -15°. Il est également possible de l'éloigner
de 65 cm (25.75 po) du mur, de le faire pivoter de ±90° et de le tourner de ± 6°.
ATTENTION:
.
les murs à chevrons en bois! Le mur doit pouvoir supporter jusqu'à cinq fois
le poids de l'ensemble moniteur et support. En cas de doute sur les capacités
du mur à supporter le moniteur, prenez contact avec le service clientèle ou un
artisan qualifié.
DE
WICHTIGE SICHERHEITSHINWEISE – BEWAHREN SIE DIESE HINWEISE
SORGFÄLTIG AUF
Vielen Dank, dass Sie sich für eine VMSA-Wandhalterung von Sanus Systems
VisionMount™ entschieden haben. Die VMSA kann LCD-Flachbildschirme
mit einem Gewicht bis zu 60 kg an eine vertikale Wand anbringen. Es handelt
sich um eine vollbewegliche Halterung, mit der Sie Ihren Fernseher um ±6°
querneigen, um +5° bis -15° neigen, um ±90° schwenken und um 65 cm
(25.75) Zoll von der Wand abziehen können.
VORSICHT:
in Holzstiftwänden ausgelegt! Die Wand muss das fünffache Gewicht der aus
Monitor und Halterung bestehenden Kombination tragen können. Falls Sie
Zweifel darüber haben, ob die Wand den Monitor trägt, setzen Sie sich bitte mit
dem Kundendienst von Sanus Systems oder einem qualifizierten Unternehmer
in Verbindung.
INSTRUCCIONES IMPORTANTES DE SEGURIDAD – CONSERVE ESTAS
ES
INSTRUCCIONES
Gracias por elegir un soporte mural VMSA VisionMount™ de Sanus Systems. El
VMSA está diseñado para montar paneles planos LCD que pesen hasta 60 kg
(130 lb) a un muro vertical. Es un soporte con movimiento total que permite
al televisor un balanceo de ±6°, una inclinación desde +5° hasta -15°, una
rotación de ±90°, y extenderse 65 cm (25.75") desde el muro.
PRECAUCIÓN:
Americas: 800-359-5520 • 651-484-7988 • info@sanus.com • www.sanus.com
Europe, Middle East, and Africa: 31 (0) 40 26 68 619 • sanus.europe@sanus.com • www.sanus.com
Asia Pacific: 86 755 8996 9226 • 800 999 6688 (mainland China only) • sanus.ap@milestone.com • www.sanus.com
©2008 Milestone AV Technologies. All rights reserved. Sanus is a division of Milestone.
All other brand names or marks are used for identification purposes and are trademarks of their respective owners.
VMAA26
This product is designed for use in wood
Ce produit n'est conçu que pour
Dieses Produkt ist zum Gebrauch nur
Este producto está previsto
Sanus Systems 2221 Hwy 36 West, Saint Paul, MN 55113 USA
(6901-170017 <00>)
para usar solamente sobre tabiques con montantes de madera. El tabique tiene
que ser capaz de soportar hasta cinco veces el peso del monitor y el soporte
combinados. Si tiene alguna duda sobre si la pared será capaz de soportar el
monitor, póngase en contacto con el servicio de atención al cliente de Sanus
Systems System o consulte a un técnico cualificado.
PT
INSTRUÇÕES DE SEGURANÇA IMPORTANTES – GUARDE ESTAS
INSTRUÇÕES
Obrigado por escolher um suporte de parede VMSA Sanus Systems
VisionMount™. O VMSA foi projetado para suporte de painéis LCD planos
com peso até 60 kg em uma parede vertical. Trata-se de um suporte com
movimento total, que permite à TV giro de ±6°, inclinação de +5° a -15°,
rotação de ±90°e extensão de d 25.75" (65 cm) da parede.
ATENÇÃO:
exclusivo em estruturas de madeira! A parede deve ser capaz de suportar cinco
vezes o peso do monitor acrescido do peso do material de montagem de
parede. Se tiver dúvidas sobre a capacidade da parede para suportar o monitor,
por favor contacte o Centro de Atendimento ao Cliente da Sanus Systems ou
consulte um técnico de instalações.
NL
BELANGRIJKE VEILIGHEIDSINSTRUCTIES – BEWAAR DEZE GOED
Bedankt voor uw keuze voor een Sanus Systems VisionMount™ VMSA-
wandbevestiging. De VMSA is ontworpen voor het monteren van LCD-
flatpanels met een gewicht tot 60 kg op een verticale muur. Het is een
wandmontage voor een Full Motion TV die het de TV mogelijk maakt om ±6°
te rollen, +5° tot -15° te zwenken, ±90° te kantelen , 65 cm (25.75") van de
muur te komen.
LET OP:
houten wanden! De wand moet in staat zijn vijf maal het gecombineerde
gewicht van de monitor plus de muursteun te dragen. Heeft u twijfels hierover,
neem dan contact op met de afdeling Customer Service van Sanus Systems, of
met een erkend aannemer.
IT
ISTRUZIONI DI SICUREZZA IMPORTANTI - CONSERVARE CON CURA
QUESTE ISTRUZIONI
Grazie per aver scelto un supporto a parete Sanus Systems VisionMount™
VMSA. Il supporto VMSA è progettato per montare schermi LCD a pannello
piatto con peso fino a 60 kg (130 libbre) su una parete verticale. Si tratta di
un supporto con movimento completo che permette al televisore un rollio di
±6°, inclinazione da +5° a -15°, rotazione di ±90° ed estensione di 65 cm (25.75
pollici) dalla parete.
PRECAUZIONE:
usato esclusivamente su montante in legno! La parete deve essere in grado
di sopportare fino a cinque volte il peso del monitor combinato al supporto a
muro. In presenza di dubbio sulla capacità della parete di sopportare il moni-
tor, contattare l'Assistenza Clienti di Sanus Systems o rivolgersi a una persona
qualificata.
Este produto foi desenhado para uso
Dit product is alleen geschikt voor gebruik op
Prodotto destinato a essere
Advertisement

Related Manuals for Sanus Systems VMAA26


Summary of Contents for Sanus Systems VMAA26
- Page 1 Thank you for choosing a Sanus Systems VisionMount™ VMSA wall mount. The VMAA26 is designed to mount LCD flat panels weighing up to 60 kg (130 lb) to a vertical wall. It is a full motion mount that allows the TV to roll ±6°, tilt +5°...
- Page 2 Veggen må kunne bære minst fem ganger den samlede vekten av skjermen og festet. Hvis du tviler på om veggen er sterk nok til å bære skjermen, bør du kontakte Sanus Systems Customer Service eller en kvalifisert snekker.
- Page 3 Si no entiende las instrucciones de montaje o tiene alguna duda sobre la seguridad de la instalación, contacte con Sanus Systems o llame a un operario cualificado. Sanus Systems no es responsable de daños o lesiones causados por el montaje, ensamblaje o uso incorrectos.
- Page 4 αμφιβολίες για την ασφάλεια της εγκατάστασης, επαφή με την Εξυπηρέτηση Πελατών της Sanus Systems ή επικοινωνήστε με εξειδικευμένο εγκαταστάτη. Η Sanus Systems δε φέρει ευθύνη για ζημιές ή τραυματισμό που ενδεχομένως έχει προκληθεί από εσφαλμένη τοποθέτηση, συναρμολόγηση ή χρήση. ΠΡΟΕΙΔΟΠΟΙΗΣΗ! περιέχει...
- Page 5 DİKKAT: Bu ürünü Sanus Sistemleri tarafından açıkça belirtilmeyen bir amaç için kullanmayın. Hatalı kurulum kişisel yaralanmaya ya da cihazınızın zarar görmesine neden olabilir. Bu talimatları anlamadıysanız ya da kurulumun düzgün bir şekilde yapıldığından emin değilseniz Sanus Sistemleri Müşteri Hizmet Merkezi ya da yetkili bir uzman ile iritibata geçin.
- Page 6 Qualora qualche pezzo risultasse mancante o danneggiato, si invita l’utilizzatore a non restituire l’unità al rivenditore ma a contattare il Servizio Clienti di Sanus Systems. Non usare mai componenti danneggiati! Παρεχόμενα κομμάτια και υλικά...
- Page 7 [03] x 2 [01] x 1 [04] x 2 [05] x 1 [02] x 1 1/4-20 x 0.75 in. [06] x 4 [07] x 4 [08] x 4 [09] x 2 M4 x 12mm M6 x 12mm M5 x 12mm 1/4-20 x 2.0 in.
- Page 8 Wood Stud Mounting NOTE Use awl to verify stud location. CAUTION: Do not over-tighten the lag bolts [07]. Tighten the lag bolts [07] only until the washers [08] are pulled against the wall plate [01]. Any material covering the wall must not exceed 16 mm (5/8in.). Fixation sur montants de bois REMARQUE Utilisez le poinçon pour vérifier l’emplacement du montant.
- Page 9 3/16 in. 30 - 40 cm (12 - 16 in.) < 16 mm (5/8 in.) 6901-170017 <00> 001439.eps Attach Plate to Wall [08] [07] 64 mm (2.5 in.) [01]...
- Page 10 TV with flat back Determine the diameter of the screw your TV requires by hand threading them into the threaded insert on the back of the TV. Verify that there are adequate threads to secure the brackets to the monitor. Do not use a screw that’s too long.
- Page 11 6901-170017 <00> 001427.eps FPM70-Flat and Curved Back Brackets [13], [14], [15], [16], [17] [23], [24], [25], [26] [27], [28] [03] 001429.eps FPM70-Brackets not level...
- Page 12 TV with curved back or obstruction near threaded insert Determine the diameter of the screw your TV requires by hand threading them into the threaded insert on the back of the TV. Verify that there are adequate threads to secure the brackets to the monitor. Do not use a screw that’s too long.
- Page 13 Arkası kavisli ve çıkıntılı TV TV’niz için gerekli Cıvata çapını cıvatayı TV’nizin arkasındaki dişli yuvasına elinizle takarak hesaplayın. Destekleri monitöre sabitlemek için yeterli sayıda halka olduğundan emin olun. Çok uzun bir vida kullanmayın. Monitörün içindeki bileşenlere zarar verebilirsiniz. Hangi donanımı kullanacağınızdan emin değilseniz, yardım için Müşteri Hizmetleriyle temasa geçin.
- Page 14 Install Vise Assemblies NOTE: Do not overtighten the nut [10]. The vise assembly [06] must rotate freely around the carriage bolt [11]. Poser les ensembles étaux NOTE : Ne pas serrer excessivement l’écrou [10]. L’ensemble étau [06] doit tourner librement autour duboulon à t te carrée [11]. Schraubstockeinheiten anbringen HINWEIS: Die Mutter [10] nicht zu stark anziehen.
- Page 15 6901-170017 <00>...
- Page 16 Install Arm Assembly to Monitor NOTE: Do not overtighten the fastener in the vise assemblies [06]. Tighten only enough to prevent the tubes [04] from moving. Poser l’ensemble bras sur le moniteur NOTE : Ne pas serrer excessivement la fixation dans l’ensemble étau [06]. Ne serrer que juste assez pour éviter le déplacement des tubes [04].
- Page 17 [33] [04] [03] [02] [04] 001438.eps FPM70-Arm Attachment Detail 6901-170017 <00> [03] [06] [33] [04]...
- Page 18 Attach Arm to Wall Mount HEAVY! You will need assistance with this step. CAUTION: Avoid potential injuries or property damage! Ensure the safety bolts [12] are secure. Periodic tightening may be required. Fixer le bras au support mural LOURD! Vous aurez besoin d’aide pour cette étape. ATTENTION: Évitez de possibles blessures corpo- relles ou dommages matériels ! Veillez à...
- Page 19 [33] [02] [01] [12] 6901-170017 <00>...
- Page 20 [33] Install Preventer Install the preventer [05] on the left side if you want the arm to fold to the left. Install the preventer on the right side if you want the arm to fold to the right. Installer la butée Installer la butée [05] à...
- Page 21 [05] [09] 6901-170017 <00>...
- Page 22 Install Cable Management NOTE: Be sure to leave enough slack in the cables to allow the monitor to move freely. Use the cable ties [32] and wire clips [31] to secure the cables to the brackets [03] and arm [02]. Installez la goulotte de câbles NOTE : Laissez suffisamment de mou dans les câbles pour autoriser un déplacement libre du moniteur.
- Page 23 [31] [32] [02] [31] [31] [03] 001454.ep FPM70-Cab 6901-170017 <00>...
- Page 24 [33] Adjust Monitor Position 8.1: Adjust Level [A]. 8.2: Adjust left/right swivel tension. CAUTION: Avoid potential injuries or property damage! Remove the safety bracket [B] only to adjust the swivel tension nut [C]. Be sure to replace the safety bracket after adjusting the swivel tension nut. The hex hole in the safety bracket must seat over the swivel tension nut.
- Page 25 Regolazione della posizione del monitor 8.1:Regolazione del livello [A]. 8.2: regolare la tensione della rotazione sinistra/destra. PRECAUZIONE: personale o danneggiamento dell’apparecchio! Per regolare il dado di trazione [C] di regolazione della rotazione rimuovere solo la staffa di sicurezza [B]. Dopo aver effettuato la regolazione del dado di tensione assicurarsi di ricollo-care la staffa di sicurezza.
- Page 26 Ustaw telewizor 8.1: Poziomowanie [A]. 8.2: wyregulować kąt obrotu w lewo/w prawo. UWAGA: Unikaj potencjalnych obrażeń i uszkodzeń! Zde- jmuj wspornik zabezpieczający [B] tylko w celuregulacji nakrętki napinającej przegubu [C], po czym natychmiast zakładaj go z powrotem. Sześciokątny otwór we wsporniku zabezpieczającym należy nasadzić na nakrętkę napinającą przegubu.
- Page 27 [33] 6901-170017 <00> 001451.eps 001451.eps FPM70-Left / Right Angle 001449.eps FPM70-Back of Assembly...
- Page 28 001450.eps FMP70-Up / Down Pitch 001453.eps FPM70-Full 6901-170017 <00>...
- Page 29 Milestone AV Technologies and its affiliated corporations and subsidiaries (collectively, “Milestone”), intend to make this manual accurate and complete. However, Milestone makes no claim that the information contained herein covers all details, conditions, or variations. Nor does it provide for every possible contingency in connection with the installation or use of this product.
Need help?
Do you have a question about the VMAA26 and is the answer not in the manual?
Questions and answers