Table of Contents
Advertisement
Quick Links
Advertisement
Table of Contents

Related Manuals for Lenovo ThinkVision E20-30


Summary of Contents for Lenovo ThinkVision E20-30
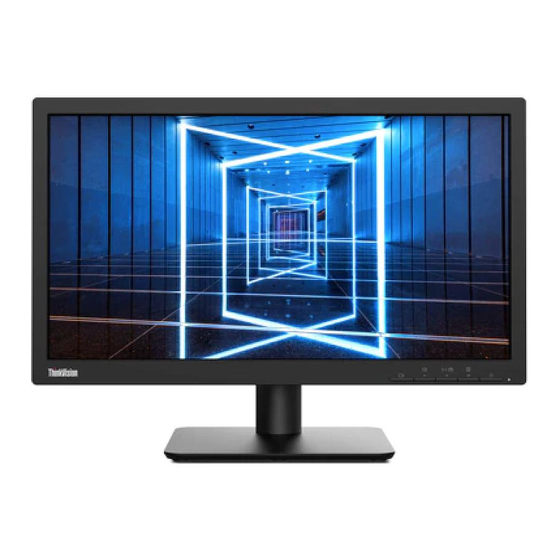
- Page 1 ThinkVision E20-30 User Guide Machine Type: 62F7-KAR4-WW...
- Page 2 Version 1 (November 2021) All rights reserved Lenovo 2021 LENOVO products, data, computer software, and services are developed on earmarked funds and are sold to government agencies as commodities as defined in 48 C.F.R. 2.101, with limited restricted rights of use, duplication, and disclosure granted to the government agencies.
-
Page 3: Table Of Contents
Contents Safety Matters…………………………………………………………………………….……iv General Safety Principles…………………………………………………………………..iv TCO Certified……………………………………………………………………………….v Chapter 1. New Member Guide…………………………………………………………….…1-1 Items List…………………………………………………………………………………1-1 Precautions For Use………………………………………………………………………1-2 Product Overview………………………………………………………………………...1-2 Set Up the Display……………………………………………………………………….1-4 Chapter 2. Adjusting and Using the Display……………………………………………………2-1 Comfort and Assistance Functions……………………………………………………….2-1 Arrange Your Working Area……………………………………………………………..2-1 Placing and Viewing the Display………………………………………………………...2-1 Tips on Healthy Work Habits…………………………………………………………….2-2 Adjusting the Display Image……………………………………………………………..2-3 Select Supported Display Modes………………………………………………………..2-7... - Page 4 Telephone Technical Support………………………………………………………….……A-1 Appendix B. Declaration………………………………………………………………………B-1 Trademark……………………………………………………………………………….B-2 Power Cord……………………………………………………………………………..B-2 ⅲ...
-
Page 5: Safety Matters
Safety Matters General Safety Principles For tips on safe computer use, please go to: http://www.lenovo.com/safety Avant d’installer ce produit, lisez les consignes de sé curité . Vor der Installation dieses Produkts die Sicherheitshinweise lesen. Πριν εγκαταστήσετε το προϊόν αυτό, διαβάστε τις πληροφορίες ασφάλειας (safety information). -
Page 6: Tco Certified
A third-party certification according to ISO 14024 Toward sustainable IT products Say hello to a more sustainable product IT products are associated with a wide range of sustainability risks throughout their life cycle. Human rights violations are common in the factories. Harmful substances are used both in products and their manufacture. - Page 7 A third-party certification according to ISO 14024 Toward sustainable IT products Say hello to a more sustainable product IT products are associated with a wide range of sustainability risks throughout their life cycle. Human rights violations occur in the supply chain. Harmful substances are used both in products and their manufacture. Products can often have a short lifespan because of poor ergonomics, low quality and when they are not able to be repaired or upgraded.
-
Page 8: Chapter 1. New Member Guide
Chapter 1. New Member Guide This user guide provides users with detailed operating instructions. For a quick overview of the instructions, please refer to the Setup coloring page for brief information. Items List The following items should be included in the package of this product: ■Quick Start Guide ■Display ■Stand... -
Page 9: Precautions For Use
Precautions For Use To set up your display, please refer to the following illustration. Note: Do not touch the screen area of the display. The screen area is a glass product and can be easily damaged by friction or pressure. 1. - Page 10 Display Control Different functions can be used through the key controls on the panel frame. For information on how to use these key controls, see "Adjusting the Display Image" on pages 2-3. Kensington anti-theft lock Your display is equipped with a Kensington anti-theft lock, which is located on the back of the display.
-
Page 11: Set Up The Display
Set Up the Display This section describes how to set up the display. Connecting and Powering on the Display Note: Before performing this procedure, be sure to read the "Safety Matters" on page iv. 1. Turn off the power to the computer and all connected devices, and then unplug the computer's power cord. - Page 12 3. For computers with VGA connections. 4. For computers with HDMI connections. 1-5 Display User Guide...
- Page 13 5. Plug the power cord into the display, and then plug the display power cord and computer cord into a grounded power outlet. Note: A certified power cord must be used for this equipment. The installation and/o r equipment regulations of the country concerned should be taken into account.
- Page 14 7. Turn on the power to the display and computer. 8. When you install the display driver, download the driver that corresponds to your display model from the Lenovo website at http://support.lenovo.com.cn/. To install the driver, see the "Manually Install the Driver for the Display"...
-
Page 15: Chapter 2. Adjusting And Using The Display
Chapter 2. Adjusting and Using the Display This section describes how to adjust and use this display. Comfort and Assistance Functions Good ergonomic designs are important for the comfortable use of your personal computer. Your workplace and the equipment you use should be arranged appropriately for your personal needs and the type of work you do. -
Page 16: Tips On Healthy Work Habits
Accessibility Information Lenovo is committed to providing greater access to information and technology for people with disabilities. With assistive technologies, users with disabilities can access information most appropriate for their specific situation. Some of these technologies are already available in the operating system;... -
Page 17: Adjusting The Display Image
Adjusting the Display Image This section describes the functions of the user controls used to adjust the display image. Using Direct Access Controls When On Screen Display (OSD) is not displayed, you can use direct access controls. Icon Control Description Power Power on/off To access the OSD menu... - Page 18 Use the On-Screen Display (OSD) Control When adjusting the settings, you can view the user controls through the OSD. Use controls: 1. Press to open the OSD Main Menu. 2. Use to move between icons. Select an icon and press to access the feature.
- Page 19 Table 2-1. OSD Functions Main Menu Submenu Description Controls and Adjustment Brightness Adjustment Adjust the overall brightness of the screen Display controll Contrast Adjustment Adjusts the degree of difference between bright and dark areas Input Automatic input switching Select VGA port Signal source switching Select the HDMI port Port Settings...
- Page 20 Language Changing the menu language The selected language only affects the language of the OSD and does not affect any software running on the computer OSD Display Time Set the duration of the OSD display Setting when no operation is performed Menu Settings Menu Horizontal Move the OSD left and right...
-
Page 21: Select Supported Display Modes
Select Supported Display Modes The display mode used by the display is controlled by the computer. Therefore, you should refer to the computer's documentation for detailed information on how to change the display mode. When the display mode is changed, the image size, position, and shape may change. This is normal and the image can be readjusted using the automatic image settings and image controls. -
Page 22: Understanding Power Management
Understanding Power Management The power management function is activated when the computer detects that the mouse or keyboard has not been used for a user-defined time interval. There are several states as described in the table below. For best performance, it is best to turn off the display at the end of the day, or when it is not in use for a longer period during the day. -
Page 23: Maintaining The Display
Maintaining the Display Always turn off the power to the display before performing any maintenance work on the display. Do not: • Let water or liquids spill onto the display. • Use solvents or abrasive substances. • Use flammable cleaning materials to clean the display or any other electronic device. •... - Page 24 Step 4: Install the assembly bracket for the VESA compatible wall mount. (100mm x 100mm distance), VESA assembly screws M4 x 10 mm. VESA hole Step 5: Mount the LCD to the wall following the instructions for the wall mount. Only the lightest weight/weight-bearing wall mount from the UL list should be used: Note: When using the flexible arm, the display should not be tilted downward by more than 5 degrees.
-
Page 25: Chapter 3. Reference Information
Chapter 3. Reference Information This section provides display specifications, instructions for manual installation of the display driver, and troubleshooting information. Display Specifications Table 3-1. Display Specifications - Model H22195HE0 Size Thickness 179.7mm (7.08 in.) Height 352.6mm (13.88 in.) Width 464.8mm (18.30 in.) Support Arm Tilt Range: -5°~22°... - Page 26 Supported display Horizontal frequency 30 kHz - 83 kHz modes Vertical frequency 50 Hz - 75 Hz Self-resolution 1600 x 900 @ 60 Hz Temperature At working time 0° to 40° C (32° F to 104° F) During storage -20° to 60° C (-4° F to 140° F) During transport -20°...
-
Page 27: Troubleshooting
Troubleshooting If you encounter problems setting up or using your display, you may be able to solve the problem. Before contacting your dealer or Lenovo, please try the following suggested actions depending on the problem you are experiencing. Table 3-2. Troubleshooting... - Page 28 Problem Possible Causes Recommended Refer to Operations •Image settings are Adjust the system's "Adjusting the •Blurred lines or images not optimized resolution setting to the Display Image" in text •The system's display resolution of this display: on pages 2-3 •Horizontal or vertical property settings are 1600x900 @60 Hz.
-
Page 29: Manually Install The Driver For The Display
Windows 7 operating system. 4. Find the corresponding display driver from the Lenovo website http://support.lenovo.com.cn/ and download it to the PC to which the display is connected (e.g. desktop). 5. Open the Display Properties window as follows: Click the Start, Control Panel, Hardware, and Sound icons, and then click the Display icon. - Page 30 17. Reboot the system. The system will automatically select the maximum refresh rate and the corresponding color matching profile. Note: Unlike CRTs, LCDs, increasing the refresh rate does not improve display quality. Lenovo recommends using a 1600x 900 @ 60Hz refresh rate or 640 x 480 @ 60Hz refresh rate. Get further help If you are still unable to resolve the issue, please contact Lenovo Support.
-
Page 31: Appendix A. Services And Support
(Finnish) Warranty service and support: 0810-631-213 (hardware) France (French) Warranty service and support: 0800-500-4618 (toll-free) Germany (German) Greece Lenovo Business Partner (Greek) Dial 999-9190, wait for operator, and request to reach 877-404-9661 Guatemala (Spanish) Appendix A. Services and Support A-1... - Page 32 03-7724-8023 (Standard Charges Apply) (English) 356-21-445-566 Malta (English, Italian, Maltese Arabic) 001-866-434-2080 Mexico (Spanish) 020-513-3939 Netherlands (Dutch) 0508-770-506 New Zealand (English) 001-800-220-2282 Nicaragua (Spanish) 8152-1550 Norway (Norwegian) Lenovo Customer Support Center: 001-866-434 (toll-free) Panama (Spanish) Appendix A. Services and Support A-1...
- Page 33 Country or Region Telephone Number 0-800-50-866 OPCION 2 Peru (Spanish) 1-800-8908-6454 (GLOBE subscribers) Philippines 1-800-1441-0719 (PLDT subscribers) (Tagalog, English) Laptops and tablets branded with logo Think: 48-22-273-9777 Poland ThinkStation and ThinkServer: 48-22-878-6999 (Polish, English) 808-225-115 (Standard Charges Apply) Portugal (Portuguese) 4-021-224-4015 Romania (Romanian)
-
Page 34: Appendix B. Declaration
Any references to non-Lenovo websites in this publication are for convenience purposes only and do not in any way constitute an endorsement of those websites. The information on these sites is not part of this Lenovo product literature and the use of these sites is at your own risk. -
Page 35: Trademark
Trademark The following terms are trademarks of Lenovo in the United States and/or other countries (regions): Lenovo Lenovo Logo ThinkCentre ThinkPad Think Vision Microsoft, Windows, and Windows NT are trademarks of Microsoft Group, Inc. Other company, product, or service names may be trademarks or service marks of other owners.