Table of Contents
Advertisement
Instruction
manual
Model 966 - 1/2" 12.0V Drill/Driver
Model 8623 12V Battery Pack
Model 8604
12.0/14.4V Charger
PATENT PENDING
To learn more about Porter-Cable
visit our website at:
http://www.porter-cable.com
Copyright © 2002 Porter-Cable Corporation
ESPAÑOL: PÁGINA 19
FRANÇAISE : PAGE 39
Two-Speed Cordless
Drill/Drivers And
Hammer Drill Driver
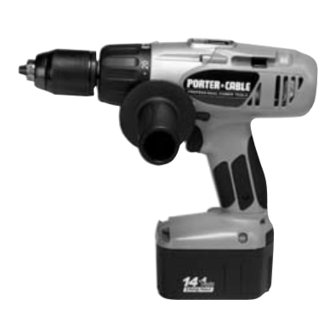
Model 977 - 1/2" 14.4V
Hammer Drill/Driver
Model 8723 14.4V Battery Pack
Model 978 - 1/2" 14.4V Drill/Driver
Model 8723 14.4V Battery Pack
IMPORTANT
Please make certain that the person who is to
use this equipment carefully reads and
understands these instructions before starting
operations
.
The Model and Serial No. plate is located on the main
housing of the tool. Record these numbers in the
spaces below and retain for future reference.
Model No. ______________________________________
Type ___________________________________________
Serial No. _______________________________________
905385 - 11-11-02
Advertisement
Table of Contents

Related Manuals for Porter-Cable 8623


Summary of Contents for Porter-Cable 8623
- Page 1 Instruction manual Model 966 - 1/2" 12.0V Drill/Driver Model 8623 12V Battery Pack Model 8604 12.0/14.4V Charger PATENT PENDING To learn more about Porter-Cable visit our website at: http://www.porter-cable.com Copyright © 2002 Porter-Cable Corporation ESPAÑOL: PÁGINA 19 FRANÇAISE : PAGE 39...
-
Page 2: Safety Guidelines - Definitions
SAFETY GUIDELINES / DEFINITIONS This manual contains information that is important for you to know and un- derstand. This information relates to protecting YOUR SAFETY and PRE- VENTING EQUIPMENT PROBLEMS. To help you recognize this information, we use the following symbols. Please read the manual and pay attention to these sections. -
Page 3: Electrical Safety
Do not abuse the cord. Never use the cord to carry the tool. Keep cord away from heat, oil, sharp edges or moving parts. Replace damaged cords immediately. Damaged cords increase the risk of electric shock. A battery operated tool with integral batteries or a separate battery pack must be recharged only with the specified charger for the battery. -
Page 4: Specific Safety Rules And Symbols
THERE ARE CERTAIN APPLICATIONS for which this tool was designed. Porter-Cable strongly recommends that this tool NOT be modified and/or used for any application other than for which it was designed. If you have any questions relative to its application DO NOT use the tool until you have written Porter-Cable and we have advised you. -
Page 5: Additional Safety Rules For Hammer Drill/Drivers
Before using a battery charger, read all instructions and cautionary markings on (1) battery charger, (2) battery pack, and (3) product using battery. To reduce risk of injury, a Porter-Cable charger should only be used to charge a Porter-Cable battery pack. Other types of batteries may burst causing personal injury and damage. - Page 6 15. Do not charge battery in damp or wet locations. 16. Do not attempt to charge any other cordless tool or battery pack with the Porter-Cable charger. 17. Do not short across the terminals of the battery pack: EXTREMELY HIGH TEMPERATURES COULD CAUSE PERSONAL INJURY OR FIRE.
-
Page 7: Functional Description
(in the United States), have been paid to the RBRC ™ . For further information, call: 1-800-8-BATTERY. FUNCTIONAL DESCRIPTION FOREWORD Your Porter-Cable Cordless Hammer Drill/Driver is designed to drill holes and drive fasteners in various materials as indicated in the following chart: MAXIMUM CAPACITIES DRILLING SPEED RANGE MILD STEEL ALUMINUM WOOD SELF-FEED BIT WOOD SCREWS "... - Page 8 INSTALLING AND REMOVING DRILL AND SCREWDRIVER BITS Always set the reversing button to the center (locked "OFF") position when installing and removing bits. The three-jaw chuck is designed for self-centering of the bit. Open jaws large enough by turning the sleeve (A) Fig.
-
Page 9: Side Handle
used when drilling larger holes and when driving or removing screws. The high speed position is normally used for drilling small holes. DRIVER BIT STORAGE Convenient storage areas with retaining clip Fig. screwdriver bits are provided on each side of the tool. SIDE HANDLE Model 977 is shipped with a side handle (A) Fig. -
Page 10: Operation
OPERATION CHARGING THE BATTERY PACK GENERAL Before using your cordless tool for the first time, the battery pack should be fully charged. If the battery pack is installed in the tool, remove it by following instructions under INSTALLING OR REMOVING BATTERY PACK. As a battery pack approaches the discharged state, you will notice a sharp drop in tool performance. - Page 11 Problems will be indicated by charger indicator lights (see Fig. 8): • If the green light (A) continues to flash after battery pack is inserted in charger, the battery pack temperature is either too high or too low for charging. If left alone, the charger will continue to monitor the battery pack temperature and will begin charging when the temperature reaches an acceptable level.
- Page 12 HOW TO HOLD THE HAMMER DRILL/DRIVER The front end of the Hammer Drill/Driver may be made live if the tool drills into live wiring in the wall. TO PREVENT ELECTRICAL SHOCK, THE HAMMER DRILL/DRIVER MUST BE HELD AS SHOWN IN FIG. 10B. IT’S A HAMMER DRILL GENERAL DRILLING...
-
Page 13: Drilling Wood
In addition to the instructions listed under "GENERAL DRlLLlNG", the following also apply: When using twist drills in wood, withdraw them from the hole frequently to clear chips built up in flutes to avoid overheating and burning work. If a backing block is used to keep back of work from splintering, clamp it securely in place. - Page 14 Set torque adjusting collar for desired torque and set speed selector to LOW. Set screwdriver for correct rotation. Start screw straight in hole with fingers. Place bit on screw, remove fingers, start screwdriver, and exert pressure to drive screw. As soon as screw has seated, lift screwdriver from screw. A lubricant, such as soap or wax, may be used on screw threads for ease of driving, particularly in hard wood.
-
Page 15: Maintenance
LUBRICATION For your continued safety and electrical protection, lubrication and service on this tool should ONLY be performed by an AUTHORIZED PORTER-CABLE SERVICE STATION or a PORTER-CABLE/DELTA FACTORY SERVICE CENTER. At approximately 100 hours of use, take or send your tool to your nearest Authorized Porter-Cable Service Station to be thoroughly cleaned and inspected;... - Page 16 Fig. 12 REMOVE Fig. 14 ALTERNATE CHUCK REPLACEMENT Remove battery pack to prevent accidental start-up. Open chuck jaws as wide as possible to gain access to the chuck retaining screw. Remove chuck retaining screw by turning it clockwise (left-hand thread) with an hex wrench.
- Page 17 ACCESSORIES A complete line of accessories is available from your Porter-Cable • Delta Supplier, Porter-Cable • Delta Factory Service Centers, and Porter- Cable Authorized Service Stations. Please visit our Web Site www.porter-cable.com for a catalog or for the name of your nearest supplier.
- Page 18 PORTER-CABLE LIMITED ONE YEAR WARRANTY Porter-Cable warrants its Professional Power Tools for a period of one year from the date of original purchase. We will repair or replace at our option, any part or parts of the product and accessories covered under this warranty which, after examination, proves to be defective in workmanship or material during the warranty period.
- Page 19 Porter-Cable • Delta products should be obtained by contacting any Porter-Cable • Delta Distributor, Authorized Service Center, or Porter-Cable • Delta Factory Service Center. If you do not have access to any of these, call 888-848-5175 and you will be directed to the nearest Porter-Cable •...
Need help?
Do you have a question about the 8623 and is the answer not in the manual?
Questions and answers