Table of Contents
Advertisement
Quick Links
SERVICE MANUAL
Warning
The technical information and parts shown in this
manual are not to be used for: the development,
design, production, storage or use of nuclear, chemical,
biological or missile weapons or other weapons of
mass destruction; or military purposes; or purposes that
endanger global safety and peace. Moreover, do not
sell, give, or export these items, or grant permission for
use to parties with such objectives. Forward all inquiries
to Hitachi Ltd.
Be sure to read this manual before servicing. To assure safety from fi re, electric shock, injury, harmful
radiation and materials, various measures are provided in this Hitachi Multimedia LCD Projector. Be
sure to read cautionary items described in the manual to maintain safety before servicing.
1. When replace the lamp, to avoid burns to your fi ngers. The lamp becomes too hot.
2. Never touch the lamp bulb with a fi nger or anything else. Never drop it or give it a shock. They may
cause bursting of the bulb.
3. This projector is provided with a high voltage circuit for the lamp. Do not touch the electric parts of
power unit (main), when turn on the projector.
4. Do not touch the exhaust fan, during operation.
5. The LCD module assembly is likely to be damaged. If replacing to the LCD LENS/PRISM assembly,
do not hold the FPC of the LCD module assembly.
6. Use the cables which are included with the projector or specifi ed.
1. Features -----------------------------------------------2
2. Specifi cations -----------------------------------------2
3. Names of each part ---------------------------------3
4. Adjustment --------------------------------------------5
5. Troubleshooting ------------------------------------ 12
6. Service points -------------------------------------- 18
7. Wiring diagram ------------------------------------- 31
SPECIFICATIONS AND PARTS ARE SUBJECT TO CHANGE FOR IMPROVEMENT.
Multimedia LCD Projector
Caution
Service Warning
Contents
June 2005 Digital Media Division
SM0553
CP-SX1350W
8. Disassembly diagram ----------------------------- 38
9. Replacement parts list ---------------------------- 41
10.RS-232C commands ----------------------------- 42
11. Block diagram -------------------------------------- 52
12. Connector connection diagram ---------------- 53
13.Basic circuit diagram ------------------------------ 54
(P5SX+)
Advertisement
Table of Contents

Related Manuals for Hitachi CP-SX1350W


Summary of Contents for Hitachi CP-SX1350W
-
Page 1: Table Of Contents
Be sure to read this manual before servicing. To assure safety from fi re, electric shock, injury, harmful radiation and materials, various measures are provided in this Hitachi Multimedia LCD Projector. Be sure to read cautionary items described in the manual to maintain safety before servicing. -
Page 2: Features
CP-SX1350(P5SX+) 1. Features Ultra high brightness Partial magnification function Whisper mode equipped Keystone distortion correction User memory function Optical lens shift 2. Specifications Drive system TFT active matrix Liquid Crystal Panel size 2.5cm (0.99inches) Panel Number of pixels 1400 (H) × 1050 (V) Lamp 310W D-sub... -
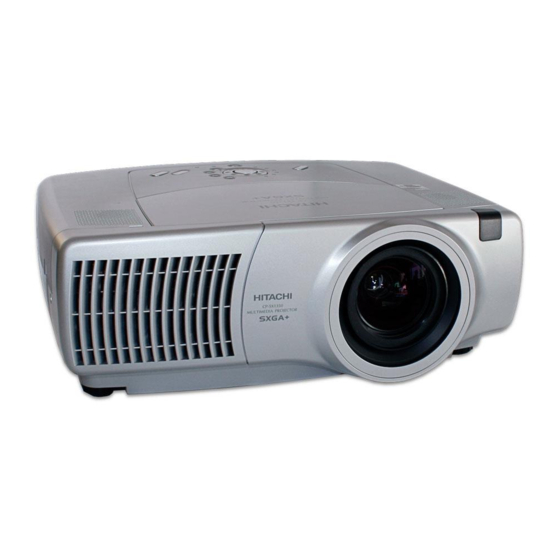
Page 3: Names Of Each Part
CP-SX1350(P5SX+) 3. Names of each part Parts names Projector Control Panel KEYSTONE STANDBY/ON button S-VIDEO indicator and STANDBY/ON VIDEO indicator SEARCH M1-D INPUT ZOOM buttons indicator LENS SHIFT FOCUS ZOOM TEMP indicator FOCUS buttons RESET LAMP indicator KEYSTONE button COMPONENT ENTER LENS SHIFT buttons MENU button... - Page 4 CP-SX1350(P5SX+) Remote control 20 LASER INDICATOR 1 STANDBY/ON button 21 VIDEO button LASER INDICATOR 4 LENS SHIFT buttons 22 RGB button STANDBY/ON VIDEO 23 BLANK button 24 ASPECT button 6 SEARCH button LENS SHIFT FOCUS ZOOM 25 LASER button – –...
-
Page 5: Adjustment
CP-SX1350(P5SX+) 4. Adjustment 4-1 Before adjusting 4-1-1 Selection of adjustment When any parts in the table 4-1 are changed, choose the proper adjusting items with the chart. Table 4-1: Relation between the replaced part and adjustment Adjustment Replaced White Color Ghost Flicker E-POS... - Page 6 CP-SX1350(P5SX+) 4-2 Ghost adjustment Signals for internal adjustment Adjustment procedure 1. Use DAC-P - GHOST - R: in the FACTORY MENU to adjust so that R color ghost is at a minimum. (Set the adjustment value to default, and then 0/255 112/255 raise the value.
- Page 7 CP-SX1350(P5SX+) 4-5 NRSH adjustment (vertical stripe adjustment) Signals for internal adjustment Adjustment procedure 1. Make this adjustment after completing the adjustment in 4-4 E-POS adjustment. /255 2. Use DAC-P - NRSH - R: in the FACTORY /255 MENU to adjust so that the vertical lines spaced /255 every 6 dots are as inconspicuous as possible.
- Page 8 CP-SX1350(P5SX+) 4-7 Color uniformity adjustment Preparations 1. Perform these adjustments after the white 6. To temporarily turn correction off, place the cursor balance adjustment described in Section 4-6. on [C.UNIF.] in the Adjust Tone menu and press 2. Make a color uniformity adjustment for the the [ ] key.
- Page 9 CP-SX1350(P5SX+) Adjustment procedure 1 (when a color differential meter is used) 1. First adjust [MID-L] tone [G:]. 9. Similarly, measure adjustment points [No.3] to 2. Select adjustment point [No.2][G:]. [No.17] and adjust their color coordinates When the background is not [G] monochrome, starting in order from the small number points.
- Page 10 CP-SX1350(P5SX+) Adjustment procedure 2 (visual inspection) 1. First adjust [MIN] tone [G:]. same color as measurement point [No.1]. 2. Select [No.2] [G:]. Adjustment technique: If the background is [G] monochrome, press the First, adjust [B:] of the point whose color is to [ENTER] key on the Remote control transmitter be adjusted so that it approximates that of to change to solid white.
- Page 11 CP-SX1350(P5SX+) 4-8 AIR-SENSOR adjustment When the PWB assembly DRIVE or the PWB assembly DUST SENSOR is replaced, perform this adjustment after completing reassembling the projector. 1. Before this adjustment, clean the air filter and make sure the projector is compretely assembled. 2.
-
Page 12: Troubleshooting
CP-SX1350(P5SX+) 5. Troubleshooting Check points PWB assembly REMC SPEAKERS (TEMP. SENSOR) E807 E808 EW51 TP-FS2 ESPL TP-FS E804 E806 ESPR E811 E803 P601 E802 PWB assembly DRIVE E800 E305 E805 Q801 IV02 Collector E801 E304 IV01 E303 E809 CHV34 CHV35 E302 CHV36 CHV33... - Page 13 CP-SX1350(P5SX+) Power can not be turned on Are voltage Disconnect input on the PWB TSW from Power unit Open assembly Drive at (circuit). And check standby mode? TSW short or open? E800 : +16.5V E800 : +15V Short E800 : +4V E800 : +6V Fuse...
- Page 14 CP-SX1350(P5SX+) Lamp does not light Is the voltage at collector What is the state of Light of Q801 on the PWB assembly PWB assembly Drive LAMP indicator DK52 Drive fixed to "L" during during operation? warming-up? "L" = 0V Not light Light Change the lamp.
- Page 15 CP-SX1350(P5SX+) Picture is not displayed when the RGB signal is input Check at operating mode Change the Are signal IS01 on the PWB input at each pin on the assembly Signal. PWB assembly Is it repaired? Drive? TPX29 : R signal IC (IS01) TPX26 : G signal EL4332CS...
- Page 16 CP-SX1350(P5SX+) No sound Check at operating mode (Make sure the state of MUTE and Volume, and the setting of SPEAKER in OPTION menu) Are voltage input at each pin on the PWB Power unit (circuit) assembly Drive? E800 : +16.5V E800 : +15.0V E800...
- Page 17 CP-SX1350(P5SX+) Can’t communicate with computer via NETWORK terminal. Check at operating mode Does the Lamp Is the computer Make sure Network on lower right corner of the connected with the hardware Network connector light projector directly? in orange? Change to cross-cable, Is the computer or use the straight and projector connected with...
-
Page 18: Service Points
CP-SX1350(P5SX+) 6. Service points 6-1 Lead free solder [CAUTION] This product uses lead free solder (unleaded) to help preserve the environment. Please read these instructions before attempting any soldering work. CAUTION Always wear safety glasses to prevent fumes or molten solder from getting into the eyes. Lead free solder can splatter at high temperatures (600˚C). - Page 19 Therefore, regarding these parts, you can either replace part, LCD/ PRISM assembly, or send the whole unit LCD/PRISM assembly back to HITACHI, where we will replace the malfunctioning part, recondition the device and send it back to you. Note that you can also replace the LCD/ LENS PRISM assembly, which consists of LCD/PRISM assembly and LENS assembly.
- Page 20 CP-SX1350(P5SX+) 6-4 Air filter WARNING • Please carefully read the “User’s Manual - Safety Guide. • Before caring, make sure the power switch is off and the power cable is not plugged in, then wait at least 45 minutes for the lamp to cool suffi ciently. •...
- Page 21 CP-SX1350(P5SX+) 6-5 Lamp WARNING HIGH VOLTAGE HIGH TEMPERATURE HIGH PRESSURE The projector uses a high-pressure mercury glass lamp. The lamp can break with a loud bang, or burn out, if jolted or scratched, handled while hot, or worn over time. Note that each lamp has a different lifetime, and some may burst or burn out soon after you start using them.
- Page 22 CP-SX1350(P5SX+) Replacing the Lamp If the indicators or a message prompts you to replace the lamp, replace the lamp as soon as possible. Lamp cover Lamp cover 1. Turn off the projector, and unplug the power cord. Allow the lamp knob bulb to cool for at least 45 minutes, and prepare a new lamp.
- Page 23 CP-SX1350(P5SX+) Replacing the Lens 1. Slide the lamp cover lock to unlock the lamp 5. Mount the replacement lens. cover and then grasp the projecting part of the (1) Align the red mark on the lens with the red lamp cover to lift it open. mark on the lens holder and insert the lens 2.
- Page 24 CP-SX1350(P5SX+) 6-7 Other care WARNING • Please carefully read the “User’s Manual - Safety Guide”. • Before caring, make sure the power switch is off and the power cable is not plugged in. • Be cautious of high temperature. Do not touch about the lens and ventilation openings during use or imme- diately after use prevent a burn.
- Page 25 CP-SX1350(P5SX+) 6-8 Notice of AUTO adjustment Use of AUTO adjustment with the image through RGB input optimizes V_POSI, H_POSI, H_SIZE and H_PHASE automatically. In case that projected image has dark tone around its peripheral, AUTO operation sometimes makes artifacts in the image, shifts capture area and so on. Those failures are caused by period of image data is not exactly distinguished to period of blanking on signal processing.
- Page 26 PIN BOX (ID Inquiring Code) 2. Send HITACHI sales company the Inquiring code (10 digits) to inquire the correct PIN code. 3. With the PIN BOX menu displayed, input the correct PIN code. Enter the correct PIN CODE that HITACHI sales company informed.
- Page 27 CP-SX1350(P5SX+) 6-10 Related messages When the unit's power is ON, messages such as those shown below may be displayed. When any such message is displayed on the screen, please respond as described below. Message Description Lamp usage time is approaching 2000 hours. (*2) CHANGE THE LAMP Preparation of a new lamp, and an early lamp change is AFTER REPLACING LAMP,...
- Page 28 CP-SX1350(P5SX+) Caring of the Metal Pieces of filter cover and the dust-detecting windows The metal pieces of filter cover and the dust-detecting windows should be cleaned for normal operation of the optical dust detecting system. Please pay attention not to remain fiber or fragment of cloth inside the duct.
- Page 29 CP-SX1350(P5SX+) 6-11 Regarding the indicator lamps ATTENTION • When the interior portion has become overheated, for safety purposes, the power source may be automati- cally turned off, and the indicator lamps may also be turned off. In such a case, press the "○" (OFF) side of the power switch, and wait at least 45 minutes.
- Page 30 CP-SX1350(P5SX+) 6-12 HIDDEN SERVICE menu To display the OSD for “HIDDEN SERVICE” menu set up. HIDDEN SERVICE When using control panel When using remote control MUTE COLOR BLACK AIR-SENSOR 1. Display the menu by the “MENU” 1. Display the menu by the “MENU” button.
-
Page 31: Wiring Diagram
CP-SX1350(P5SX+) 7. Wiring diagram... - Page 32 CP-SX1350(P5SX+)
- Page 33 CP-SX1350(P5SX+)
- Page 34 CP-SX1350(P5SX+)
- Page 35 CP-SX1350(P5SX+)
- Page 36 CP-SX1350(P5SX+)
- Page 37 CP-SX1350(P5SX+)
-
Page 38: Disassembly Diagram
CP-SX1350(P5SX+) 8. Disassembly diagram M : Meter screw T : Tapping screw... - Page 39 CP-SX1350(P5SX+) M : Meter screw T : Tapping screw...
- Page 40 CP-SX1350(P5SX+) Cautions when disassembling or re-assembling the projector The Keypad board is installed on the Upper case. When removing, lift carefully without excessive force to prevent damaging cables and connectors. Keypad board E303, E304 When removing the Drive board, there might be damage to the flexible cables of LCD panels and two board- to-board connectors.
-
Page 42: Rs-232C Commands
CP-SX1350(P5SX+) 10. RS-232C communication Connecting the cable (1) Turn off the projector and the computer power supplies. (2) Connect the CONTROL port of the projector with a RS-232C port of the computer by a RS-232C cable. Use the cable that fulfills the specification shown in the following figure. (3) Turn on the computer power supply and after the computer has started up, turn on the projector power supply. - Page 43 CP-SX1350(P5SX+) Requesting projector status (Get command) (1) Send the request code Header + Command data (‘02H’+‘00H’+ type (2 bytes)+‘00H’+‘00H’) from the computer to the projector. (2) The projector returns the response code ‘1DH’+ data (2 bytes) to the computer. Changing the projector settings (Set command) (1) Send the setting code Header + Command data (‘01H’+‘00H’+ type (2 bytes) + setting code (2 bytes)) from the computer to the projector.
- Page 44 CP-SX1350(P5SX+) Command data chart Command data Names Operation type Header Action Type Setting code BE EF 06 00 B9 D3 02 00 07 20 00 00 Keystone V Increment BE EF 06 00 DF D3 04 00 07 20 00 00 Decrement BE EF 06 00...
- Page 45 CP-SX1350(P5SX+) Command data Names Operation type Header Action Type Setting code ENGLISH BE EF 06 00 F7 D3 01 00 05 30 00 00 FRANÇAIS BE EF 06 00 67 D2 01 00 05 30 01 00 DEUTSCH BE EF 06 00 97 D2 01 00...
- Page 46 CP-SX1350(P5SX+) Command data Names Operation type Header Action Type Setting code BE EF 06 00 EF F6 01 00 B3 30 05 00 BE EF 06 00 7F F7 01 00 B3 30 04 00 BE EF 06 00 4F F5 01 00 B3 30 03 00...
- Page 47 CP-SX1350(P5SX+) Command data Names Operation type Header Action Type Setting code BE EF 06 00 0D 83 02 00 00 21 00 00 V Position Increment BE EF 06 00 6B 83 04 00 00 21 00 00 Decrement BE EF 06 00 BA 82 05 00...
- Page 48 CP-SX1350(P5SX+) Command data Names Operation type Header Action Type Setting code BE EF 06 00 26 72 01 00 06 22 01 00 MIDDLE BE EF 06 00 D6 72 01 00 06 22 02 00 Video NR HIGH BE EF 06 00 46 73 01 00...
- Page 49 CP-SX1350(P5SX+) Command data Names Operation type Header Action Type Setting code BE EF 06 00 31 D3 02 00 01 20 00 00 Volume Increment BE EF 06 00 57 D3 04 00 01 20 00 00 Decrement BE EF 06 00 86 D2 05 00...
- Page 50 CP-SX1350(P5SX+) Command data Names Operation type Header Action Type Setting code BE EF 06 00 FE 22 01 00 00 23 00 00 Large BE EF 06 00 6E 23 01 00 00 23 01 00 PinP Size Small BE EF 06 00 9E 23 01 00...
- Page 51 CP-SX1350(P5SX+) Command data Names Operation type Header Action Type Setting code Last Ch BE EF 06 00 9E D9 01 00 18 20 10 00 M1-D BE EF 06 00 AE D4 01 00 18 20 03 00 BE EF 06 00 5E D4 01 00...
-
Page 52: Block Diagram
CP-SX1350(P5SX+) 11. Block diagram... -
Page 53: Connector Connection Diagram
CP-SX1350(P5SX+) 12. Connector connection diagram Connector connection diagram... -
Page 54: Basic Circuit Diagram
CP-SX1350(P5SX+) 13. Basic circuit diagram Parts with hatching are not mounted. PWB assembly SENSOR (P5SX+) IR01 IR02 IR03 KSM-2003LM2EL KSM-2003LM2EL SPS-450F-1 Vout GND VCC Vout GND VCC Vout PWB assembly REMOTE CONTROL (P5SX+) PWB assembly LIMIT SWITCH (P5SX+) - Page 55 Warning POWER UNIT (BALLAST) (P5SX+) For handling of the circuit diagram, refer to the warning on the cover.
- Page 56 Warning POWER UNIT (CIRCUIT) (P5SX+) For handling of the circuit diagram, refer to the warning on the cover.
- Page 57 R2G1 CPU-RESET GFBK C248 I201 R202 0.01 PW465A-30VL 4.7K 4.7K I201 I201 PW465A-30VL PW465A-30VL CHPA10 L211 R201 R2C1 GCLK GCLK GFBK CHPA11 EMU-RESET CHPY11 1 CHPB09 CHPD10 CHPU04 CHPJ17 R2G8 R2C2 GPEN GPEN GREF RESET DCLK DCLK CHPE05 1 CHPA09 CHPC14 1608 CHPT04...
- Page 58 L251 C1V222-2A 3216 +3.P I253 MBM29LV160TE70TN(E1) BYTE VSS-46 DQ15/A-1 DQ14 R271 R279 DQ13 PW2FAN-S LAMP-S 3216 ROT_S NC-10 DQ12 3216 FIL_IR_IN R272 R297 R298 ROMWE R280 C275 RESET LAMP_ST0 0.01 LAMP_ST1 NC-13 DQ11 DVISTATUS 3216 FAN-S NC-14 3216 R288 RYBY DQ10 R291 PCS1...
- Page 60 I801 SPI-8001TW I807 SI-3010KM ADND NC-16 Vin1 Vin2 I802 I810 LCD-B-FAN L862 SI-3050KM SI-3010KM L861 C10-K4L +1.8V SWout1 SWout2 SLF6028 +12V R891 R892 DGND1 DGND2 D813 POWER6 1SS355 Vref1 Vref2 NC-8 AGND C804 22/16 MVK/SKV I851 E801 (LCD-B-FAN) L801 PNA4612M05HT ZH-03H 1608 FAN1S...
- Page 61 L402 2518 +1.8V C401 100/6.3 MVK/SKV I401 GND1 L3E07061K0A I401 L3E07061K0A I401 L3E07061K0A R1IN0 R1OUT0 R1IN1 R1OUT1 B1IN0 B1OUT0 GND-A5 R1IN2 R1OUT2 R1D0 B1IN1 B1OUT1 R401 C421 GND-C20 DRO1 R1IN3 R1OUT3 R1D1 B1IN2 B1OUT2 B1D0 R421 2.2/6.3 GND-E16 DRO2 R1IN4 R1OUT4 R1D2 DBO1...
- Page 62 CHVRR APVRR P501 R1D0 54132-36HLow R1D0 R1D1 R1D1 R1D2 N.C. R1D2 R1D3 R1D3 APR02 R1D4 R1D4 R1D5 R1D5 RCLY APR03 R1D6 R1D6 R1D7 APR04 R1D7 R/CLY R1D8 /CLY R1D8 R1D9 C507 APR05 R1D9 CHMDR R2D0 VDDY R2D0 R2D1 22/16 C537 R2D1 RLCCOM APR06...
- Page 63 I691 SI-3010KM POWER5 +15.5V +16.5V GND1 CHVRG APVRG P601 G1D0 54132-36HLow G1D0 G1D1 G1D1 N.C. G1D2 G1D2 G1D3 APG02 G1D3 G1D4 G1D4 G1D5 APG03 GCLY G1D5 G1D6 G1D6 G1D7 G/CLY APG04 G1D7 /CLY G1D8 G1D8 C607 G1D9 APG05 CHMDG G1D9 VDDY G2D0 G2D0...
- Page 64 CHVRB APVRB P701 54132-36HLow B1D0 B1D0 B1D1 N.C. B1D1 B1D2 APB02 B1D2 B1D3 B1D3 B1D4 APB03 B1D4 BCLY B1D5 B1D5 B1D6 APB04 B1D6 B/CLY B1D7 /CLY B1D7 B1D8 C707 APB05 B1D8 B1D9 CHMDB VDDY B1D9 B2D0 47/16 C737 APB06 B2D0 BLCCOM B2D1 MVK/SKV...
- Page 65 E101 R195 WR-30VS(H30) RGB-Y2 TPX29 RGB-Y R194 TPX26 TPX23 TPX20 TPX19 TPX18 RGB1/2 +5VST TPX30 GND1 GND1 GND1 C129 C139 I108 0.1/16 470p-C VD-1 VDD-102 C100 SN74LVC1G125DCK REF_BYPASS GND-101 0.01 HDCONT GND-3 GND-100 C128 C193 0.01 1 R107 GND-4 GND-99 33p-C C102 RAIN0...
- Page 66 ASPECT S.ASP1 QV01 2SC4081 RV07 16 : 9 82K-1% QV02 LETTER S.ASP2 RV08 2SC4081 SELECT 27K-1% 4 : 3 S-VIDEO CVBS CV05 0.1/16 COMPONENT RV27 V.SEL2 RV28 V.SEL1 LV05 +5VST +2.5V 2518 QV03 CV08 CV02 RV13 2SC4081 0.1/16 S.CIN S.CIN 15p-C SEP.C SEP.C...
- Page 67 EV01 +5VST WR-30VS(H30) RN35 LN04 CHV22 CHV21 WIRED_RC +12V SLF6028 RN69 CHV23 CHV30 LN03 W_RC_SW VOL_SEL CN23 CHV24 CHV31 CN51 RN57 GND1 QN51 0.1/16 2518 DATA-A 2SA1774 CHIME_CTL CHV25 10/6.3 V-Cr CHV32 CN56 QN57 2125 CHIME CLK-A V-Cb 10/6.3 GND1 RN79 2SC4081 RN83...
- Page 68 RG56 IG12 SN74LVC244APW GBO7 GBO6 GBO5 GBO4 3216 GBO3 GBO2 GBO1 RG55 GBO0 IG15 DG11 SN74LVC244APW +5VST 3216 RB461F RG62 3216 GFBK CG21 0.01 IG02 CAT24WC02JI RG36 CG42 RG31 0.01 RG32 DVIGND DVIGND 3216 RG41 QG02 DTC114EUA DVIGND RG42 0.01 CG54 USB_5Vin 0.01...
- Page 69 CW58 +15.5V 0.01 0.01 QW57 +5VST 2SA1774 LW31 IW52 BA6247FP-Y +3.P QW51 2518 DTC114EUA GND1 ZOOM QW52 DTC114EUA FOCUS LENS_ID0 QW53 EW51 IW31 DTC114EUA PH-13H TLV0838CPWR LENS_ID1 RW31 33 TEMP_IN CW31 QW54 LW64 SHIFT LENS_ID2 AP72 RW32 33 47p-C DTC114EUA LENS_ID0 TEMP_OUT RW52...
- Page 70 +3.P Hitachi Proxima RXDNIC TXDNIC REF6 RE71 OEM_ID0 RE72 REF7 OEM_ID1 REA5 3.3K 3216 RE19 CHKE02 3216 LE01 C1V222-2A 3216 CHKE01 LE02 C1V222-2A 3216 USB_5Vin CE21 22/6.3 RE27 MVK/SKV 101 100 99 98 83 82 81 80 79 78 77 76 75 74 73...
- Page 71 LL01 C1V222-2A 3216 +3.P RL43 QL01 DTC114EUA D-RESET CL47 CL49 10/6.3 10/6.3 CL48 CL46 2125 2125 CL51 0.01 CL50 RESETN 0.01 1SS355 330p-C 330p-C DL08 XL03 XL04 4.8MHz SG-8002JF 32.76800kHZ SG-3032JC RL83 RL84 IL03 SI-3010KM +2.5V +4.0V TPE01 CL34 RXP-ET CL29 22/6.3 0.1/16...
- Page 72 +4.0V +3.3IP LP04 +3.3IP RP33 2518 VHS_IP RP34 VVS_IP GND1 RP35 VCLK_IP LP03 GND1 GND1 +2.5IP 2518 CP25 LP05 0.1/16 GND1 2518 +3.3IP GND1 GND1 GND1 GND1 RP49 LP06 C1V222-2A RP50 3216 +2.5IP XP01 10MHz GND1 SMD-49 GND1 RP46 1.0M RP23 RP71 1.0M...
- Page 73 PWB assembly SIGNAL 1 (P5SX+)
- Page 74 PWB assembly SIGNAL 2 (P5SX+)
- Page 75 PWB assembly KEYPAD (P5SX+)
- Page 76 PWB assembly DUST SENSOR (P5SX+)
- Page 77 CP-SX1350(P5SX+) Basic circuit diagram list PWB assembly SENSOR PWB assembly DRIVE 9 PWB assembly REMOTE CONTROL PWB assembly DRIVE 10 PWB assembly LIMIT SWITCH PWB assembly DRIVE 11 POWER UNIT BALLAST PWB assembly DRIVE 12 POWER UNIT CIRCHIT PWB assembly DRIVE 13 PWB assembly DRIVE 1 PWB assembly DRIVE 14 PWB assembly DRIVE 2...
- Page 78 Fax: +46 (0) 8 562 711 13 Tel: +39 02 38073415 Servizio Clienti Email: csgswe@hitachi-eu.com Fax: +39 02 48786381/2 Email: customerservice.italy@hitachi-eu.com HITACHI EUROPE S.A.S HITACHI EUROPE LTD (Norway) AB Lyon Office STRANDVEIEN 18 B.P. 45, 69671 BRON CEDEX 1366 Lysaker FRANCE...