
Related Manuals for Labconco Protector 34000 Series


Summary of Contents for Labconco Protector 34000 Series
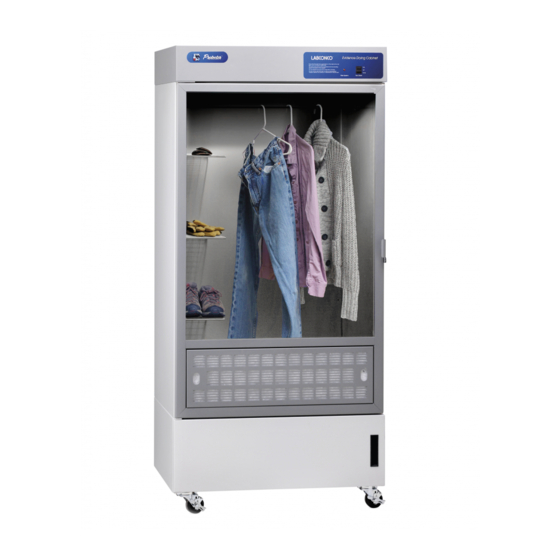
- Page 1 Protector Evidence Drying Cabinets Models 34000 Series 3' 34040 Series 4' 34050 Series 5'...
- Page 2 Warranty Labconco Corporation provides a warranty to the original buyer for the repair or replacement of parts and reasonable labor as a result of normal and proper use of the equipment with compatible chemicals. Broken glassware and maintenance items, such as filters, gaskets, light bulbs, finishes and lubrication are not warranted.
-
Page 3: Table Of Contents
CHAPTER 1: INTRODUCTION CHAPTER 2: PREREQUISITES Space Requirements Clearance Location Requirements Exhaust Requirements Electrical Requirements Drain Requirements Water Requirements (Models 34000-10 thru -14, 34040-10 thru -14, 34050-10 thru -14 only) CHAPTER 3: GETTING STARTED Unpacking the Cabinet Moving the Cabinet Attaching the Cabinet to the Wall Drain Options-UV Lamp Models (Models 34000-00 thru -04, 34040-00 thru -04, 34050-00 thru -04 only) - Page 4 CHAPTER 5: USING THE CABINET UV Lamp Models (Models 34000-00 thru -04, 34040-00 thru -04, 34050-00 thru -04 only) Fan/UV Light Switch UV Security Lock Filter System Light Shelf Operation Drying in the Cabinet Wash Down Models (Models 34000-10 thru -14, 34040-10 thru -14, 34050-10 thru -14 only) Fan/Drain Pump Switch Filter System Light...
-
Page 5: Chapter 1: Introduction
Congratulations on the purchase of a Labconco Protector Evidence Drying Cabinet. The cabinet is designed to protect you, and the room environment from biohazardous aerosols and offensive odors while drying evidence. The Protector Series cabinet is the result of years of experience in manufacturing laboratory equipment, and users like you suggested many of its features to us. -
Page 6: Chapter 2: Prerequisites
Before you install the evidence drying cabinet, you need to plan the site for installation. Examine the location where you intend to install the cabinet. You must be certain that the area is level and of solid construction. In addition, a source of electrical power must be located near the installation site. -
Page 7: Location Requirements
Chapter 2: Prerequisites Location Requirements Note: The 3' Cabinet is equipped with locking casters to ease installation and maintenance. It should be located on a flat floor for proper cabinet alignment and door operation. Exhaust Requirements If you intend to connect the cabinet to the optional Exhaust Connection Kit, first examine the location to ensure that it accommodates the cabinet’s exhaust duct. -
Page 8: Water Requirements (Models 34000-10 Thru -14, 34040-10 Thru -14, 34050-10 Thru -14 Only)
Chapter 2: Prerequisites Water Requirements (Model # 34000-10 thru -14, 34040-10 thru -14 & 34050-10 thru -14 Only) If you intend to connect the water supply to wash down the cabinet, locate the cabinet within 6 feet (1.8 m) of a domestic water line, equipped with a water shut off valve ending in a 3/4"... -
Page 9: Chapter 3: Getting Started
Note: United States Interstate Commerce Commission rules require that claims be filed with the delivery carrier within fifteen (15) days of delivery. Do not return goods without the prior authorization of Labconco. Unauthorized returns will not be accepted. If the cabinet was damaged in transit, you must file a claim directly with the freight carrier. -
Page 10: Moving The Cabinet
Chapter 3: Getting Started 3' Cabinet Sizes The 3' Cabinet is secured to the pallet using four transport brackets, two on each side. To remove the brackets, do the following: 1. Using the 1/2" wrenches, loosen and remove the bolts and locknuts that secure the brackets to the pallet. -
Page 11: Attaching The Cabinet To The Wall
Chapter 3: Getting Started Attaching the Cabinet to the Wall WARNING: The evidence drying cabinet must be secured to a wall stud, or other suitable wall structure, using the included strap(s) and bracket(s). This will minimize the possibility of the unit overturning when in use. 1. - Page 12 Chapter 3: Getting Started Figure 3-1 Secure bracket to wall stud 79.0" (2400 cm) from the floor to the top of the strap slot Product Service 1-800-522-7658...
-
Page 13: Drain Options-Uv Lamp Models
Chapter 3: Getting Started Drain Options - UV Lamp Models (Model # 34000-00 thru -04, 34040-00 thru -04 & 34050-00 thru -04 only) NOTE: These models can either drain to a bucket, already located in the lower storage area, or the bucket can be removed, and an optional Drain Kit (#3928200) can be installed. -
Page 14: Drain Options-Wash Down Models
Chapter 3: Getting Started Drain Options - Wash Down Models (Model # 34000-10 thru -14, 34040-10 thru -14 & 34050-10 thru -14 only) NOTE: This model is designed to have its drain hose routed to a nearby floor drain. To install the drain hose assembly: NOTE: The drain line should be routed to a floor drain with an air gap only. -
Page 15: Preparing The Evidence Drying Cabinet For Operation
Rubber Drain Stopper If you did not receive one or more of the components listed for the cabinet, or if any of the components are damaged, contact Labconco Corporation immediately for further instructions. 3. Using a step ladder, remove the tape and/or packaging material around the top of the unit. -
Page 16: Initial Operation
UV light should relight. Turn the UV Security Keylock to the “OFF” position, and the UV light will turn off. If the UV light does not work as described, call Labconco’s Product Service Department at 1-800-522-7658 or 816-333-8811. Spray Gun and Drain Pump and Tests (Model # 34000-10 thru -14, 34040-10 thru 34040-14 &... - Page 17 The Protector Evidence Drying Cabinet operates using the following principles: Directional airflow. Prefiltration of large particulates by an inlet prefilter (in the door) and an exhaust prefilter (in the top of the liner). Filtration and retention of particulates by a High Efficiency Particulate Air (HEPA) filter.
-
Page 18: Chapter 4: Performance Features And Safety Precautions
Chapter 4: Performance Features and Safety Precautions Directional Airflow Directional airflow plays a critical role in evidence drying cabinet performance. Air is drawn into the inlet prefilter, located on the bottom of the door. The filtered air then flows upward through the liner, passing over the evidence to be dried. Before leaving the liner, the air then passes through the exhaust prefilter, that is designed to protect the HEPA filter from large particulates, and may be removed to examine it for the collection of evidence. -
Page 19: Optional Evidence Prefilters
Note: The HEPA filter media is very fragile. DO NOT touch the media. If you think the media of a HEPA filter is damaged, DO NOT USE THE CABINET. Call Labconco’s Product Service Department at 1-800-522-7658 or 816-333-8811. Note: HEPA Filters are only effective against particulate material. Gases will pass through the filter. -
Page 20: Blower
Chapter 4: Performance Features and Safety Precautions Blower The blower assembly pulls room air into the intake prefilter on the front of the door, through the liner and exhaust prefilter, and then forces it through the HEPA and granular activated carbon filter. The evidence drying cabinet uses a motorized, backward curved fan for quiet, energy efficient operation. -
Page 21: Safety Precautions
Chapter 4: Performance Features and Safety Precautions Safety Precautions Wash Down Models (Model # 34000-10 thru -14, 34040-10 thru - 14 & 34050-10 thru -14 only): DO NOT directly connect the drain line to a sewer, drain system or place in a vertical standpipe. - Page 22 Avoid puncturing the HEPA filter during installation or normal operation. If you suspect that a HEPA filter has been damaged, DO NOT use the cabinet; contact Labconco at 800-821-5525 or 816-333-8811 for further information. The HEPA filters in the cabinet will gradually accumulate airborne particulate matter from the items placed in the cabinet.
-
Page 23: Chapter 5: Using The Cabinet
UV Lamp Models (Model # 34000-00 thru -04, 34040-00 thru -04 & 34050-00 thru -04 only) Fan/UV Light Switch The cabinet Fan/UV Light switch is located on the upper front of the cabinet, as shown in Figure 5-1. Turning the switch to the “Fan” position starts the blower, drawing air in through the cabinet. -
Page 24: Shelf Operation
Chapter 5: Using the Cabinet Figure 5-1 Shelf Operation The three drying shelves on the left side wall can be positioned horizontally to dry small pieces of evidence, or swung down, against the left side wall of the liner, if needed. - Page 25 Chapter 5: Using the Cabinet Wash hands and arms thoroughly with germicidal soap. Wear a long sleeved lab coat with knit cuffs and over-the-cuff rubber gloves. Use protective eyewear. Wear a protective mask if appropriate. Wipe-Down Open the door to its full open position. ...
-
Page 26: Wash Down Models (Models 34000-10 Thru -14, 34040-10 Thru -14, 34050-10 Thru -14 Only)
Chapter 5: Using the Cabinet Wash hands and arms thoroughly with germicidal soap. Shutdown Close the door. If UV disinfection is desired, insert the UV Security Lock Key, and turn it to the “ON” position. Turn the Fan/UV Light switch to “UV”. -
Page 27: Shelf Operation
Chapter 5: Using the Cabinet Shelf Operation The three drying shelves on the left side wall can be positioned horizontally to dry small pieces of evidence, or swung down, against the left side wall of the liner, if needed. To position the shelves in the up (horizontal) position: 1. - Page 28 Chapter 5: Using the Cabinet Wipe-Down Open the door to its full open position. Wipe down the interior surfaces of the cabinet with 70% ethanol, or a suitable disinfectant, and allow to dry. CAUTION: Do not use bleach on the stainless steel liner. Use disinfectants compatible with stainless steel.
- Page 29 Chapter 5: Using the Cabinet Allow the pump to operate for 30 seconds to 5 minutes after the cabinet liner has drained. Then turn off the pump. Turn the cabinet water shut off valve off. Remove and clean out the drain strainer. ...
-
Page 30: Routine Maintenance Schedule
Using an appropriate glass cleaner, or LabSolutions Glass & Surface Wipes, Labconco part # 1570000; clean the door and the surface of the UV lamp. Operate the cabinet blower, noting if the Filter System Light turns on. -
Page 31: Chapter 6: Maintaining The Cabinet
Chapter 6: Maintaining the Cabinet Service Operations Door Evidence Prefilter Replacement: 1. Pull the prefilter frame(s) straight away from the door(s), as shown in Figure 6-1. 2. Wearing appropriate gloves, and working on the inside surface of the prefilter frame(s), carefully pull out the Evidence prefilter(s). The Evidence prefilter(s) can now be examined for trace evidence, or stored with the evidence in a sealed bag for future reference. -
Page 32: Cabinet Evidence Prefilter Replacement
Chapter 6: Maintaining the Cabinet Cabinet Evidence Prefilter Replacement: 1. Open the cabinet’s glass door(s), and locate the cabinet prefilter frame on the upper right side of the liner. See Figure 6-2. 2. To access the prefilter, loosen the captive thumbscrew until it is released. The front of the prefilter frame will swing down. -
Page 33: Granular Activated Carbon And Hepa Filter Replacement
Chapter 6: Maintaining the Cabinet Granular Activated Carbon and HEPA Filter Replacement: 1. Use an appropriate stepladder release the two bungee cords securing the granular activated and carbon and HEPA filters, as shown in Figure 6-3. 2. When handling used filters or prefilters, always wear appropriate personnel protective equipment. -
Page 34: Changing The Uv Lamp
Chapter 6: Maintaining the Cabinet Changing the UV Lamp (Model # 34000-00 thru -04, 34040-00 thru -04 & 34050-00 thru -04): Note: For optimum performance, the UV lamp should be changed on an annual basis. The UV lamp and the work area of the cabinet must be thoroughly decontaminated before removing the lamp. -
Page 35: Resetting A Circuit Breaker
Chapter 6: Maintaining the Cabinet Resetting a Circuit Breaker: To reset any of the circuit breakers located on the top rear of cabinet, depress the white button until it sets. Figure 6-4 Setting the Speed Control Adjustment of the speed control varies the volume of air drawn through the liner while the unit is operating. -
Page 36: Chapter 7: Troubleshooting
Refer to the following table if the cabinet fails to operate properly. If the suggested corrective actions do not solve the problem, contact Labconco for additional assistance. PROBLEM CAUSE CORRECTIVE ACTION Cabinet blower and Unit not plugged into Plug the cabinet into appropriate lights won’t turn on... - Page 37 Chapter 7: Troubleshooting PROBLEM CAUSE CORRECTIVE ACTION Filter System Light Blockage of the Check the inlet prefilters; replace if turns on intake prefilters needed. Ensure that there is no obstruction of the exhaust on top of the cabinet. HEPA filter loading Replace the HEPA filter.
-
Page 38: Appendix A: Components
Evidence Drying Cabinet Replacement Parts Item Quantity Part Cabinet Description Size ea per unit 3872600 Door Prefilter, 3FT package of 6 ea 3872601 Door Prefilter, 4FT package of 6 ea 3872902 Door Prefilter, 5FT package of 6 ea 3951802 Door Evidence Prefilter, 3FT package of 10 ea 3951822 Door Evidence Prefilter, 4FT package of 10 ea 3951832... -
Page 39: Appendix B: Dimensions
Interior Dimensions: 56.0" (1422mm) Height x 26.5" (673mm) Deep x “C” Lower Storage Dimensions: 12.4" (315mm) Height x 26.5" (673mm) Deep x “D” Model Number Size 3’ 34000-00 thru -14 36.0" Casters 32.3" 25.5" (1097mm) (820mm) (648mm) 4’ 34040-00 thru -14 48.0"... -
Page 40: Appendix C: Specifications
Electrical Data Model # Requirements Energy Use 34000 -00 , -10 115 VAC, 60 Hz, 6 Amps 100W 34000- 01 thru -04 & -11 thru -14 230 VAC, 50/60 Hz, 3 Amps 100W 34040 -00 , -10 115 VAC, 60 Hz, 6 Amps 100W 34040- 01 thru -04 &... -
Page 41: Appendix D: Accessories
Door Evidence Prefilters (3FT #3951802, 4FT #3951822, 5FT #3951832) Package of 10 each Door Evidence prefilters. Evidence prefilters are single use polyester prefilters to be examined and or retained for trace evidence. Precut to fit the door prefilter frame. 1 lb. (0.5kg). Cabinet Evidence Prefilters (#3951803) Package of 10 each Cabinet Evidence prefilters. - Page 42 Paper Liners (3FT #3894200, 4FT #3894201, 5FT #3894202) A package of 100 paper liners (die cut paper to fit the bottom of the cabinet) to collect material that falls from evidence. Paper is waxed on one side. 25 lbs. (11kg). Security Tags (#3902400) Package of 100 each tamper-evident, labeled tags.
Need help?
Do you have a question about the Protector 34000 Series and is the answer not in the manual?
Questions and answers