Table of Contents
Advertisement
Quick Links
Advertisement
Table of Contents

Related Manuals for Peloton GUIDE


Summary of Contents for Peloton GUIDE
- Page 1 U S E R M A N U A L...
-
Page 3: Table Of Contents
T A B L E O F C O N T E N T S W A R N I N G S A N D S A F E T Y I N S T R U C T I O N S M E M B E R S U P P O R T M E E T T H E P E L O T O N G U I D E I N S T A L L A T I O N... -
Page 4: W A R N I N G S A N D S A F E T Y I N S T R U C T I O N S
Keep your workout area clear and free of obstructions. If working out with others, keep at least an arm’s length apart at all times to avoid injury. No one under the age of 16 should use the Peloton Guide, unless under adult supervision and participating in a class that is specifically designed and labeled as appropriate for the user’s age. -
Page 5: M E M B E R S U P P O R T
M E M B E R S U P P O R T Member satisfaction is a top priority for Peloton. If you require assistance or are experiencing issues with the Peloton Guide, please visit support.onepeloton.com for additional help. When you contact Member Support, have the following information ready:... -
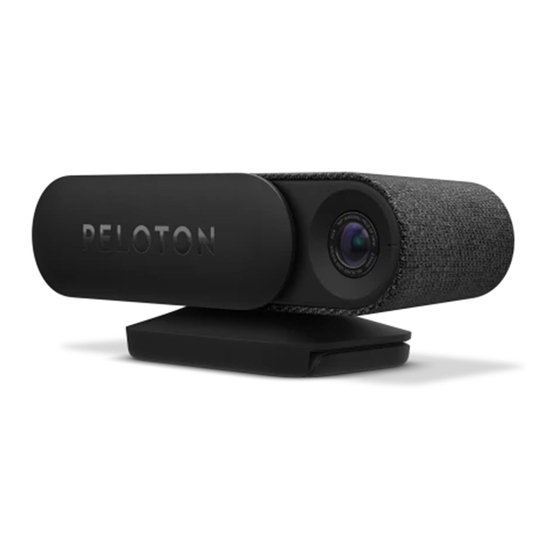
Page 6: M E E T T H E P E L O T O N G U I D E
M E E T T H E P E L O T O N G U I D E W H A T ’ S I N T H E B O X ? P E L O T O N G U I D E M O U N T R E M O T E A N D A A A B A T T E R I E S P O W E R A D A P T E R... - Page 7 M E E T T H E P E L O T O N G U I D E Camera Cover Camera Status Light HDMI Output Power Input Microphone Switch Navigation buttons Select Volume buttons Back Menu Play/Pause Press to release battery cover M E E T T H E P E L O T O N G U I D E | 7...
- Page 8 S P E C I F I C A T I O N S A N D R E Q U I R E M E N T S D I M E N S I O N S Guide: 166mm × 64mm × 42mm / 6.5″ L × 2.5″ W × 1.7″ H Height (mounted): 65mm / 2.6″ H Weight: 510g / 18oz.
- Page 9 Never use abrasive or harsh chemicals when cleaning the Peloton Guide. y Never spray or pour liquid directly on the Guide. Never allow liquid to drip into any opening on the Guide. R E M O T E C O N T R O L...
- Page 10 When a remote is connected, you can access the pairing screen by navigating to Settings › Remote › Pair New Remote. Once you see the pairing screen, make sure your remote is within 20ft / 6.1m of the Guide, and press and hold the buttons for 4 seconds.
-
Page 11: I N S T A L L A T I O N
W H E R E T O P U T Y O U R G U I D E Finding the right spot to install the Peloton Guide will help you get the most out of the camera and voice features. Use these guidelines to get set up. - Page 12 Avoid having sources of movement visible to the camera, including mirrors, televisions, and doorways to high-traffic areas. y Choose workout clothes that contrast with your background. If you fade into the background, the Guide could have trouble finding you.
- Page 13 C A N I M O U N T T H E G U I D E O N M Y T V ? Is your TV anchored to a wall? Installing the Guide on a freestanding TV could cause the TV to tip. If your TV is not anchored, please install the Guide on a flat surface instead.
- Page 14 Fold the back of the mount in to press firmly against the back of the TV. Set the Guide on the mount. M O U N T I N G O N A F L A T S U R F A C E Set the closed mount on a flat, stable surface.
- Page 15 Plug the other end of the power cord into the power adapter. Plug the power adapter into an electrical socket. Set your TV to the HDMI input used to connect to your Guide. Wait for a Peloton screen to appear.
-
Page 16: S E T U P
1 . R E M O T E S E T U P When you turn on the Guide for the first time, you will be prompted to pair the remote. If you ever want to pair your remote again, or pair another remote, navigate to Settings ›... - Page 17 First, use the camera view to ensure that the Guide is in the best possible location. You should be able to see your whole body and workout area without distortion. Move or tilt the Guide to fix any problems before proceeding to the next step.
-
Page 18: U S I N G T H E P E L O T O N G U I D E
F I N D I N G Y O U R W AY A R O U N D H O M E S C R E E N Each time you turn on the Peloton Guide and log in, you’ll see a Home Screen. Use the buttons on your remote to see your recent activity and personalized class recommendations. - Page 19 30 Day Movement Tracker Highlights shows your best moves and the moves that could use some work, based on your recent activity. Total Workouts shows the number of Peloton Workouts you’ve completed in each discipline. Recent Workouts shows the last classes you took. Select to see the complete list of your workouts in the Workouts tab. Select an individual workout to see more details on how you did.
- Page 20 Barre or Dance Cardio. S E T T I N G S Use the Settings menu to edit your account or preferences, or to make changes to your Peloton Guide. For a complete list of available settings, see Settings 32).
- Page 21 U S I N G T H E P E L O T O N G U I D E C A M E R A When the Guide’s camera is in use, the status light will turn green. The camera is only in use when you are in a class with the camera cover open and Self Mode (see p.
- Page 22 When the Heart Rate Band is ready to pair, the display will flash with a blue animation. When you are logged into a Peloton account on a Peloton Guide, the Guide will detect the Heart Rate Band and prompt you to pair.
-
Page 23: T A K I N G A C L A S S
T A K I N G A C L A S S Select a class from the Home screen, Classes, Programs or Collections to pull up the class details. Class details include: y Class Plan: a detailed rundown of the segments and movements in a class y Playlist: all songs that will be played during a class y Body Activity: a snapshot of which muscle groups are targeted in a class y More Info: extra information including a class description, other Members’... - Page 24 C A M E R A Keeping the camera on allows you to use Self Mode. To disable the camera, slide the Peloton Guide’s camera cover over the lens. V O I C E C O N T R O L Keeping the microphone on lets you use your voice to control class playback and change display options.
-
Page 25: Class Screen
To change the size or location of the Self Mode window, or to hide it completely, press and select another view option. You can also turn off Self Mode by sliding the Peloton Guide’s camera cover over the lens. T A K I N G A C L A S S... -
Page 26: Movement Tracker
“...what song is this?” “...maximize Self Mode, please.” You can also use voice commands to exit to the home screen, control music and instructor volume, and put the Guide to sleep from within a class. T A K I N G A C L A S S... - Page 27 T A K I N G A C L A S S P O S T - C L A S S When a class is over the Peloton Guide will show you a snapshot of how you did, including how many movements it tracked, and which muscles you worked hardest.
-
Page 28: A C C O U N T
To use the Peloton Guide, you will need to attach an active Peloton All-Access Membership. During the onboarding process, you will be prompted to activate the Peloton Guide using a code displayed on the screen. You can log into an existing account or create a new one, and purchase a new All-Access Membership or attach an existing one. If you have a Peloton App Membership, you will be prompted to cancel it and sign up for a new All-Access Membership. - Page 29 Select Add Existing to add a user who already has a Peloton account, or Create New to set up a new account. All profiles added to your Peloton Guide will live on the login screen. To remove profiles at any time, select Manage, or focus on a profile and press Accounts created on the Peloton Guide will give the user full access to Peloton content on the Guide or the Peloton App.
-
Page 30: T R O U B L E S H O O T I N G
If the light is on, make sure that your TV is powered on and set to the correct input. y If the light is off, check that the power cord is securely attached to the Peloton Guide and the power adapter, and that the adapter is fully plugged into the outlet. - Page 31 Navigate to Settings › Systems › Factory Reset to completely reset the Guide. Be aware that you will have to go through the activation process again after a factory reset, and that you will need to remove and reinstall the remote batteries to pair the remote.
-
Page 32: S E T T I N G S
Select to sign out of the logged-in account. N E T W O R K Wi-Fi Toggle Wi-Fi on and off. The Peloton Guide will not be able to access any content, including your profile and workout history, when Wi-Fi is turned off. Connected Network Displays the name of the connected network. - Page 33 M O V E M E N T T R A C K E R Camera Shows whether the Guide camera is currently enabled. Slide the camera cover to turn the camera on or off. Track and Display Movement Tracker Turn Movement Tracker on or off.
- Page 34 By default, the screensaver starts after 5 minutes of inactivity. Select to set a different time-out period. Auto-sleep By default, the Guide will sleep after 15 minutes of inactivity. Select to set a different time-out period. S E T T I N G S | 3 4...
- Page 35 Track and display Strive Score Toggle to turn Strive Score on or off. When Strive Score is enabled and a heart rate monitor is connected, your Guide will track this non-competitive metric and save it to your workout history. Hide Strive Score from others Toggle on or off to choose whether other Members can see your heart rate zone on the Here Now module.
-
Page 36: W A R R A N T Y
Product purchased or used outside the U.S. or Canada, a Product that is moved outside of Peloton’s service area in the U.S. or Canada, and units missing serial numbers. - Page 37 Use of the Product for commercial purposes or for any use other than normal use in a single family or household. y Any attempt to repair fitness equipment creates a risk of injury and property damage. Peloton is not responsible or liable for any damage or injury incurred during, or as a result of, any repair or attempted repair of equipment by anyone other than a Peloton authorized service technician.
- Page 38 Limited Warranty and you submit a claim to Peloton under this Limited Warranty, then without excluding, restricting or modifying any other rights to which you may be entitled under applicable laws, Peloton will, at its option and as its sole obligation, either replace the defective or malfunctioning Product or component of the same or a comparable model, or repair it.
-
Page 39: Canada
Product purchased or used outside the U.S. or Canada, a Product that is moved outside of Peloton’s service area in the U.S. or Canada, and units missing serial numbers. - Page 40 Use of the Product for commercial purposes or for any use other than normal use in a single family or household. y Any attempt to repair fitness equipment creates a risk of injury and property damage. Peloton is not responsible or liable for any damage or injury incurred during, or as a result of, any repair or attempted repair of equipment by anyone other than a Peloton authorized service technician.
- Page 41 Limited Warranty and you submit a claim to Peloton under this Limited Warranty, then without excluding, restricting or modifying any other rights to which you may be entitled under applicable laws, Peloton will, at its option and as its sole obligation, either replace the defective or malfunctioning Product or component of the same or a comparable model, or repair it.
-
Page 42: United Kingdom
Peloton does not warrant that the operation of the Product will be uninterrupted or error-free. y Data loss, including any damages or costs related to data recovery, removal, and installation. Peloton does not warrant that it will be able to repair or replace the Product under this Limited Warranty without risk to or loss of information or data stored on the Product. - Page 43 Use of the Product for commercial purposes or for any use other than normal use in a single family or household. y Any attempt to repair fitness equipment creates a risk of injury and property damage. Peloton is not responsible or liable for any damage or injury incurred during, or as a result of, any repair or attempted repair of equipment by anyone other than a Peloton authorized service technician.
- Page 44 Limited Warranty and you submit a claim to Peloton under this Limited Warranty, then without excluding, restricting or modifying any other rights to which you may be entitled under applicable laws, Peloton will, at its option and as its sole obligation, either replace the defective or malfunctioning Product or component of the same or a comparable model, or repair it.
-
Page 45: Australia
The rights described in this Peloton Interactive, Inc., located at 441 Ninth Avenue, 6th Floor, New York, New York, 10001, and its affiliate companies (“Peloton”) Guide Limited Warranty are in addition to the rights you have as a consumer under the Australian Consumer Law. - Page 46 Damage or equipment failure due to normal wear and tear, improper or negligent assembly, maintenance, installation, relocation, or repair (other than in each case that is caused by a Peloton authorized service technician), use of the Product beyond its design and...
- Page 47 You must follow all directions provided by Peloton Member Support and ensure that the defective Product or components are properly packed to protect it from damage during shipping. If you do not do so, Peloton will not be responsible for any damage that occurs to the Product or component during shipment.
- Page 48 Without excluding, restricting or modifying any rights or remedies to which you may be entitled under the Australian Consumer Law or other applicable law, any disputes between you and Peloton related to this Limited Warranty or the Product will be governed by the then-current dispute resolution procedures in Peloton’s Terms of Service, available at www.onepeloton.com.au/terms-of-service.
- Page 49 4 0 0 0 2 7 7 1 - A © Peloton 2022, Peloton Interactive, Inc. All rights reserved. onepeloton.com...
Need help?
Do you have a question about the GUIDE and is the answer not in the manual?
Questions and answers