
Related Manuals for Innovo iP900AP


Summary of Contents for Innovo iP900AP
- Page 1 Innovo® iP900AP Finger Pulse Oximeter User Manual Innovo Medical 10101 Stafford Centre Drive Suite B Stafford, TX 77477 http://www.innovo-medical.com...
- Page 3 Copyright © Innovo Medical 2017. All rights reserved. Innovo Medical owns and reserves all of the rights comprised in the copyright of this document. No part of this document may be changed, excerpted, copied, reproduced, or imitated in any form or by any means without prior written consent of Innovo Medical.
-
Page 4: Table Of Contents
Overview ............. 9 Working Principles ..........9 Intended Use............. 10 Product Features ..........11 Limitations ............11 Innovative Features of the iP900AP ....12 Chapter 3 Product Structure, Operation Instructions and Parameter Settings ........... 14 Schematic Structural Diagram ......14 Schematic Diagram of Display ...... - Page 5 Tips to getting a good reading ......26 Chapter 4 Cleaning and Disinfection ......... 28 Chapter 5 Maintenance and Troubleshooting ....30 Maintenance ............. 30 Troubleshooting ..........31 Chapter 6 Technical Description and Safety Type..... 33 Technical Specifications ........33 Safety Type ............
-
Page 6: Letter To Users
Letter to Users Thank you for choosing our Innovo iP900AP Finger Pulse Oximeter. By listening intently and applying some of the changes as suggested by our customers, we hope you will find that the iP900AP is much more user-friendly, reliable and comfortable pulse oximeter than its predecessor. -
Page 7: Standard Packing List
Standard Packing List Pulse oximeter………………………….1 PC AAA Battery……………………………..2 PCS Lanyard………………………………….1 PC User Manual…………………………….1PC Chapter 1 Precautions, Warnings and Symbol Precautions Do not attempt to repair the pulse oximeter by yourself. Only certified engineers should maintain and repair it. Change the contact position between the oximeter probe and the finger periodically if your finger feels sore or is uncomfortable. - Page 8 the normal range and you are sure that the device is not malfunctioning. The pulse oximeter uses infrared light (invisible to your eyes) to measure your SpO level. Hence, please do not stare at the light emitting components of the oximeter to avoid potential eye damage and/or blindness.
- Page 9 The following factors may affect the performance and accuracy of the oximeter: The oximeter is used in an environment with high-frequency devices, such as high-frequency electric knives and/or CT apparatuses. Ambient light intensity that is too bright. Hence, please avoid direct exposure to strong light (such as beams from operating lamps or sunlight) during measurement.
-
Page 10: Warnings
Warnings Warning: Do not use the oximeter in an environment with any flammable gases, flammable anesthetic, or other flammable substances. Warning: Keep unit and lanyard away from children as the included lanyard may pose as an entanglement or choking hazard to small children. Adult supervision is required;... - Page 11 Warning: Do not use the oximeter in an MRI or CT environment. Caution: Do not operate the oximeter if it is wet. Avoid moving the oximeter from a cold to a hot and humid environment. Caution: Install the batteries properly before powering on the oximeter for normal use.
-
Page 12: Symbol
Symbol Symbol Meaning BF-type application part Caution: Please refer to this manual Symbol of oxygen saturation %SpO Symbol of pulse rate bpmPR Manufacturer information... - Page 13 Symbol Meaning Please read the manual carefully Electrical waste materials should be sent to dedicated collection points for recycling A personal injury or device damage may Warning result if the device is not used correctly Important information on the proper Caution usage of the device Necessary information to protect the...
-
Page 14: Chapter 2 About This Product
Chapter 2 About This Product Overview stands for peripheral capillary oxygen saturation. Oxygen saturation is defined as the ratio of oxyhemoglobin (HbO ) to the total concentration of hemoglobin (i.e. Oxyhemoglobin + reduced hemoglobin) present in the blood. It is an important physiological parameter involved in respiration and circulation. -
Page 15: Intended Use
To improve accuracy, the iP900AP uses a proprietary algorithm to collect data from pulsatile arterial blood and excludes local noise from the tissues. The relative... -
Page 16: Product Features
Product Features Lightweight, portable and easy to use Six different display options Dual-color OLED screen to show measured values, plethysmograph, bar graph and perfusion index Large font display Preset alarm function Low Battery indicator ... -
Page 17: Innovative Features Of The Ip900Ap
(around 60 mm Hg) of the oxyhemoglobin dissociation curve. Innovative Features of the iP900AP The iP900AP is designed to address and alleviate some of the above problems by 1) Increasing the sensitivity of the sensor to allow user to... - Page 18 2) Using a self-adjusting smart spring system to fit user’s finger snugly but not too tight as to impede blood flow that may lead to a low PI. 3) Using soft, hypoallergenic medical grade silicone in the finger chamber to minimize discomfort to user’s finger. 4) Using solid ABS plastic to block ambient light from reaching the sensor so that the signal to background ratio and the accuracy of the measurement is dramatically increased.
-
Page 19: Chapter 3 Product Structure, Operation Instructions And Parameter Settings
Chapter 3 Product Structure, Operation Instructions and Parameter Settings Schematic Structural Diagram OLED screen Power-on key/function key Battery cover Note: The illustration in this manual may differ slightly in appearance from the actual product. -
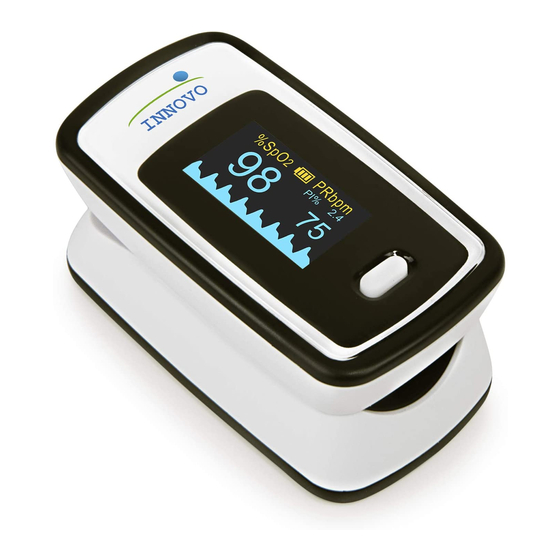
Page 20: Schematic Diagram Of Display
Schematic Diagram of Display The following figure shows the information display on the OLED screen of the Oximeter in normal detection state: Operation Instructions 3.3.1 Installing the Batteries Install two AAA batteries into the battery compartment according to the indicated polarity, and mount the battery cover. - Page 21 3.3.2 Installing the Lanyard Thread the thin end of the lanyard through the lanyard hole, and thread the coarse end of the lanyard through the thin end of the lanyard, and tighten the lanyard.
- Page 22 3.3.3 Switching On the Power Supply of the Pulse Oximeter Insert one of your fingers into the finger chamber of the pulse oximeter. Note: The fingernail should be facing the top chamber (which contains the sensor). Finger should also be inserted completely into the chamber.
- Page 23 Note: Before each use, it is recommended to clean finger and the silicone padded finger chamber. The silicone is non-toxic, soft and hypoallergenic. 3.3.4 Reading Oxygen Saturation Level and Pulse Rate from the OLED Screen Do not move your finger and hand during measurement. Keep your body as still as possible.
- Page 24 3.3.5 Switching Off the Power Supply of the Oximeter The oximeter will automatically shut down in 10 seconds after finger is removed from the chamber or if no signal is detected by the device. 3.3.6 Switching the Display PRESS (<0.5 sec) function while...
- Page 25 Note: Replace the batteries when the batteries are low and the symbol flickers on the OLED screen.
- Page 26 3.3.7 Plethysmograph and Perfusion Index The plethysmograph indicates the amount of blood flow detected by the pulse oximeter and the perfusion index indicates the strength of your pulse. Each wave in the plethysmograph corresponds heartbeat wave amplitude corresponds to the amount of blood detected by the pulse oximeter.
-
Page 27: Parameter Settings
Parameter Settings 3.4.1 Power-On Key/Function Key Operations PRESS (<0.5 sec) the power-on/function key to turn the pulse oximeter on. Once it is turned on, HOLD (>0.5 sec) the power-on/function key to enter the menu interface. PRESSING (<0.5 sec) the power-on/function key will allow you to scroll through the options while HOLDING (>0.5 sec) will select an item. - Page 28 To turn the alarm on/off, PRESS the power-on key/function key to move " * " to Alm. HOLD the power-on key/function key to switch the option from on to off or vice versa. When Alm is set to on and the measured values of the blood oxygen saturation (SpO and/or pulse rate (PR) exceed the stated upper or lower limit (See 3.4.7 Alarm Range Setting to set parameters...
- Page 29 3.4.4 Demo Mode To turn demo mode on, PRESS the power-on key/function key to move " * " to Demo. HOLD the power-on key/function key to switch the option from on to off or vice versa. 3.4.5 Restore Factory Settings PRESS the power-on key/function key to move "...
- Page 30 next to Alm Setup, HOLD the power-on key/function key to enter Menu Interface 2. " * " should be at Sounds Setup. Press the power-on key/function key to move " * " to the option you desire to change. SpO Alm Hi and Alm Lo refer to the upper and lower limit of the levels that you wish the alarm to go off at...
-
Page 31: Tips To Getting A Good Reading
Tips to getting a good reading Make sure that your finger is inserted deep into the chamber so that the fingertip is placed directly in between the LED light source and the LED sensor. Avoid making any body movement, especially your finger while taking measurement. - Page 32 hypotension and hypothermia may experience inaccurate reading during use. In such case, we suggest that you consult a physician. The pulse bar graph, plethysmograph and perfusion index (PI) are useful features that can be used to determine the reliability of a reading. If the height of the pulse bar is less than 30%, this indicates signal inadequacy and the displayed SpO or pulse rate value is potentially incorrect.
-
Page 33: Chapter 4 Cleaning And Disinfection
Chapter 4 Cleaning and Disinfection It is recommended to clean the pulse oximeter regularly. The pulse oximeter can be disinfected as needed. To clean, use a soft cloth lightly dampened with water. To disinfect, use a soft cloth lightly dampened with isopropyl alcohol. - Page 34 Caution: Do not rub the body of the device using materials such as steel wire balls or polished metal objects. Caution: Do not immerse or soak any part of the device in any liquid. Caution: Do not pour or spray liquid onto the device. Caution: Do not allow any liquid to seep into the device during cleaning.
-
Page 35: Chapter 5 Maintenance And Troubleshooting
Chapter 5 Maintenance and Troubleshooting Maintenance Remove the batteries from the battery compartment if the pulse oximeter will not be used for an extended period of time. Replace the batteries if they are low on power. Clean the pulse oximeter and the fingertip before every use to ensure accurate reading. -
Page 36: Troubleshooting
Troubleshooting Problems Possible Cause Solution The oximeter 1. Finger is not 1. Make sure that fails to inserted finger is placed display the correctly. right in blood between the 2. User’s blood oxygen sensor and perfusion is too saturation LED lights. low to be levels and/or measured. - Page 37 Problems Possible Cause Solution The SpO 1. Finger may 1. Insert finger Pulse Rate not be inserted deep into the reading is deep enough. chamber. unstable or 2. Excessive 2. Please do not fluctuates. body move during movement. measurement. 3. Pulse is too 3.
-
Page 38: Technical Description And Safety Type
Problems Possible Cause Solution The display 1. The oximeter 1. This is normal. screen turns powers off Just turn the off suddenly. automatically oximeter on when no signal again. is detected for 2. Replace the more than 10 batteries. seconds. 2. - Page 39 red light 660 nm ± 3nm; infrared light 905 nm ± 5nm. 3. Maximum optical output power of the probe: 1.2 mW for infrared light (905 nm). 4. Working power supply and current Internal Power Supply Two 1.5V dry batteries Working Current 30 mA 5.
- Page 40 Parameter Value Upper limit: 100 Oxygen saturation Lower limit: 94 Upper limit: 130 Pulse rate Lower limit: 50 When the alarm is set to on and the measured values exceed the Alarm condition preset alarm parameter range, the alarm will go off. 7.
- Page 41 Parameter Value Oxygen ±2% (70% to 100%) Measure- No requirement (≤ 69%) saturation ment accuracy Pulse rate ±2 bpm Oxygen Upper limit: 50% to 100% saturation Lower limit: 50% to 100% Alarm Upper limit: 25 bpm to 250 range Pulse rate Lower limit: 25 bpm to 250 Oxygen ±...
-
Page 42: Safety Type
Safety Type Anti-electric-shock type: internal power supply device Anti-electric-shock degree: BF-type application part Running mode: continuous working Waterproof grade: IP22 Storage and Transportation... - Page 44 Distributed by: Innovo Medical 10101 Stafford Centre Drive Suite B Stafford, TX 77477 Phone: +1-858-888-9781 cs@innovogroups.com www.innovo-medical.com...
Need help?
Do you have a question about the iP900AP and is the answer not in the manual?
Questions and answers
It’s throwing a err7 code
The Err7 code on the Innovo iP900AP means the emission LED or reception diode is damaged.
This answer is automatically generated