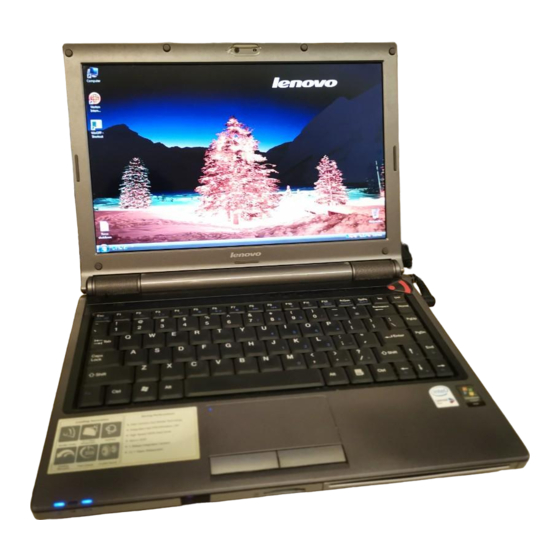
Lenovo Laptop User Manual
Lenovo laptop user manual
Hide thumbs
Also See for Laptop:
- Upgrade manual (7 pages) ,
- User manual (2 pages) ,
- User manual (52 pages)
Table of Contents
Advertisement
Lenovo Portable Computer User Guide
Chapter 1 Welcome
This user's guide provides the hardware and software information
of the LENOVO ® Notebook Computer which you will use.
The computer is a precision electronic equipment. Read through the
whole guide before your first use. Especially if you are a new user
of computers or you're new to notebook computers. Don't worry if
you are still confused about some part of the guide. Keep this guide
as a reference when you are using your computer, or call our agent
for help.
Pay your attention to the caution and safety messages in this
guide and the safety messages in the preface.
Note
1. Do not plug in and/or remove any computer
2. The computer has adopted many new hardware
components. The user must install the drivers by
following the guide's instruction to get the best
computer performance.
1.1 Quick tour of your notebook computer
Thank you for your purchase of the LENOVO3000 Y300 series
notebook computer. This powerful, flexible and lightweight
notebook computer is designed to provide long-term reliable and
component while using the computer (except USB,
PCMCIA and/or CD-ROM devices which support
PnP-Plug and play Technology).
1
Advertisement
Table of Contents

Related Manuals for Lenovo Laptop


Summary of Contents for Lenovo Laptop
-
Page 1: Chapter 1 Welcome
Chapter 1 Welcome This user’s guide provides the hardware and software information of the LENOVO ® Notebook Computer which you will use. The computer is a precision electronic equipment. Read through the whole guide before your first use. Especially if you are a new user of computers or you’re new to notebook computers. -
Page 2: Finding Where Everything Is Located
It is a good friend of you whenever you are in work or entertainment time. LENOVO® 3000 Y300 series has two select models as follows: Intel® 945GM Express Chipset with integrated graphics card Intel® 945PM Express Chipset with NVIDIA® Geforce® Go 7300 discrete graphics card. - Page 3 Lenovo Portable Computer User Guide 1. Integrated camera 1.3-Mega Multi-function and high quality CMOS camera has been integrated for picture taking and video communication, etc. To use the integrated camera, double-click the Scanners and Camera wizard on the desktop and follow the instructions on the screen.
- Page 4 Lenovo Portable Computer User Guide 4. Shuttle This Shuttle control is associated with Shuttle Center software. To use the Shuttle Center, first install the Shuttle Center driver, and then refer to Shuttle Center Help. Click to enter into menu and then click to OK Long press to quickly return to primal menu;...
- Page 5 · Press OK to run Lenovo Shuttle Center application · Press Up and Down button to control If Lenovo Shuttle Center is not installed on your Notebook · Press Up and Down button to control the volume · Press OK to run Windows Media Player 5.
- Page 6 Lenovo Portable Computer User Guide recovery application. You can recover, backup or uninstall the system through the application. See <Onekey Recovery User Guide> in Lenovo Drivers CD for details. Caution: Make sure you have already backed up the data in the hard drive.
- Page 7 Lenovo Portable Computer User Guide 3. Numeric-lock indicator 4. Voice indicator 9. Status indicator 2 The system status indicators show the status of the computer as follows: 1. Power button 2. Battery indicator 3. Wireless LAN /Bluetooth indicator 10. Keyboard Standard 86-key keyboard (Embedded numeric keypad and function keys.
-
Page 8: Front View
Lenovo Portable Computer User Guide 1.2.2 Front view 1. Infrared port Use this port to send and receive infrared (IR) signals to and from other IR-compatible devices. This port supports a transfer rate of up to 4 Mbps per second. - Page 9 Lenovo Portable Computer User Guide The slot lets you easily transfer data from other digital device. It supports Memory Stick, Memory Stick Pro, SD (Secure Digital) and MMC . 3. Optical driver Optical media drive provides the way to transfer data between your computer and CD/DVD.
-
Page 10: Left View
Lenovo Portable Computer User Guide 1.2.3 Left view VGA port USB ports Air Vent IEEE1394 port PC card slot HDD Compartment... -
Page 11: Vga Port
Lenovo Portable Computer User Guide 1. VGA port This port lets you connect an external monitor or a projector to your computer. 2. USB (Universal Serial Bus) ports You can connect USB devices to your computer, such as mouse, full-size keyboard and memory key, etc. The USB ports comply with USB2.0 standards, which enable data transfer speeds 40 times faster... -
Page 12: Right View
Lenovo Portable Computer User Guide 5. PC card slot The slot supports Type II PC card. 6. HDD compartment The HDD compartment contains the hard disk. 1.2.4 Right view Security keyhole USB ports Microphone jack Earphone jack Connecter cover RJ45 LAN connector... - Page 13 Lenovo Portable Computer User Guide 1. Security keyhole You can buy a security cable that can attach to the keyhole. Use it to anchor you computer to your desk or other large object to deny theft. The security cable’s instructions tell you how to use it.
- Page 14 Lenovo Portable Computer User Guide 5. Connector cover Protect RJ11 and RJ45 connector. When it is covered you cannot see the RJ11 and RJ45 connector. 6. RJ45 LAN connector The LAN jack supports RJ-45 standard. You can use a cable to connect your computer to a LAN (Local Area Network).
-
Page 15: Bottom View
Lenovo Portable Computer User Guide the computer. Wrong adaptor can damage your computer. Caution The AC adaptor can adapt to any voltage from 100 to 240 volts and to a frequency of either 50 or 60 hertz, enabling you to use the computer in almost any region. - Page 16 Lenovo Portable Computer User Guide Battery pack Battery Status indicator lights Battery Pack Lock/Release Latch FAN/CPU/Wireless LAN Card/Memory Cover 1. Battery Pack When the battery is fully recharged, it can supply the power to your computer and let you enjoy your mobile computing. To recharge the battery, simply connect the AC adaptor to the AC power and the computer.
- Page 17 Lenovo Portable Computer User Guide 2. Battery status indicator lights The status indicator lights correspond to the capability of your battery. 3. Battery pack lock and release Latch Slide it to free the battery pack for removal. Note Do not press the computer too hard when you are trying to release the battery pack.
-
Page 18: Turn On/Off The Power
If you need to install additional memory module, bring your computer to one of our agents. The professional technician who has been qualified by Lenovo will help you. Because of compatibility, Lenovo does not guarantee all memory modules are compatible with the computer. -
Page 19: Turn On The Computer
Lenovo Portable Computer User Guide 1.3.2 Turn on the computer Because the battery is uncharged, when you turn on the computer for first time, you have to connect the AC adaptor to your computer. Note Use the power cord and AC adaptor that come with the computer. -
Page 20: Using Battery Pack
Lenovo Portable Computer User Guide cannot shut down automatically. In this case, press the power button “ computer. Note If you are using the Windows operating system, you’d better use the operating system to turn off the computer to avoid data loss. -
Page 21: Using Battery
Lenovo Portable Computer User Guide Note: 1. Do not unplug the power connection during the charging. 2. Only use and charge the battery that comes with the computers. 3. Operate the computer on the battery power until the battery is fully discharged. -
Page 22: Battery Initialization
Lenovo Portable Computer User Guide computer or not, it always performs self-discharge. (About 1% a day) If the battery has not been used for a long time, it might have no power due to self-discharge. This is the inherent feature of lithium-ion battery. -
Page 23: Checking The Battery Status
Lenovo Portable Computer User Guide Turn on the computer when the battery is fully-charged. Press [F2] to enter the BIOS setup program. Unplug the AC adaptor. Let the computer operate on the battery power until it automatically turns off at the end of battery power. - Page 24 Lenovo Portable Computer User Guide When the battery power is low the system notifies the user of the situation through sound (The related BIOS and system should be made). A red “X” mark appears on the battery icon at the right-bottom of Windows taskbar and a prompt window pops up to suggest you to connect to the AC power to avoid data loss.
-
Page 25: Using The Lcd Display
Lenovo Portable Computer User Guide Note The broken lithium-ion battery pollutes the environment and can be dangerous to human. Do not dispose the battery as normal trash. Dispose the battery as required by local directives or regulations. Contact local manage institutions for disposal details. -
Page 26: Using Keyboard
Lenovo Portable Computer User Guide hold the up-middle side of the display panel and the other hand to open or close it gently. 2. Do not hold only left or right side when open or close the display panel. 3. Do not open or close the display roughly. This might damage the LCD display. -
Page 27: Keyboard Shortcut
Lenovo Portable Computer User Guide and characters under the mode. Press [Fn] +[ Print Screen/Num Lock] again to disable this function. 1.6.2 Keyboard shortcut You can use the keyboard shortcut to access some functions quickly: Shortcut [Fn] + [ESC] [Fn] + [END]... - Page 28 Lenovo Portable Computer User Guide [Fn] + [PrtScrn] [Fn] + [SysRq] [Fn] + [à][ß] [Fn] + [ ][ ] You also can use Windows Key “ applications or utilities: Shortcut + Ctrl + F +Pause/Break If you want to change the keyboard setting, Click Start à Control Panel à...
-
Page 29: Using Touchpad
Lenovo Portable Computer User Guide 1.7 Using Touchpad Touchpad is a touch sensitive device. It can perform all the functions of a normal mouse. Touch and move your finger on the pad to direct the on-screen pointer. The two buttons next to the Touchpad performs the same functions as mouse buttons. - Page 30 Lenovo Portable Computer User Guide Note Always keep the Touchpad and your fingers dry. Avoid spilling any liquid on the Touchpad. Do not exposure the Touchpad under magnetic and radiant environment for a long time. 1.8 Using optical driver Drivers are classified into following two types: 1.
- Page 31 Lenovo Portable Computer User Guide Note The slot in ODD doesn't support 8cm disk. Do not use 8cm disk whenever. Note Do not move the computer when the optical drive is working. The optical drive indicator at the upside of the keyboard shows the optical drive working status.
-
Page 32: Chapter 2 More Understanding
Lenovo Portable Computer User Guide Chapter 2 More understanding After you are familiar with the basic hardware and software operation, following content will more understanding about your notebook computer. 2.1 Setup and maintain the computer 2.1.1 EnergyCut The notebook computer has a series of automatic adjustable power-saving facilities called EnergyCut. -
Page 33: Standby Mode
Lenovo Portable Computer User Guide 2.1.2 The EnergyCut under Windows XP ACPI mode Under the ACPI mode of the Microsoft Windows XP operating system, the system EnergyCut will be controlled by the operating system. Go to Control Panel à Performance and Maintenance à Power Options to modify all the EnergyCut t settings. -
Page 34: Hibernation Mode
Lenovo Portable Computer User Guide computer”, “press the power button”, or “press the sleep button”. 2.1.5 Hibernation mode Hibernation mode suspends the system hard disk (STD). It is a very useful facility. It saves all the data of memory and video memory to the hard disk. - Page 35 Lenovo Portable Computer User Guide 2.1.6 Set up low power protection: Note If you do not save your data in time before the battery run out, while you have no related protection settings, you data will lose. So we suggest you to read the following instructions about setting up low power protection.
- Page 36 Lenovo Portable Computer User Guide Options à Alarms, Click “Alarm Action” in “Critical battery alarm”, in the pop-up window, choose “when the alarm goes off, the computer will Hibernate”, click OKin the pop-up window, and click Applyin the Power Options Properties window.
-
Page 37: Setting Display Resolution
Lenovo Portable Computer User Guide 2.3 Setting display resolution To view a program at a specific resolution, both the video controller and display must support the program, and the necessary drivers must be installed. Before changing any of the original display settings, note the original settings for future reference. -
Page 38: Using Card Reader
Lenovo Portable Computer User Guide 2.6 Using PC card Installing PC cards PC cards can enhance the notebooks’ performance without any cost of mobility. The mostly used PC cards include memory cards, Modem, hard disks and LAN cards. PCMCIA defines the industry standard for PC cards. -
Page 39: Chapter 3 System Configuration
Lenovo Portable Computer User Guide This computer has a 4 in 1 Memory Card Reader. It can read and write the popular Memory Stick, Memory Stick Pro, SD (Secure Digital) and MMC cards. Chapter 3 System configuration 3.1 Install drivers We provide a driver CD with all drivers that you need in the box. -
Page 40: Install Chipset Driver
Lenovo Portable Computer User Guide compromise the system’s stability and audio or video effect, even cause you to reinstall the operating system. 3.1.1 Install chipset driver · Insert the driver CD. · Select “E:\WinXP\Chipset\Setup.exe”. In the installation screen, follow the instruction to start the files copying process. At the end of installation, select “Yes, I want to restart my computer now”... - Page 41 Lenovo Portable Computer User Guide · Select Start \WinXP\Audio\Setup.exe”. In the installation screen, follow the instruction to start the files copying process. Then System Settings Change will ask “Do you want to restart your computer now?” Click Yes to restart your computer.
- Page 42 Lenovo Portable Computer User Guide complete the installation. · Restart the system after the installation. 3.1.7 Install Wireless LAN card (optional) driver · Insert the driver CD. · Run “E:\WinXP\Wireless\DPInst.exe”. In the installation screen, follow the instruction to start the files copying process and complete the installation.
-
Page 43: Bios Setup
Lenovo Portable Computer User Guide · Run “E:\WinXP\Quick Button\Setup.exe”. In the installation screen, follow the instruction to start the files copying process and complete the installation. At the end of installing, click Yes to reboot the system. · The system will restart to complete the installation. -
Page 44: Main Screen
Lenovo Portable Computer User Guide as Firmware. It is used to translate software instructions to the instructions that the hardware can understand. To enter the BIOS setup utility, press F2 before the operating system is booted. BIOS Setup Utility is a menu-driven application in English. It is used to change the system configuration based on user’s need. -
Page 45: Advanced Menu
Lenovo Portable Computer User Guide The following table lists keys that can be used in the BIOS menus. Function Help Exit the current menu, enter the Exit menu. Scroll through the items on a menu, or scroll through menus Change Values... -
Page 46: Security Menu
Lenovo Portable Computer User Guide 1. Core Multi-Processing: Determine whether the second core is enabled if your Processor is duo core. 2. Num Lock: Select Power-on state for Num Lock. By default, the setting is Off. 3. Plug&Play O/S: Select the operating system installed on your system. - Page 47 Lenovo Portable Computer User Guide The Set Supervisor/User /HDD Password items set passwords for different levels of access to the notebook. The notebook is shipped with the password disabled. 1. Supervisor Password: This field allows you to set the Supervisor password.
-
Page 48: Boot Menu
Lenovo Portable Computer User Guide allows full access to the BIOS Setup menu. To clear a password, highlight the Set Supervisor Password field and press the <Enter> key. Enter the current password. Leave the Enter New Password field blank and press <Enter> twice. The password is now cleared up. - Page 49 Lenovo Portable Computer User Guide 1. Quick Boot: Enable Quiet Boot to turn off the memory check sound during the POST. 2. Boot Menu: Choose if you want to show the Boot Menu. 3. Boot Time Diagnostic Screen: Choose the logo screen or the diagnostic screen during boot.
-
Page 50: Exit Menu
Lenovo Portable Computer User Guide Press the Up and Down arrow keys to select which component is used for the boot device, then use F5 and F6 to confirm the boot order of the device . 3.2.6 Exit menu... - Page 51 Lenovo Portable Computer User Guide Choose from one of the following items to execute the operation. Exit Saving Changes: Exit the BIOS setup screen and save all the changes which you have made. Exit Discarding Changes: Exit the BIOS setup screen and discard all the changes which you have made.
- Page 52 Lenovo Portable Computer User Guide Audio l Azalia l 2 speakers built-in. Display l Color 13.1’ WXGA TFT-LCD. Keyboard l 86 Key Windows Keyboard Expansion l One Type II PCMCIA Slot l One Modem Jack RJ-11 l One LAN Jack RJ-45...
- Page 53 Lenovo Portable Computer User Guide Battery Li-ion Adaptor 3 Pin...
-
Page 54: Chapter 4 Technical Support And Customer Service
Lenovo Portable Computer User Guide Chapter 4 Technical support and customer service 4.1 Kindly remind Note: Use your Lenovo notebook computer in compliance with the requirements in this guide, for example, conditions and environment requirements. If you violate any requirement for any purpose, Lenovo will not guarantee the computer’s performance, stability,... -
Page 55: Cleaning Your Computer
Lenovo Portable Computer User Guide Keep the temperature around the computer in the range of 10-35 when you use the computer. Do not use the computer in a humid, extremely hot or cold, vibrating, dusty environment or under direct sunshine. -
Page 56: For Outdoor Use
Lenovo Portable Computer User Guide Recharge the battery only after the power has run out and fully recharge it at one time. Do not stop recharging or start discharging when the battery is still under recharging. This helps keeping your battery in an optimized status. -
Page 57: Troubleshooting
Do not change the computer’s factory hardware, including removing original hardware or adding new hardware, without authorization from Lenovo licensed agencies. Lenovo has no warranty on the usability or reliability of any devices or software that are not provided by Lenovo or its affiliates. 4.2 Troubleshooting 4.2.1 The computer does nothing when you turn it on. - Page 58 Lenovo Portable Computer User Guide If you hear a series of beeps, it means that there are system errors. Contact Lenovo licensed service agencies. If the computer shows the screen of logo, but cannot boot the operating system or reports errors when the system is booted, see if there is a floppy disk in the floppy drive.
- Page 59 See if a printer of other model can print normally when it is connected with your notebook computer. If the methods above do not work, contact Lenovo licensed service agencies. 4.2.5 A peripheral device or an electronic device can not work when it is connected to the computer.
- Page 60 See if a device of other model can work normally when it is connected with above-mentioned methods do not work, contact Lenovo licensed service agencies. 4.2.6 You can not dial-up with the computer. See if the telephone cable is well connected to the Modem port on the computer.
- Page 61 Lenovo Portable Computer User Guide well. 4.2.7 The computer reports error, or halts when running some programs. See if these programs are normally installed and some files in these programs are not deleted by accident. See if the hardware configuration of the computer meets the lowest operating requirement of these programs.
-
Page 62: Warranty Service Telephone Numbers
Contact Lenovo licensed service agencies for maintenance and repair services. You can get free or charging services on the basis of Lennon’s service policies. You also can contact service support systems of Lenovo to get more service information. 4.3.1 Warranty service telephone numbers The phone numbers provided later in this section are correct at time of printing and are subject to change without notice. - Page 63 Note: The contact information is subject to change. If there is any change, we’ll not give any additional notification. Conform to the latest telephone numbers, web site address or addresses released by Lenovo Group. Keep the guide well for future use!