Table of Contents
Advertisement
Advertisement
Table of Contents

Related Manuals for Kodak PIXPRO FZ55


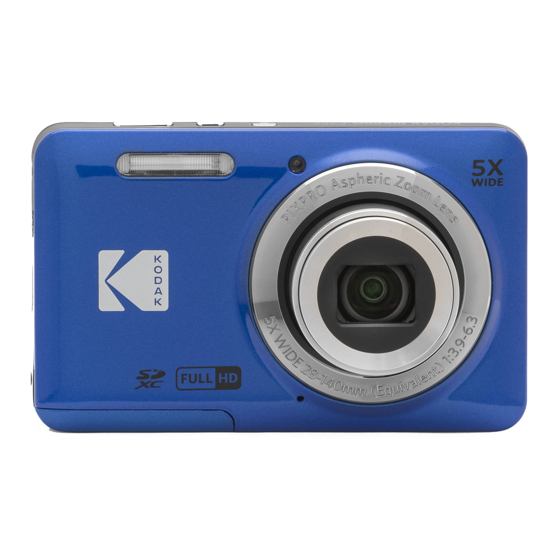
Summary of Contents for Kodak PIXPRO FZ55
- Page 1 KODAK PIXPRO FZ55 DIGITAL CAMERA User Manual...
-
Page 2: Before You Start
BEFORE YOU START Declaration of Conformity Responsible Party: JK Imaging Ltd. Address: JK Imaging Ltd., 17239 So. Main Street, Gardena, CA 90248 USA Company website: kodakpixpro.com For Customers in the USA Tested to Comply with FCC Standards FOR HOME OR OFFICE USE This device complies with part 15 of the FCC Rules. - Page 3 About this Manual Thank you for purchasing this KODAK PIXPRO Digital Camera. Please read this manual carefully and keep it in a safe place for future reference. JK Imaging Ltd. reserves all rights of this document. No part of this published manual may be reproduced, transmitted, transcribed, stored in a retrieval system or translated into any language or computer language, in any form, by any means, without the prior written permission of JK Imaging Ltd.
-
Page 4: Safety Notes
SAFETY NOTES Safety Notes for this Camera Do not drop the camera or allow it to hit solid objects. Do not attempt to disassemble or repair the camera. Do not use or store the camera in dusty places or on a beach to help prevent dust or sand from entering the camera, causing possible damage. - Page 5 Safety Notes for Battery Please use a battery that is the same type as the one included. Replacement batteries can be purchased at: kodakpixpro.com Please use the included charger to charge the battery. If battery fluid leaks inside the camera, contact our customer service department immediately. If battery fluid leaks onto your skin, rinse your skin with clean water and seek immediate medical attention.
- Page 6 Safety Notes for Memory Cards We highly suggest buying only well-known, name brand memory cards to ensure peak performance and reliability. Format the memory card using the camera before you use it or insert a new one. Do not drop the memory card or allow it to hit solid objects to avoid damaging it. Do not attempt to disassemble or repair the memory card.
- Page 7 Other Safety Notes Do not disconnect the power or turn the camera off during the update process. Doing so may cause incorrect data to be written and the camera may not power on later. Do not hang the neck or wrist strap of the camera around the neck of a child. When using your camera on an airplane, observe the relevant rules specified by the airline and FAA regulations.
- Page 8 WARNING Altering, tampering or modifying the any parts of FZ55 camera is unauthorized and will void the manufacturer’s warranty and “could” void Federal and/or State Compliance. This equipment has been tested and found to comply with the limits for a Class B digital device, pursuant to part 15 of the FCC Rules.
-
Page 9: Table Of Contents
CONTENTS BEFORE YOU START ......1 MODE OVERVIEW ......21 Display Setting ..........21 SAFETY NOTES ......... 3 LCD Screen Display ......... 22 CONTENTS ........8 Overview of the Screen Icons in Photo Shooting Mode ....... 22 GETTING STARTED ......12 Overview of the Screen Icons in Movie Mode .......... - Page 10 BASIC OPERATION ......31 Photos and Video Deletion ......41 USING THE MENUS ......42 Using the Zoom Function........ 31 Macro Mode............. 32 Photo Menu ............. 42 Self-timer Setting ..........33 Expo Metering (Exposure Metering) ......42 Flash Mode ............34 Image Size ........
- Page 11 AF Assist Beam .......... 49 Rotate ..........58 Digital Zoom ..........49 Resize ..........58 Date Imprint ..........50 Color ........... 59 Quick Review..........50 Playback Settings Menu ......59 Face Detection .......... 50 Protect ............60 Movie Menu ............. 51 Delete ............
- Page 12 Connecting to a Computer ...... 65 Connecting to PICTBRIDGE™ Compatible Printers ........66 Using the PICTBRIDGE™ Menu ....68 File Settings ..........71 Format ............72 Copy to Card ..........72 File Numbering .......... 73 Reset ............73 Firmware (FW) Version ......73 APPENDICES ........
-
Page 13: Getting Started
GETTING STARTED Accessories Included Your camera box should contain the camera model you purchased along with the following accessories. If anything is missing or appears to be damaged, please contact your retailer first or our customer service center. (The battery chargers may be a little different in shape due to the difference of countries or regions this type of camera is sold to, and is subject to matching the physical product). -
Page 14: Part Names
Part Names 10 11 12 1 Flash Lamp 8 LCD 16 Strap Eyelet 2 AF Assist Beam/ 9 Power Button 17 [ ] Display Button/Arrow Button (Up) Self-timer Lamp 10 Quick Video Recording Button 18 [ ] Flash Button/Arrow Button (Right) 3 Lens 11 Shutter Button 19 [... -
Page 15: Installing Battery And Memory Card
Installing Battery and Memory Card 1. Open the battery cover door. 2. Insert the battery into the battery slot in the correct direction as shown in the following diagram. - Page 16 3. Insert the memory card into the memory card slot as shown in the diagram below: Write Protection Toggle Switch A memory card (SD/SDHC/SDXC) is optional and not included in all camera packaging. It needs to be purchased separately. Please use an original memory card which is Class 10 or higher and has a capacity of 4GB to 512GB.
-
Page 17: Charging The Battery
Charging the Battery Before you charge your battery, you should turn the camera off and insert the battery. 1. Connect the camera to the power charger using the supplied USB cable. 2. Insert the plug of the power charger into the wall outlet to charge the battery. Indicator Lamp The charger is for indoor use only. -
Page 18: Turning Camera On And Off
When the camera is turned off, you can also connect the camera to your PC using a USB cable to charge the battery. Please charge the battery indoors between 0°C and 40°C (32°F and 104°F). Turning Camera On and Off Press the Power button to turn the camera on. -
Page 19: How To Take Pictures
How to Take Pictures 1. Hold the camera with both hands, being careful to not block the flash and lens with fingers. 2. Point the lens toward the object you want to take a picture of, and then frame it with the LCD. 3. -
Page 20: Resetting Your Language
Resetting your Language After you set your language for the first time, follow the instructions below to reset your desired language. 1. Press the button and press the [ ] buttons to select . Press the button to enter the menu. 2. -
Page 21: Resetting Date/Time
Resetting Date/Time After you set your Date/Time for the first time, follow the instructions below to reset date and time. 1. Press the button and press the [ ] buttons to select . Press the button to enter the menu. 2. -
Page 22: Mode Overview
MODE OVERVIEW Display Setting Press the [ ] button to display the settings: Classic, Full, Off. Classic: Displays the camera parameters on screen Full: Camera parameters with Grid and Histogram x3.5 x3.5 1234 1234 00:56:00 00:56:00 F2.9 F2.9 -0.3 F2.9 -0.3 Off: Does not display any additional icons on screen... -
Page 23: Lcd Screen Display
LCD Screen Display Overview of the Screen Icons in Photo Shooting Mode x3.5 1234 00:56:00 F2.9 -0.3 1 Self-timer 9 Histogram 17 Focus Frame 2 Flash Mode 10 Aperture 18 Image Size 3 Macro Mode 11 Shutter Speed 19 Number of Remaining Shots 4 Shooting Mode 12 Zoom Display 20 Video Quality... -
Page 24: Overview Of The Screen Icons In Movie Mode
Overview of the Screen Icons in Movie Mode x3.5 00:56:00 -0.3 EV 1 Zoom Display 5 Self-timer 9 Focus Frame 2 Movie Mode 6 Memory Card/Built-In Memory 10 Remaining Recording Time 3 Expo Metering 7 Battery Status 11 Video Quality 4 Macro Mode 8 Color Effect 12 Exposure Compensation (EV Value) -
Page 25: Overview Of The Screen Icons In Playback Mode
Overview of the Screen Icons in Playback Mode 1/45 2015 10-25 15:37 File Protection Memory Card/Built-in Memory DPOF File Battery Status Zoom Magnification Area Touch-up Image Zone Display Mode Image Zoom Ratios Memory space (indicating the current number of Shooting Date photos and total number of photos) -
Page 26: Using The Mode Button
Using the Mode Button This camera provides a convenient Mode button that allows you to switch easily between different modes. After pressing the Mode button to enter the Mode Selection Menu, press the [ ] button to choose the desired mode. Press the button to confirm your selection. -
Page 27: Movie Mode
Movie Mode Switch to this mode to record videos. Scene Mode You can press the [ ] button to select your desired scene from the 14 preset modes according to the type of environment you are shooting in, and press the button to confirm your selection. - Page 28 Backlit Portrait When the sun or any other light source is behind the target you want to shoot, this mode automatically adjusts the foreground exposure to produce the best pictures possible. Macro Mode The macro setting is ideal for shooting small objects or extreme close-up photos. Night Landscape For night scenes, this mode automatically increases the ISO value to compensate Mode...
- Page 29 Night Portrait For portraits against night scenery. Portrait The camera is set to automatically adjust exposure for realistic capture of skin tones. Children Turns flash off automatically. Avoids disturbing the subject and is suitable for taking photos of children. Landscape For landscapes and outdoor shots.
-
Page 30: Panorama Mode
Panorama Mode With Panorama Mode, you can take a series of pictures which will be automatically stitched into an ultra-wide panoramic (up to 180°) picture by the camera. 1. Press the arrow buttons to select a desired shooting direction. Should you not select a direction, the default shooting direction is “left Cancel Save... -
Page 31: Face Beautifier
In the process of shooting in Panorama Please refer to the table below if any nonadjustable Mode, when the LCD shows “Improper options in alignment. Please try again”, it means that in mode: (O: Available X: Not available) the process of the camera moving, the angle is off the green line and stitching cannot be Options Aperture... -
Page 32: Basic Operation
BASIC OPERATION Using the Zoom Function Your camera is equipped with two types of Zoom Functions: Optical Zoom and Digital Zoom. Press the Zoom button of the camera to zoom in or out on the subject while taking pictures. Zoom Indicator x3.5 1234 00:56:00... -
Page 33: Macro Mode
Macro Mode The Macro Setting is ideal for shooting small objects or close-up photos. This mode allows you to focus on subjects very close to the camera. 1. Press the [ ] button to enter the Macro Menu. acro Off 2. -
Page 34: Self-Timer Setting
Self-timer Setting Self-timer Smile Press the Shutter Button Use this function to take pictures at pre-set intervals. The and a picture will be taken camera shutter speed can be set to 2 seconds, 10 seconds immediately after a smile is or Smile Detection. -
Page 35: Flash Mode
Flash Mode Slow Sync. This allows you to take The flash provides supplemental light for scenes. The flash is pictures of people at night usually used when shooting against the light to highlight the that clearly show both your object; it is also suitable for metering and shooting in darker subjects and the night time scenes to improve the exposure. -
Page 36: Ev Setting
EV Setting Exposure Compensation Set up Exposure Compensation to adjust The EV Function Menu of the camera includes functions, the picture brightness. If there is very such as EV, Shutter Adjustment and ISO. Using the high contrast between the photographed appropriate Function Settings can improve your pictures. -
Page 37: Shutter Adjustment
Using Quick Recording Shutter Adjustment For shutter speed, the camera may automatically In the Photo Shooting Mode, press the Fast Video set the aperture value corresponding to the Recording Button to begin recording video. manually set shutter speed to obtain the most suitable exposure value. -
Page 38: Playback
PLAYBACK Viewing Photos and Videos To view captured photos and video clips on the LCD: 1. After pressing the button, the last photo or video clip taken will be displayed on the LCD. 2. Use the [ ] buttons to scroll through the photos or video clips stored on the built-in memory or on the Memory Card in the camera. -
Page 39: Thumbnail View
Thumbnail View When in Playback Mode, press the on the Zoom button to display thumbnail images of photos and videos on the screen. 1. Slide the Zoom button to switch between 3 x 3 and 4 x 4 thumbnails. 2. When a 3 x 3 or 4 x 4 thumbnail is displayed, press the arrow buttons to select the picture or video clip to view. -
Page 40: Using Zoom Playback (For Still Pictures Only)
Using Zoom Playback (for still pictures only) When playing back photos, you can also use the Zoom Button to zoom in on the photos, 2 to 8 times their original magnification. 1. Press the [ ] buttons to select the picture on which to use the zoom feature. 2. -
Page 41: Slideshow
Slideshow This setting allows you to view all the stored pictures as a slideshow. 1. Press the button to enter playback screen. 2. Press the button to enter slide option. 3. Press the [ ] buttons to select slideshow playing or [Cancel] to return to the playback screen. Play Slide Show Effect 2 Play Slide Show... -
Page 42: Photos And Video Deletion
Photos and Video Deletion In Playback Mode, press the [ ] button to select your desired photos and videos. To delete photos or videos: 1. Press the button to switch to Playback Mode. 2. Press the [ ] buttons to select the photos and videos to be deleted. 3. -
Page 43: Using The Menus
USING THE MENUS Photo Menu Expo Metering (Exposure Metering) Use this setting to select the “target” size of the Mode: camera’s field of view to be metered. 1. In Photo Shooting Mode, press the button to enter the Photo Shooting Menu. 2. -
Page 44: Image Size
The bigger the number of recorded pixels is, Image Size the better the image quality becomes. As the The size setting refers to the image resolution in number of recorded pixels lessens, you will pixels. A higher image resolution allows you to be able to record more images on a memory print that image in larger sizes without degrading card. -
Page 45: Continuous Shot
Press the shutter button to start continuous Continuous Shot shooting. Use this setting to perform continuous shooting. After entering this mode, you can shoot multiple Face Beautifier images by continuously holding the shutter button down. Skin Soften 30 sec 30 sec Effect 1 Time-Lapse 30 sec Effect 1... -
Page 46: Focus Setting
Focus Setting This setting allows you to select different modes Use this setting to control wide dynamic image for optimum focus. range when taking static pictures. Photos with extreme contrast of bright and dark areas will still maintain distinguishable detail and depth. (Suggest using tripod) HDR: Off Object Tracking... -
Page 47: White Balance Setting
White Balance Setting The white balance setting allows you to adjust the color temperature for different lighting scenes to ensure the most accurate color reproduction. Press SET To Enter Incandescent Manual WB Daylight (Fully press the Shutter Button to detect the white balance value) Cloudy Color Temp. -
Page 48: Color Effect
Color Effect The image color setting allows you to select different color effects. Press SET To Enter Normal Normal Normal Normal Dreamy Vivid Vignetting Black and White Salon Sepia When HDR or Continuous Shot function is enabled, Dreamy, Vignetting and Salon is not display. -
Page 49: Scene
Photo Shoot Settings Menu Scene Select a scene under Scene Mode ( ). Refer to the “Scene Mode” section on page 26. Press SET To Select Scene Pet Mode Press SET To Enter Menu Press the button to enter the menu. mode, you can press the [ ] button on the shooting screen to set up Auto shooting. -
Page 50: Quality
Quality AF Assist Beam The quality setting can be used to adjust the image In a darker environment, the AF assist beam setting compression ratio. can be turned on for better focus. Quality Normal Best Fine AF Assist Beam Normal Best 16M Average File Size: 4.0MB Digital Zoom... -
Page 51: Date Imprint
Date Imprint Quick Review Include a Date/Time stamp on the photo image. This option allows quick review of the photos immediately after they are taken. Each photo is displayed on the LCD screen based on the selected time. Date Date/Time Date Imprint 1 sec 2 sec... -
Page 52: Movie Menu
Movie Menu Expo Metering (Exposure Metering) Use this setting to select the “target” size of the Mode: camera’s field of view to be metered. 1. Press the button, select the mode and press the button to enter the Movie Menu. Expo Metering: AiAE Expo Metering: AiAE AiAE (Artificial... -
Page 53: Video Quality
* The longest recording time is 29 minutes Video Quality at one time. Set the image resolution used during video recording. When recording in higher pixel resolutions for extended periods of time, this can cause the camera to generate heat. This is not a camera malfunction. -
Page 54: Color Effect
Movie Shooting Settings Menu Color Effect The Image Color Setting allows you to select different color effects. Press SET To Enter Menu Normal Normal Press the button to enter the menu. Normal AF Assist Beam Digital Zoom Vivid Black and White Sepia... -
Page 55: Af Assist Beam
AF Assist Beam Digital Zoom In a darker environment, the AF assist beam setting This setting is for adjusting digital zoom. If this can be turned on for better focus. function is disabled, only optical zoom can be used. AF Assist Beam Normal Digital Zoom... - Page 56 Options in the shooting mode (O: Available X: Unavailable) Shooting Modes Options Others...
-
Page 57: Playback Menu
Playback Menu Display Mode Mode: 1. Press the button to display the playback screen and press the button to enter the menu. Press SET To Confirm Normal Mode: Display all images. Normal Mode Normal Mode: Display all images. Date Mode: Arranged by date. 2. -
Page 58: Hdr
Touch-up The playback beauty feature allows for With the HDR function, pictures that are beautification using three individual effects. overexposed may be corrected to optimize the highlights and lowlights captured to more accurately represent the actual scene. Red-Eye Reduction Red-Eye Reduction Skin Soften Cancel Eye Brightening... -
Page 59: Rotate
Rotate Resize You can use this setting to change the orientation of This setting allows you to resize a picture to a the picture. particular resolution and saves it as a new picture. Resize to 1024x768 Turn Right Turn Right Resize to 1024x768 Turn Left Resize to 640x480... -
Page 60: Color
Playback Settings Menu Color This setting allows you to change the picture color effect. The file is saved as a new photo and stored in memory together with the original photo. Press SET To Enter Menu Cancel Press the button to enter the menu. Cancel Protect Vivid... -
Page 61: Protect
Protect Delete To prevent any pictures or videos from being You can delete one or all photo/video files. accidentally erased, use this setting to lock one or all of the files stored on the memory card. Delete Date folder Protect Date folder Reset Delete one photo or video. -
Page 62: Dpof
DPOF (Digital Print Order Format) Trim The Trim setting allows you to crop photos and The DPOF feature allows you to compile and select save them as new pictures. a group of pictures that you would like to print and will save your selection on the memory card so 1. -
Page 63: General Settings
General Settings Sound Settings With this setting you may adjust the sound volume. Mode: Sound Settings 1. Press the button and press the [ ] buttons to select . Press the button to enter the menu. Volume 2. Press the [ ] buttons to select and press the ] button to enter... -
Page 64: Language
Language Date & Time Refer to the “Resetting your Language” section on Refer to the “Resetting Date/Time” section on page page 19. World Time LCD Brightness The Zone setting is a useful function for your Use this setting to adjust the brightness of your overseas trips. -
Page 65: Connection Settings
Connection Settings Mode: 1. Press the button and press the [ ] buttons to select . Press the button to enter the menu. 2. Press the [ ] buttons to select and press the ] button to enter the menu. 3. -
Page 66: Connecting To A Computer
Connecting to a Computer You can use a USB cable to connect the camera and copy (transmit) photos to a computer (PC or Mac), printer or other device. Setting the USB Mode Press the [ ] buttons to select [PC] and press the button to confirm. -
Page 67: Connecting To Pictbridge™ Compatible Printers
Connecting to PICTBRIDGE™ Compatible Printers PICTBRIDGE™ technology allows printing of the photos saved on the memory card by a printer. To find out if a printer is PICTBRIDGE™ compatible, simply look for the PICTBRIDGE™ logo on the packaging or check the owner's manual for specifications. With the PICTBRIDGE™ function on your camera, you can print the captured photos directly to a PICTBRIDGE™... - Page 68 Connecting to your Printer 1. Make sure both the camera and printer are turned on. 2. Connect one end of the supplied USB cable to the USB port on your camera. 3. Connect the other end of the cable to the USB port on the printer. If the camera is not connected to a PICTBRIDGE™...
-
Page 69: Using The Pictbridge™ Menu
Using the PICTBRIDGE™ Menu After setting the USB mode to Printer, the PICTBRIDGE™ menu will appear. PictBridge Print (with Date) Print (without Date) Print Index Print DPOF Images Exit Press the [ ] buttons to select a menu item and press the ] button to enter the item. - Page 70 Back 2. Press the [ ] buttons to select a photo to be printed. 3. Press the [ ] buttons to select the number of copies for the currently displayed photo. 4. Press the button and the following screen will appear. Print (With Date) Print (Without Date) Cancel...
- Page 71 Print Index Exit You can print all photos in the camera via this Select [Exit] to exit the PICTBRIDGE™ menu. At function. this time, the message [Remove USB Cable!] will appear on the screen. Print Index Remove USB Cable!! Cancel Print DPOF Images Disconnect the USB cable from the camera and To use DPOF printing, you must select your photos...
-
Page 72: File Settings
File Settings Mode: 1. Press the button and press the [ ] buttons to select . Press the button to enter the menu. 2. Press the [ ] buttons to select and press the ] button to enter the menu. Format Copy to Card File Numbering... -
Page 73: Format
Format Copy to Card Please Note: formatting enables you to delete all Use this setting to copy the files stored in the contents on the memory card and camera’s built-in camera’s built-in memory to a memory card. memory, including protected photo and movie files. Copy to Card Format Copy files from built-in memory to... -
Page 74: File Numbering
File Numbering Firmware (FW) Version After you take a picture or video clip, the camera Use this setting to view the current camera will automatically save it with a sequential number. firmware version. You can use this to reset the file numbering to 1. FW Version File Numbering Current Ver: V1.01... -
Page 75: Appendices
APPENDICES Specifications Design and specifications are subject to change without notice. Type 1/2.3"BSI CMOS Image Effective Pixels 16.35Megapixels Sensor Total Pixels 16.76 Megapixels Focal Length 5.1mm (Wide) — 25.5mm (Tele) 35mm Film Equivalent 28mm (Wide) — 140mm (Tele) F Number F3.9 (Wide) —... - Page 76 (16:9) (4:3) (3:2) 12MP: 4608 × 2592 16MP: 4608 × 3456 14MP: 4608 × 3072 2MP: 1920 × 1080 10MP: 3648 × 2736 Still Image Number of 5MP: 2592 × 1944 Recording 3MP: 2048 × 1536 Pixels 0.3MP: 640 × 480 1920 ×...
- Page 77 Pan-Panorama Max 180°(Horizontal) LCD Display 2.7 inch (230k Pixels) ISO Sensitivity Auto, ISO100/200/400/800/1600/3200 AF Method Single AF, Multi-AF (TTL 9-point), Object Tracking, Face-Detection Artificial Intelligence AE (AiAE), Center-Weighted Average, Exposure Metering Method Spot (Fixed to Center of Frame), Face AE Exposure Control Method Program AE (AE-Lock Available) Exposure Compensation...
- Page 78 Flash Method Internal Force Off, Flash Auto, Force Flash, Slow Sync., Flash Modes Slow Sync. + Red-Eye Reduction, Red-Eye Reduction Flash (Wide) Approx. 0.3m ~ 3.9m (ISO800) Shooting Range (Tele) Approx. 1.2m ~ 2.4m (ISO800) Recycling Time 6 seconds or less Internal Memory: Approx.
-
Page 79: Prompts And Warning Messages
Prompts and Warning Messages Message Description Action Recharge the Li-ion battery or The camera battery is depleted. Warning! Battery replace with fully charged spare It is a warning indicating that the exhausted. Li-ion battery. The camera will shut camera is going to shut off. down in 2 seconds. - Page 80 Message Description Action Warning! Do not turn This message appears during the This message disappears after the off your camera during firmware update process. camera update and restart. update! Indicates that you can disconnect The message disappears after you Remove USB cable!! the USB cable.
- Page 81 Message Description Action Format the memory card. WARNING: Formatting the memory card will erase all data on the card. During power-on, the memory card Copy the data from the memory card to another Card Error ! cannot be recognized or a read/ storage, such as a computer.
- Page 82 Message Description Action This image cannot be The file format does not support editing This message will disappear after 2 edited. or the edited file cannot be edited again. seconds. This indicates that the memory card Exceeded maximum exceeded the maximum number of Copy the data to your PC and format folder number.
-
Page 83: Troubleshooting
Troubleshooting Problem Possible causes Solution The battery has been depleted. Replace the battery. Camera does not turn on The battery is not inserted Correctly reinstall the battery. correctly. Camera turns off suddenly The battery has been depleted. Replace the battery. during operation Camera movement while taking a The picture is blurred... - Page 84 Problem Possible causes Solution Using a memory card below Use a memory card with Class Saving data to memory card Class 10 may result in slower 10 or higher standard to improve is slow recording times. performance. Cannot write to the memory The memory card has been Release the write lock of the memory card...
-
Page 85: Memory Card Compatibility
Memory Card Compatibility • Cards compatible with this camera ( : Compatible X: Not Compatible) √ micro micro micro Conversion adapter SDHC SDXC SDHC SDXC to SD card Format FAT12, 16 FAT32 exFAT FAT12, 16 FAT32 exFAT Capacity Up to 2GB 4~32GB 64GB~2TB Up to 2GB... - Page 86 © 2022 JK Imaging Ltd. All Rights Reserved. The Kodak trademark, logo and trade dress are used under license from Eastman Kodak Company. All other logos, products or company names that are referred to in this document are trade names, trademarks or registered trademarks of their holders.
Need help?
Do you have a question about the PIXPRO FZ55 and is the answer not in the manual?
Questions and answers
camera turns off when connected to pc
SD CARD DOES NOT reformat on the camera
The Kodak PIXPRO FZ55 camera may not reformat the SD card because the Kingston 12GB card is either incompatible or has too high a capacity for this camera model. It is recommended to use an SD card in the 32GB or 64GB range with a Class 10 or higher speed rating. Additionally, updating the camera firmware may help resolve compatibility issues.
This answer is automatically generated
If I press the set button too soon when setting the date and time, how do I get back to the date screen to correct my error?
Press the [ ]/[ ] buttons to navigate back to the Date/Time setting option. Then, use the buttons to adjust the values as needed. Press the confirmation button once finished.
This answer is automatically generated