Table of Contents
Advertisement
owner's manual
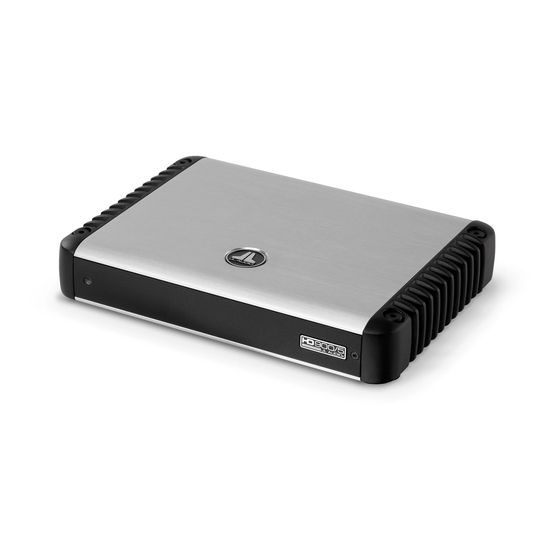
5-Channel Class-D System Amplifier
Thank you for purchasing a JL Audio amplifier for
your automotive sound system.
Your amplifier has been designed and manufactured to exacting
standards in order to ensure years of musical enjoyment in your vehicle.
For maximum performance, we highly recommend that you have
your new amplifier installed by an authorized JL Audio dealer. Your
authorized dealer has the training, expertise and installation equipment
to ensure optimum performance from this product. Should you
decide to install the amplifier yourself, please take the time
to read this manual thoroughly so as to familiarize yourself
with its installation requirements and setup procedures.
If you have any questions regarding the instructions in this
manual or any aspect of your amplifier's operation, please contact your
authorized JL Audio dealer for assistance. If you need further assistance,
please call the JL Audio Technical Support Department
at (954) 443-1100 during business hours.
Advertisement
Table of Contents

Related Manuals for JL Audio HD900/5


Summary of Contents for JL Audio HD900/5
- Page 1 For maximum performance, we highly recommend that you have your new amplifier installed by an authorized JL Audio dealer. Your authorized dealer has the training, expertise and installation equipment to ensure optimum performance from this product.
-
Page 2: Protect Your Hearing
The serial number can be found on the bottom panel of the amplifier and on the amplifier packaging. Serial Number: 2 | JL Audio - HD900/5 Owner’s Manual installation aPPlications This amplifier is designed for operation in vehicles with 12V, negative-ground electrical systems. - Page 3 Your JL Audio amplifier employs an advanced type of heat management, called RealSink™. This feature takes advantage of convection and radiation effects to remove heat from the amplifier circuitry. For optimum cooling performance, the vertical heat sinks located at the sides of the amplifier should be exposed to as large a volume of air as possible.
-
Page 4: Product Description
Product descriPtion The JL Audio HD900/5 is a very powerful and compact five-channel amplifier utilizing patented Single Cycle Control™ Class D technology for all channels. This groundbreaking technology delivers reference-grade, full- range sonic performance while requiring far less current from the vehicle’s electrical system than a conventional amplifier. -
Page 5: Typical Installation Sequence
Use a 2 AWG or 1/0 AWG main power wire with a power distribution block when additional amplifiers are being installed with the HD900/5 and powered from the same main power wire. 3) Connect power wire to the positive battery post. -
Page 6: Battery Connection
(including cheap wire that is fraudulently sold as 4 AWG wire) can create a fire hazard. If you are installing the HD900/5 with other amplifiers and wish to use a single main power wire, use 2 AWG or 1/0 AWG pure copper wire as a main power wire. - Page 7 For optimal grounding, we recommend the use of a JL Audio ECS master ground lug (XB-MGLU). Alternatively, a sheet metal screw or bolt can be used with a star washer. Many vehicles employ small (10 AWG - 6 AWG) wire to ground the battery to the vehicle chassis and to connect the alternator’s positive...
-
Page 8: Standard Mounting
8 | JL Audio - HD900/5 Owner’s Manual control Panel securitY coVer The HD900/5 features a Control Panel Security Cover. - Page 9 “2 ch.” input mode To operate all five channels of the HD900/5 with a single pair of stereo inputs, select the “2 Ch.” position on the “Input Mode” switch and connect a single pair of input cables to the “Front”...
-
Page 10: Crossover Controls
“Input Sens.” (Input Sensitivity). These controls are designed to match the input sensitivity of each channel section of the HD900/5 to the specific signal source that is feeding the amplifier. These controls must be adjusted, with care, following the procedures outlined in this manual. - Page 11 while the “Sub” channel filter is a low-pass filter (attenuates high frequencies). For each filter, the user can select from a shallow (12dB/octave) filter slope or a more aggressive (24dB/octave) slope. 1) “High-Pass Filter” Controls (Front and Rear channels) or “Low-Pass Filter” Control (Sub Channel): These switches allow you to select filter slopes or defeat the filter(s) completely.
- Page 12 (3-channel mode) In this configuration, the “Front” channels of the HD900/5 will be bridged to drive the left front component speaker system (150W x 1 @ 4Ω) with high-pass filtering. The “Rear” channels will be bridged to drive the right front component speaker system (150W x 1 @ 4Ω),...
-
Page 13: Speaker Outputs
(oPtional) With the addition of the optional Remote Level Control (HD-RLC), you can control the level of the Subwoofer Channel of the HD900/5 from the front of the vehicle. The HD-RLC connects to the jack labeled “Remote Level Control” on... - Page 14 14 | JL Audio - HD900/5 Owner’s Manual speaker connector Plugs There are three speaker connector plugs on the HD900/5: one for the front channels, one for the rear channels and one for the subwoofer channel. To connect the speaker wires to the amplifier,...
- Page 15 “status” led / Protection circuitrY There is a single multi-color LED on the control panel of the amplifier to indicate the amplifier’s operating status. This LED’s behavior is as follows: 1) Flashing Green: amplifier is powering up, audio output is muted. 2) Constant Green: amplifier is on and functioning normally, audio output is active.
- Page 16 If your amplifier fails or malfunctions, please return it to your authorized JL Audio dealer so that it may be sent in to JL Audio for service. There are no user serviceable parts or fuses inside the amplifier. The unique nature of the circuitry in the JL Audio amplifiers requires specifically trained service personnel.
- Page 17 Due to ongoing product development, all specifications are subject to change without notice. aPPendix a: Hd900/5 specifications Amplifier Topology: Class D, switching type with patented Single-Cycle Control™ technology. Power Supply: Pulse width modulation-regulated switching power supply Recommended Fuse Value / Type: 60A (AFS, AGU or MaxiFuse™)
- Page 18 41 ......508 Full-clockwise: 508 18 | JL Audio - HD900/5 Owner’s Manual aPPendix c:...
-
Page 19: Subwoofer Channel
(bass/treble, loudness, EQ, etc.). Set fader control to center position and subwoofer level control to 3/4 of maximum (if used to drive the HD900/5). Disconnect the HD-RLC Remote Level Control temporarily (if one is being used). 3) Switch the “Input Voltage” to “Low” and turn the “Input Sens.”... -
Page 20: Appendix D: Troubleshooting
“i get a distorted / attenuated sound coming out of the speaker(s)” “my amplifier’s output fluctuates when i tap on it or hit a bump” 20 | JL Audio - HD900/5 Owner’s Manual Please refer to Appendix C (pages 18, 19) to set the input sensitivity for maximum, low-distortion output. - Page 21 “my amplifier turns on, but there is no output” Check your voltage source and grounding point. The power supply of the HD900/5 will operate with charging system voltages down to 9V. Shutdown problems at higher volume levels can occur when the charging system voltage drops below 9V.
- Page 22 22 | JL Audio - HD900/5 Owner’s Manual...
- Page 24 - amPliFiers (usa) JL AUDIO warrants this product to be free of defects in materials and workmanship for a period of two (2) years from the original date of purchase. This warranty is not transferable and applies only to the original purchaser from an authorized JL AUDIO dealer.
Need help?
Do you have a question about the HD900/5 and is the answer not in the manual?
Questions and answers