Belling KENSINGTON User Manual
Ec (100 cm)
Hide thumbs
Also See for KENSINGTON:
- User manual (32 pages) ,
- User manual (32 pages) ,
- User manual (44 pages)
Table of Contents
Advertisement
Quick Links
Advertisement
Table of Contents

Related Manuals for Belling KENSINGTON


Summary of Contents for Belling KENSINGTON
- Page 1 KEN SI N GTON User manual - EC (100 cm)
- Page 2 0800 952 1068 ES - Spain Spares Store 0344 815 3745 FR - French To register your appliance online: www.belling.co.uk IT - Italy To contact us by email: PL - Poland gdhainfo@gdha.com To register your appliance by mail: Please NL - Netherlands...
-
Page 3: Table Of Contents
CO NT E N TS INTRODUC TION SAFETY GETTING TO KNOW YOUR PRODUCT USING YOUR APPLIANCE USING THE HOB USING THE G RILL USING THE MAIN OVEN - FANNED CO OKING GU IDE BAKING GUIDE ROAS TING GUIDE CLOCK/P ROG RAMM ER REMOVING SHELF RU N NER S CLEANING YOU R AP PL IANCE TEC HNICAL DATA... -
Page 4: Introduc Tion
I N T R O D U C T I O N Thank you for buying this British-built appliance from E U R O P E A N D I R E C T I V E S As a producer and a supplier of cooking appliances we This user guide book is designed to help you through are committed to the protection of the environment each step of owning your new product. -
Page 5: Safety
S A F E T Y 6 The appliance is not intended to be WA RNING operated by means of an external timer 6 Never put items directly on the base or separate control system. of the oven or cover the oven with foil, as this can cause the base element to 6 Unattended cooking on a hob with fat or overheat. - Page 6 C AUTION OT H ER SA FE T Y A DVI C E 6 If the hob surface is cracked, broken or 6 Servicing should be carried out only by shattered, switch off the appliance to authorised personnel. avoid the possibility of electric shock and call for a service engineer’s visit.
-
Page 7: Getting To Know Your Product
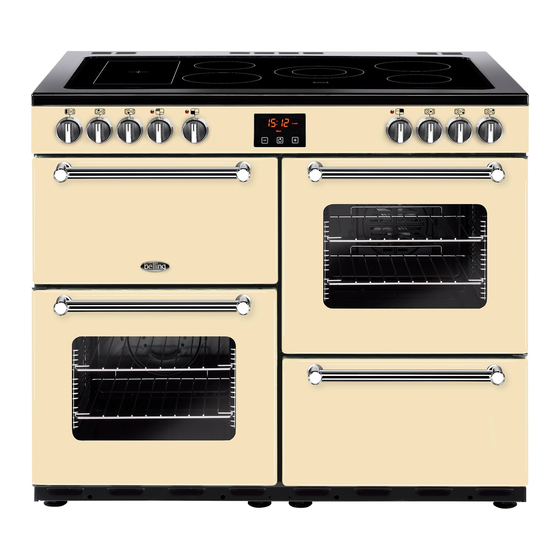
G E T T I N G T O K N O W Y O U R P R O D U C T 100/110cm Note: Your appliance layout may differ depending on the model. H O B Fascia Top Oven/Grill Left hand rear Small Right hand front... - Page 8 O V E N C O N T R O L S A P P L I A N C E F U N C T I O N S Oven Note: Your oven may not have all of the functions shown here.
-
Page 9: Using Your Appliance
U S I N G Y O U R A P P L I A N C E Top Oven - Grill O V E N S A N D G R I L L 6 The door must be OPEN when the grill is used. - Page 10 H O B Hot Hob warning (if fitted) A light appears on the hob display when the surface becomes hot. This light will illuminate when any cook zone is in use and will remain lit until the surface has cooled down.
-
Page 11: Using The Hob
U S I N G T H E H O B 6 Be careful when cooking foods in salted S A F E T Y water, or foods containing large amounts 6 Commercial simmering aids should of sugar, syrup or jam - if they are spilled not be used as they create excessive onto hot areas of the hob they may temperatures that can damage the... -
Page 12: Using The G Rill
U S I N G T H E G R I L L B E F O R E YO U S TA R T G R I L L I N G ..A L U M I N I U M F O I L 6 Never cover the grill pan or grill trivet Before you use the grill, make sure you have placed the with foil, or allow fat to build up in the... -
Page 13: Using The Main Oven - Fanned
U S I N G T H E M A I N O V E N - F A N N E D 6 Accessible parts may be hot when the Shelf positions oven is used. Young children should be kept away. - Page 14 Cooking with a fanned oven W H E N U S I N G T H E O V E N 6 As this is a high efficiency oven, you may As part of the cooking process, hot air is expelled notice the emission of steam from the through a vent at the top of the oven(s).
- Page 15 When roasting meats, you will notice that Be safe fat splashing is reduced, which is due in part to the lower oven temperatures, and Do not defrost stuffed poultry using this will help keep cleaning of the oven to a method.
-
Page 16: Co Oking Gu Ide
C O O K I N G G U I D E G R I L L Food Type Time Approx (mins) 8 - 15 Bacon 12 - 15 Sausages Chops - Lamb 10 - 15 - Pork 15 - 25 Toast - 2 rounds 1 - 2 (per side) -
Page 17: Baking Guide
B A K I N G G U I D E M A I N O V E N Cooking times & temperatures Note: This is a fanned oven, therefore some adjustment will have to be made to The temperature settings and times conventional cooking temperatures. - Page 18 Food Type Temp. Setting °C Time Approx. Shelf Position Puddings Bread & butter pudding 45 - 1 hour Fruit crumble 40 - 1 hour Miscellaneous Yorkshire pudding: - large 40 - 48 4 - 5 - small 15 - 20 4 - 5 Shortcrust pastry depends on filling...
- Page 19 Problem Possible Cause Texture with Too much raising agent. Flour pronounced unevenly mixed. holes. Texture too Not enough raising agent. close and cake Not enough liquid. Too insufficiently cool an oven. Insufficient risen. creaming. Not enough liquid. Baked for Cake crumbles too long.
-
Page 20: Roas Ting Guide
R O A S T I N G G U I D E Smaller joints weighing less than 1.25kg The times given in the roasting guide are only (2½lb) may require 5 minutes per 450g approximate, because the size and age of the bird will (1lb) extra cooking time. -
Page 21: Clock/P Rog Ramm Er
C L O C K / P R O G R A M M E R Please be aware that only the main oven U S I N G T H E T O U C H C O N T R O L S is controlled by the programmer. - Page 22 Once set, the minute minder will start to countdown in steps of seconds. The display will show the minute minder symbol and the remaining time. The countdown will continue in the background, if other functions are being set. When the set time for the minute minder has completed, an alarm is heard and the minute minder symbol will flash on the display.
- Page 23 Once set, the automatic mode, auto cooking symbol and the time of day is displayed. When cooking is completed, an alarm is heard and the manual mode symbol flashes on the display. Press the Menu button to stop the alarm and then the ‘time of day’...
- Page 24 To deactivate the Key lock S E T T I N G T H E V O L U M E ∙ Press and hold the plus button for 3-5 seconds. The Key lock symbol will disappear and the appliance can continue to be used.
-
Page 25: Removing Shelf Ru N Ner S
R E M O V I N G S H E L F R U N N E R S R E M O V I N G S H E L F R U N N E R S 1. -
Page 26: Cleaning You R Ap Pl Iance
C L E A N I N G Y O U R A P P L I A N C E D O ' S D O N ’ T S ∙ Warm, soapy water ∙ Undiluted bleaches ∙ Chloride products ∙... -
Page 27: Tec Hnical Data
T E C H N I C A L D A T A E L E C T R I C A L R A N G E Hob top Electrical supply Hotplate Zone Load (kW) Small 1.20 Large 1.70 240 V Ceramic Warming zone... - Page 28 W W W. B E L L I N G . C O . U K Stoney Lane, Prescot, Merseyside L35 2XW belling.co.uk Customer Care 0344 815 3740 Product Information Helpline 0344 248 4149 084017200...
Need help?
Do you have a question about the KENSINGTON and is the answer not in the manual?
Questions and answers