Table of Contents
Advertisement
Advertisement
Table of Contents

Related Manuals for Oasis Aquatics CX15

Summary of Contents for Oasis Aquatics CX15
-
Page 2: Table Of Contents
TABLE OF CONTENTS IMPORTANT WARNINGS & SAFETY INSTRUCTIONS .............. 3 1.1 Important Warnings ........................3 1.2 Important Safety Instructions ..................... 3 1.3 General Warnings ........................3 GENERAL OVERVIEW ........................ 4 2.1 Recommendations and Helpful Hints ..................5 2.2 Contents ............................ 5 2.3 Tools Needed .......................... - Page 3 UNIT MENU GUIDE ........................17 7.1 Backwash ..........................17 7.2 Brightness ..........................17 7.3 Cell Cleaning ........................... 17 7.4 Chlor Boost ..........................17 7.5 Chlor Setting ..........................17 7.6 Clock/Timer ..........................17 7.7 Contrast ........................... 18 7.8 Power/Mode ..........................18 7.9 Pump Setting ...........................
-
Page 4: Important Warnings & Safety Instructions
IMPORTANT WARNINGS & SAFETY INSTRUCTIONS 1.1 Important Warnings This manual contains important information about the installation, operation and safe use of this product. This information should be given to the owner and/or operator of this equipment. When installing and using this electrical equipment, basic safety precautions should always be followed. Failure to follow safety warnings and instructions in this manual can result in serious injury and/or damage to your equipment. -
Page 5: General Overview
There is one design, comprising 6 different size models in our range: The models available (CX15, 25, 25LS, 35, 45 and 55) are all reverse polarity units designed to automatically change direction every 4-16hrs (depending on your setting). See 7.3 CELL CLEANING to change the reversing times. -
Page 6: Recommendations And Helpful Hints
2.1 Recommendations and Helpful Hints • Read and keep your manual in a safe place. • Increase chlorine production when temperature goes up. • Use stabiliser to stabilise chlorine in pool. • Maintain your salt levels between 3000-3500ppm for optimum performance. •... -
Page 7: Pool Preparation
POOL PREPARATION BEFORE OPERATING YOUR OASIS CX PREMIUM SALT & MINERAL CHLORINATOR PLEASE READ THE FOLLOWING: Check your salt levels in your pool before starting your unit. See 6.6 to perform a SALT TEST. Salt and mineral levels should ideally be 3000-3500ppm (1500ppm -2000ppm for CX25LS) and no more than 5000ppm. -
Page 8: Power Pack And Cell Installation
POWER PACK AND CELL INSTALLATION 4.1 Power Pack Installation The Oasis CX Premium Salt & Mineral Chlorinator has an Ingress Protection Rating of IP23 enabling it to be installed outdoors. Regulations require that the Power Pack shall be installed outside the pool zone. The Power Pack shall be installed according to AS/NZS 3000 wiring rules. -
Page 9: Installation Diagram
4.3 Installation Diagram WARNING: DO NOT plug in if carton has been wet Important Notes: The pump rating must not exceed 8amps. Saltwater may damage electrical components in the Power Pack. WARNING: We DO NOT recommend the use of valves on the inlet or outlet of the cell housing. If you do use a valve, then it is important to ensure that the valve cannot deadhead (lock closed) while the pump is running. -
Page 10: Initial Start Up Of Your Unit
INITIAL START UP OF YOUR UNIT 5.1 Initial Start Up On initial start-up of your Oasis CX Premium Salt & Mineral Chlorinator the screen to the right will be displayed. 5.2 Start Up Clock Set START UP CLOCK SET allows you to program the exact time of the day. HH digits will flash and pressing [+] will increase the time and pressing [-] will decrease the time. -
Page 11: Mineral Or Salt Mix
5.5 Mineral or Salt Mix MINERAL OR SALT MIX allows you to enter the type of mineral used in the pool. Pressing [+] or [-] will change it from SALT to MINERAL MIX. The reason for this is because more minerals are required to be as conductive as SALT. -
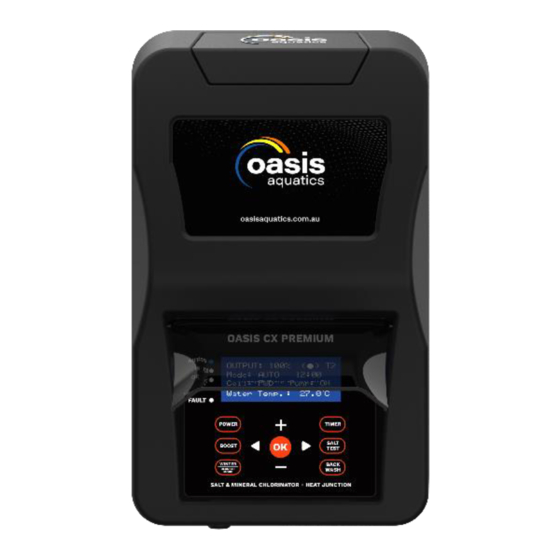
Page 12: Control Panel Operation
CONTROL PANEL OPERATION 6.1 OK BUTTON Menus are entered by either pressing the menus shortcut button on the control panel or by entering MAIN MENU, which is done by pressing the [OK] button. Any inactivity in any display for longer than 60 seconds results in the display returning to the DDS screen. -
Page 13: Power/Mode
6.2 POWER/MODE [POWER] button changes the operating modes of your Oasis CX Premium Salt & Mineral Chlorinator. When pressed the Mode will change AUTO to OFF then ON. When the unit is first powered on the factory setting is in AUTO as shown to the right Pressing [POWER] to OFF will display the screen as seen to the right Pressing [POWER] to ON will display the screen as seen to the right... -
Page 14: Winter / Blanket Mode
6.4 WINTER / BLANKET MODE ACTIVATE THOUGH WINTER MONTHS OR WHEN BLANKET IS IN USE BEFORE ENTERING WINTER / BLANKET MODE YOU MUST BE IN THE DDS SCREEN. [WINTER / BLANKET MODE] button automatically turns your Oasis CX Premium Salt & Mineral Chlorinator set point (Chlor Setting) down by 50% when the unit is either in AUTO or ON mode. -
Page 15: Timer Settings
Summer Settings Ideally, run for 4 hours in the morning (6am-10am) and 4 hours in the evening (4pm-8pm). For a smaller pool you can run less hours. In extreme weather it may be necessary to run longer hours. Contact your local pool Professional for further assistance. Winter Settings See 6.4 WINTER / BLANKET MODE for more detail 6.52 Timer Settings Pressing [TIMER] displays the screen to the right. -
Page 16: Salt Test
6.6 SALT TEST BEFORE ENTERING SALT TEST YOU MUST BE IN THE DDS SCREEN. [ TDS TEST] button measures the salt level in your swimming pool. A reading will appear on the screen, allow at least 30 seconds for an accurate reading. BEFORE PERFORMING A SALT TEST, ENSURE THE CELL IS CLEAR OF ANY CALCIUM DEPOSITS, AS THIS WILL INSULATE THE ELECTRODES AND IMPACT YOUR READINGS. -
Page 17: Backwash
6.7 BACKWASH BEFORE ENTERING BACKWASH MODE YOU MUST BE IN THE DDS SCREEN. [BACKWASH] button assists you in the operation of your pump and filter during the backwash process. IMPORTANT INFORMATION BEFORE PERFORMING A BACKWASH. NEVER OPERATE THE FILTER LEVER WHILE THE PUMP IS RUNNING YOU MAY DAMAGE THE SEAL AND LEAKS MAY OCCUR. -
Page 18: Unit Menu Guide
UNIT MENU GUIDE 7.1 Backwash See 6.7 BACKWASH (CONTROL PANEL OPERATION) 7.2 Brightness BRIGHTNESS is entered by pressing the [OK] button in the MAIN MENU and scrolling to BRIGHTNESS (Menu 2). The factory setting is 60%. Pressing [+] or [-] allows you to adjust the BRIGHTNESS. Pressing [OK] saves the selection. -
Page 19: Contrast
7.7 Contrast CONTRAST is entered by pressing the [OK] button in the MAIN MENU and scrolling to CONTRAST (Menu 7). The factory setting is 50%. Pressing [+] or [-] allows you to adjust the CONTRAST adjustment and pressing [OK] saves the required CONTRAST and returns to the DDS screen. -
Page 20: Water Chemistry
WATER CHEMISTRY The Oasis CX Premium Salt & Mineral Chlorinator unit is designed for use with swimming pool water balanced in accordance with the Langelier Saturation Index with a pH range of 6.8-7.8. As previously advised, for best performance and operation of your Oasis CX Premium Salt & Mineral Chlorinator unit, certain water balances must be maintained within your swimming pool. -
Page 21: Total Alkalinity
8.3 pH Measurement Interval: Once a week Ideal pH Levels: Concrete Pools: 7.4 - 7.6 Fibreglass/Vinyl Pools: 7.0 - 7.2 A pH of 8.0 makes oxidization only about 26% effective which is why it is critical to keep your pH in range. -
Page 22: Chlorinator Maintenance
CHLORINATOR MAINTENANCE Maintenance of your VAPURE VP-Series Salt Chlorinator is simple. Your unit has to be one of the most productive pieces of equipment on your swimming pool so it requires some basic maintenance. While water chemistry will always be the most important form of maintenance there are also other hints and pointers to take note of. -
Page 23: Inspecting The Power Pack
DO NOT scratch or bend the electrode plates in the Cell Housing. Ensure that the O-ring is clean, greased and properly seated. Rinse the electrode in clean water and refit the electrode in the Cell Housing, ensuring that the Cell Locking Ring is hand tight and secure. -
Page 24: System Troubleshooting
SYSTEM TROUBLESHOOTING If you suspect for any reason your Oasis CX Premium Salt & Mineral Chlorinator is not performing or running as it should be, here are some handy troubleshooting tips that may assist you. Fault Indication Potential Cause Remedy See the LCD DISPLAY for the reason then go to that section in this 10.1... - Page 25 Fault Indication Potential Cause Remedy Check that POWER PACK POWER CORD Not plugged into power point or power point not turned on goes into wall outlet and outlet is turned on Plugged into power point and Test wall outlet with a working appliance turned on but still no power Check CIRCUIT BREAKER at bottom of Wall outlet working but still no...
- Page 26 No liability or responsibility is accepted persons or OASIS AQUATICS Pty Ltd appointed agents. OASIS AQUATICS Pty Ltd reserves the right to refuse warranty if any damage caused to the chlorinator or auxiliary pool equipment that is not a result of a manufacturer’s defect.
-
Page 27: Schematics And Part Numbers
SCHEMATICS AND PART NUMBERS Oasis CX Premium Salt & Mineral Chlorinator CX Chlorinator - Salt and Mineral Operation MANUAL Page 26 of 33... - Page 28 Oasis CX Premium Salt & Mineral Chlorinator – Parts list POWER PACK CODE CX Description SL-15PP Oasis CX 15 Power Pack SL-25_35_45PP Oasis CX25,CX35 & CX45 Power Pack SL- 55PP Oasis CX 55 Power Pack N00895 Wire Loom SL-12 - Mul N00364 Oasis CX Front Cover BLACK N 01209...
- Page 29 Oasis CX Premium Salt & Mineral Chlorinator – Parts list Electrode Cell Parts CODE CX Description SL-CELL15RP OASIS CX 15 g/hr Cell ONLY SL-CELL25RP OASIS CX 25 g/hr Cell ONLY SL-CELL25RP-LS OASIS CX 25 g/hr LOW SALT Cell ONLY SL-CELL35RPB OASIS CX 35 g/hr Cell ONLY SL-CELL45RPB OASIS CX 45 g/hr Cell ONLY...
-
Page 30: Specification Table
Current Model Description Output (litres) (litres) Size including Cool Climate Warm Climate Pump CX15 CX15 Salt & Mineral Chlorinator 15g /hr 50,000 35,000 8 amps 10 amps CX25 CX25 Salt & Mineral Chlorinator 25g /hr 85,000 55,000 8 amps 10 amps CX35 CX35 Salt &... -
Page 31: Warranty
WARRANTY THIS EQUIPMENT HAS BEEN MANUFACTURED AND TESTED TO THE HIGHEST STANDARD AND ACCORDINGLY CARRIES THE FOLLOWING WARRANTY. 13.1 The Oasis CX Premium Salt & Mineral Chlorinator Power Pack & Electrolytic Cell will be repaired at no charge, for a period of 3 years or 10 000 hours, whichever occurs first fom the date of purchase should it be found, after examination, that the failure has been caused by faulty workmanship or materials. -
Page 32: Technical Support
TECHNICAL SUPPORT For all warranty enquiries please contact your local distributor or contact Sunlover Heating directly and we will either direct you to your nearest authorised repairer or assist you. OASIS AQUATICS Ph: 1800 815 913 Website: oasisaquatics.com.au Email: info@oasisaquatics.com.au... -
Page 33: Notes
NOTES CX Chlorinator - Salt and Mineral Operation MANUAL Page 31 of 31... - Page 34 A part of the Victoria New South Wales Queensland 62 Parkhurst Drive Unit 2, 10 Boden Road Unit 4, 8 Reichert Drive Knoxfield VIC 3180 Seven Hills NSW 2147 Molendinar QLD 4214 Australia Australia Australia T: 03 9887 2131 T: 02 9838 0000 T: 07 5679 6821 oasisaquatics.com.au info@oasisaquatics.com.au...
Need help?
Do you have a question about the CX15 and is the answer not in the manual?
Questions and answers