Advertisement
Available languages
Available languages
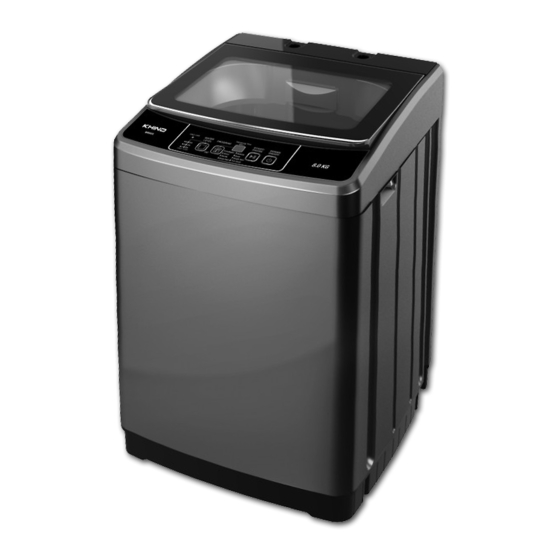
WM80A, WM100A & WM120A
model /
型号
Fully Auto Washing Machine / 全自动洗衣机 /
Mesin Basuh Automatik Sepenuhnya
Instruction Manual / 说明书 / Buku Panduan
Please read this manual carefully before operating this product. Keep this manual handy for further reference.
请在使用此产品前,详读此说明书。并将之收藏以作日后参考。
Sila baca buku panduan ini dengan teliti sebelum menggunakan produk ini. Simpanlah untuk rujukan masa depan.
www.khind.com.my
This manual is also available online
P/N: 40-51069-00
Advertisement
Table of Contents

Related Manuals for KHIND WM80A


Summary of Contents for KHIND WM80A
- Page 1 WM80A, WM100A & WM120A model / 型号 Fully Auto Washing Machine / 全自动洗衣机 / Mesin Basuh Automatik Sepenuhnya Instruction Manual / 说明书 / Buku Panduan Please read this manual carefully before operating this product. Keep this manual handy for further reference.
-
Page 2: Safety Precaution Information
Safety Precaution Information Safety Precaution Information • This appliance is not intended for use by persons (including children) with reduced physical, sensory or Please read the notice carefully in order to prevent hazard and extend the lifespan. mental capabilities, or lack of experience and knowledge, unless they have been given supervision or DENOTING IT SHOULD BE PROHIBITED DENOTING IT SHOULD BE PAID ATTENTION instruction concerning use of the appliance by a person responsible for their safety. -
Page 3: Parts Identi Cation
Safety Precaution Information Parts Identi cation Water Inlet Filter Net Clean the lter net with a brush Remove the lter on the water in water. Having the lter Detach the water inlet hose. inlet valve. cleaned, t it in the same way. Step to detach the water inlet hose Loosen and detach slowing the Turn on the... -
Page 4: Control Panel
Parts Identi cation Parts Identi cation Control Panel WM80A Control Panel Power On/O button Press power button to turn on or turn o the washing machine. If it is turned on beyond 5 minutes, and does not start the washing machine, or not to turn o , the power On/O switch will be auto turned o . -
Page 5: Speci Cations
Parts Identi cation Speci cations WM120A Control Panel WM80A WM100A WM120A Model 220-240V~ 50Hz 220-240V~ 50Hz 220-240V~ 50Hz Voltage 420W 600W 600W Wash/Spin Power Normal 10kg 12kg Wash/Spin Capacity Water Level Volume High (Litres) Low (Litres) 720rpm 670rpm 660rpm Spin Speed 33.5kg... - Page 6 Installation Installation Anti-rat bottom board installation Outlet • After installing the washing machine, take out the anti-rat bottom board. Turn upwards the board showing “up” and insert it from the back side of washing machine. (If the anti-rat bottom board does not insert completely, it will produce noise when spinning.
-
Page 7: How To Use
Installation How To Use Connection of the power cord WM80A Power Switch • The earthing which is indicated by yellow and green colour must Press the power switch to turn on the washing machine.The default indicator will light on. be rmly connected to a special Earthing. Please call the technician to assemble. - Page 8 How To Use How To Use Preset Selector WM120A • Select an automatic process or edit process by yourself. • If the preset selector is needed, you can press the Preset button until the indicator of the preset is Power Switch light up.
-
Page 9: Troubleshooting
Is the water supply cut? power o • Is the water inlet valve blocked? or power For some troubles, the machine buzzer will ring and alarm, and the indicator will ash. WM100A WM80A Troubles Indicator Light Checklist Solution Troubles Display... - Page 10 Troubleshooting Troubleshooting WM120A Troubles Indicator Light Checklist Solution Spin The lid is unclosed during the Close the lid or use it indoor. malfunc- spin,or use under glaring sunlight. Troubles Display Cause Solution tion Totally not No display The power plug is not plugged in Plug in power plug and press working and power switch is not pressed.
- Page 11 Troubleshooting 安全注意事项 请仔细阅读注意事项,以防止危险并延长使用寿命。 Troubles Display Cause Solution 表示禁止使用 表示应注意 Memory Cannot read and write. Request professional maintenance. chip failure 请勿将洗衣机暴露在阳光直 请勿将洗衣机放在潮湿的地方。 请勿将水直接洒在电器周围的 Unable to No display Computer board failure. Request professional maintenance. 射或雨淋的地方。 控制面板上。 start or not boot Note: When you check and troubleshoot, then start the washing machine. If there is any abnormality, please unplug the power plug and call our customer service phone as soon as possible.
- Page 12 安全注意事项 安全注意事项 拆卸进水管步骤 • 此电器不适合这些人士使用:小孩,体力弱及感官,精神上有障碍,缺少经验及知识者;除非有人监督 或指示如何操作,并负责操作人的安全。 小孩需紧密地监督,此电器严禁被小孩当玩具玩。 • 如果电源线损坏,必须由制造商,其服务代理商或类似合格的人员更换,以避免造成危险。 • 本电器仅用于室内家庭使用,请勿在户外使用。商业用途将使保修失效。 • 请勿用地毯等会阻碍洗衣机底座的通风。 慢慢的松开并拆下连接处的 • 请勿超载此电器。 关闭水龙头。 打开电源按钮。 按开始/暂停按钮。 进水管,然后关闭电源。 • 如果在脱水过程中,内桶在打开盖子后15秒钟内没有停止,请立即关闭电器并致电服务技术人员。 注意: • 洗衣服之前必须放下排水管。 • 请不要拆卸本电器。安装和维护只能由合格的技术人员进行。有关指导,请参阅第27-30页的“安装”。 建议您遵循步骤1至步骤4,以防止残留在电器中的水流到地面上。如果电器内部没有水,请执行步骤1,然 • 请勿攀爬或在电器顶部放置重物。 后执行步骤4。 • 请勿将手或脚插入主机下方。 • 请勿洗涤,漂洗或脱水防水床单或衣服。 保养与维护 过滤箱 请勿洗涤,漂洗或脱水防 卸下线屑过滤器。 清洗线屑过滤器。 水床单或衣服。...
- Page 13 零件识别 零件识别 控制面板 WM80A 控制面板 1. 开/关电源按钮 使用此按钮可以打开和关闭洗衣机。如果设定的程序在开机后5分钟内没有启动,它将自动关闭。 2. 开始/暂停按钮 按此按钮可以开始清洗程序,或者暂停/恢复当前正在进行的程序。 1. 进水阀 6. 背板 11. 过滤器 3. 程序选择 2. 框架 7. 底座 12. 排水管 反复按此按钮可设置所需的洗涤程序。您可以从以下选项中选择。 3. 手柄 8. 上盖 13. 控制面板 标准: 根据衣物的重量洗涤来调节水位。 4. 电源线 9. 洗涤剂盒 14. 波轮...
- Page 14 零件识别 零件识别 WM100A WM120A 控制面板 控制面板 Normal 1. 开/关电源按钮 1. 开/关电源按钮 按下电源按钮以打开或关闭洗衣机。如果打开电源超过5分钟,并且没有启动洗衣机或不关闭,开/关电 按电源按钮打开电源。开机后,按电源按钮来关闭电源。打开电源后,5分钟后,如果在不按电源按钮 源按钮将自动关闭。 的情况下启动洗衣机,本机将自动关闭电源。 2. 开始/暂停按钮 2. 开始/暂停按钮 按此按钮可启动程序,但是在机器运行时按此按钮,程序将被暂停。 打开电源后,按开始/暂停按钮以开始。在运行时按开始/暂停按钮可暂停。暂停时按开始/暂停按钮将 可重新开始。 3. 脱水 按下此按钮可单脱水。您可以设置脱水时间。 3. 程序 按此按钮可选择所需的程序。 4. 冲洗 标准: 标准的洗涤程序, 将根据衣物的量来自动调节合适的水位。 按下此按钮可进行冲洗。您可以设置时间。 毯子: 洗涤大型衣物,例如毯子。 快速: 洗涤轻污衣物。 5. 洗涤 轻柔:...
- Page 15 规格 安装 WM80A WM100A WM120A 型号 防鼠底板安装 220-240V~ 50Hz 220-240V~ 50Hz 220-240V~ 50Hz 电压 • 安装洗衣机后,取出防鼠底板。向上翻转显示为“up”的面板,然后将其从洗衣机的背面插入。 420W 600W 600W 洗涤/脱水功率 (如果防鼠底板未完全插入,则在脱水时会产生噪音。) 8公斤 10公斤 12公斤 洗涤/脱水容量 • 将固定的螺钉安装在螺钉入口中。 水位容积 62公升 78公升 88公升 高(公升) 20公升 33公升 25公升 低(公升) 720rpm 670rpm 660rpm 脱水速度...
- Page 16 安装 安装 水喉 电源线的连接 • 黄色和绿色表示的接地必须牢固地连接到特殊的接地。请致电 技术人员进行组装。 • 插座应装有3A保险丝。 注意: 1. 如图所示,选择合适的水喉类型。 • 切勿尝试将洗衣机的接地与煤气管或水管,电话线或避雷针的 接地连接在一起。 2. 水喉的末端应大于10mm,否则连接器无法组装。 • 请勿使用损坏的电源线,否则可能会导致漏电和起火。 3. 这会有漏水的可能性。 • 万一电源线损坏,请联系当地服务公司,因为电源线拆除并更 换需使用专用工具。 进水管的安装 1. 拧下水龙头上的“a”部分。 2. 分别将进水软管连接到水龙头上。 注意:请勿过度拧紧。这可能会损坏阀门。 3. 将水通过水龙头和进水软管排入水桶或洗衣桶,以清除水管中可能堵塞进水阀滤网的颗粒。 4. 将与水龙头连接的软管连接到进水阀上。 注意:请勿过度拧紧。可能会损坏阀门。 outlet less than 5. 检查是否泄漏 •...
- Page 17 使用方法 使用方法 预设选择器 WM80A • 自己选择一个自动过程或编辑过程。 • 如果需要预设选择器,则可以按“预设”按钮,直到预设指示灯亮起。指示窗口将指示需要的 电源开关 洗涤时间(小时)。 按下电源开关以打开洗衣机。默认指示灯将点亮。 • 请完全关闭洗衣机上盖。(否则,机器会发出警告) • 洗衣机将根据您所设置的程序运作,并在您预设时间显示剩余时间。 • 在倒数至预设时间的过程中,除电源开关以外,所有按钮将无法使用。 洗涤程序选择器 节水功能 此型号有8个针对不同衣服质量的程序。默认程序为“标准”。如果需要其他程序,可以按 • 除非用户设置水循环功能,否则机器将不会执行该功能。如果需要该功能,则在最后一次排水 “程序”按钮进行选择。 之前按冲洗按钮,同时打开节水指示灯,如果不需要,请按一下使其熄灭。 开始/暂停按钮 • 当节水功能启动时,机器在最后一次清洗时不会沥干水。它将提醒用户保持水直到按下 • 按开始/暂停按钮后,洗衣机开始运作。 “冲洗”按钮。 • 如果需要更改程序或水位,请按开始/暂停按钮暂停洗衣机并重置型号。设置完成后,再次按 • 在保持水的过程当中,按下冲洗按钮可停止或开始排水。 此按钮,洗衣机将根据新设置启动。 开始/暂停按钮 • 为避免危险,请勿在洗衣机运行期间打开洗衣机盖,尤其是在脱水过程中。 • 按下开始/暂停按钮后,洗衣机将开始运作。...
- Page 18 水龙头是否已打开? 按其他按钮进行设置,设置后,最后按“开始/暂停”按钮,系统将根据新设置的程序运行, • 插头是否松动或保险丝损坏? 然后盖上洗衣机上盖,洗衣机便开始处于运行状态。 • 是否有打开电源或启动按钮? b. 在洗衣机运行期间,尤其是在脱水过程中,请勿随意打开上盖,以免发生事故。 加水失败 • 水龙头是否已打开? c. 洗涤结束后,它会自动蜂鸣并关闭电源。 • 排水管是否已冻结? • 是否供水已中断? • 进水阀是否堵塞? 对于某些故障,机器的蜂鸣器会响起并发出警告,并且指示灯会闪烁。 WM80A 问题 显示 检查清单 解决方案 故障 无显示 插头与插座的连接不良或开关未启 正确连接插头并启动开关。 动。 无显示 插座没电或保险丝损坏。 请与授权技术人员联系。 无显示 因电源故障而丢失当前的进程。 仅在消除电源故障后再重复使用。 无显示 电压太低或太高。 先拔下插头并等待电压恢复正常后,...
- Page 19 故障排除 故障排除 问题 显示 检查清单 解决方案 问题 指示灯 检查清单 解决方案 脱水期间 水位传感 传感器因电流短路或断路等原因而 请与授权技术人员联系。 衣服没有均匀地放在内桶里。机器将 打开盖子,将衣服均匀地分布在内桶 内桶和箱 器异常 尝试进行2次自动检查和调整,如果 中,然后盖上盖子。 发生故障,并且会发出警告。 体之间发 无可用,将发出警告。 生碰撞 进水口无 PCB, 进水阀或水位传感器出现异 排水后请切断电源,并尝试与授权技 法停止 或 常。 术人员联系。 供水不足 水龙头关闭,供水被切断或水压过 水压恢复正常后,打开水龙头或使用 自动排水 低,因此水在相当长的时间内无法达 机器。打开洗衣机上盖,然后关上并 内存芯片 无法被读取或写入。 请与授权技术人员联系。...
-
Page 20: Maklumat Keselamatan
Maklumat Keselamatan 故障排除 Sila baca notis dengan teliti untuk mengelakkan bahaya dan memperpanjang jangka hayat. WM120A MENANDAKAN ITU HARUS DILARANG MENANDAKAN ITU HARUS DIBERI PERHATIAN 问题 显示 原因 解决方案 Jangan dedahkan mesin basuh Jangan letakkan mesin basuh di Jangan taburkan air terus ke unit di 水位传感器... - Page 21 Maklumat Keselamatan Maklumat Keselamatan Penapis Masuk Air • Perkakas ini bukan untuk digunakan oleh orang ( termasuk kanak-kanak ) yang kurang upaya fizikal, deria atau kecacatan mental, atau kurang pengalaman dan pengetahuan, melainkan mereka diberi perhatian atau tunjuk ajar berkaitan penggunaan perkakas oleh orang yang bertanggungjawab untuk keselamatan mereka. Kanak-kanak haruslah diperhatikan untuk memastikan mereka tidak bermain dengan perkakas ini.
- Page 22 Pengenalan Bahagian Pengenalan Bahagian Panel Kawalan Panel Kawalan WM80A 1. Butang Kuasa Hidup/Mati Gunakan butang ini untuk menghidupkan dan mematikan mesin basuh. Sekiranya program yang ditetapkan tidak dimulakan dalam 5 minit setelah menghidupkan mesin, ia akan dimatikan secara automatik. 2. Butang mula/henti...
- Page 23 Pengenalan Bahagian Pengenalan Bahagian Panel Kawalan WM100A Panel Kawalan WM120A Normal 1. Butang Power On/Off 1. Butang Hidup/Mati Tekan butang kuasa untuk menghidupkan atau mematikan mesin basuh. Sekiranya mesin basuh dihidupkan Tekan butang Kuasa untuk menghidupkan kuasa. Setelah menghidupkan, tekan butang kuasa untuk mematikan melebihi 5 minit, dan tidak memulakan mesin basuh, atau tidak dimatikan, suis ON / OFF kuasa akan kuasa.
- Page 24 Spesifikasi Pemasangan WM80A WM100A WM120A Pemasangan papan bawah anti tikus Model 220-240V~ 50Hz 220-240V~ 50Hz 220-240V~ 50Hz Voltan • Setelah memasang mesin basuh, keluarkan papan bawah anti tikus. Pusing ke atas papan yang menunjukkan 420W 600W 600W Kuasa Basuh / Putar "up"...
- Page 25 Pemasangan Pemasangan Paip Sambungan kabel kuasa • Pembumian yang ditunjukkan oleh warna kuning dan hijau mesti disambungkan dengan betul ke Pembumian khas. Sila hubungi juruteknik untuk memasang. • Soket sepatutnya dipasang fius 3A. Nota: 1. Pilih jenis paip yang sesuai seperti yang ditunjukkan dalam gambar. •...
- Page 26 Cara-cara Penggunaan Cara-cara Penggunaan Pemilih Preset WM80A • Pilih proses automatik atau proses edit sendiri. • Sekiranya pemilih preset diperlukan, anda boleh menekan butang Preset sehingga penunjuk preset Suis kuasa menyala. Tingkat penunjuk menunjukkan keperluan masa untuk membasuh (jam). Tekan suis kuasa untuk menghidupkan mesin basuh. Penunjuk lalai akan menyala.
-
Page 27: Penyelesaian Masalah
Apabila pencucian selesai, buzzer akan berdering dan berikan amaran secara automatik dan matikan • Adakah injap masuk air tersekat? kuasa. Untuk beberapa masalah, buzzer akan berdering dan berikan amaran, dan penunjuk lampu akan menyala WM80A Masalah Paparan Senarai Semak Penyelesaian... - Page 28 Penyelesaian Masalah Penyelesaian Masalah Masalah Paparan Senarai Semak Penyelesaian Masalah Lampu Penunjuk Senarai Semak Penyelesaian Kerosakan Penutup dibuka semasa process Tutup penutup atau menggunakan di Saliran • Hos saluran pembuangan Periksa hos saluran pembuangan, buka putaran berputar (akan berhenti berfungsi dan dalam rumah.
- Page 29 Penyelesaian Masalah Penyelesaian Masalah WM120A Troubles Display Cause Solution Sensor Kegagalan sensor paras air, litar Sila dapatkan kakitangan perkhid- paras air terbuka atau litar pintas, kemudian matan professional untuk pemerik- Masala Paparan Sebab Penyelesaian tidak penggera diberikan secara saan dan pembaikan. Tidak dapat Tiada Palam kuasa tidak dipasang dan...
Need help?
Do you have a question about the WM80A and is the answer not in the manual?
Questions and answers
Cod e6 apa masalah
Error code E6 on the KHIND WM80A indicates a failure in the water level sensor due to an open circuit or short circuit. It triggers a warning and requires contacting authorized technical personnel for inspection and repair.
This answer is automatically generated
@Mr. Anderson Khind model wm100 A pun sama ke adakah barang ni rosak