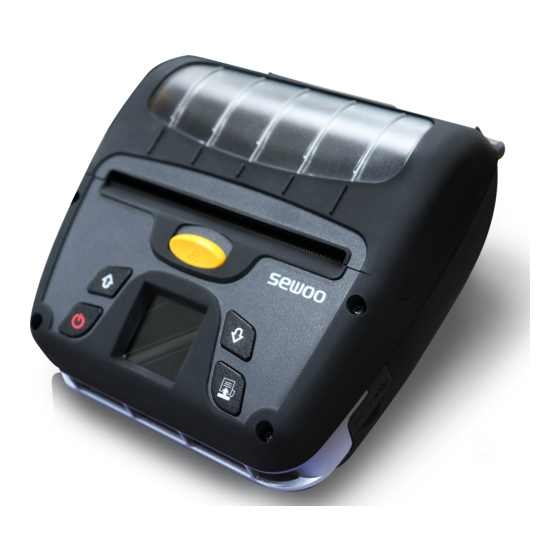
Summary of Contents for SEWOO LK-P400
- Page 1 LCD MANUAL Rev.A 06/2020 Aroot Co., Ltd. The manual and product are protected by copyright. Mobile Printer LCD Manual Model: LK-P400...
-
Page 2: Table Of Contents
Contents 1. Button Function Description 2. Icon Information Battery / Bluetooth / Wi-Fi status display Setting paper / Error status display 3. How to use the menu 4. Menu OSD Configuration and Description Language / Media type menu Printer menu (Left margin / Top margin / TOF margin / Tone detailed settings) Sensor / Print menu Bluetooth menu (Bluetooth device name setting / Pincode setting) Wi-Fi menu... -
Page 3: Button Function Description
1. Button Function Description Button Name Description -In normal mode, it is used as a power ON / OFF function. Power button -When entering the LCD menu, it switches to the normal mode. UP button -Scroll up the LCD menu tree. -Enter the LCD main menu. -
Page 4: Icon Information
2. Icon Information 1 Battery status indicator Icon Description 100% charged. 80% charged. 50% charged. 20% charged. 10% charged. 0%(requires charging.) 2 Bluetooth, Wi-Fi status display - Bluetooth Icon Description Bluetooth is connected. Active. Disabled. - Wi-Fi Icon Description Wi-Fi is connected. Active. -
Page 5: Setting Paper / Error Status Display
2. Icon Information 3 Setting paper display Icon Description Paper with black marks on the printed surface. Paper with black marks on the reverse side of the print. Gap label paper. Continuous paper. 4 Error status display Icon Description There is no paper. The set paper and actual loaded paper type are different. -
Page 6: How To Use The Menu
3. How to use the menu 1 The main menu consists of 4 items, " Setting / Diagnostics / Bluetooth / Wi-Fi ", as shown in the figure below. 2 Press the button to enter the main menu. - When entering the main menu, a gray toolbar is located in the "Setting"... - Page 7 3. How to use the menu 4 Press the button to move to the sub-menu of the selected menu. 5 The figure below is a typical detailed menu example. - Use the buttons to specify the desired settings, and press the button to set them to the specified values.
-
Page 8: Menu Osd Configuration And Description
4. Menu OSD Configuration and Description 1 Language menu Language Print Language Media Display Language Printer Exit Emulation Codepage Description Print Language Select print language. Display Language Select LCD display language. - English, Italian, French, German, Spanish, Portuguese, Chinese, Polish, Arabic, Russian Emulation Select emulation. -
Page 9: Language / Media Type Menu
4. Menu OSD Configuration and Description 2 Media type menu Language Media Printer Exit Description Select paper sensing. - Continuous Media - Black mark - Gap... - Page 10 4. Menu OSD Configuration and Description Left margin / Top margin / TOF margin / Tone detailed settings 1 When entering the selected menu, the set value is displayed on the screen. Current set value 2 If you press , a bar-shaped cursor appears at the bottom of the changeable position as shown below.
- Page 11 4. Menu OSD Configuration and Description 3 Print menu Language Left Margin Printing Speed Overwrite Media Top Margin Printer TOF Position Power save Exit Density Password Protect Label Length Password Backfeed Setting Factory Reset Cover Setting Auto Detection Description Left Margin Sets the left margin value (-127 to +127 dots).
-
Page 12: Printer Menu (Left Margin / Top Margin / Tof Margin / Tone Detailed Settings)
4. Menu OSD Configuration and Description 4 Sensor menu Sensor Check Upper Print Lower Exit Description Upper Displays the ADC value of the sensor located on the opposite side of printing. Lower Displays the ADC value of the sensor located on the printing surface. 5 Printer menu Sensor Check Print Info. -
Page 13: Bluetooth Menu (Bluetooth Device Name Setting / Pincode Setting)
4. Menu OSD Configuration and Description 6 Bluetooth menu Bluetooth Info. Discoverable Device Name MITM Pincode Change Auto Connection Description Bluetooth Info. Print Bluetooth information. Device Name Change the Bluetooth device name. Pincode Change Change the pincode. Discoverable Enable/disable Bluetooth discoverable mode. MITM Enable/disable Numeric comparison. - Page 14 4. Menu OSD Configuration and Description Bluetooth device name setting 1 When entering the device name, the setting values are displayed as shown below. Current set value 2 If you press , a bar-shaped cursor appears at the bottom of the changeable position as shown below.
- Page 15 4. Menu OSD Configuration and Description Pincode setting 1 When entering the PIN code menu, the setting values are displayed as shown below. - When entering the menu, the initial value is always 0000. Current set value 2 If you press , a bar-shaped cursor appears at the bottom of the changeable position as shown below.
- Page 16 4. Menu OSD Configuration and Description 3 Press the button to move the cursor to the position to change. 4 When the cursor is positioned to the far right, - Press the button once, and the cursor disappears. - Press the button twice to save the settings.
-
Page 17: Wi-Fi Menu
4. Menu OSD Configuration and Description 7 Wi-Fi menu Wi-Fi Info. Description Wi-Fi Info. Print Wi-Fi information. This is an automatic connection function. - Page 18 Aroot Co., Ltd. 28-6, Gajangsaneopdong Road, Osan City, Gyeonggi Province, South Korea T. +82-31-8077-5000 / F. +82-31-459-8880 www.miniprinter.com...


Need help?
Do you have a question about the LK-P400 and is the answer not in the manual?
Questions and answers