
Related Manuals for Chord Electronics Mojo 2

Summary of Contents for Chord Electronics Mojo 2
- Page 1 Chord Electronics The Pumphouse, Farleigh Lane, East Farleigh, Kent, Product Communication | English ME16 9NB. United Kingdom. +44 (0) 1622 721 444 info@chordelectronics.co.uk chordelectronics.co.uk Mojo 2 Manual...
-
Page 2: Table Of Contents
Chord Electronics Mojo 2 | User manual Contents Introduction Registering Mojo 2 Getting to know Mojo 2 Getting started Basic operation Advanced operation Adding wireless streaming with Poly Technical specifications... -
Page 3: Introduction
• Never allow Mojo 2 to come into contact with water or other liquids. • Never spray cleaning products onto Mojo 2. Only use a clean micro-fibre cloth to clean the casing. • Before using this product please read the safety document included in the box. -
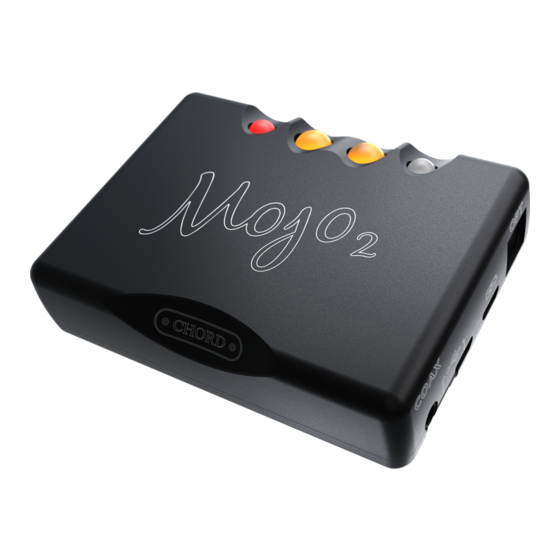
Page 4: Getting To Know Mojo
Chord Electronics Mojo 2 | User manual Getting to know Mojo 2 Coaxial input (single Connect compatible digital devices using a 3.5mm coaxial digital cable. Single coax: input or dual data only) tip: signal, sleeve: ground. Dual data coax: tip: signal 1, ring: signal 2 sleeve: ground (for... -
Page 5: Getting Started
6 Basic operation Connecting to power Mojo 2 can be used while constantly connected to power, or on the go, thanks to powerful, rechargeable batteries. A charger capable of outputting a minimum of 2 A (amps) is recommended for Mojo 2; please check your charger specifications. - Page 6 A blue charge status LED indicates the maximum battery capacity range has been reached. If Mojo 2 is left constantly on charge, it will enter intelligent desktop mode to protect the battery from overcharging. This will be indicated by a purple battery status light.
- Page 7 [for use with Hugo M-Scaler]: tip: signal 1, ring: signal 2 sleeve: ground, USB-C, Micro-USB and optical inputs. If all four inputs are connected simultaneously, Mojo 2 will auto-select the correct input when music is played to the device. Mojo 2 will prioritise specific inputs if all four are connected simultaneously. USB has priority followed by coaxial and then optical.
- Page 8 ‘+’ and ‘- ‘ buttons (see section 7 for menu options and a full guide to colours). Mojo 2 is ready to use once the colours have stopped cycling. To power down, press and...
- Page 9 10 seconds. Alternatively, press and hold menu to exit the menu immediately. Volume adjustment Mojo 2 benefits from two main volume ‘ranges’: low and high, as indicated by the colour of the menu button: unlit (low); white (high). As the volume is changed, Mojo 2 moves automatically into the respective volume ranges;...
-
Page 10: Advanced Operation
Mojo 2 | User manual 7 Advanced operation Mojo 2 benefits from a cutting-edge UHD DSP control which provides a number of advanced features, accessible via the menu button. Pressing the menu button sequentially, cycles through the various features explained in this section. - Page 11 Menu: button colour information when charging Additionally, when Mojo 2 is switched off, the menu button displays a colour when charging to indicate charging current, indicated by the table below. Charging current status can give a useful indicator of the charger/charging quality available to Mojo 2 and/or battery health.
- Page 12 7.2.1 Intelligent Desktop Mode Mojo 2 can be left connected to a power source at all times if desired. In this mode, when fully charged, Mojo 2’s menu button and battery status light displays magenta, indicating the end of the charge cycle and the initiation of Intelligent Desktop Mode which regulates charging to preserve the battery.
- Page 13 Mojo 2 | User manual NOTE If the buttons remain untouched for 10 seconds when in menu mode, Mojo 2 will automatically revert back to playback mode. Alternatively, press and hold menu to exit the menu immediately. Referring to the chart below, unlit or grey represents the volume up ‘+’ or down ‘-‘ button/s as unlit. If both buttons are unlit, the factory setting (0 dB ‘flat’) is selected.
- Page 14 Chord Electronics Mojo 2 | User manual -5 dB -6 dB -7 dB -8 dB -9 dB NOTE The following three graphs are simplified for illustrative purposes and should in no way be interpreted as a exact representation of the subject matter.
- Page 15 Chord Electronics Mojo 2 | User manual These four graphs below show Mojo2s four DSP equalisation modes, they affect frequency response, providing either lift or cut to the bass and treble across the four main ranges of adjustability: red: lower bass; yellow: mid-bass;...
- Page 16 (https:/ /www.rtings.com/headphones/1-4/graph/) lists the frequency response curves of many popular headphones and can be used as a guide for experimentation with Mojo 2’s DSP feature. DSP can be used to flatten the response curve for a more neutral sound.
- Page 17 Graph 3 Menu: crossfeed Mojo 2 offers three levels of crossfeed to improve spatial effects for a more ‘speaker-like’ sound-stage when using headphones. Press menu once (menu button will show blue), then press the volume up ‘+’ button to cycle between the four available options: red: minimum; green: moderate; blue: maximum; unlit (crossfeed off).
- Page 18 Mojo 2 | User manual Lockdown mode Mojo 2 benefits from a button-lock option where all controls can be disabled for travel use. To activate button lock, press the menu button six times until magenta is displayed, then simultaneously press both the volume up ‘+’...
- Page 19 Mojo 2 | User manual Power button sample rate information Mojo 2 is capable of playing files up to 768 kHz 32- bit and DSD 256. This is indicated by the following colours on the power button when music is playing.
-
Page 20: Adding Wireless Streaming With Poly
Chord Electronics retailer for more information or find full details on the Chord Electronics website. Existing Poly owners should refer to the supplied Poly manual (also available on the Chord Electronics website) in order to use Poly with Mojo 2.
Need help?
Do you have a question about the Mojo 2 and is the answer not in the manual?
Questions and answers
Hi. How can I use the mojo2 as an external dac into my hi fi setup.i have tried with usb c and micro also optical but i get no sound from my streamer
To use the Chord Electronics Mojo 2 as an external DAC in your hi-fi setup, follow these steps:
1. Connect a Digital Source: Use a USB-C to USB-A or USB-C to USB-C cable to connect the Mojo 2 to a computer. If using other digital sources like a CD transport or streamer, connect via optical or coaxial inputs.
2. Set the Mojo 2 as the Output Device: If using a computer, ensure the Mojo 2 is selected as the default audio output device. On Windows, install the Chord driver before connecting.
3. Connect to an Amplifier or Powered Speakers: Use the Mojo 2's analog output via a 3.5mm to RCA cable to connect to an external amplifier or powered speakers.
4. Power the Mojo 2: Ensure the device is charged or connected to power for uninterrupted use.
5. Adjust Volume and Settings: Set the Mojo 2's volume to an appropriate level and configure any sound settings as needed.
This setup allows the Mojo 2 to act as a high-quality DAC in your hi-fi system.
This answer is automatically generated